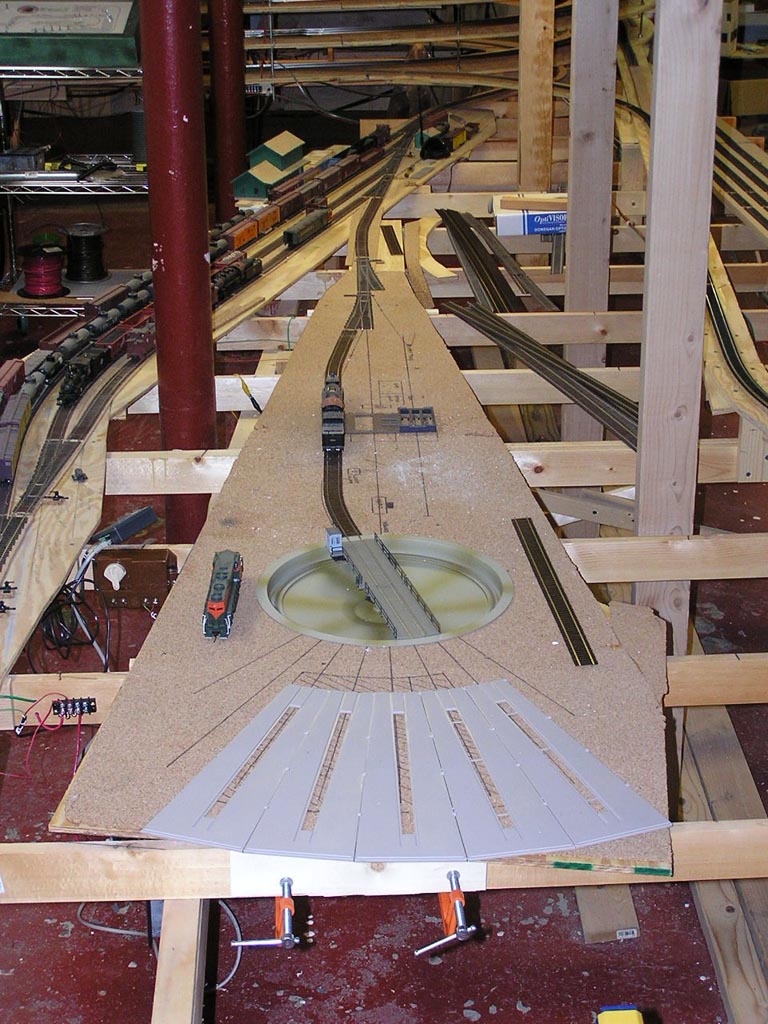
 Here's the beginning of the Laurel engine terminal. The turntable works - it's powered by the old Bachmann toy transformer at mid-left in the picture. The roundhouse floor is shown in roughly its final position. The steamer is on the outbound track, approaching the coaling tower location (you can see to base to the right of the loco). As structures are completed for the terminal, tracks will be added. For right now, I can at least turn an engine around and send it back out the opposite direction - a big improvement!
 Here's an overview of the Laurel area as it appeared in late January.
 Lander's tracks now curve around under the Thermopolis area in the far background. The passenger train is being used to test that track. It will be hidden well before it connects to the rest of the layout trackage at Shobon on the Wind River Canyon peninsula. The Glenrock subroadbed has also been extended, curving around under Thermopolis in the background.

Here's a nearly track level view of the Glenrock mainline roadbed. The passing siding will be on the blank subroadbed to the left.
 This is the shot of the far corner in the second photo above this one. Thermopolis will be along the benchwork to the left, with Glenrock siding along the benchwork to the right. The far left single track is the Lander branch. The bare subroadbed with the end hanging in space will support the track from Glenrock. You can see the rather elaborate support I had to put in place over the Minneapolis staging yard.

Another view of the Glenrock support over Minneapolis staging. Quite a bit of lumber just to support a single track, isn't it?

Early March, and the Glenrock mainline is being laid. Here we see the Dr. Pepper / Campbell's soup express. The cans are used to hold the track in place as the caulk I use to install visible track dries.

Here's another view of the mainline being laid in Glenrock. We're looking towards the east end of Glenrock siding in this view.

Remember that Fast Tracks turnout I built last July, after the NMRA convention in Philadelphia? It's finally installed! Here it is as the east switch in Glenrock. Still to be done are installation of the missing ties and painting of the rails at either end of the switch.

A bit later in March, and the Glenrock siding track installation has begun.

It's now March 22, and the first train arrives in Glenrock! The siding is still not complete, but that didn't stop a train from climbing up from Laurel to visit the new trackage. The connection from Laurel to Glenrock is just temporary (probably for a few years), until the permanent connection of the Frannie Cutoff can be made on the upper level.

Here's another view of the first train in Glenrock.

April turned out to be a very wet month. We wound up with all sorts of water in the basement - two inches in some areas. The layout wasn't damaged, but for a month I couldn't work on it at all. So I built the Laurel coaling tower. Read about it here. Here's one shot of the finished tower.

And here's a nighttime photo. It will look better when I get some scenery done around it, I think.

After the basement dried out the first week in May, I was able to resume working on the layout, albeit at an even slower pace than normal because of a very stiff and sore back. But work on the Glenrock siding continued. By mid-May, it looked like this.

Here it is again, this time about twelve days later, near the end of the month. The siding is essentially done, except for scenery (of course. Someday...).

Another view of the siding.

Here's an overall view of the Laurel peninsula with the Glenrock and Thermopolis benchwork in the background. I still have to install IRDOTs on the Minneapolis staging yard, but I'm hoping to be able to start roughing in scenery at Glenrock in a few months.

On July 1st I started working on the backdrop behind Glenrock. First I had to establish the benchwork height for the upper deck, so I hung a 1X6 at the location of the upper deck girder.

After establishing the top of the benchwork frame, I transferred that to the back girder, and started installing the backdrop framework immediately below.

By mid-July I had sixteen feet of backdrop clamped into position. By the next day it was permanently installed.

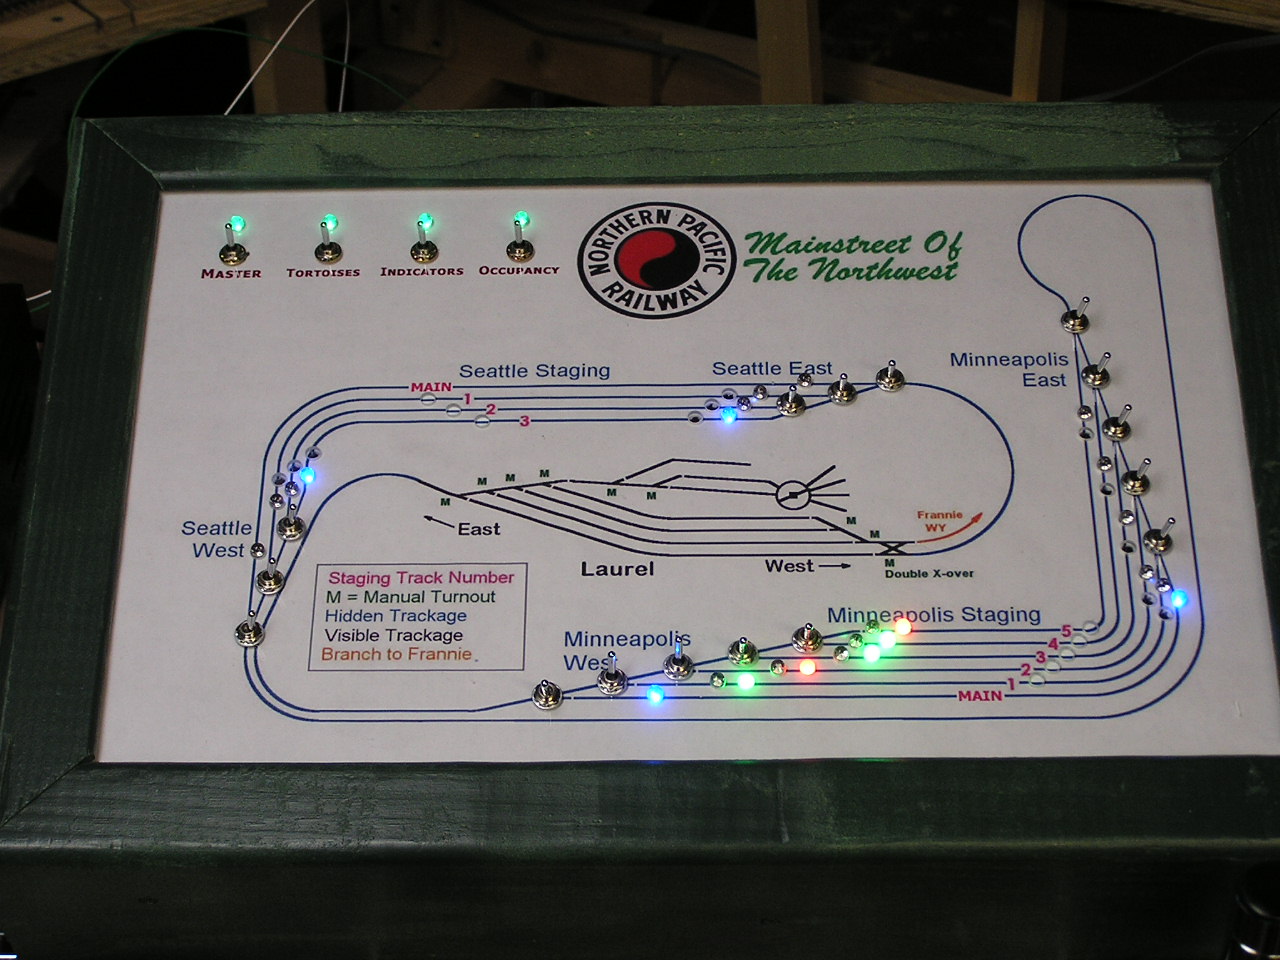
I cannot believe I'm doing this again! As I ran trains through the someday-to-be-hidden staging yards, it became apparent that I needed some sort of indicators to show which yard tracks were selected, since the reversed yard ladders of Minneapolis had me scratching my head and looking at the switches to figure out if I had the same tracks selected at each throat. If I got confused (and I built the thing!), how could I ever expect some other person who wasn't around it so much to cope? Plus, occupancy detectors for the hidden yards also were necessary, since the tracks will be hidden from view. Route selection indicators meant changing all the route switches on the track diagram from DPDT (double-pole double-throw) to 3PDT (three-pole double throw). The spacing on the old switches wasn't great enough to allow their direct replacement, and I still had to find room for the indicator LEDs, so I just scrapped the old panel (except for the frame) and started over. I expanded the diagram somewhat to allow for the larger switch bodies and set to work. Here all the switches are installed on the panel face - the easy part is over now!

Here's a close-up of the west yard throat at Minneapolis, showing the route selection switches and all the holes in the panel face (but not the graphic yet) for the blue route-selected LEDs, and the green/red bi-color LEDs for occupancy indication.

By early August the new panel face wiring was well under way.

Less than a week later and I'm adding new components to the panel frame. Here is a nifty little power supply that will power all the indicators on the panel (except the occupancy indicators, which are powered from the detectors, which in turn have their own power supply).

This shows the framework with all additional installations nearly complete. There are nine new terminal strips on the frame, to support the occupancy detectors (fifteen detectors for Minneapolis yard, and nine for Seattle yard).
By mid-August the panel is rebuilt and functional. Here the west end Minneapolis occupancy indicators are functional. The center and east end sets of detectors are yet to be installed on the layout.

Here's a close-up of the controls and indicators for the Minneapolis West yard throat. the green or red occupancy indicators are to the right of the blue route selection indicators. The route indicators show only to which track the route switches are set, not where the track switches are actually aligned. If the turnouts are not properly aligned, there's a failure somewhere in a turnout or a Tortoise switch machine.
Kind of a big gap here - vacation and a local political campaign kept me away from the layout for several months. But in mid-November, after election day (I won), I got back to the layout a little bit. By early December I had the center set of detectors installed in Minneapolis yard and wired into the panel, as you can see here.

Here is the final set of five detectors for Minneapolis East, all pre-wired and ready to install.
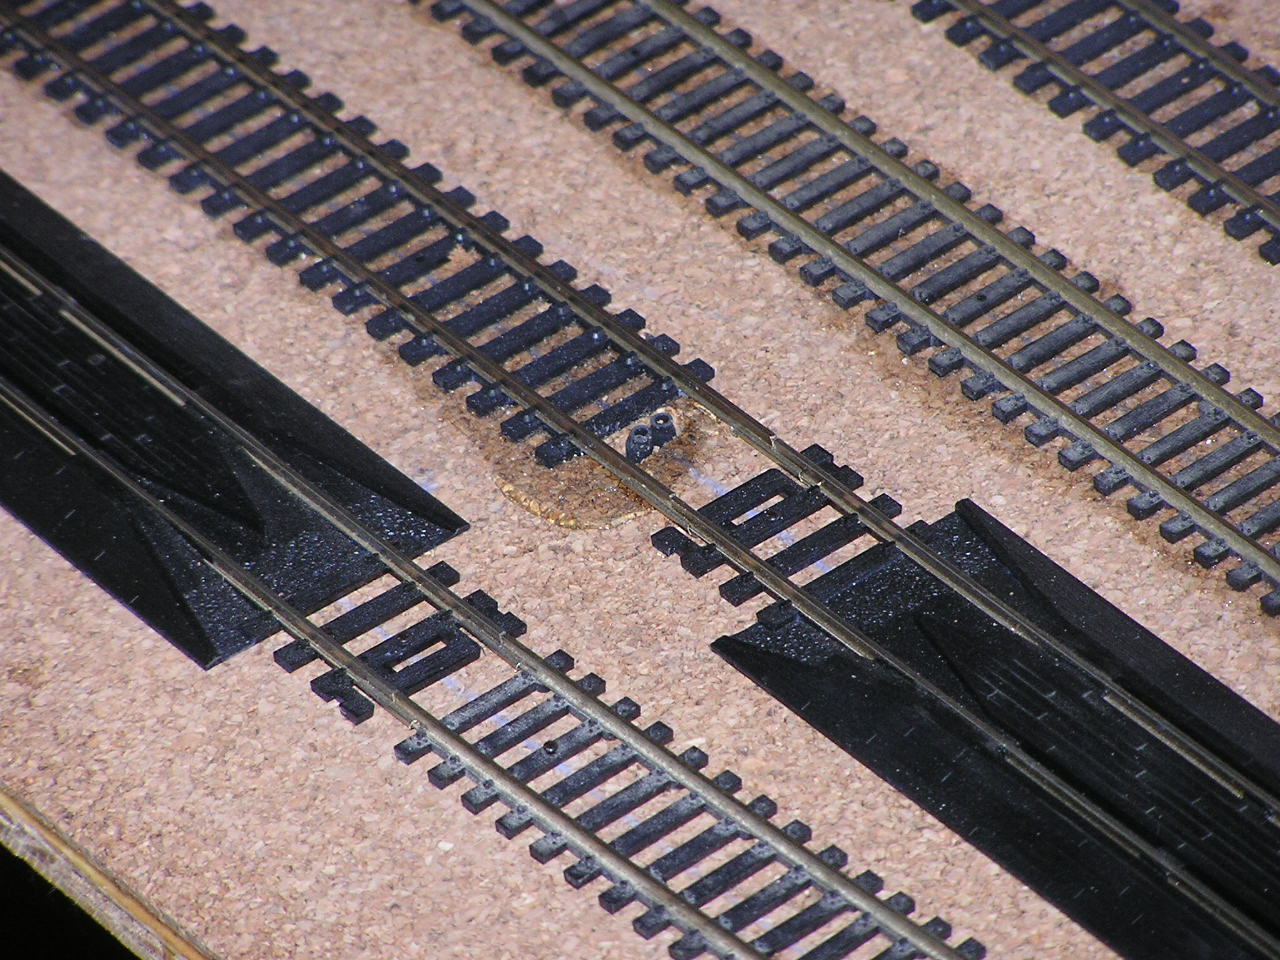
This is what the installed detectors look like from above the benchwork - just two little black tubes sticking up between the rails. One is an infra-red emitter, and the other is a detector. When a car passes over one of these, the IR beam from the emitter is reflected off the bottom of the car and back down to the detector. LED on panel foes from green to red.
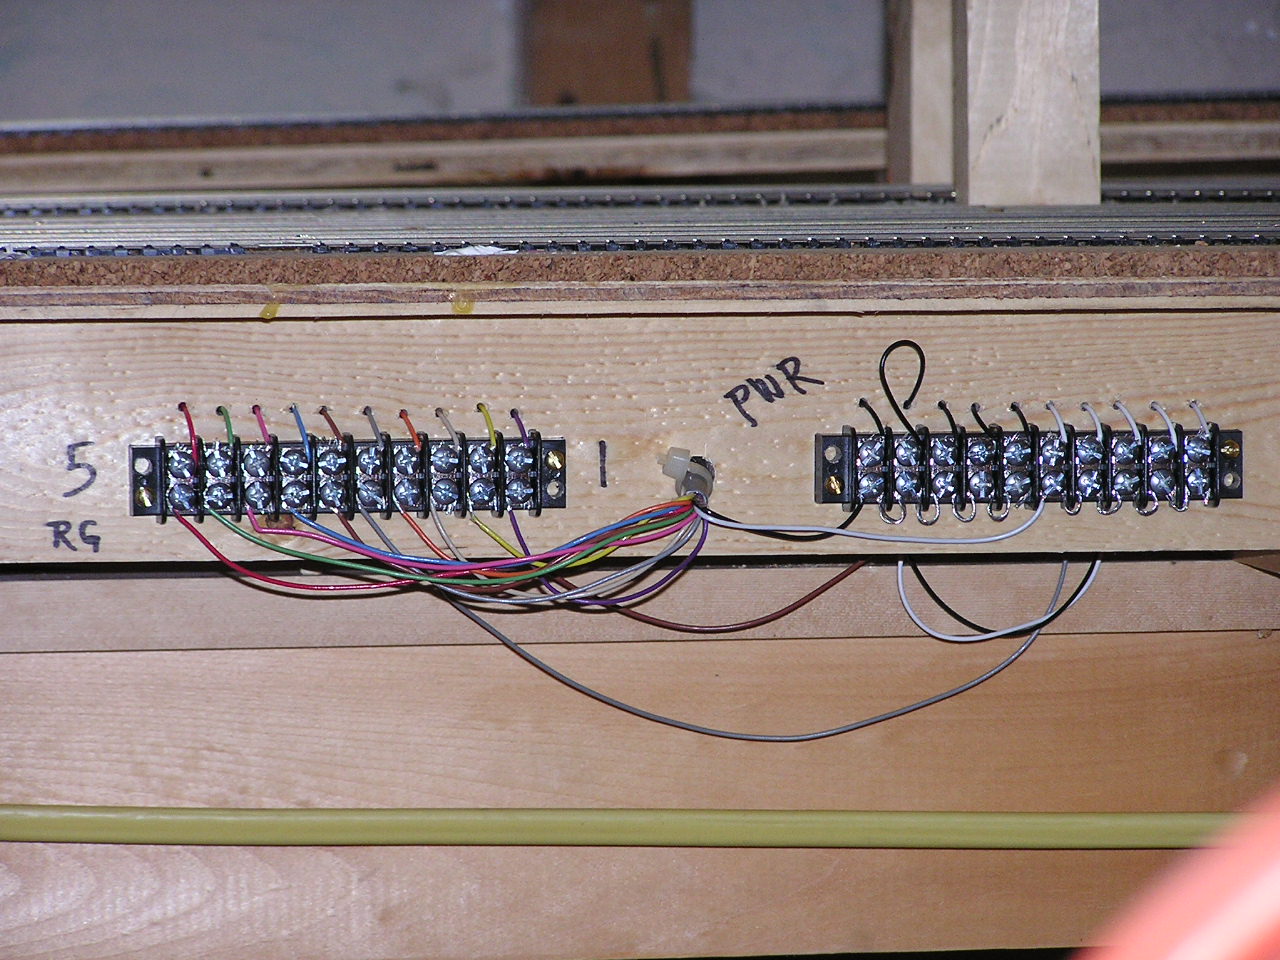
To avoid having to lay under the layout and wire in all the detectors, I brought all the wires to terminal strips at the edge of the layout (except on the detectors at Minneapolis West. They were such a pain I learned to do it this way for the rest of them!). The short wires from the detectors come to the top edge, and the cable back to the panel comes to the bottom.

The wiring for the detectors looks pretty neat, if I do say so myself. The back of the panel makes up for it. Must have been an explosion in a spaghetti factory!

This is a spot under the benchwork at Minneapolis East. The occupancy detectors are the small circuit boards. I swore I'd never get this complicated!

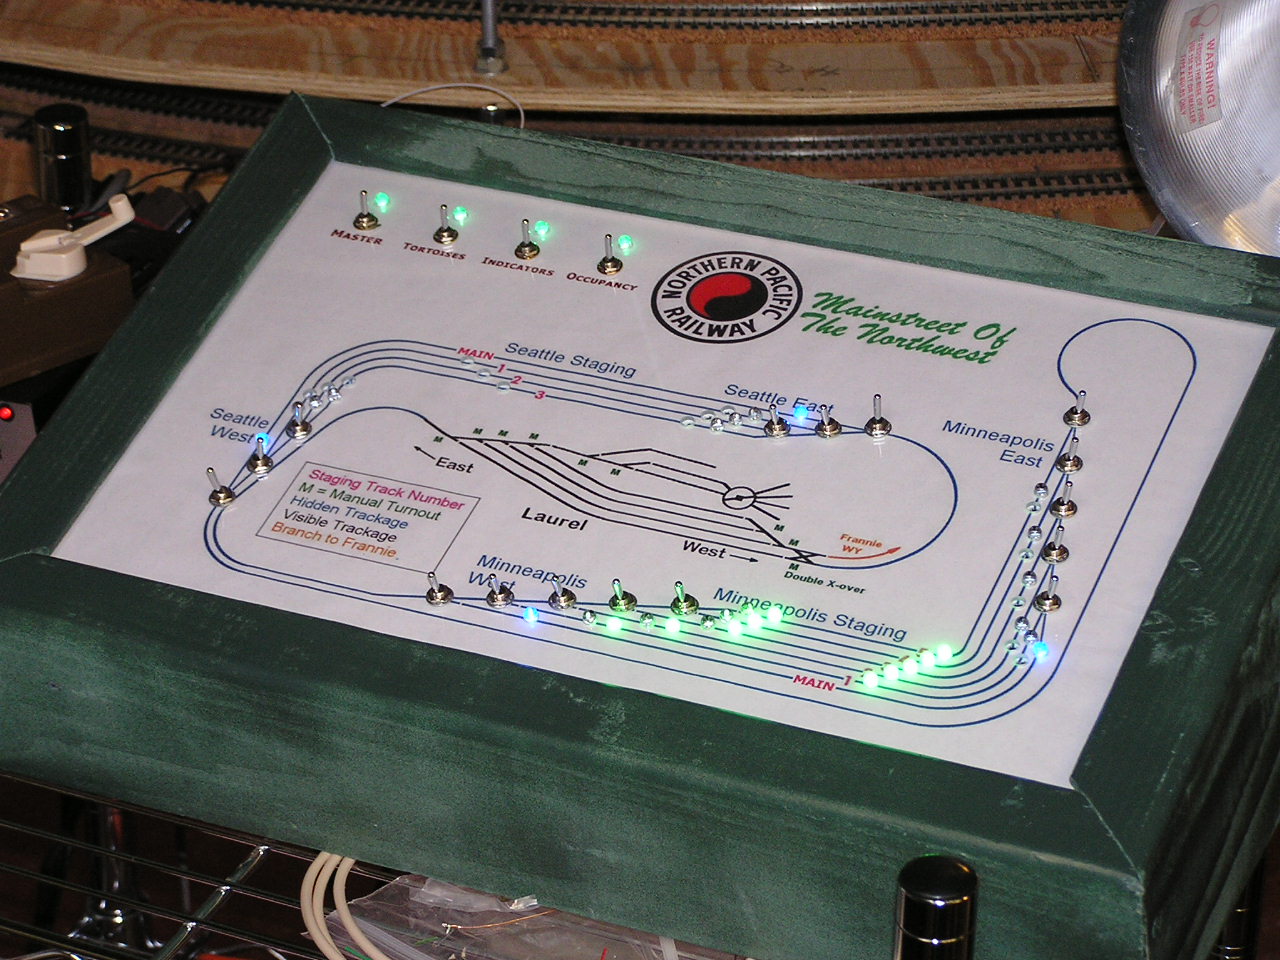
And here's the panel in mid-December, with all of the Minneapolis occupancy indicators now operational. Seattle will probably wait awhile, as I have a lot of other stuff to do before Seattle staging will be covered. When I'm about to install Lander is when I'll put those detectors in, probably.

A close-up of Minneapolis on the panel. Don't all those colored LEDs look purdy?

Here's an overall shot of the layout as of December 17th. Next up in construction is to add the base for Thermopolis and extend the backdrop around the corner so I can start adding scenery to Glenrock.

Finally, a shot of three trains sitting in Minneapolis staging.

I was busy the last part of the year - I knew that 2008 would be very busy, and I might not get a lot of time for trains, so I made the most of my Christmas break. A few days after Christmas I finally permanently installed the backdrop behind most of Glenrock.

The next day I painted it. I picked up a mistake hue from Home Depot for about four dollars. It was just the right color. Blending it with white towards the bottom yielded this.

I also spent some time beginning the fascia construction in front of Minneapolis staging. The holes are obviously for access to the tracks below. I cut the beveled upper corners just because I think it looks better than plain rectangular holes.

Here's the Glenrock area looking across the Laurel peninsula. The fascia isn't done yet, but it's temporarily installed to make sure the access will be adequate.