On the 4th I did more scenery work in the corner near Powder River and Shobon. These are just the base pieces of foam board.

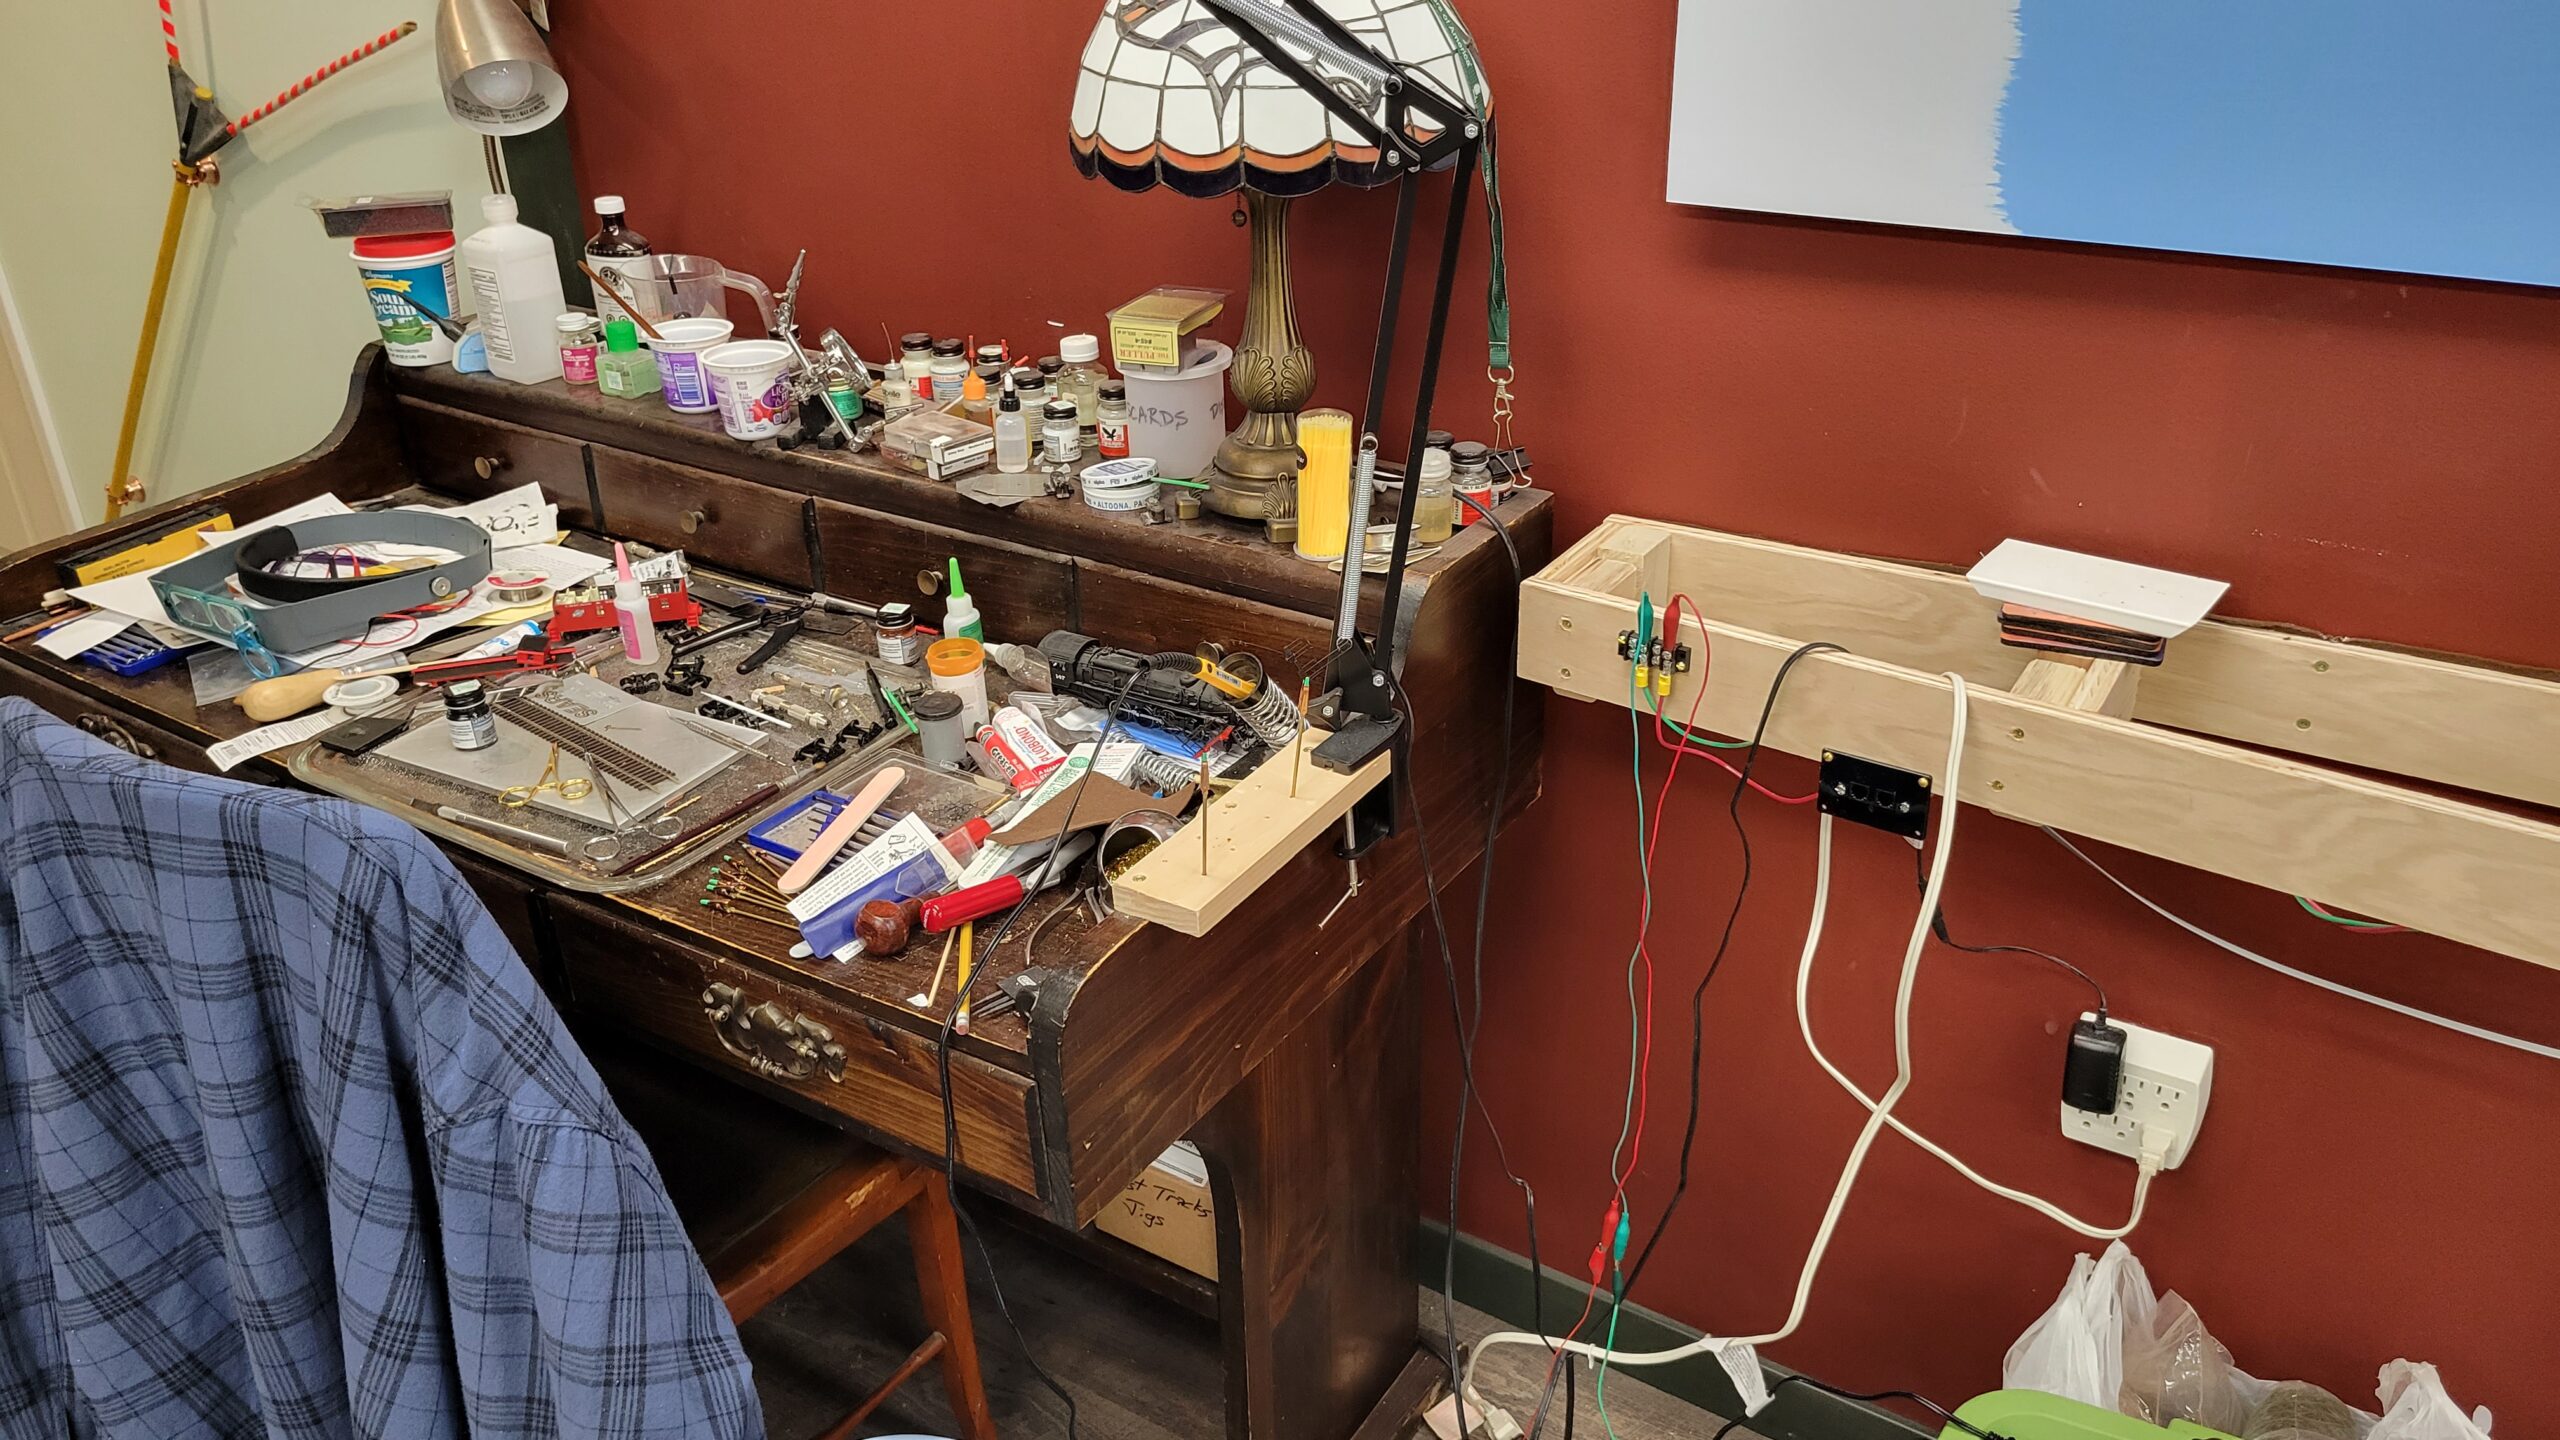
On the 4th I started a waycar (caboose) project. I'm putting together a CNW caboose that was marketed by Walthers over a decade ago. I'm adding Tomar's Adlake Markers, driving them with an NCE Light It board. Power comes from Kadee electrical pickup trucks. Here I'm testing the marker installation.

On the 6th I installed the waycar roof, and yesterday I started painting and installing the grab irons. These require drilling #80 holes in the car body for the wire grabs, and painting the grabs before installation. Here are two of the grab irons in their painting clamps drying.

Here's the back end of the waycar with two of the corner grabs installed.

On the 7th I started working on the Wind River Canyon scenery base. Here I'm positioning foam board chunks to get a sense of how it will look.

And after bit more work on the area. The thin foam boards laying flat next to the track represent the Wind River.

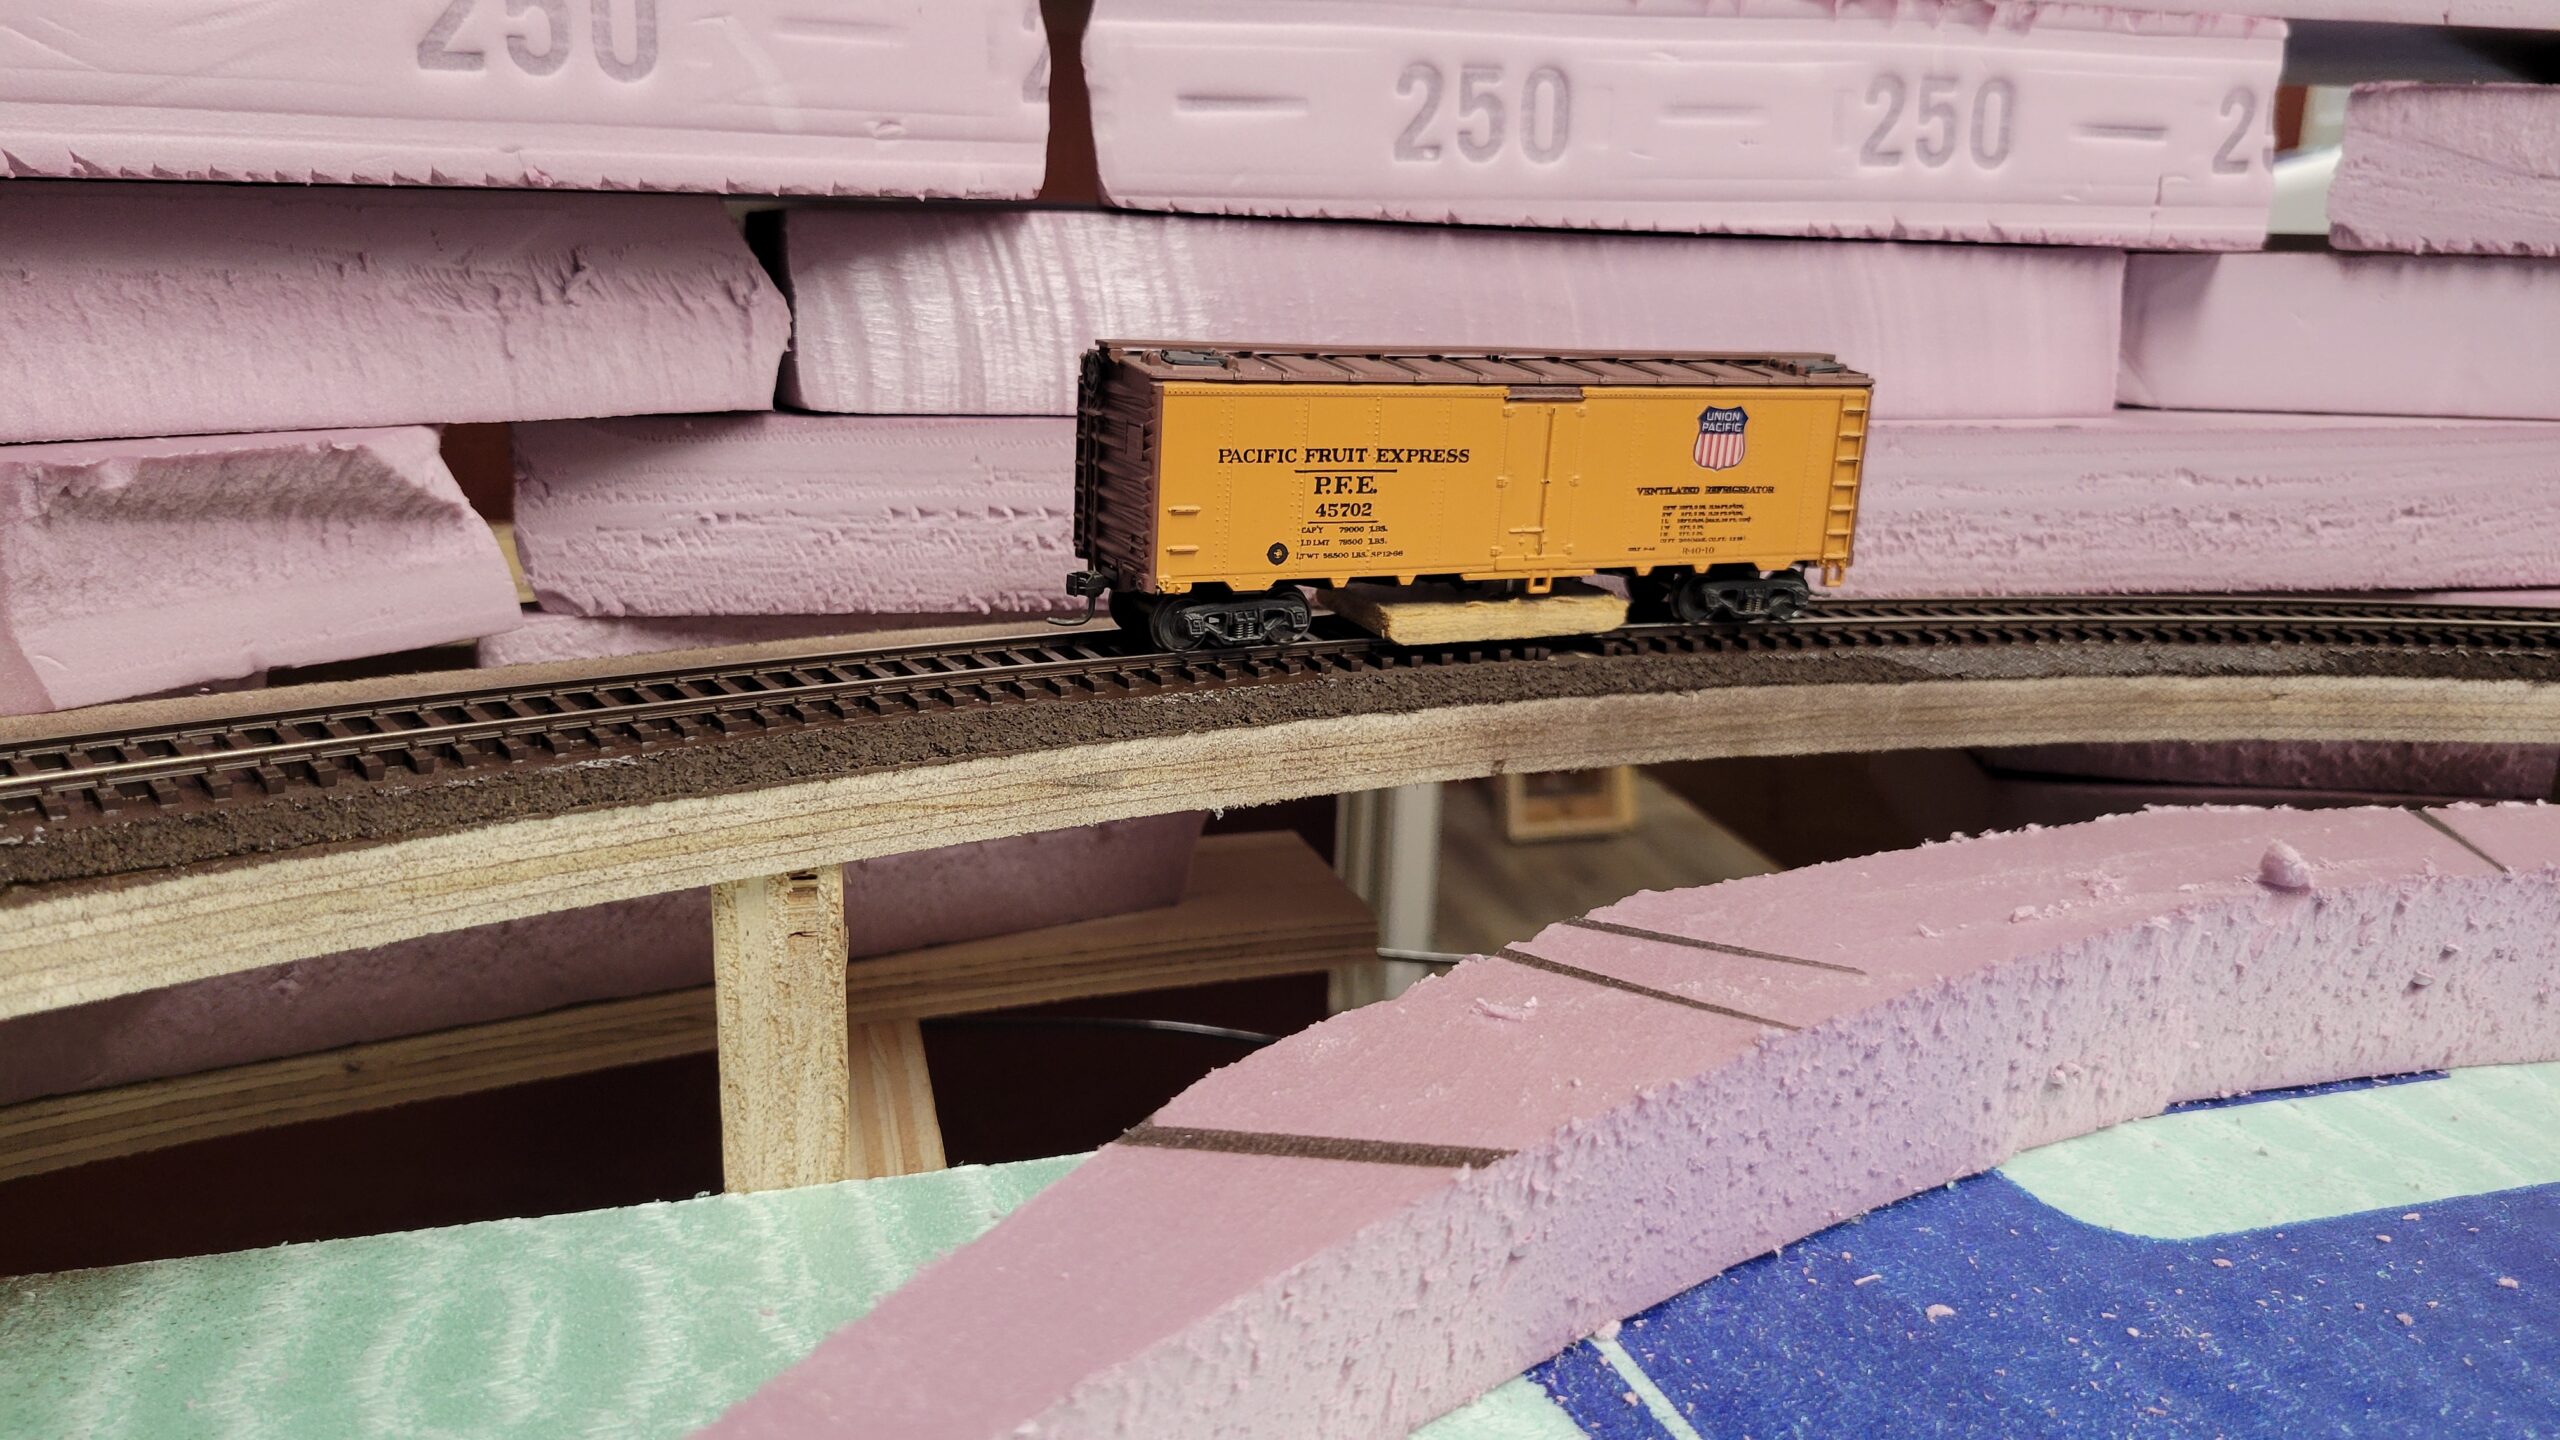
Here's my track cleaning reefer posed on the curve at the south entrance to the canyon. I'll be taking all the foam out again, and putting down a plywood base to make sure the canyon has a solid foundation.
This past week I did a bit of foam carving for the basic landforms between Powder River and Shobon. This will all be covered with plaster cloth and a layer of plaster in another week or so.

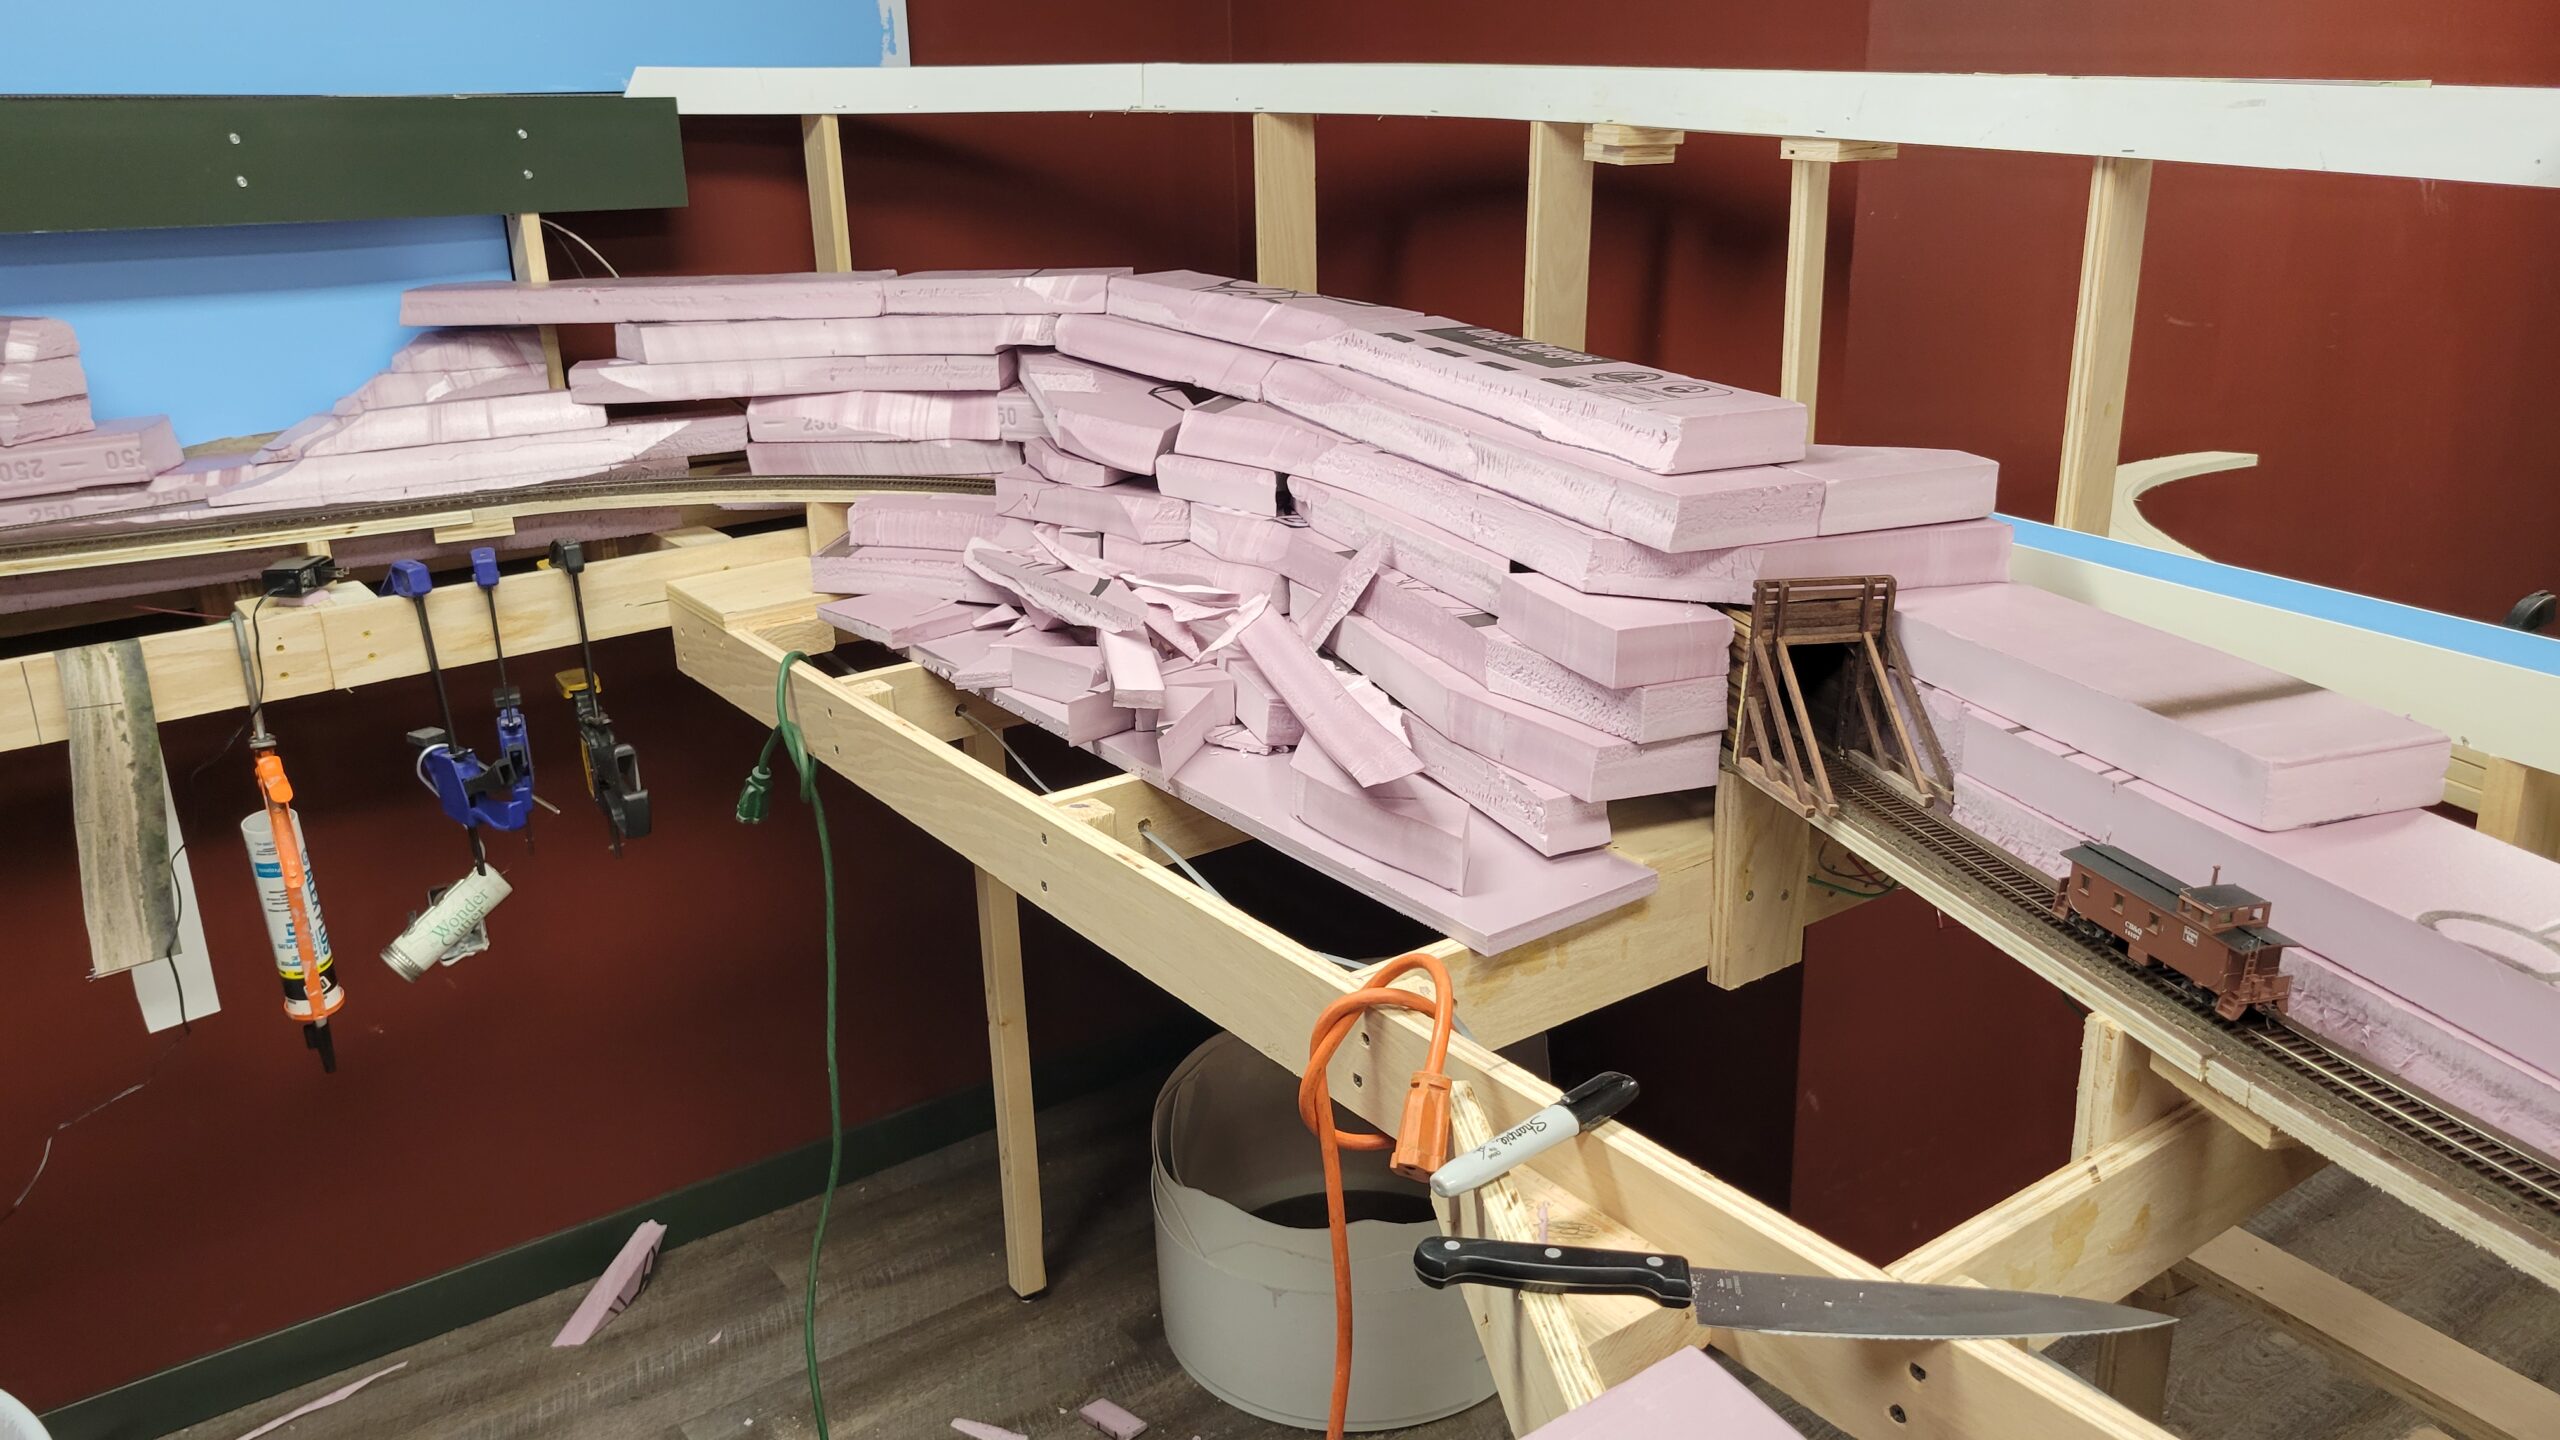
I did some work at the south end of the Wind River Canyon. I wanted a solid base for the mountainside, since it will extend upwards quite a bit, so I attached 3/4" oak plywood to the benchwork as a foundation for the foam. The oak plywood was left over from the library shelves project, otherwise I would have used the plain old 1/2" pine.

After a few sections of the base were secured, I started adding foam. Here's how it looks currently:
 Not much to show yet, but I'm waiting on a hot wire foam cutter I ordered this week to arrive to start shaping these bottom layers before I build up too high.
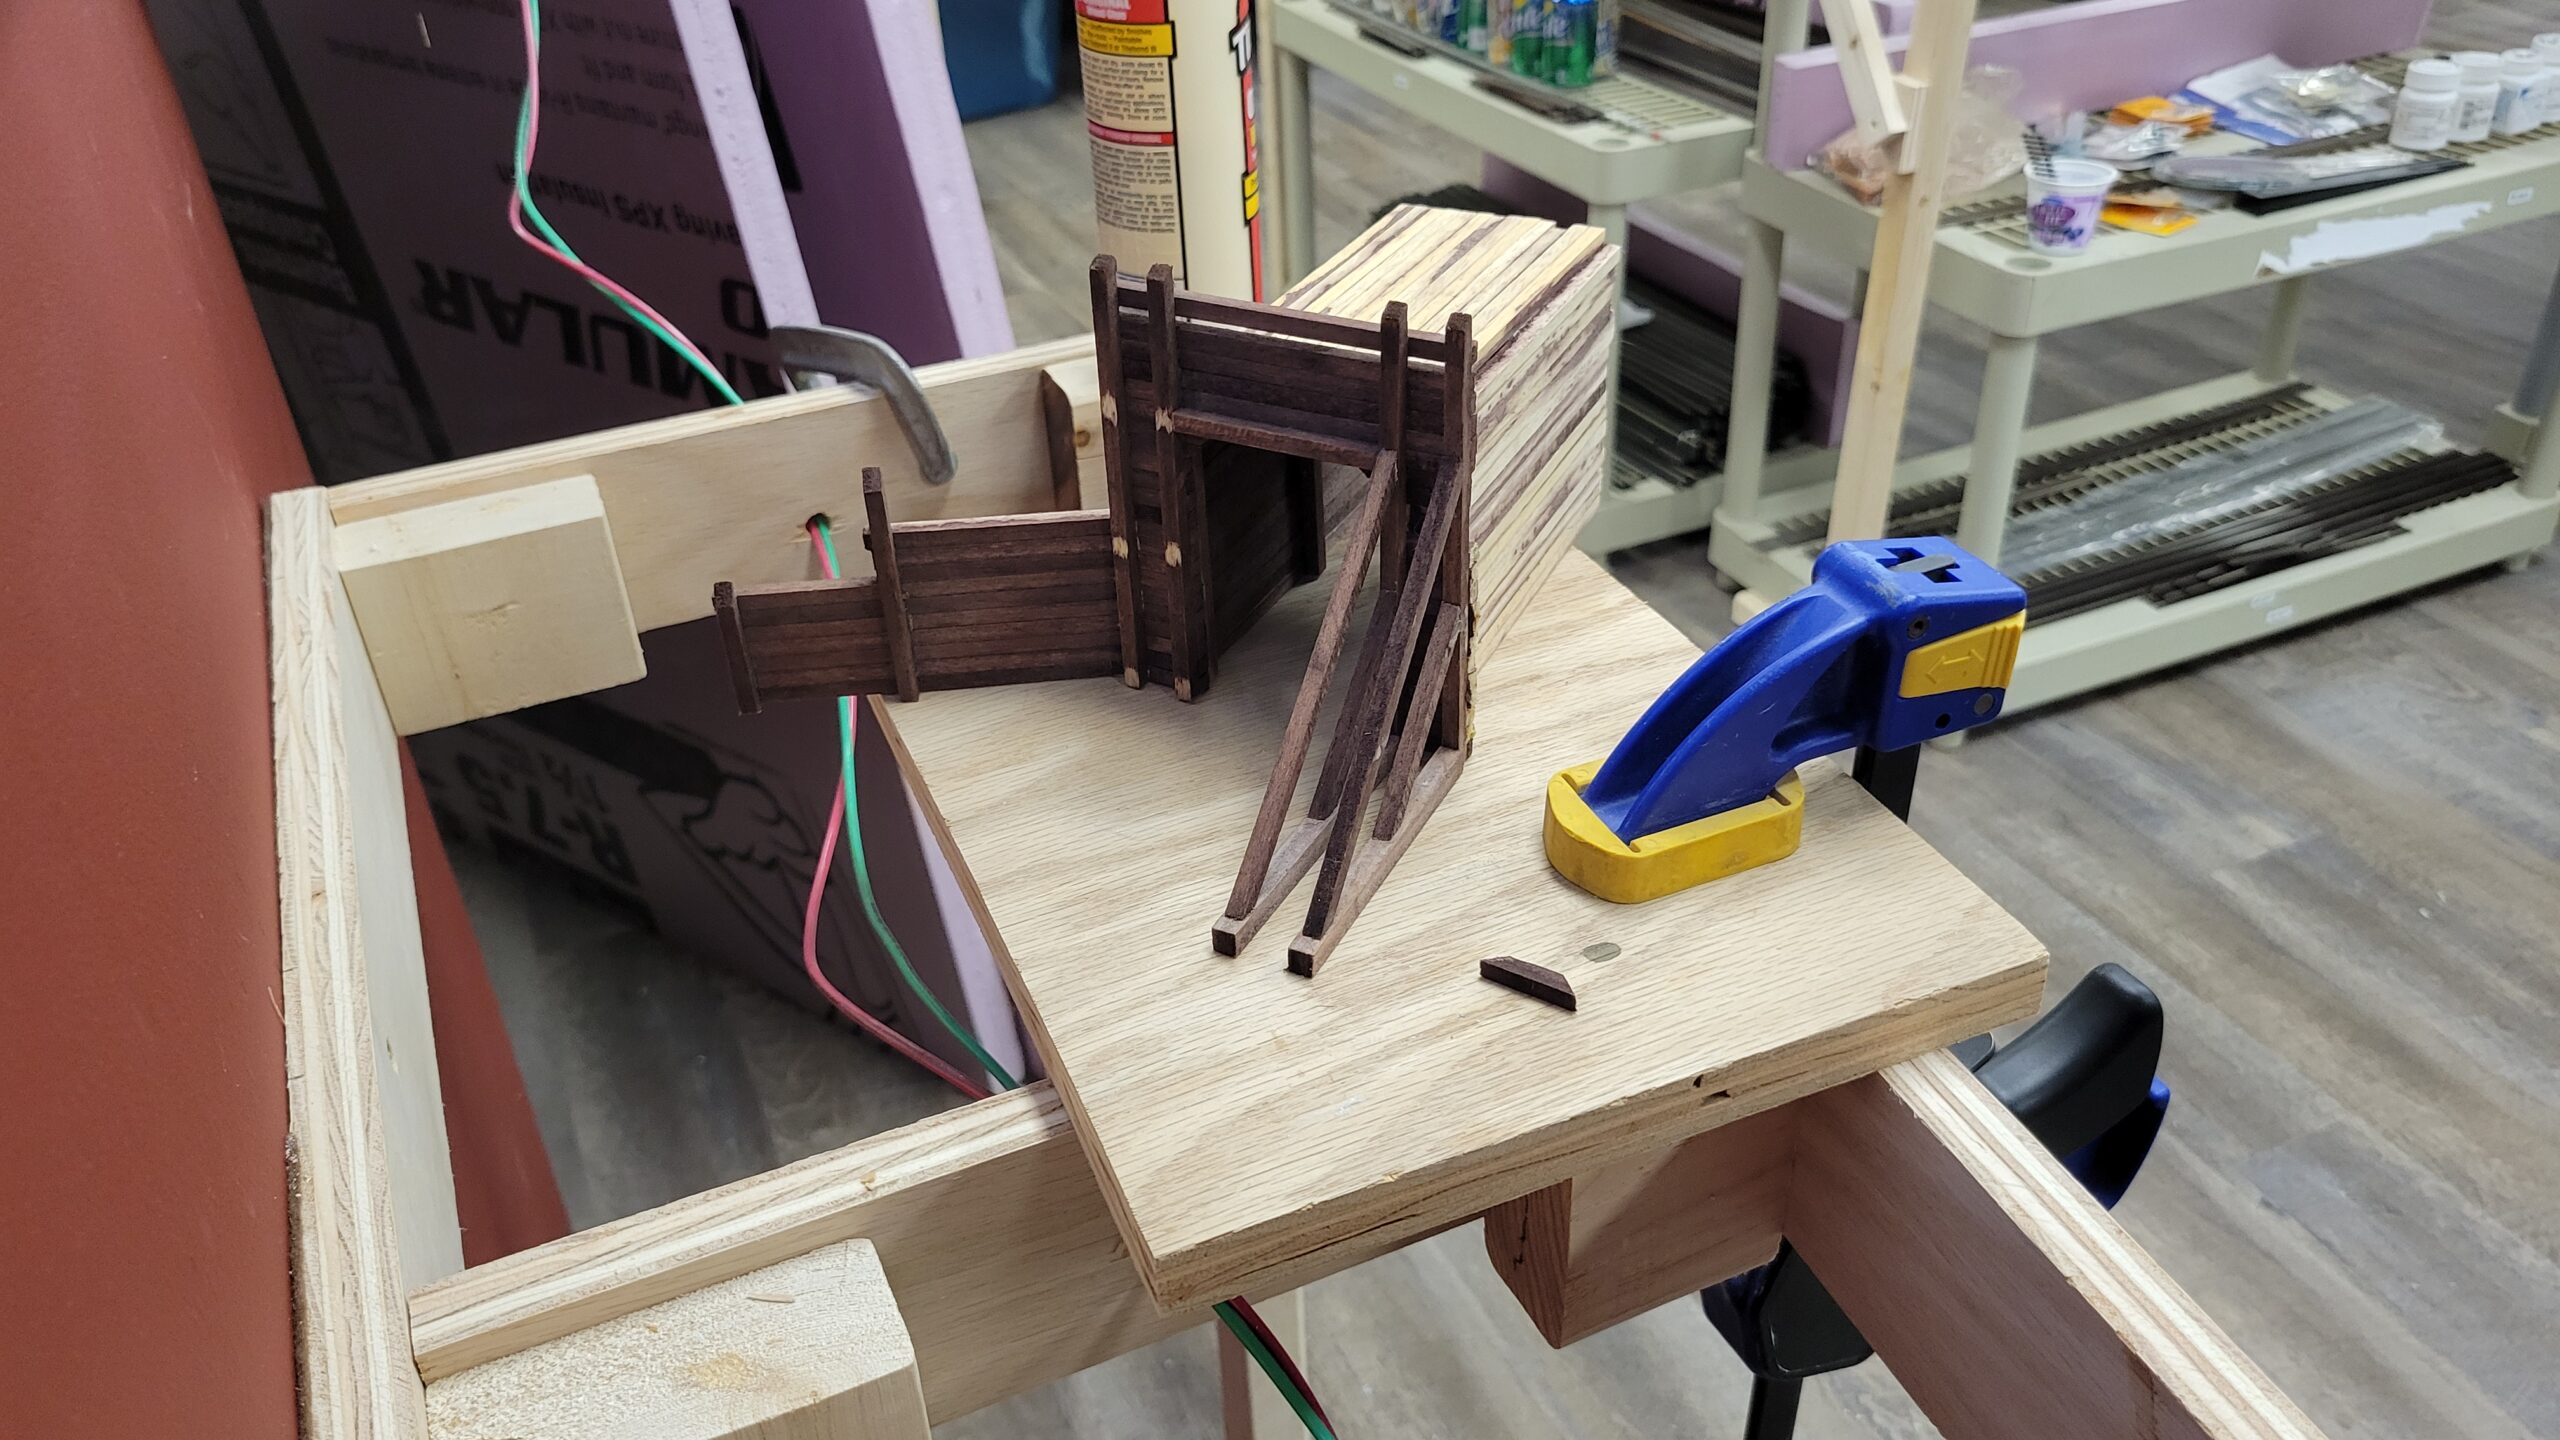
Today I started reassembling a tunnel portal for the canyon I first built nearly 40 years ago(!), when I lived in Kent, Washington. When I moved out of that house, my niece was carrying the tunnel portal, and turned around and banged it smack into a stair railing. The whole thing came apart of course, but I saved all the pieces and now, 35 years later, I'm reassembling it to use on the current layout. It's not quite done yet. The wing wall will be removed, and I still have to reinstall the left hand buttresses.
Here's one of the real portals (that the model is supposed to represent) in the Wind River Canyon. All the portals in the canyon are similar. A couple others look more like the one I'm reassembling.
In the early 2000's most of the portals were replaced or significantly reworked with steel, but one or two are still timber construction. This photo is one I took in 1990.

The caboose project is proceeding - slowly. I was painting railing and grabs (all the wire pieces) and installing them as I went. I managed to break my #79 drill bit and discovered I don't have anymore, so I ordered replacements from Micro Mark (really sucks not having a hobby shop around at times). Meanwhile I continued painting the wire parts.

Here's a closer view. Those eyelets are really small!

On the 11th I drove over to the canyon and spend several hours traveling through it both ways, stopping frequently to observe and photograph everything I could. I took almost 250 pictures! Here's the north portal of the northernmost tunnel. I'm going to try to do justice to that rock outcropping on the layout.

I completed assembly of the CNW caboose. At this point all that's left is weathering and placing it on the layout.

Mostly I continued working on the south end of Wind River Canyon. Here's a series of shots that show progress over the past week or so.
19 April:

20 April:
At this point I switched over from using Alex Plus caulk to glue the foam together to using low temperature hot glue. It's faster - in about five minutes it's fully cooled and solidified. With the caulk I could do about two layers a day, then I'd have to stop and let the caulk set up for six to eight hours.
The hot glue also makes for a less flexible build.
20 April again:

And today, 21 April. This is as high as the canyon will be at this point. Further down the peninsula it will be even higher. Before I move on "northward" tough, I'll do at least a bit of carving of the basic landforms here, and finish the base of the river (The thin foam at the base of the stack).

Yesterday I ran a few trains through the tunnel to make sure of all the clearances. Here's my Santa Fe type popping out of the tunnel heading towards Thermopolis:

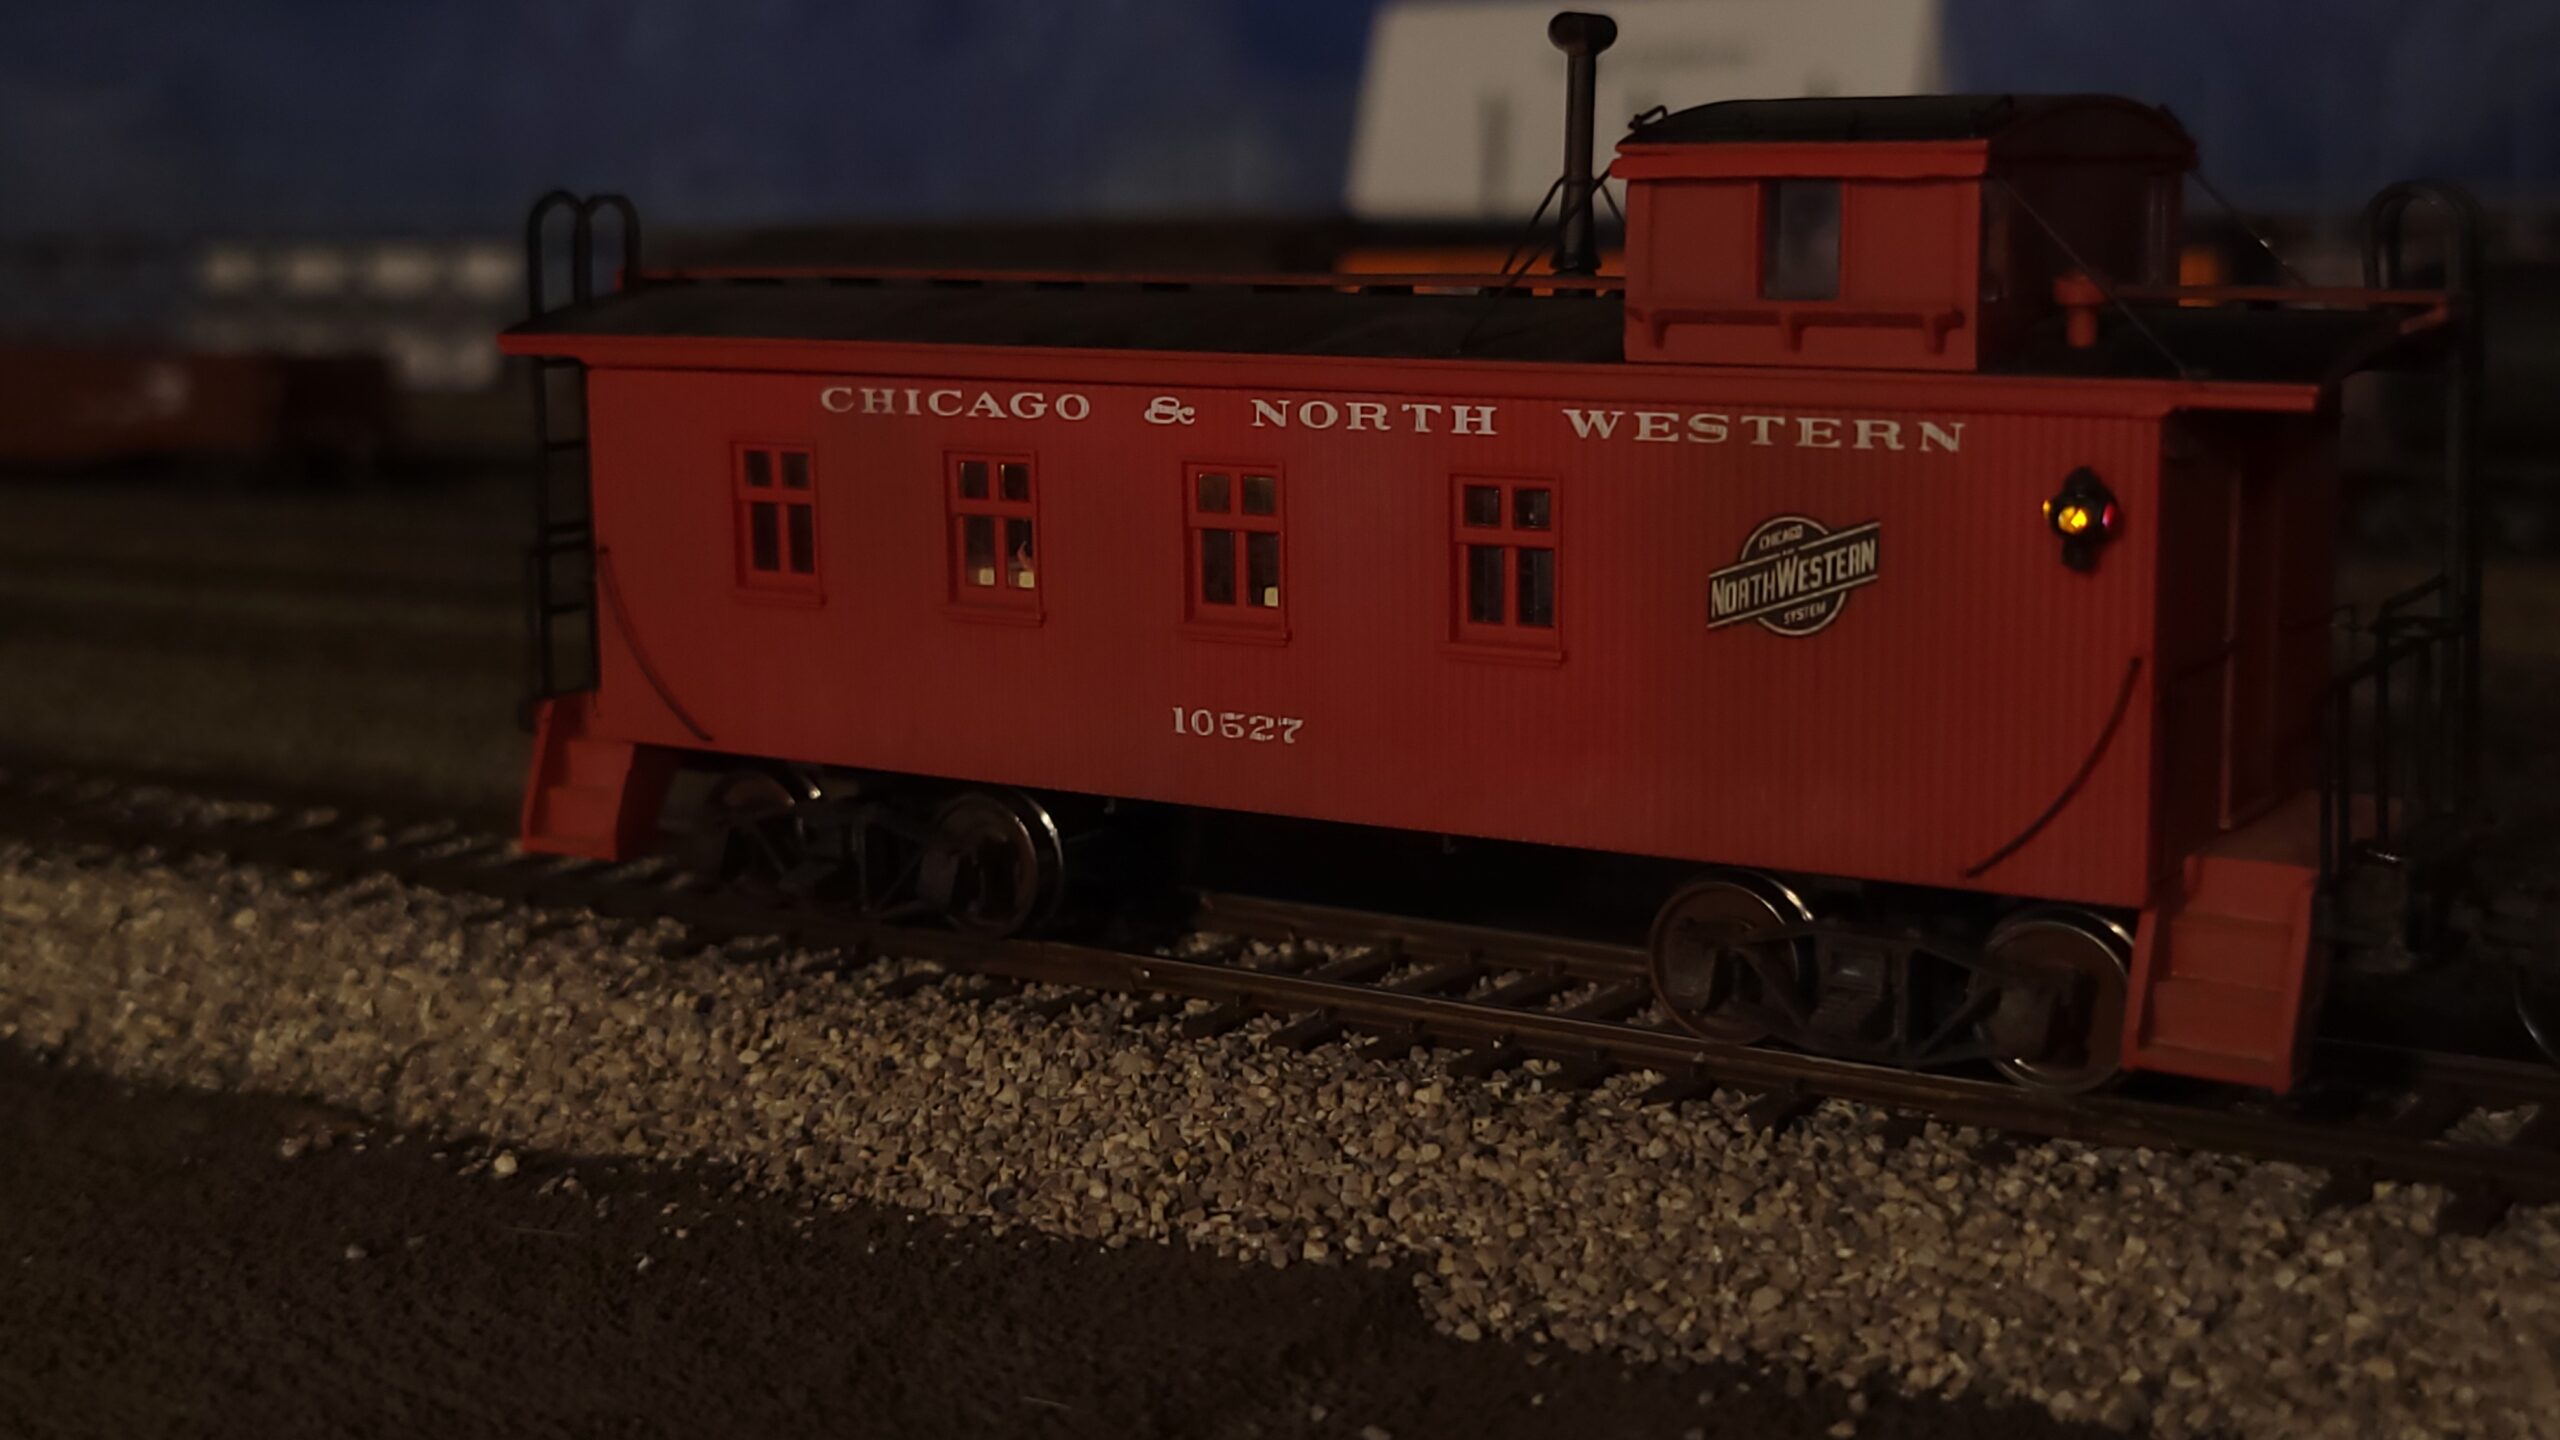
I weathered the CNW waycar and placed it on the layout. Here's a couple of shots.
First in normal lighting:
And with subdued room lighting:
I also added fascia at the south end of Wind River Canyon and began shaping the mountainside there. The fascia will be trimmed down as finish scenery work begins in this area.

And just in case you're curious, here what the back side of the big stack of foam looks like. I ran a train through all the track covered up by this stuff, and clearances are good.

Quite a bit has happened in the last couple of weeks.
Work on Wind River Canyon and the area "west" of Powder River got some work done.
First I used a hot wire foam cutter and a Surform tool to shape the big stack of foam I put together for the canyon. That Surform tool sure makes a lot of little foam crumbles!
And on the 27th of April we (my wife and I) started putting down plaster cloth. We collected all the materials and tools:
Then I cut some strips of plaster cloth and we covered the area around the siding at Powder River.

We didn't do a whole lot on the 27th, because I wanted to make sure the cloth would work out okay on top of the foam. On the 28th the cloth was dried and everything looked good, so we pressed on.
We added cloth to the area between Powder River and Shobon...

...then moved on into the south end of the canyon. We used up the entire roll of plaster cloth to get to this point.
I ordered more plaster cloth from Amazon (Woodland Scenics' small rolls are way too expensive!). Once it arrives we'll add a second coat to the area, and I'll arrange it so that the big gaping hole to the left where the CNW line disappears into the mountain isn't so obvious.
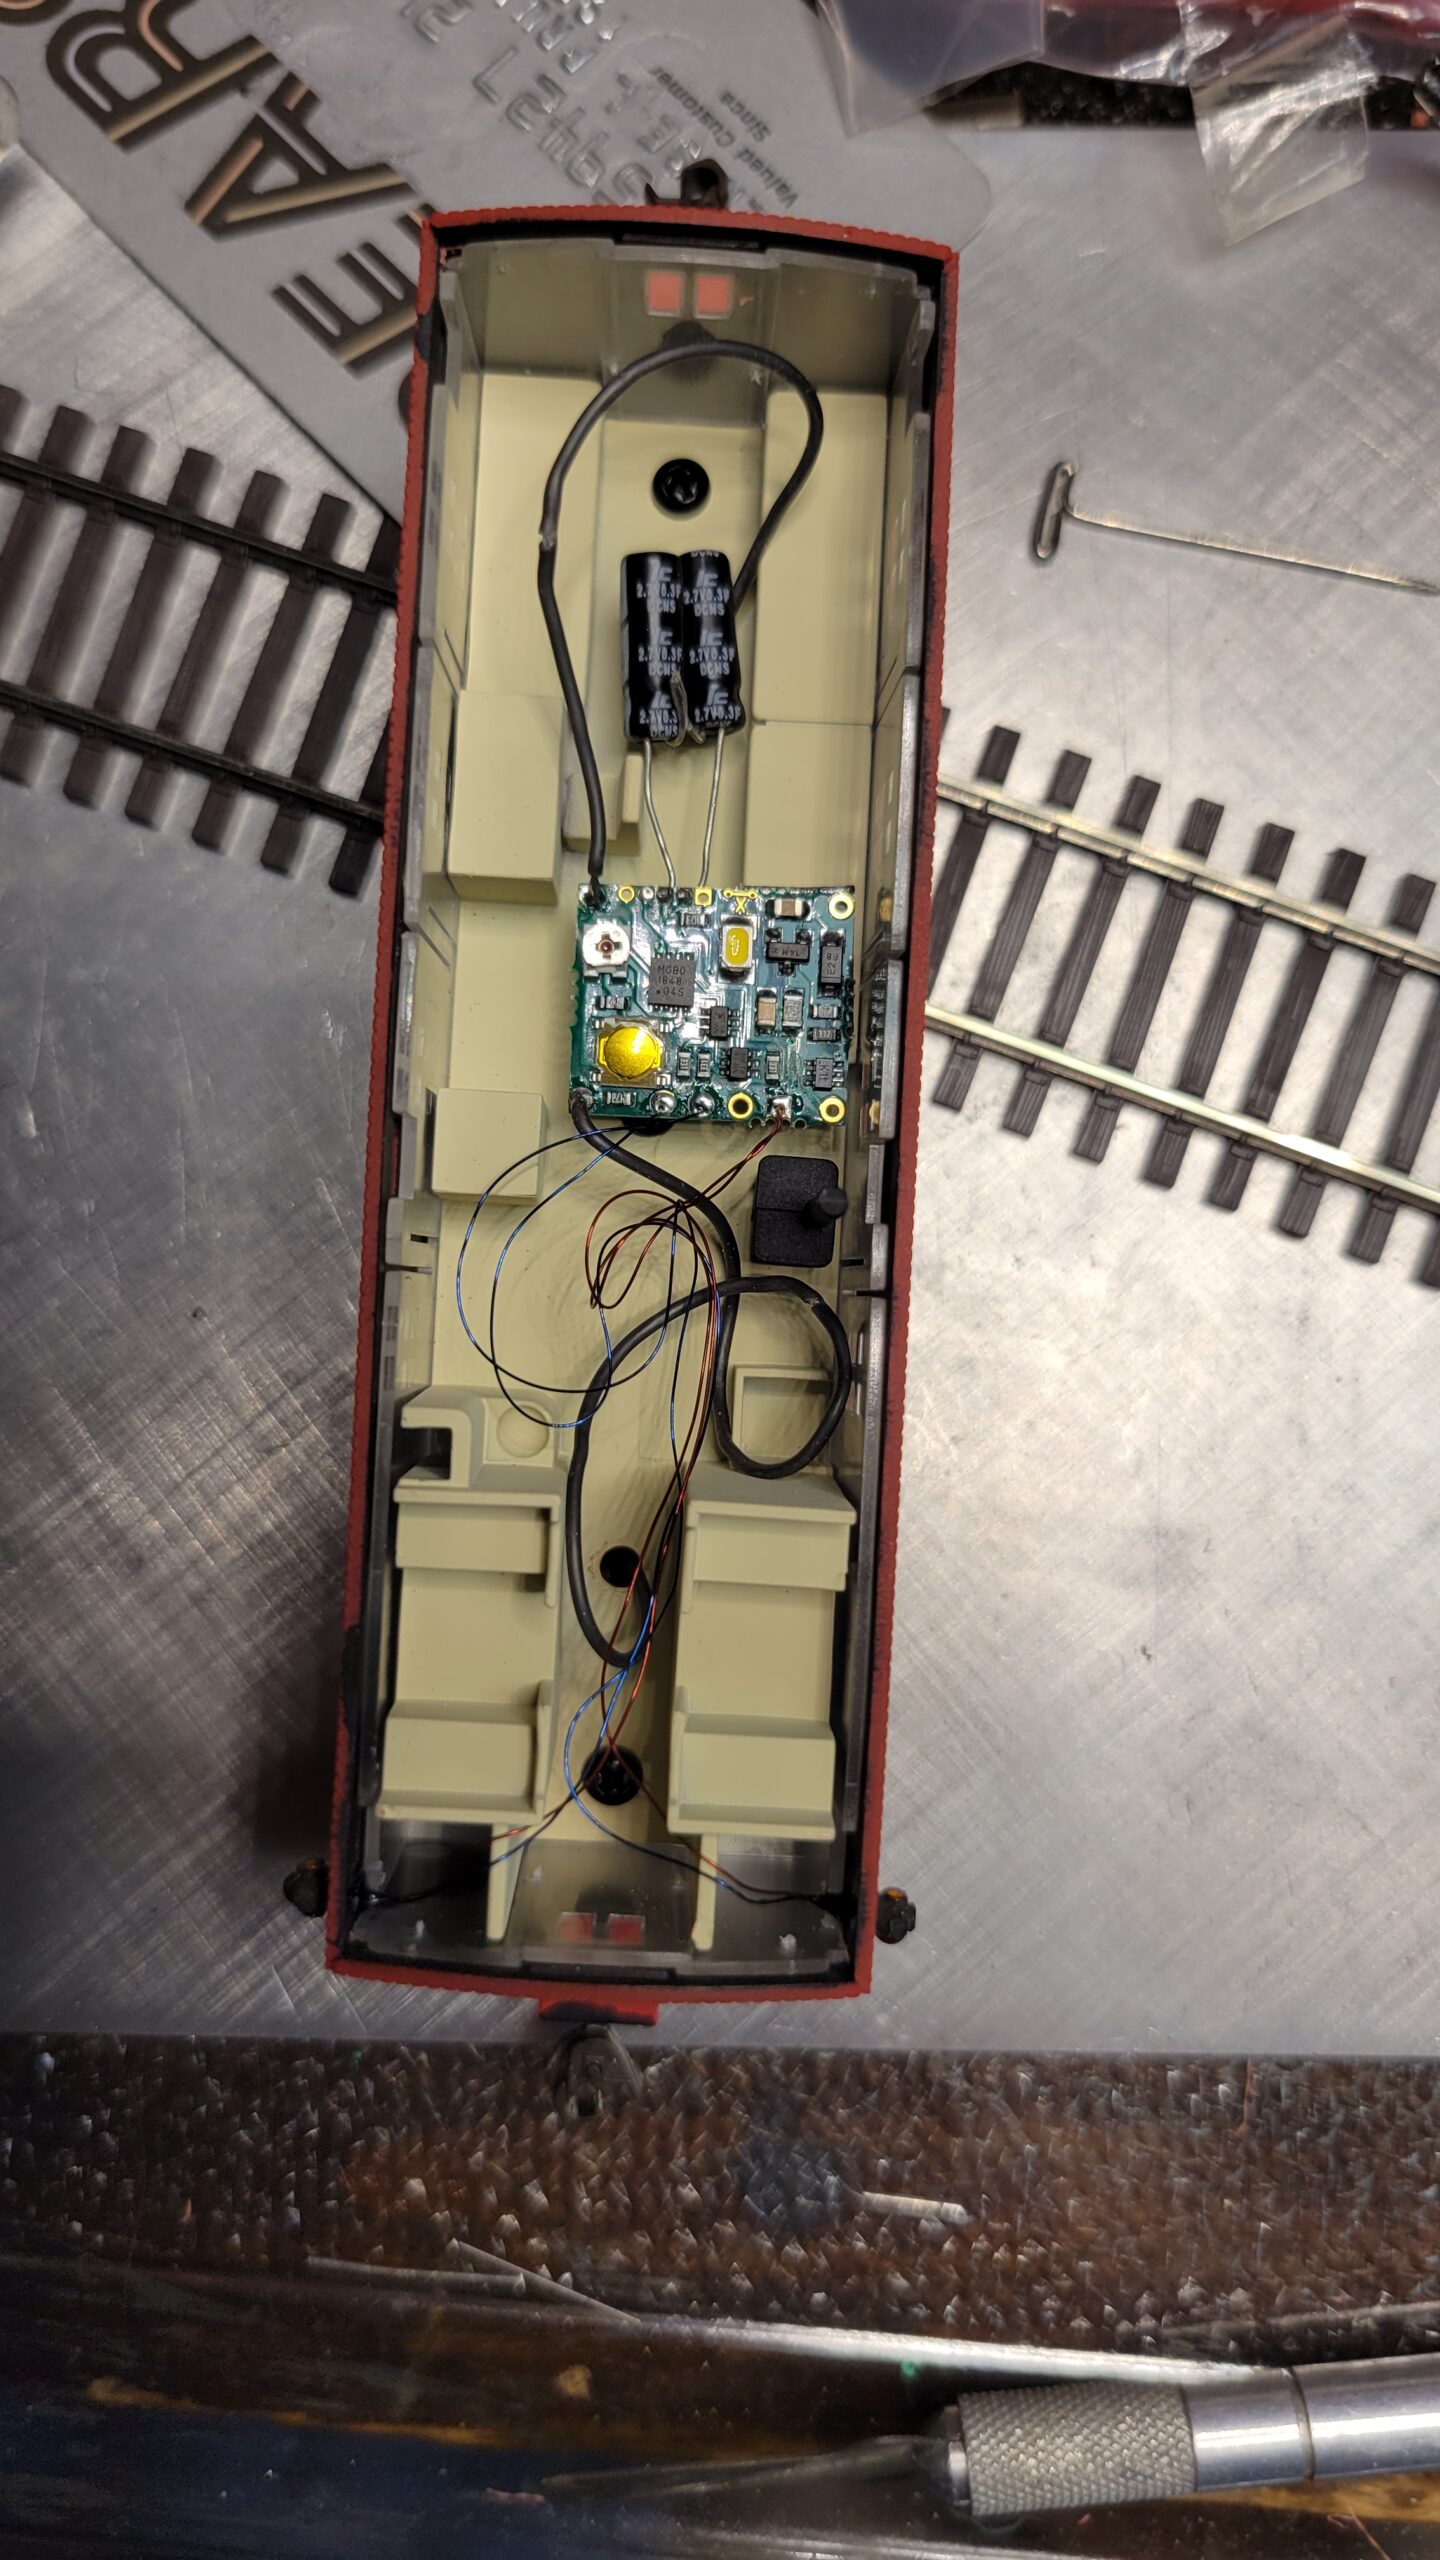
Meanwhile I started working on the second CNW waycar. This one went a bit quicker than the first because I had learned how to mount the NCE Light It, I knew the best approach to soldering the wiring, installing the power pickup trucks and all that. Here the wiring is complete and all tucked into place ready for the roof. It's April 29th.
On 2 May I extended the throttle buss through the Douglas benchwork all to way to a connection at the end near my workbench. Now I can test DCC equipment at the workbench with direct connections both to the power buss and the throttle buss. I have the NCE radio throttles, but their performance is spotty.
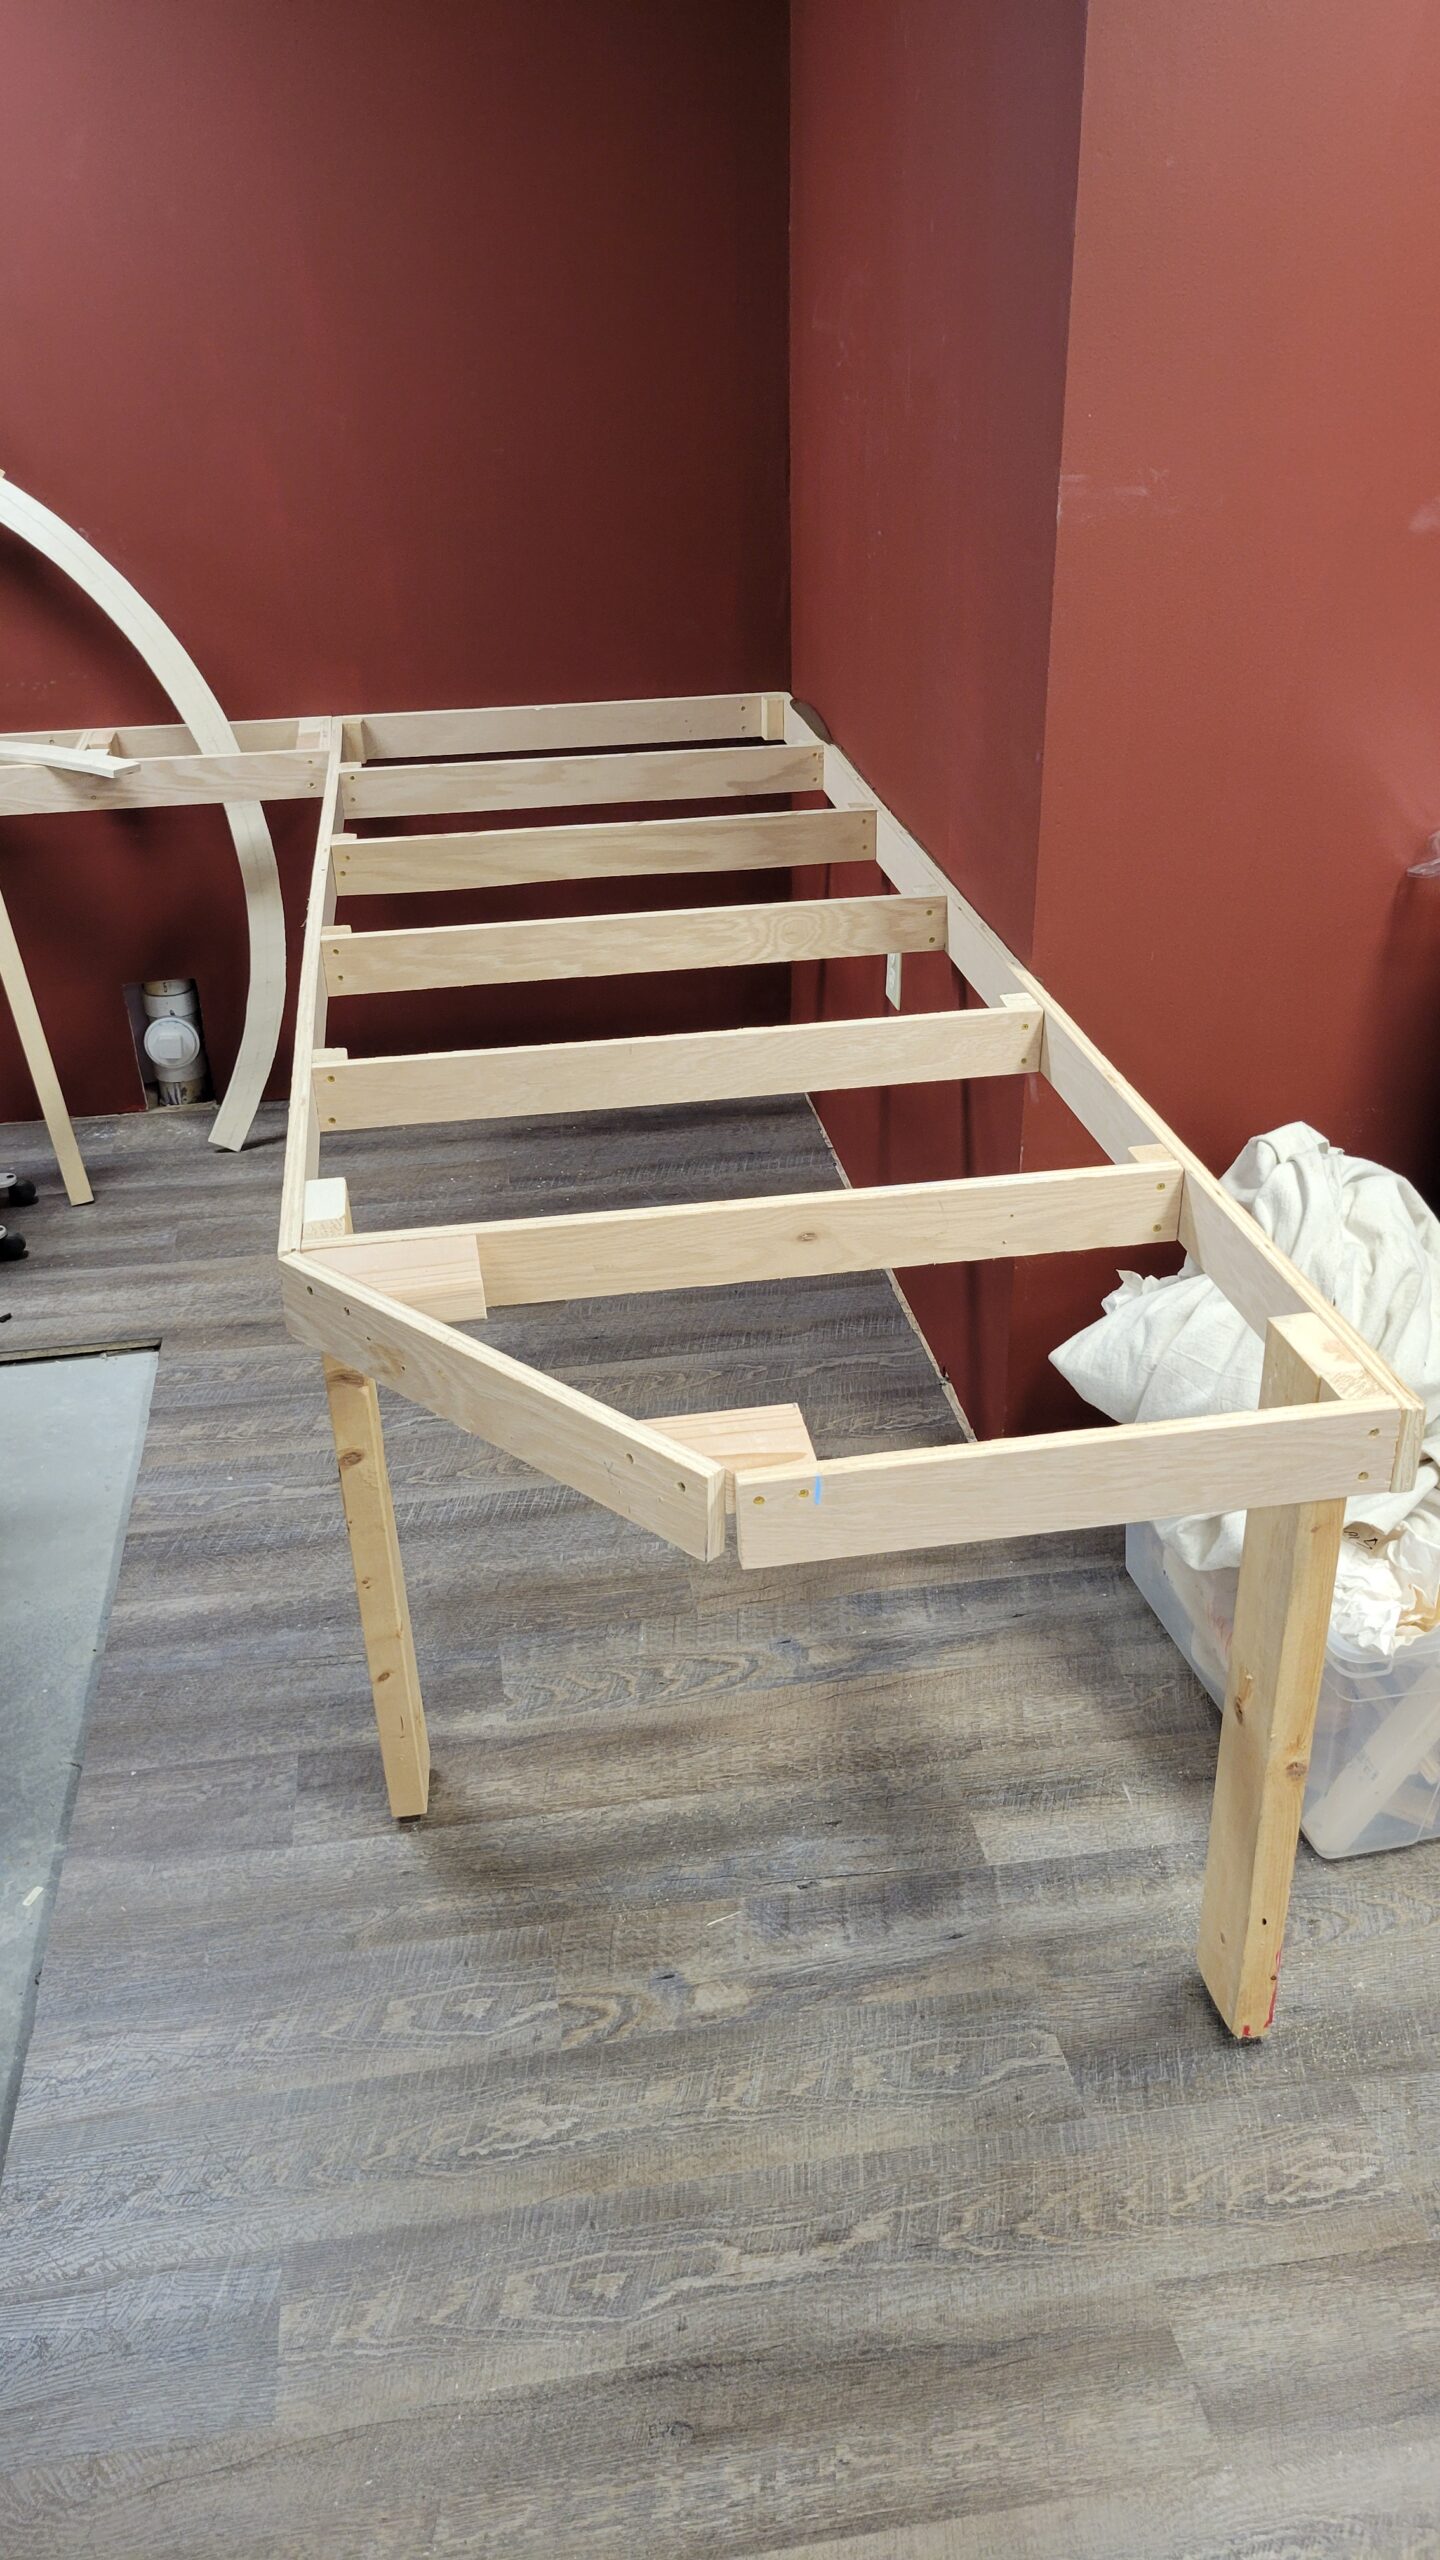
On 5 May I started building the first section of benchwork for the Worland / Greybull peninsula. I started with one of the grid sections I brought with me from the New Jersey layout, reworking it to the configuration I needed. It was 96 X 42 inches, and I narrowed that to about 33 inches. Then, to provide clearance around the wall that hides the furnace and hot water heater, I cut off one corner. It's now been installed and looks like this:
 The benchwork in this area is so low to allow room under the towns of Worland and Greybull for the hidden part of the Cody branch underneath.
I finished the second waycar by weathering it yesterday:

The plaster cloth I ordered came in, and I put a second layer on the south end of the canyon, and continued extending the foam base "north." You can't really see much difference with the second layer of plaster, but in this shot it's not dry yet, and looks a bit grayish.

I've spent nearly all of my modeling time on the canyon for the past couple of weeks. The next few shots show the progress from the 10th through today.
Here, on the 10th, the wall behind the tracks north of the first tunnel, Tunnel 5 (called Black Tunnel, presumably because of the rock color, by BNSF train crews), is being stacked. To the right, Tunnel 4 is being framed in.

Another view of Tunnel 4. This is still the 10th.

By the 13th the canyon looked like this. The wall between Black Tunnel and Tunnel 4 is almost full height, and work is beginning north of Tunnel 4.

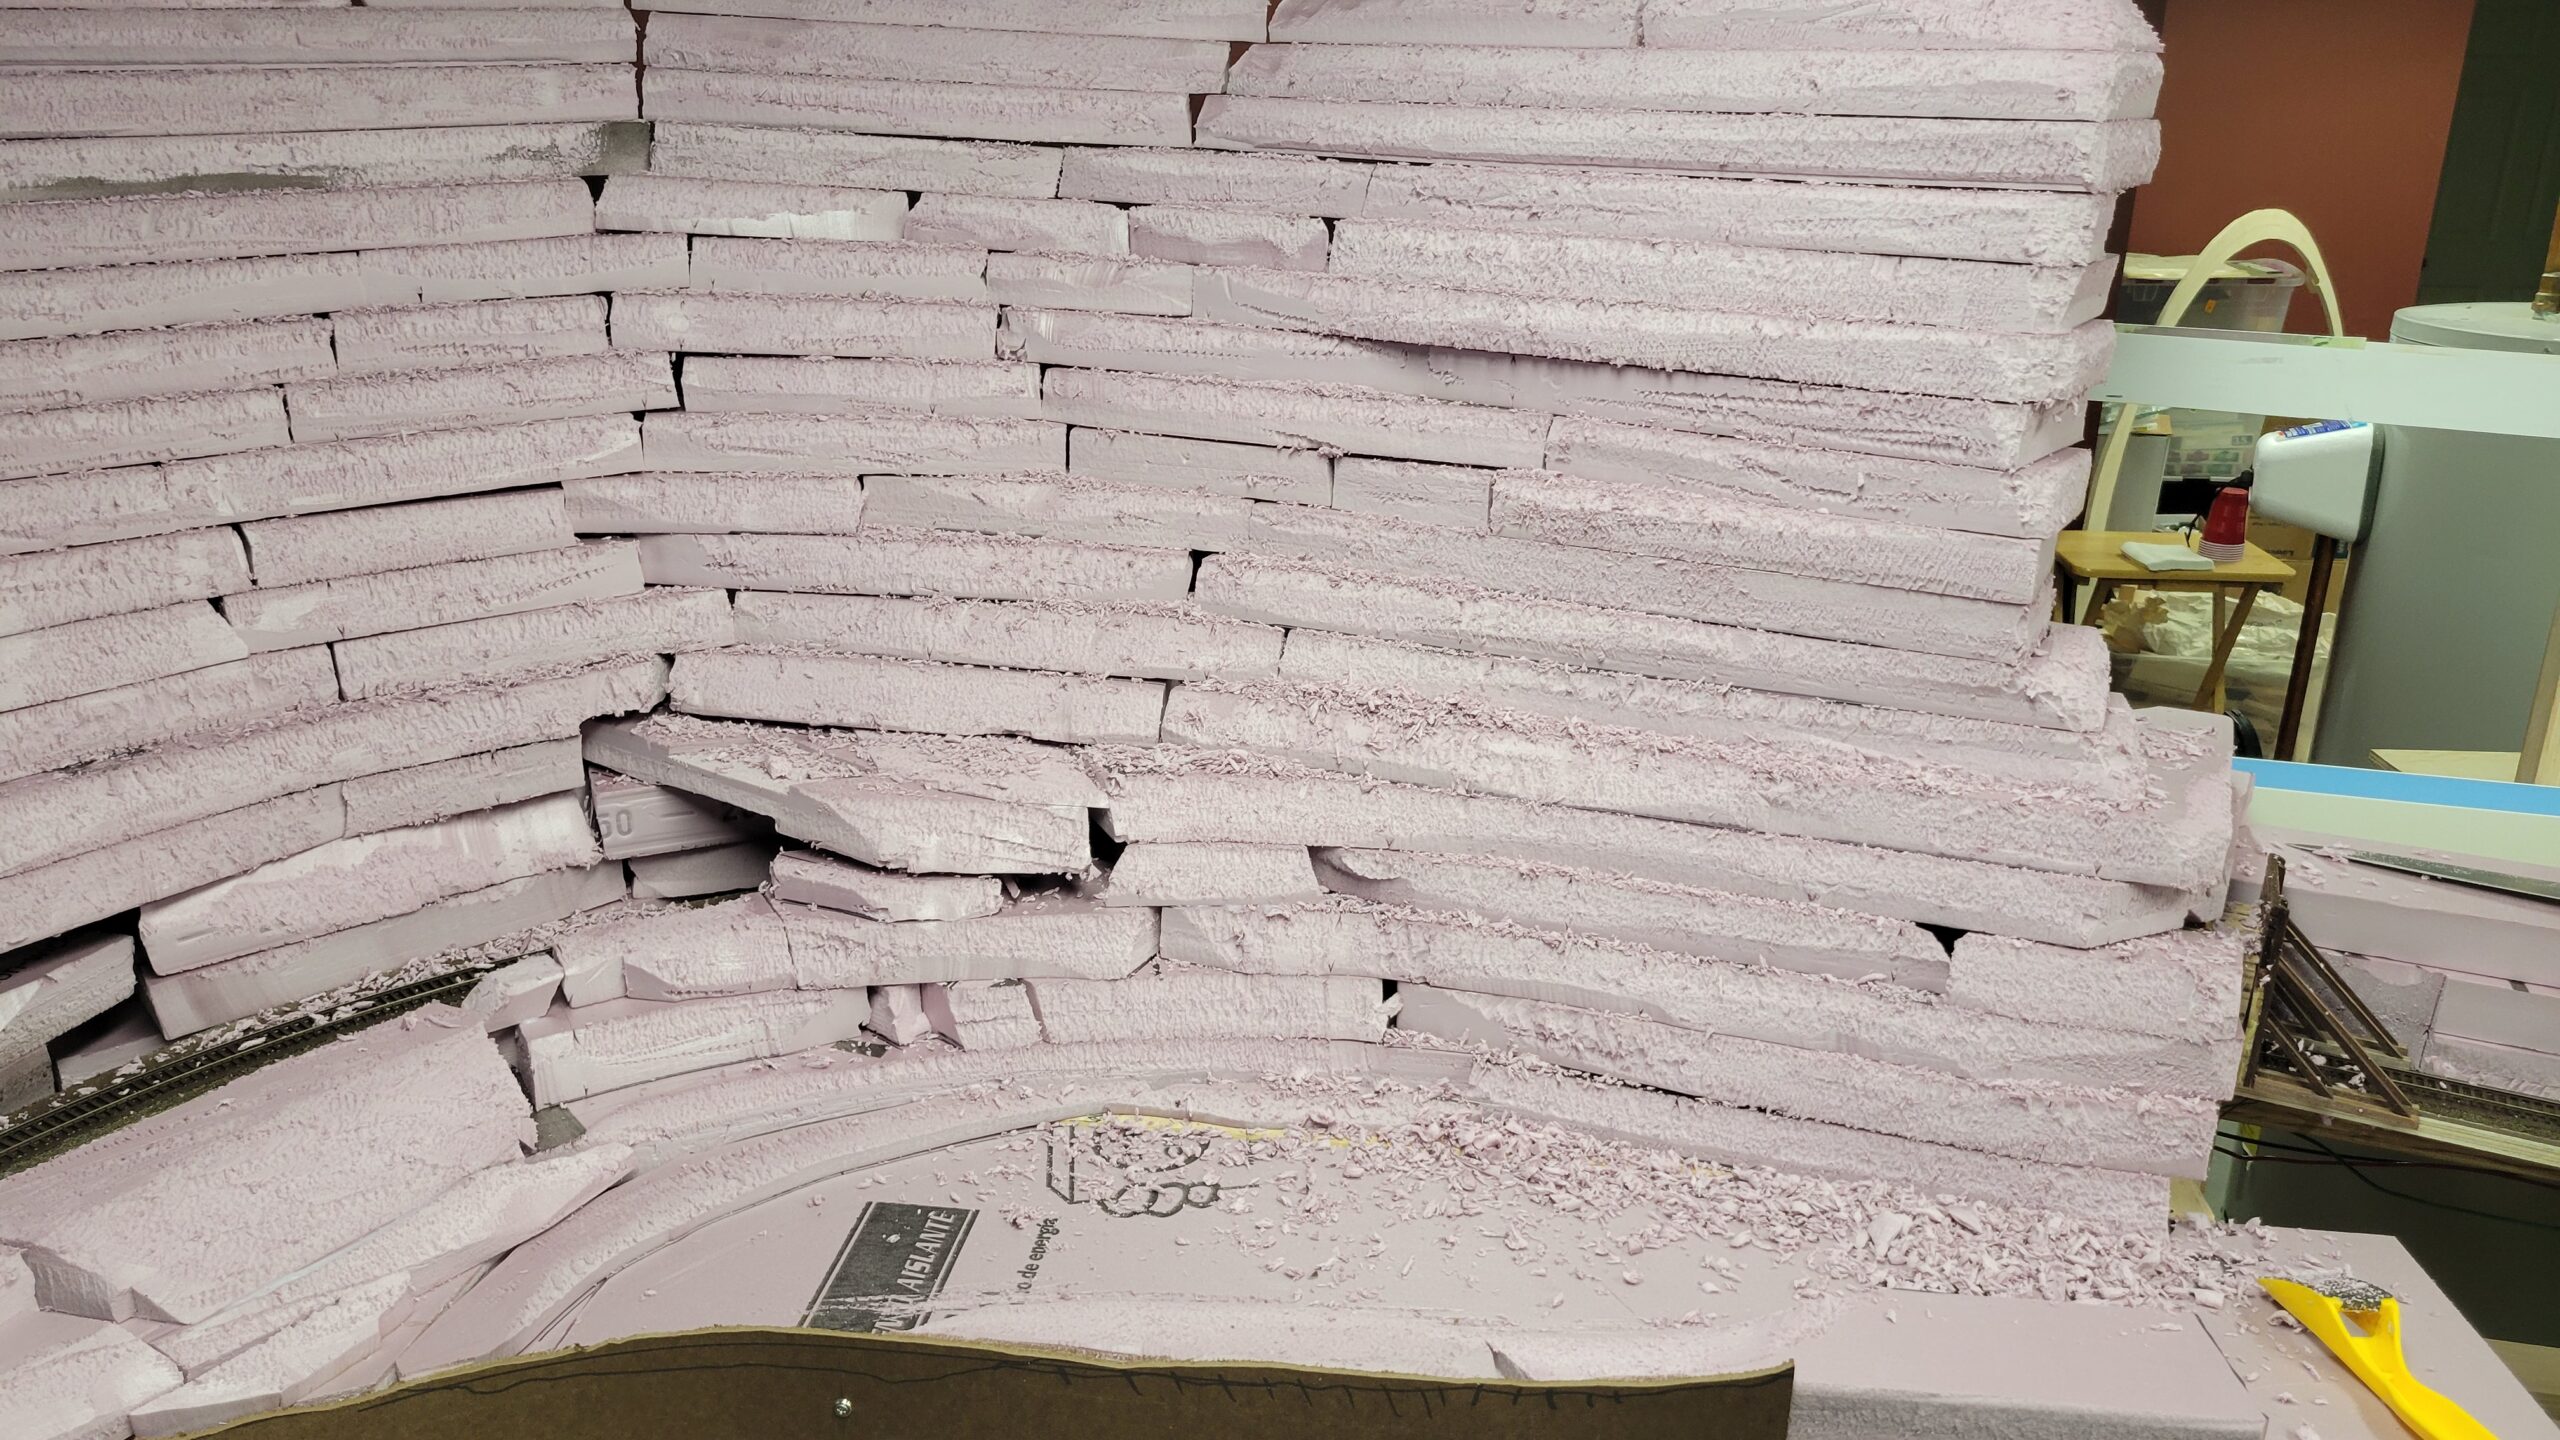
Here's the canyon as of today, May 17. I've worked my way all the way north to where the third tunnel will start in the distance. Note that I started stacking the foam in an open cribbing style north of the flat sloping sheets of foam.

In this view we're looking the opposite direction, from almost the end of the peninsula.

While the canyon has taken nearly all my time recently, I did stop for an hour or so to paint the walls for what will become Thermopolis Produce. This is an old Suydam feed mill kit.

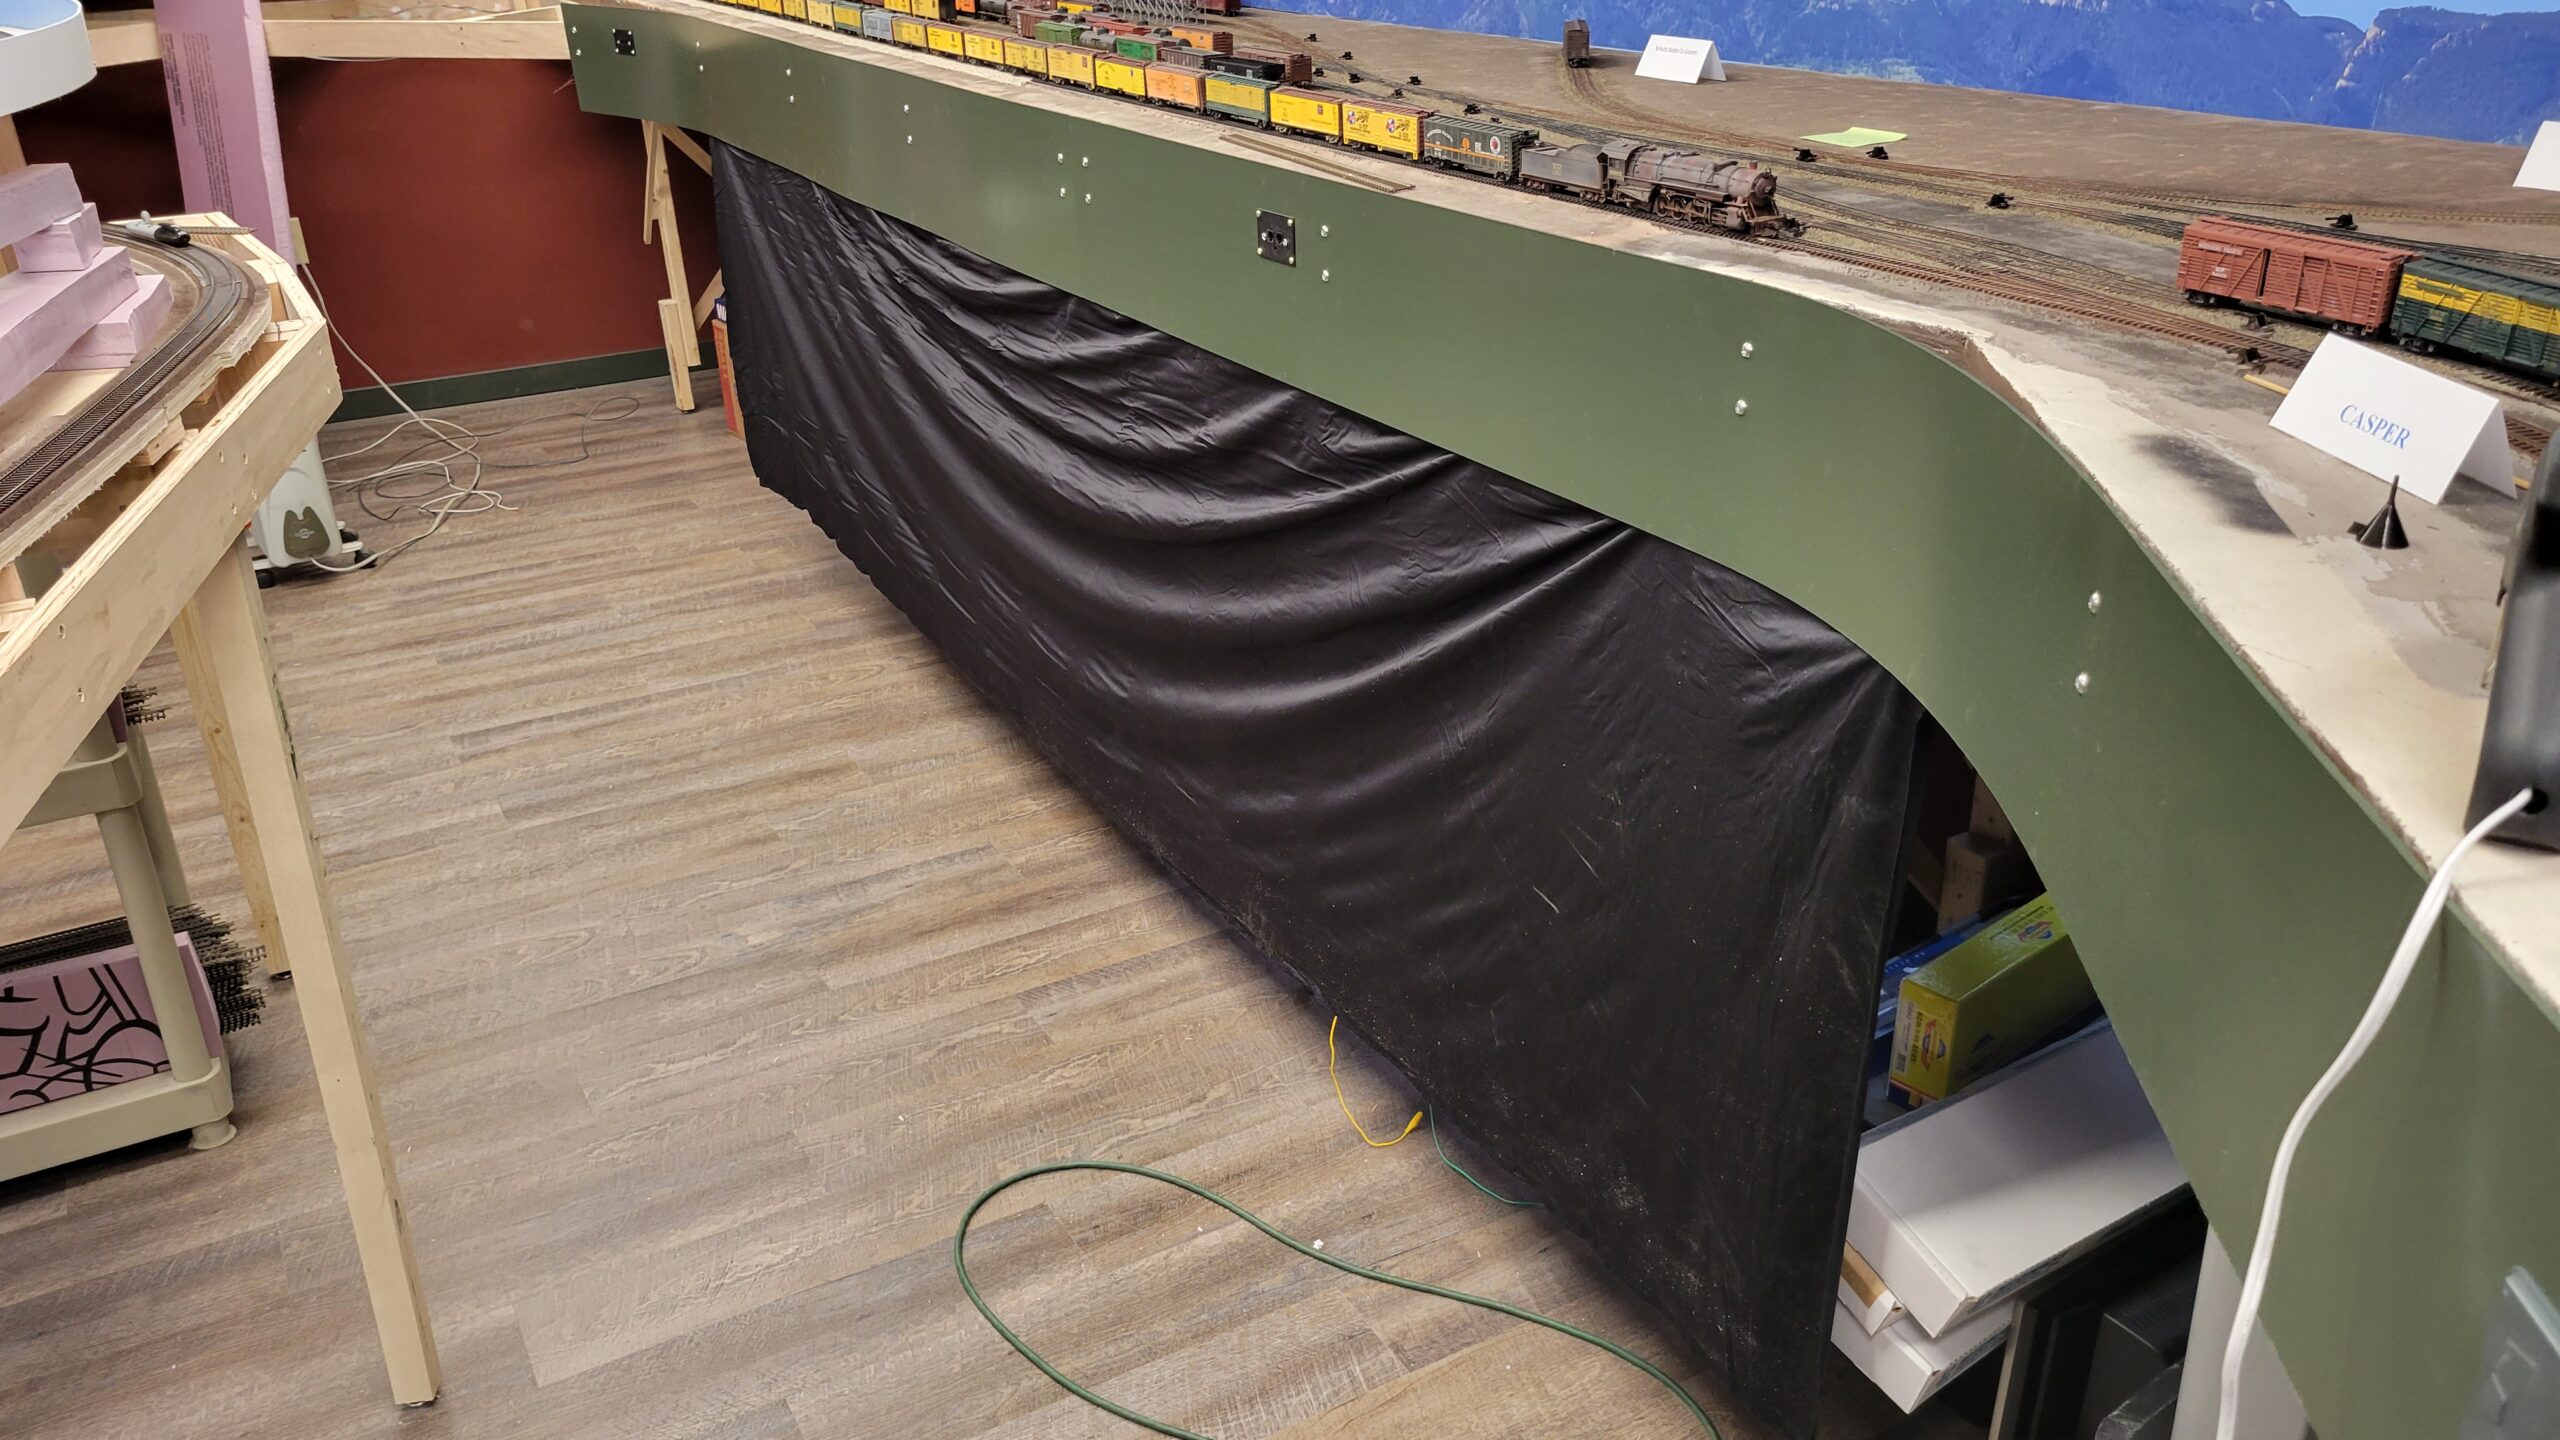
I picked up some black cloth at Hobby Lobby to try out as skirting for the layout. Here's about fifteen feet of it hanging below Casper yard:
Other than the skirting, I've focused almost entirely on the Wind River Canyon. Here's the wall between Black Tunnel and Tunnel 4 after hacking at it with the hot wire cutter. Looks pretty rough at this point. This is on 20 May.

Here's what the canyon looks like from the Thermopolis side of the peninsula. The vertical foam sticks are taped in place to keep me from encroaching on the area above Thermopolis.

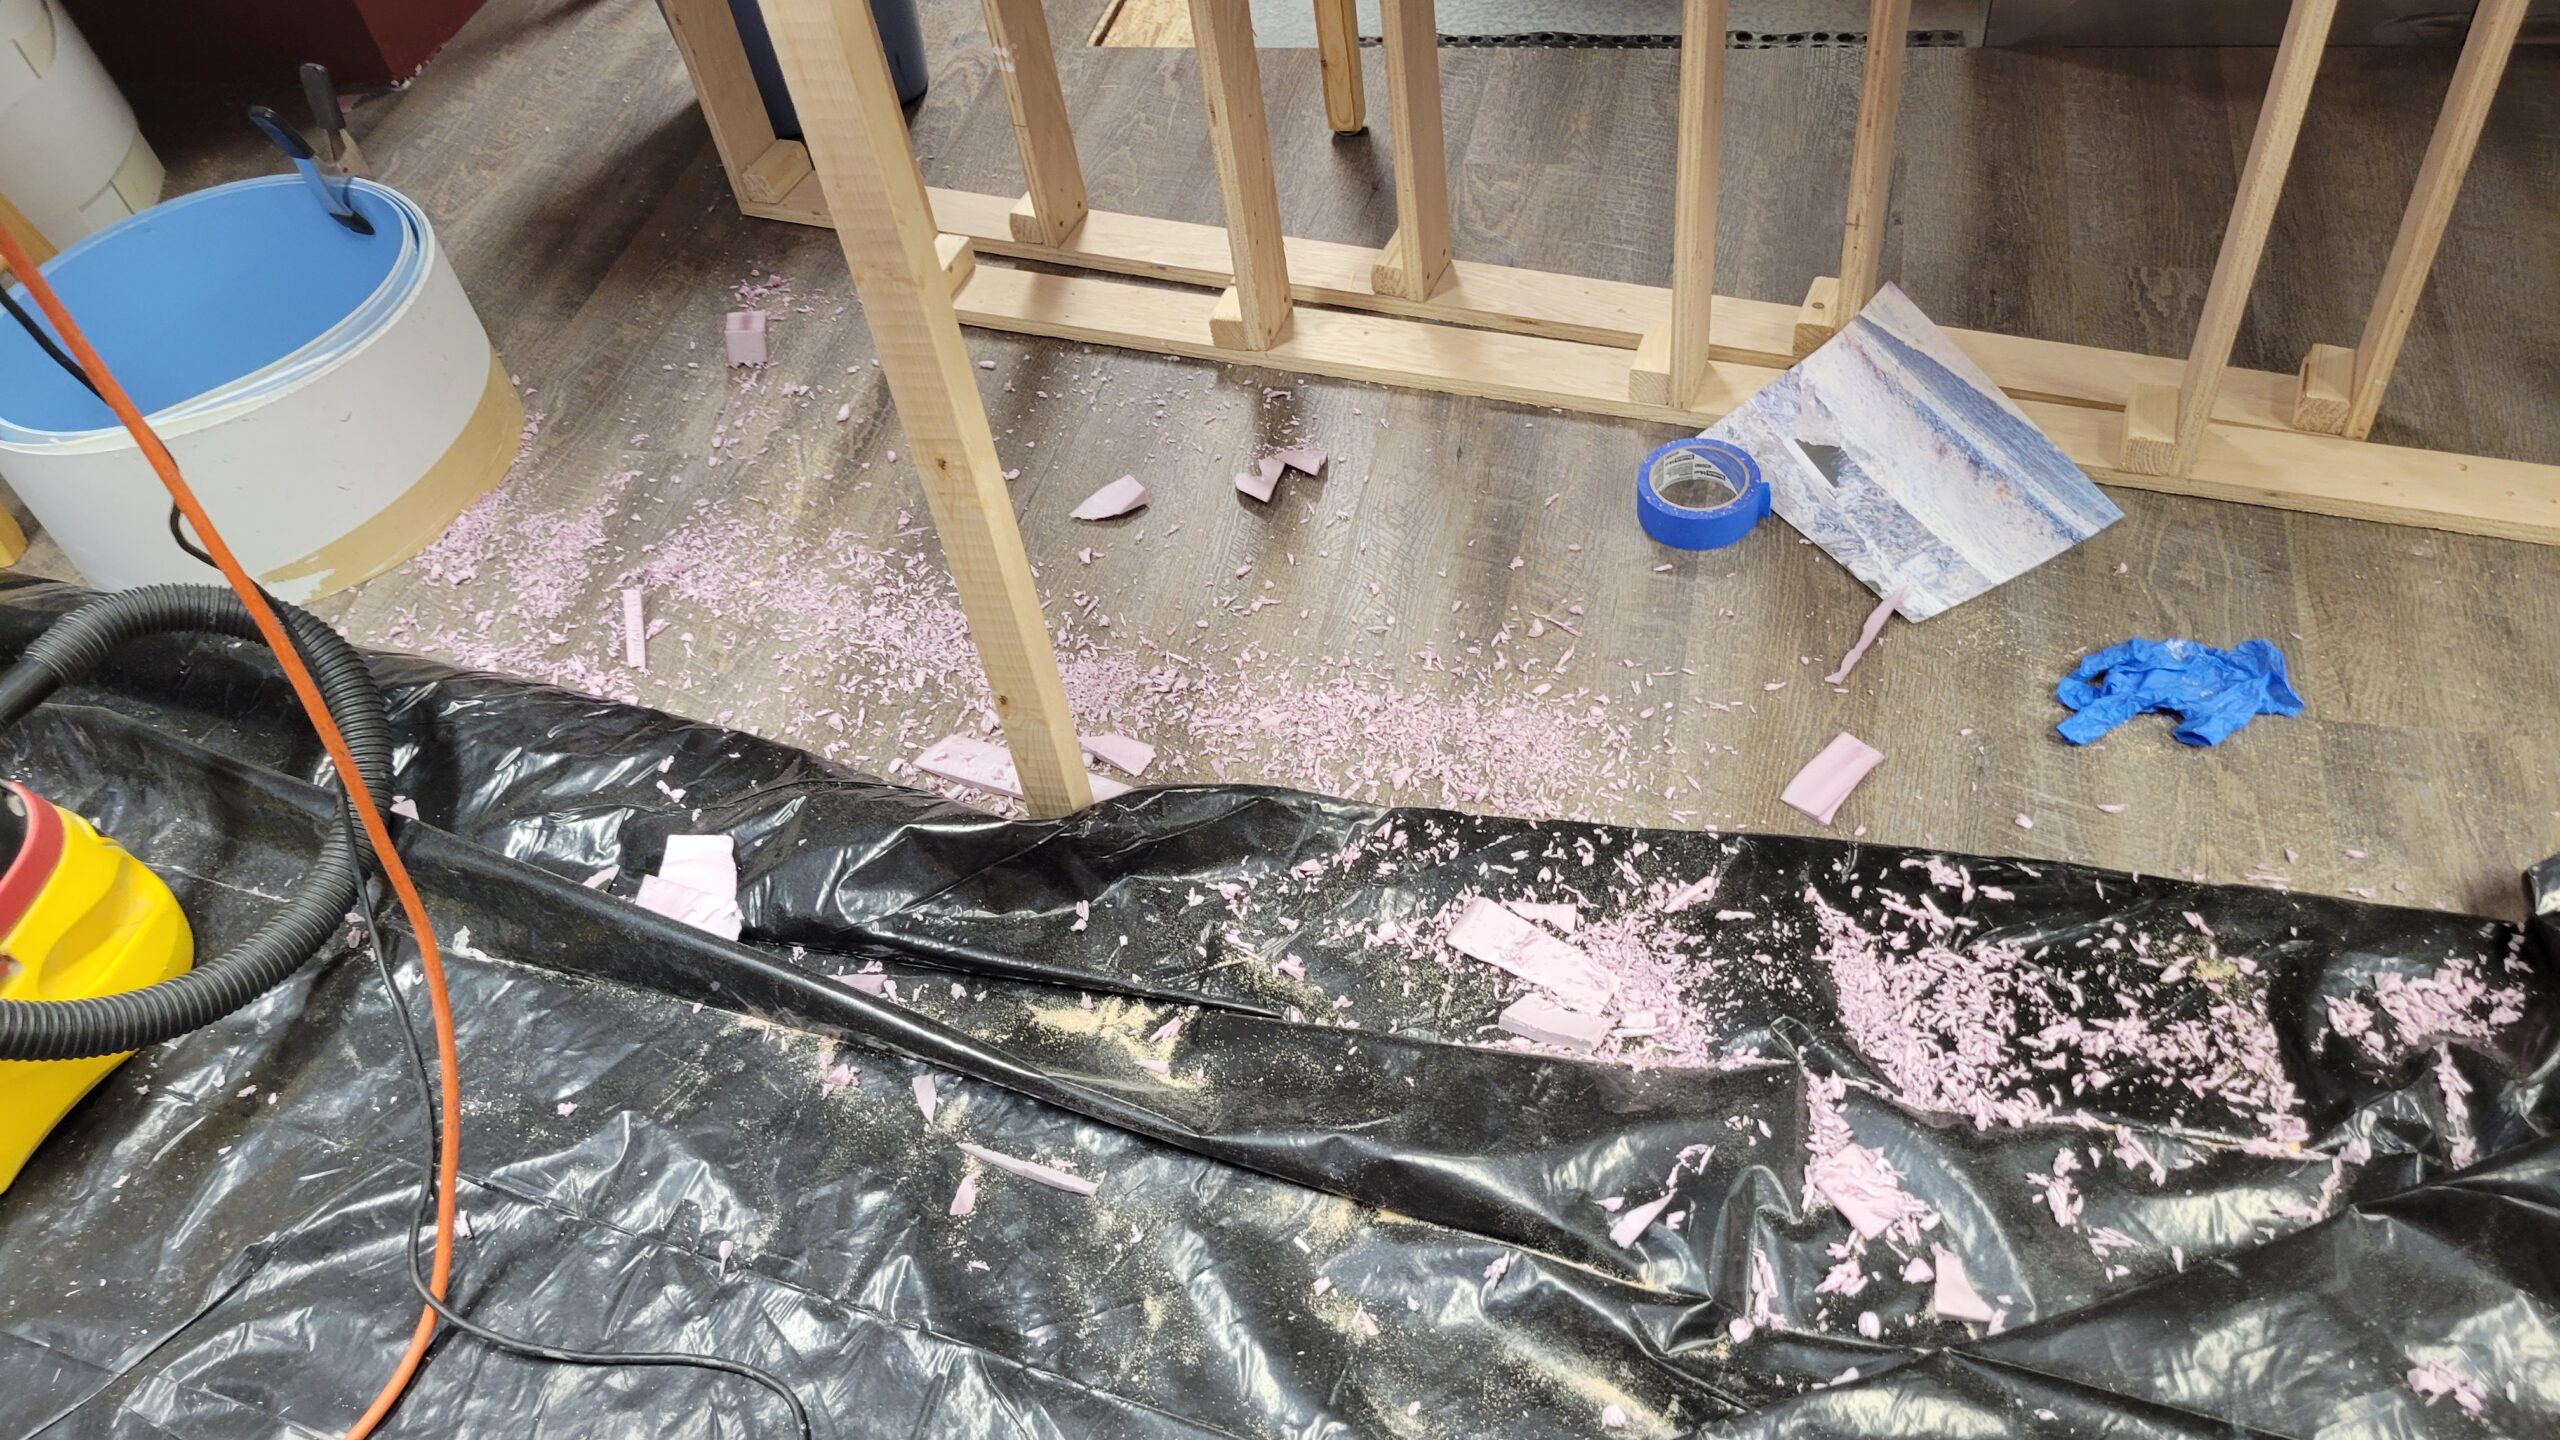
Here I'm carving away at the surface with a Surform tool. It tears out small chunks of foam, leaving a rough surface which gives something for the plaster cloth to grab on to.

That Surform tool leaves tiny chunks of foam all over the floor and the layout around the area I'm carving. I vacuum the layout off frequently, but I've just let it accumulate on the floor. I'll clean this up in a day or two.
On the 22nd I decided to check the CNW tracks and make sure trains could still get through. I took this shot of the upper level exit from behind the mountains, near Riverton. Trains ran fine all the way up and down (after I cleaned up all those foam bits).

Also on the 22nd I taped over the Burlington track in preparation for adding more plaster cloth.

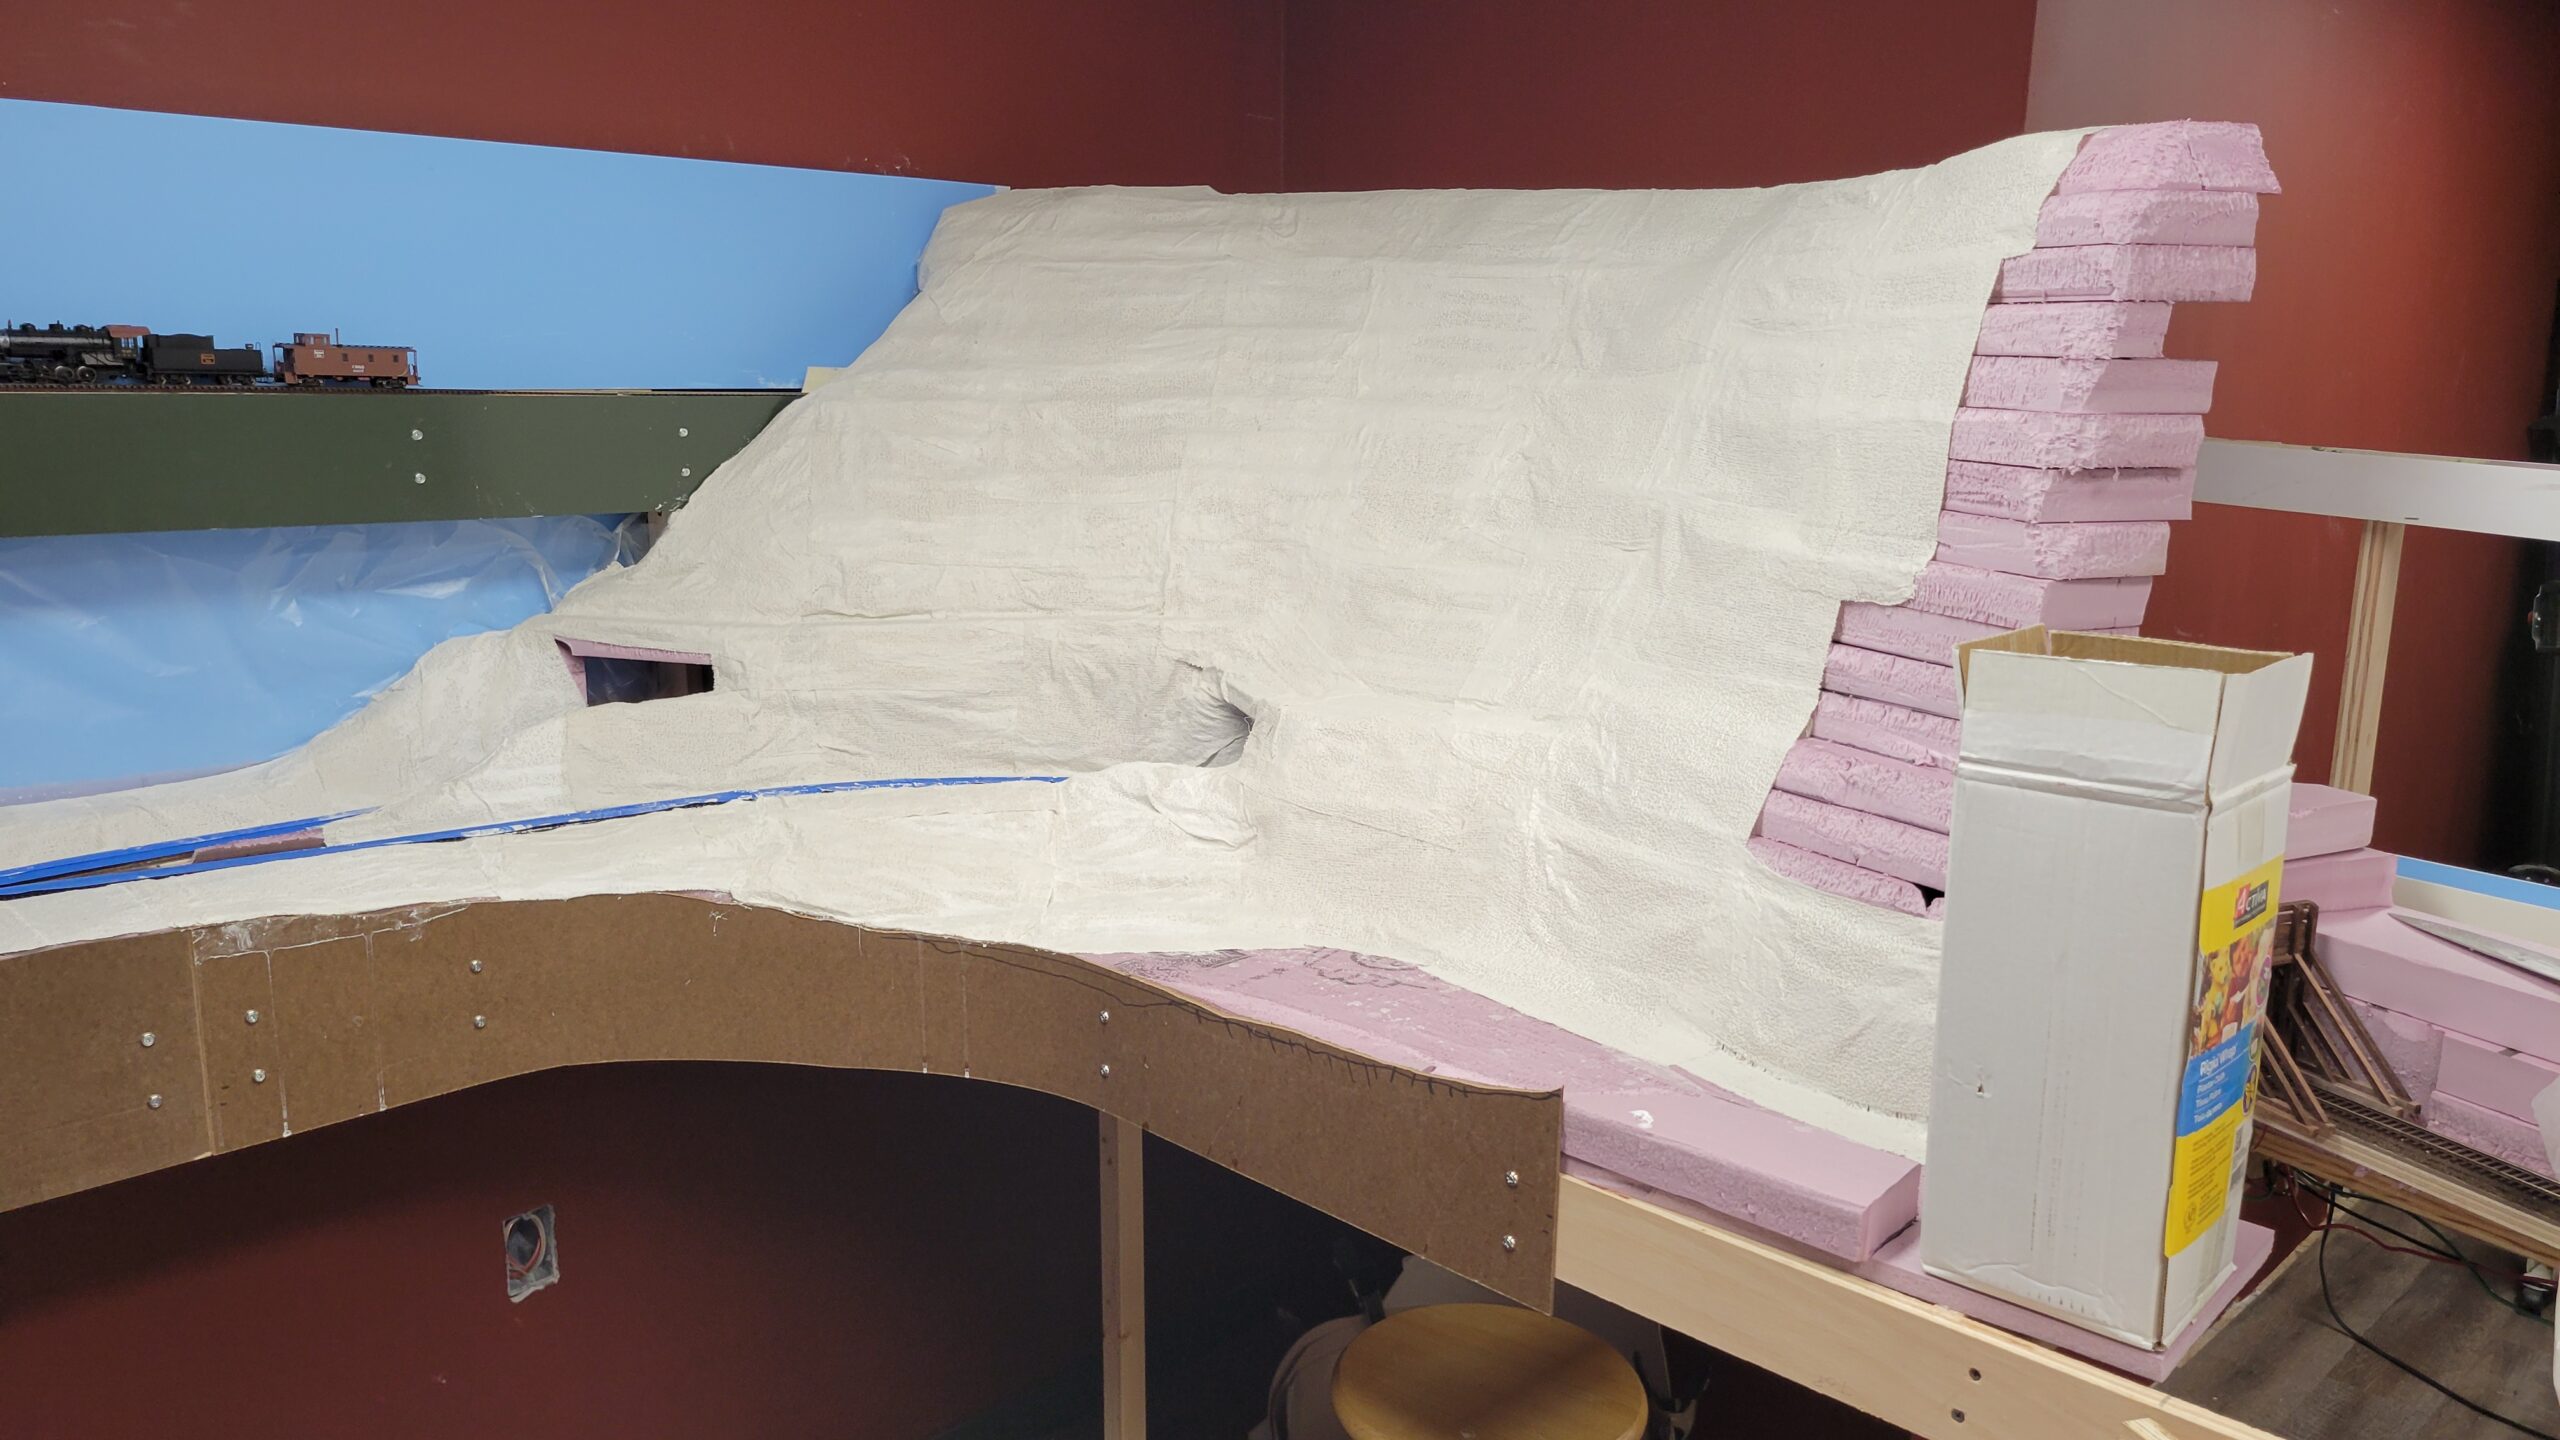
The last couple of days I've spent adding about 30 pounds of plaster cloth to the canyon. Here's how it looks as of today.

And from the "bottom" of the peninsula:

Well, it appears that the latest WordPress update has screwed up the picture upload process.
IF IT WORKS, here's the beginning of trackwork between Thermopolis and Worland. Roadbed out of Thermopolis is being installed.

A couple days later the roadbed to the beginning of Worland was complete.

2 June this short connecting track between the two towns was completely laid. Track will not be extended into Worland proper for a couple of months - I need to build additional benchwork and cut more subroadbed. Attention will be elsewhere on the layout for awhile.

By the 5th the new section was wired.

On 30 May I finally started assembly on the Suydam kit I've talked about in my last two layout update videos. Here I've assembled the four walls.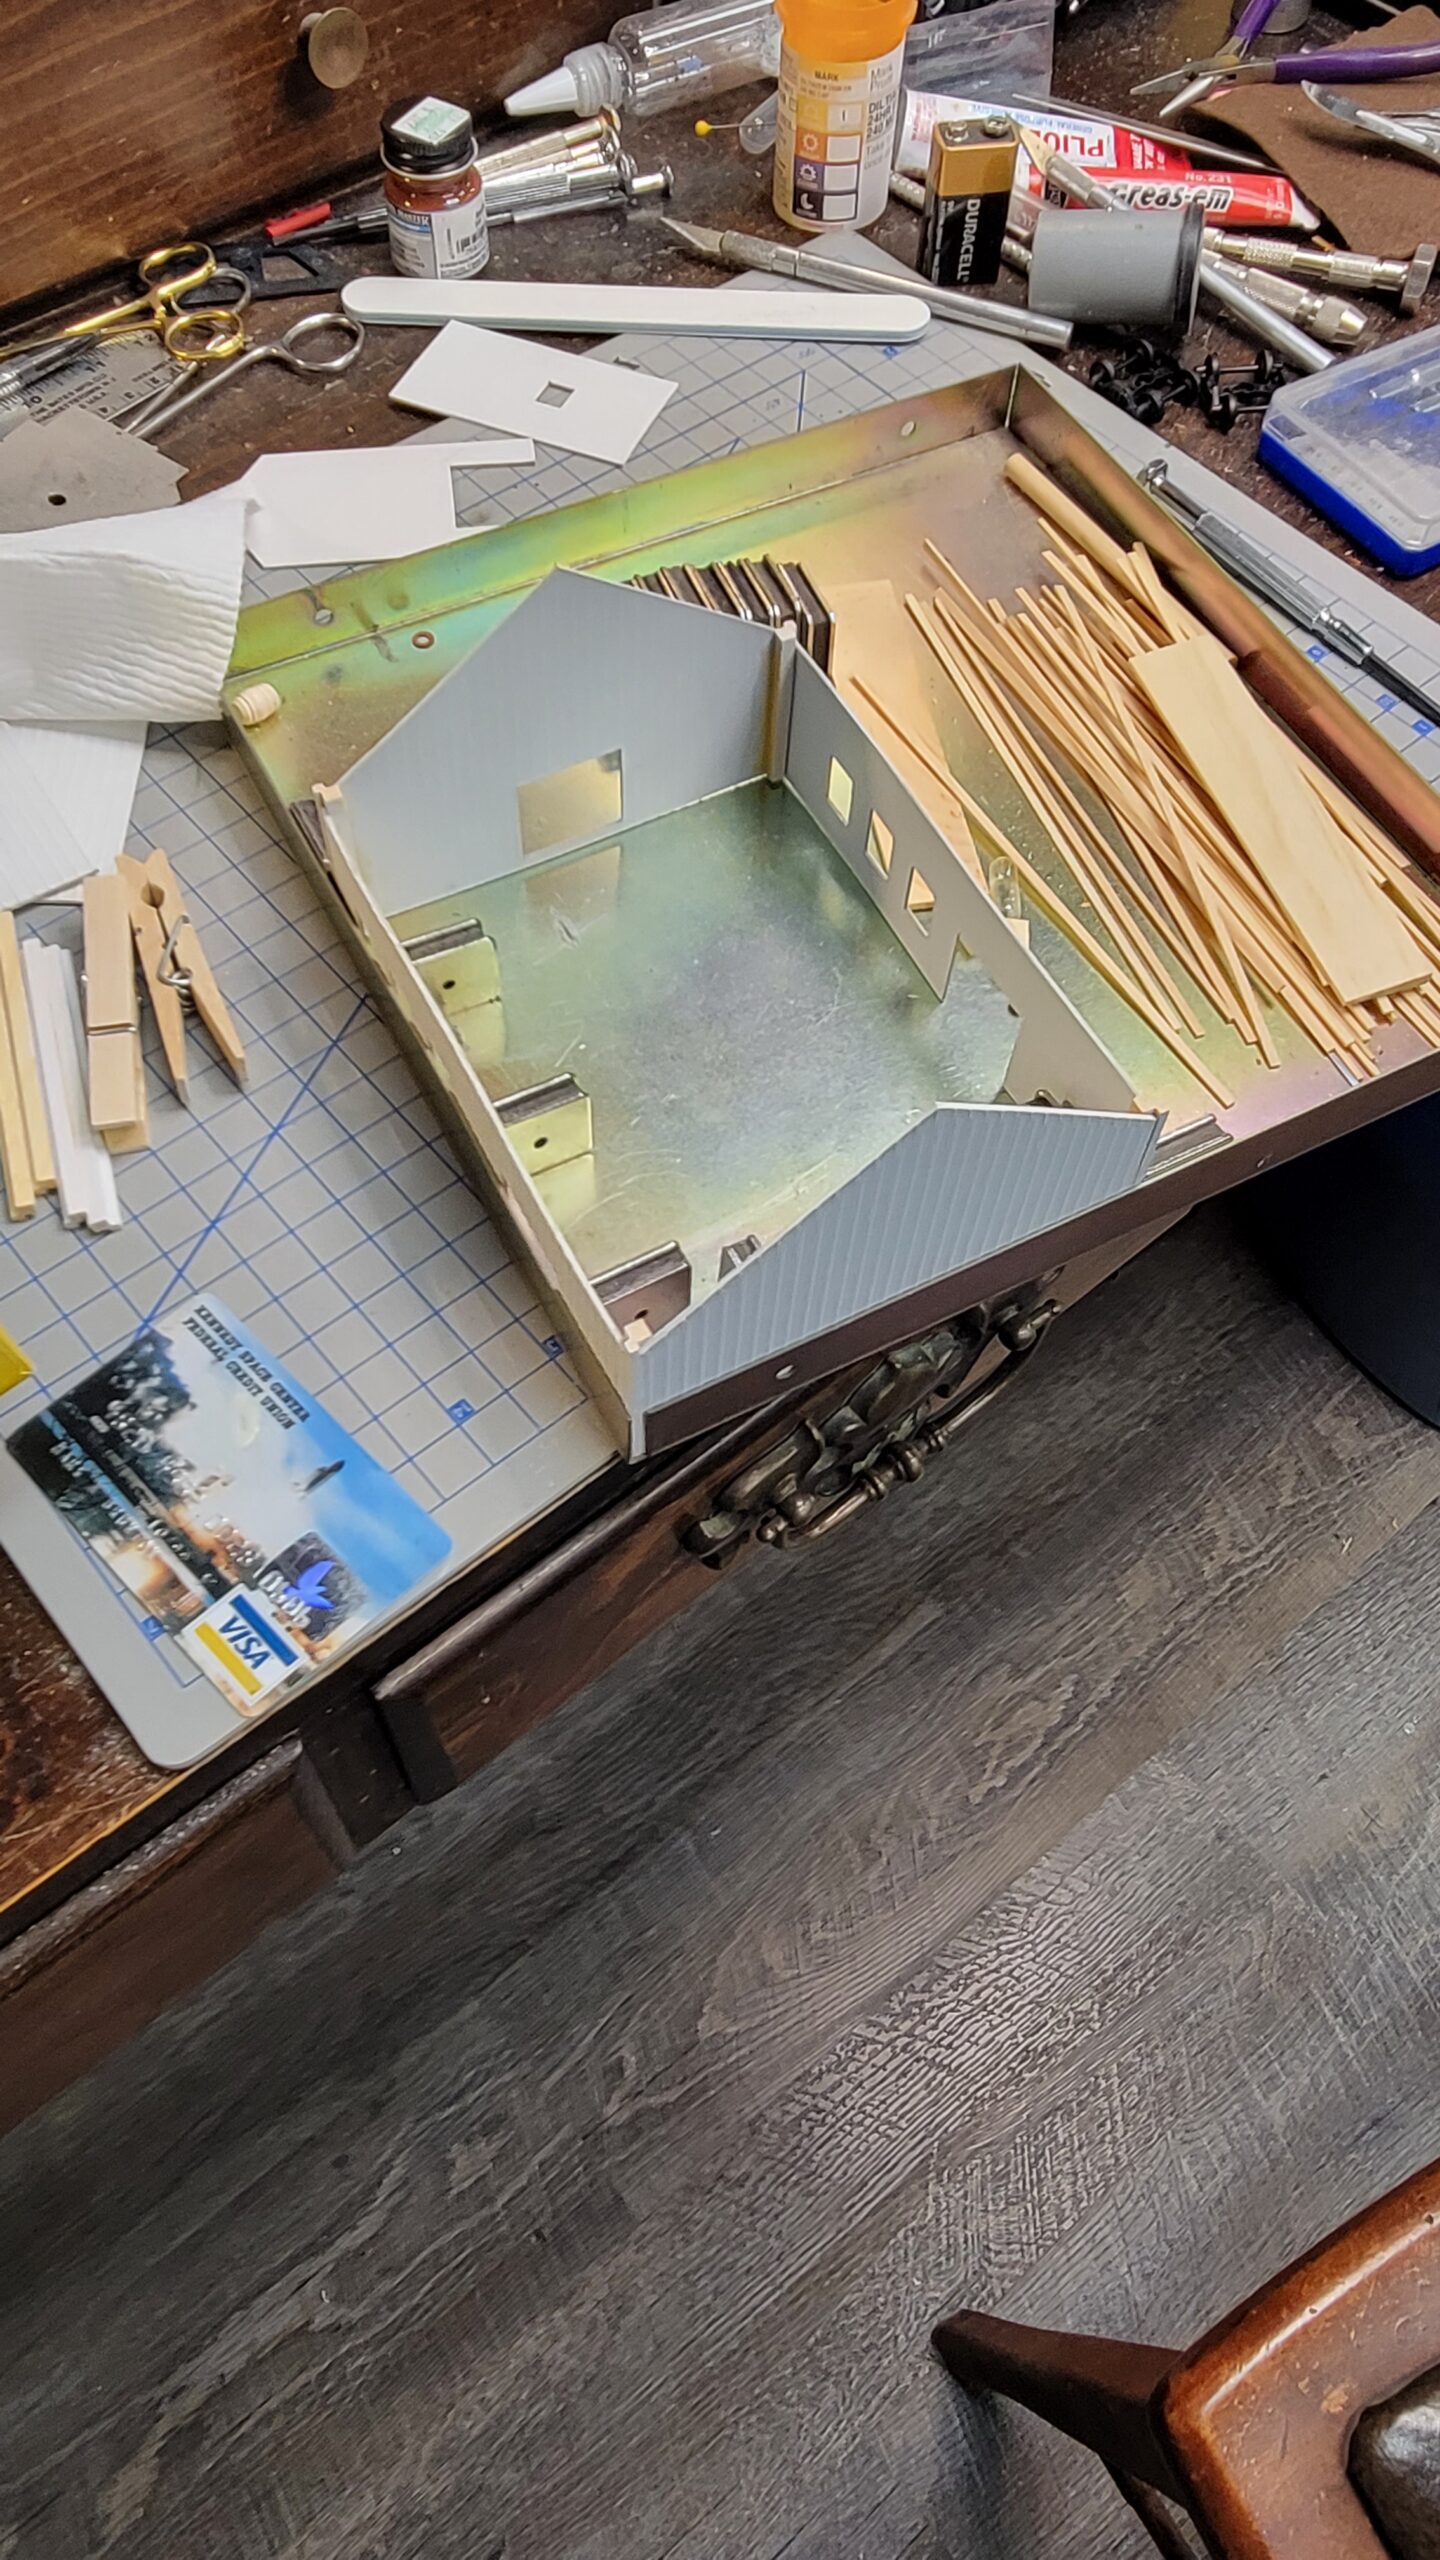
In early June I added the floor and an interior stiffening wall. Work on this is proceeding very slowly because non-modelling demands on my time have limited how much time I have for the layout. That limited modelling time is being divided among several different projects.

 In late May I won several auctions on ebay. While things often go for more than they're worth, these items were pretty good bargains. The first two items were Walthers Heavyweights Burlington passenger cars:

And the final item was a sorely needed additional Mikado for the layout. This is a BLI model that was used only sparingly. Once I re-lube it and renumber it to 5503 (I already have a 5508) it will make a fine addition to the roster.

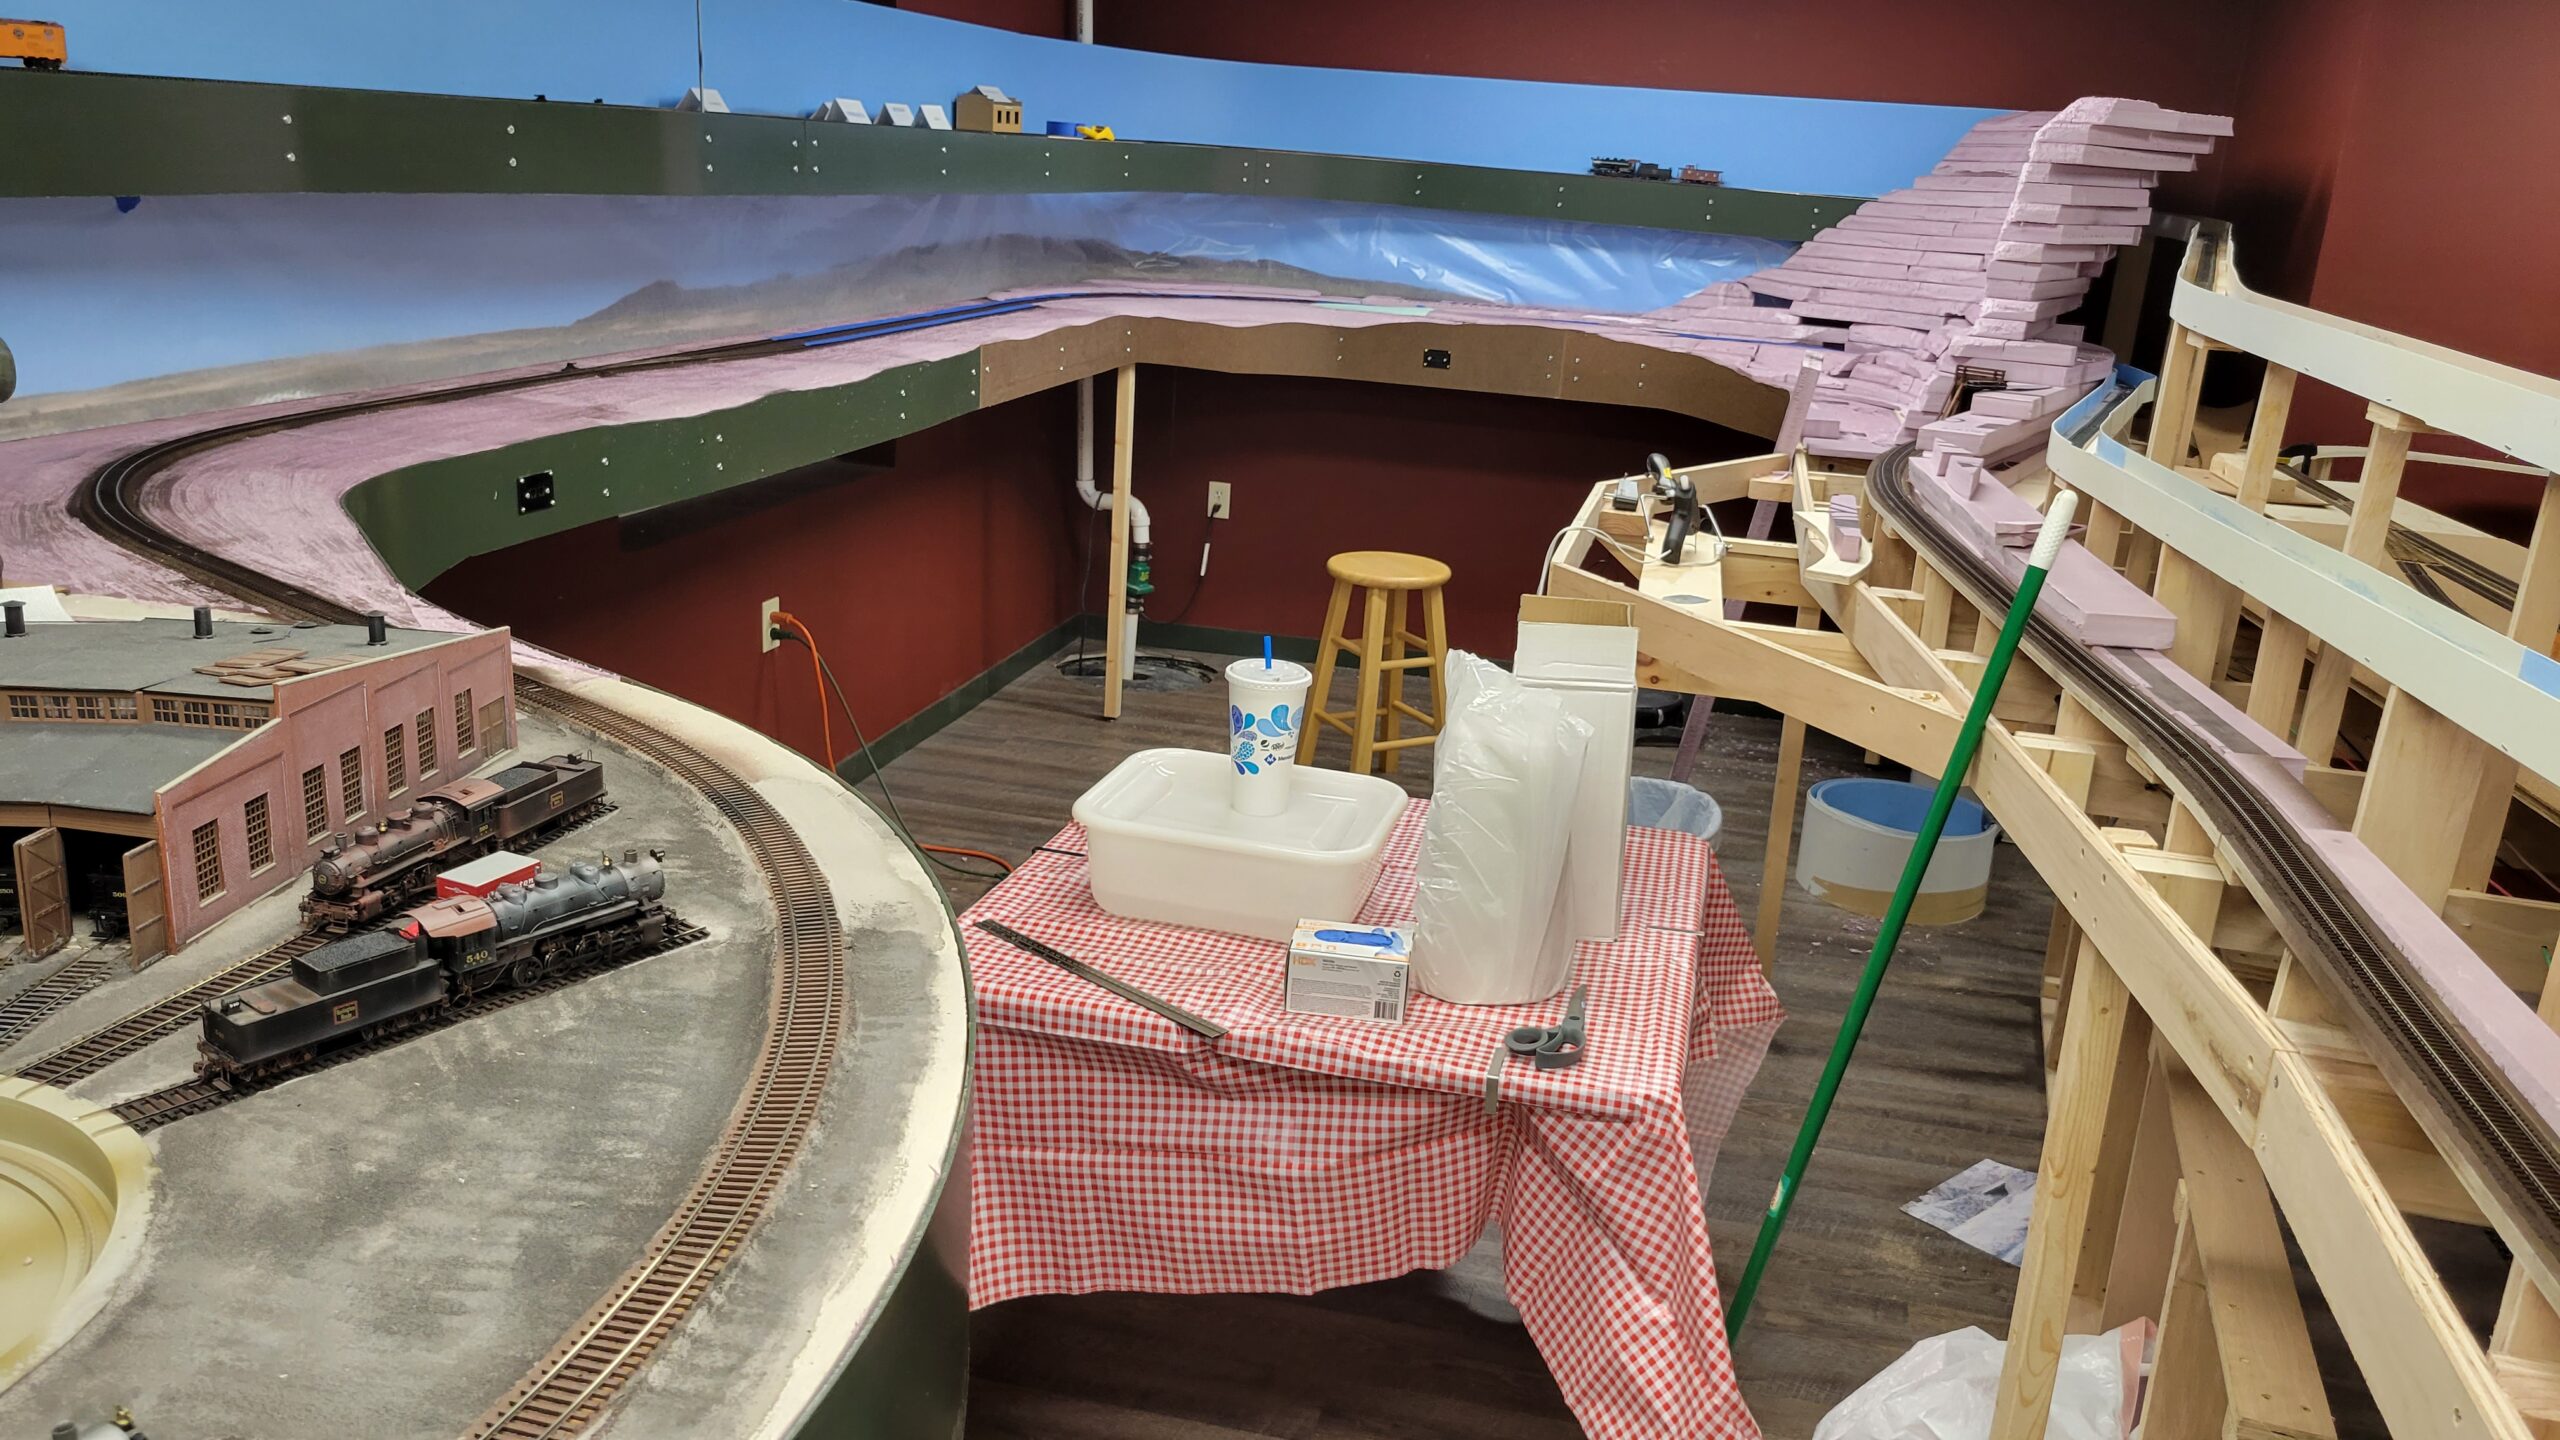
A couple days ago I got the 50 pound bag of Hydrocal I ordered a few weeks ago.

Then I collected all the tools and supplies I thought I would need and set them up on a card table at the work site. I forgot mixing sticks and a sprayer to wet the existing plaster cloth before applying the new plaster.

And I dove right in! Here I've added some brown dry Tempera pigment to the plaster powder so it won't be stark white.

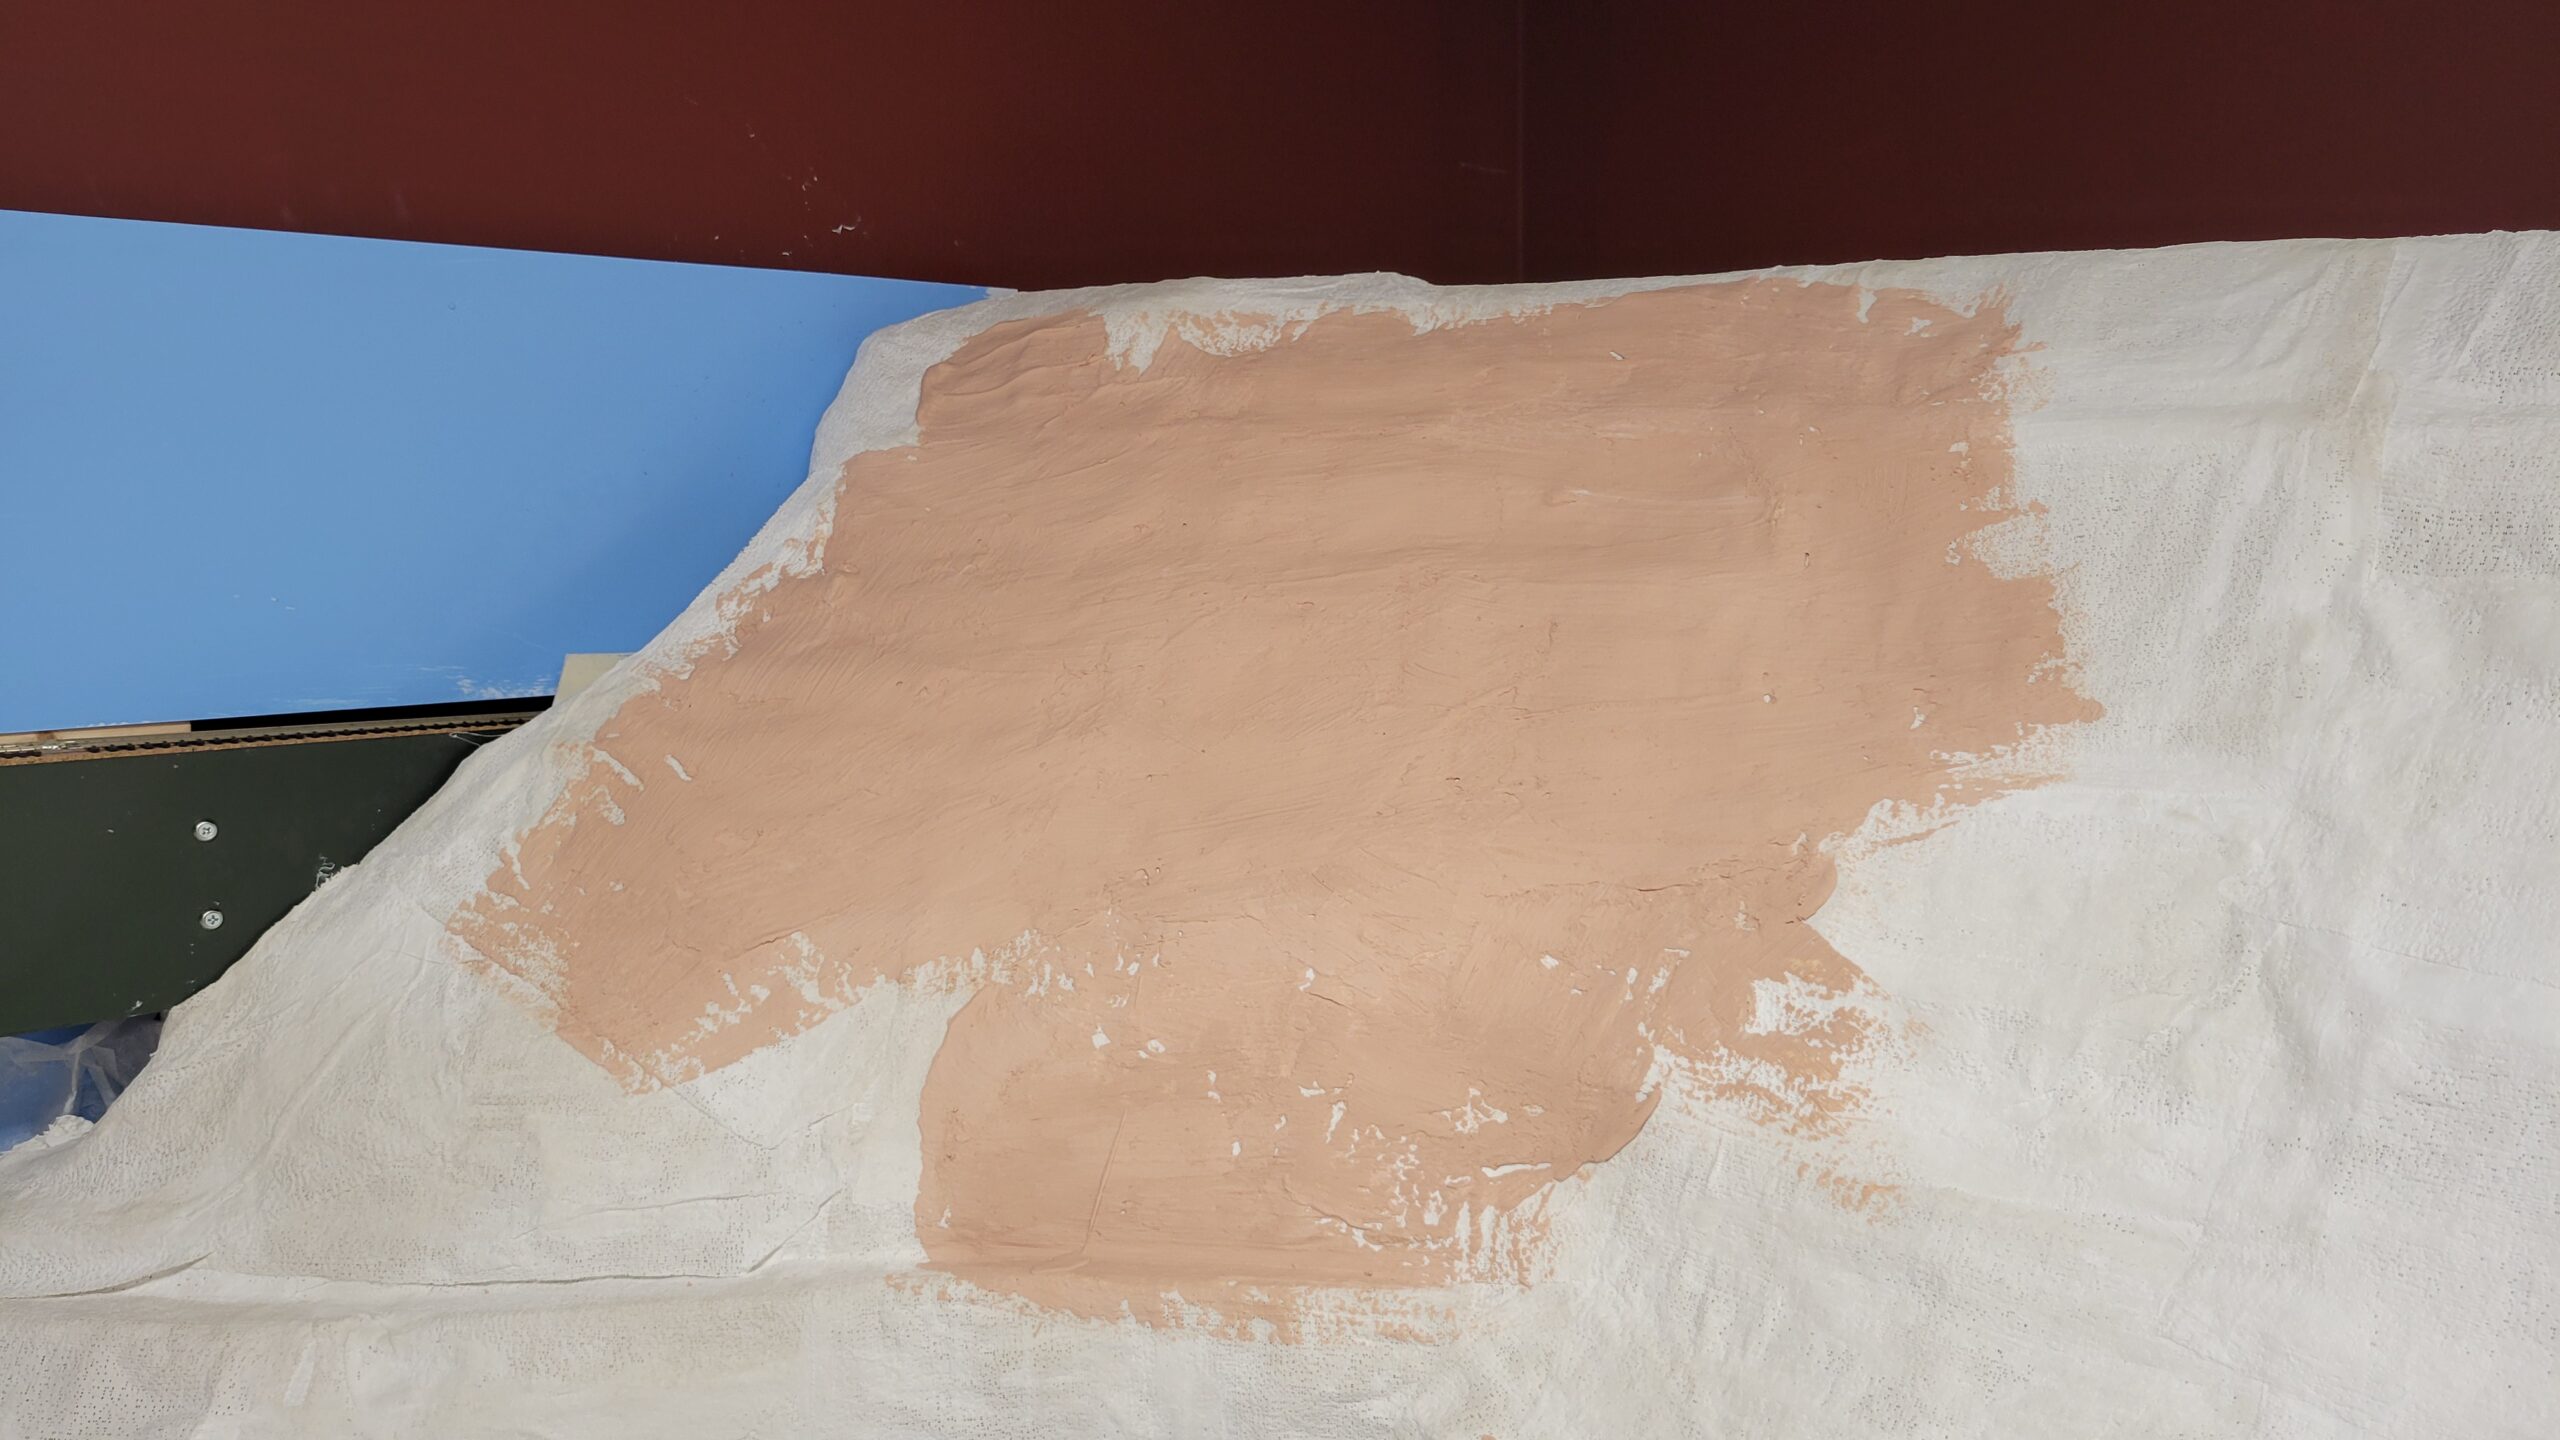
Then I mixed up my first batch and applied it to the side of the mountain at the far south end of the canyon. Looks like it came out okay, and it seems to be drying well. The Tempera pigment didn't impact the setting of the plaster at all, from what I can tell. Once it's cured for a couple days, I'll know for sure.
After waiting nearly a month, I received my WFD-31 Wifi port for my NCE system from WifiTrax in Australia. It sat in US Customs for two weeks in Chicago before it was finally released for delivery.
It arrived June 10th and took all of about 15 minutes to install (and most of that time was spent reading the instructions!). It worked first try! This is really an excellent product. The NCE radio system is spotty in my basement, with many dropped keystrokes and a couple of just plain dead spots around the room. I could have bought several repeaters (at over $100 a pop) and placed them around the room to (hopefully) solve the radio problems, then buy additional NCE radio throttles (CAB06's at around $180 each), or one WFD-31 at $140 delivered and TCS UWT-50 throttles at $200 each. But I can buy the TCS Throttles over time, and meanwhile visiting operators can run trains on my layout on their cellphones using Engine Driver or Withrottle (depending on the phone type). While I think the NCE product line is excellent quality, I opted for the ultra-reliability of the Wifi adapter for wireless throttle operation.
Here's the WFD-31 installed and operating in place of the UTP in Thermopolis. It's a direct replacement plug-in for the UTP, with the only tricky part being drilling to enlarge the LED hole in the mounting plate.

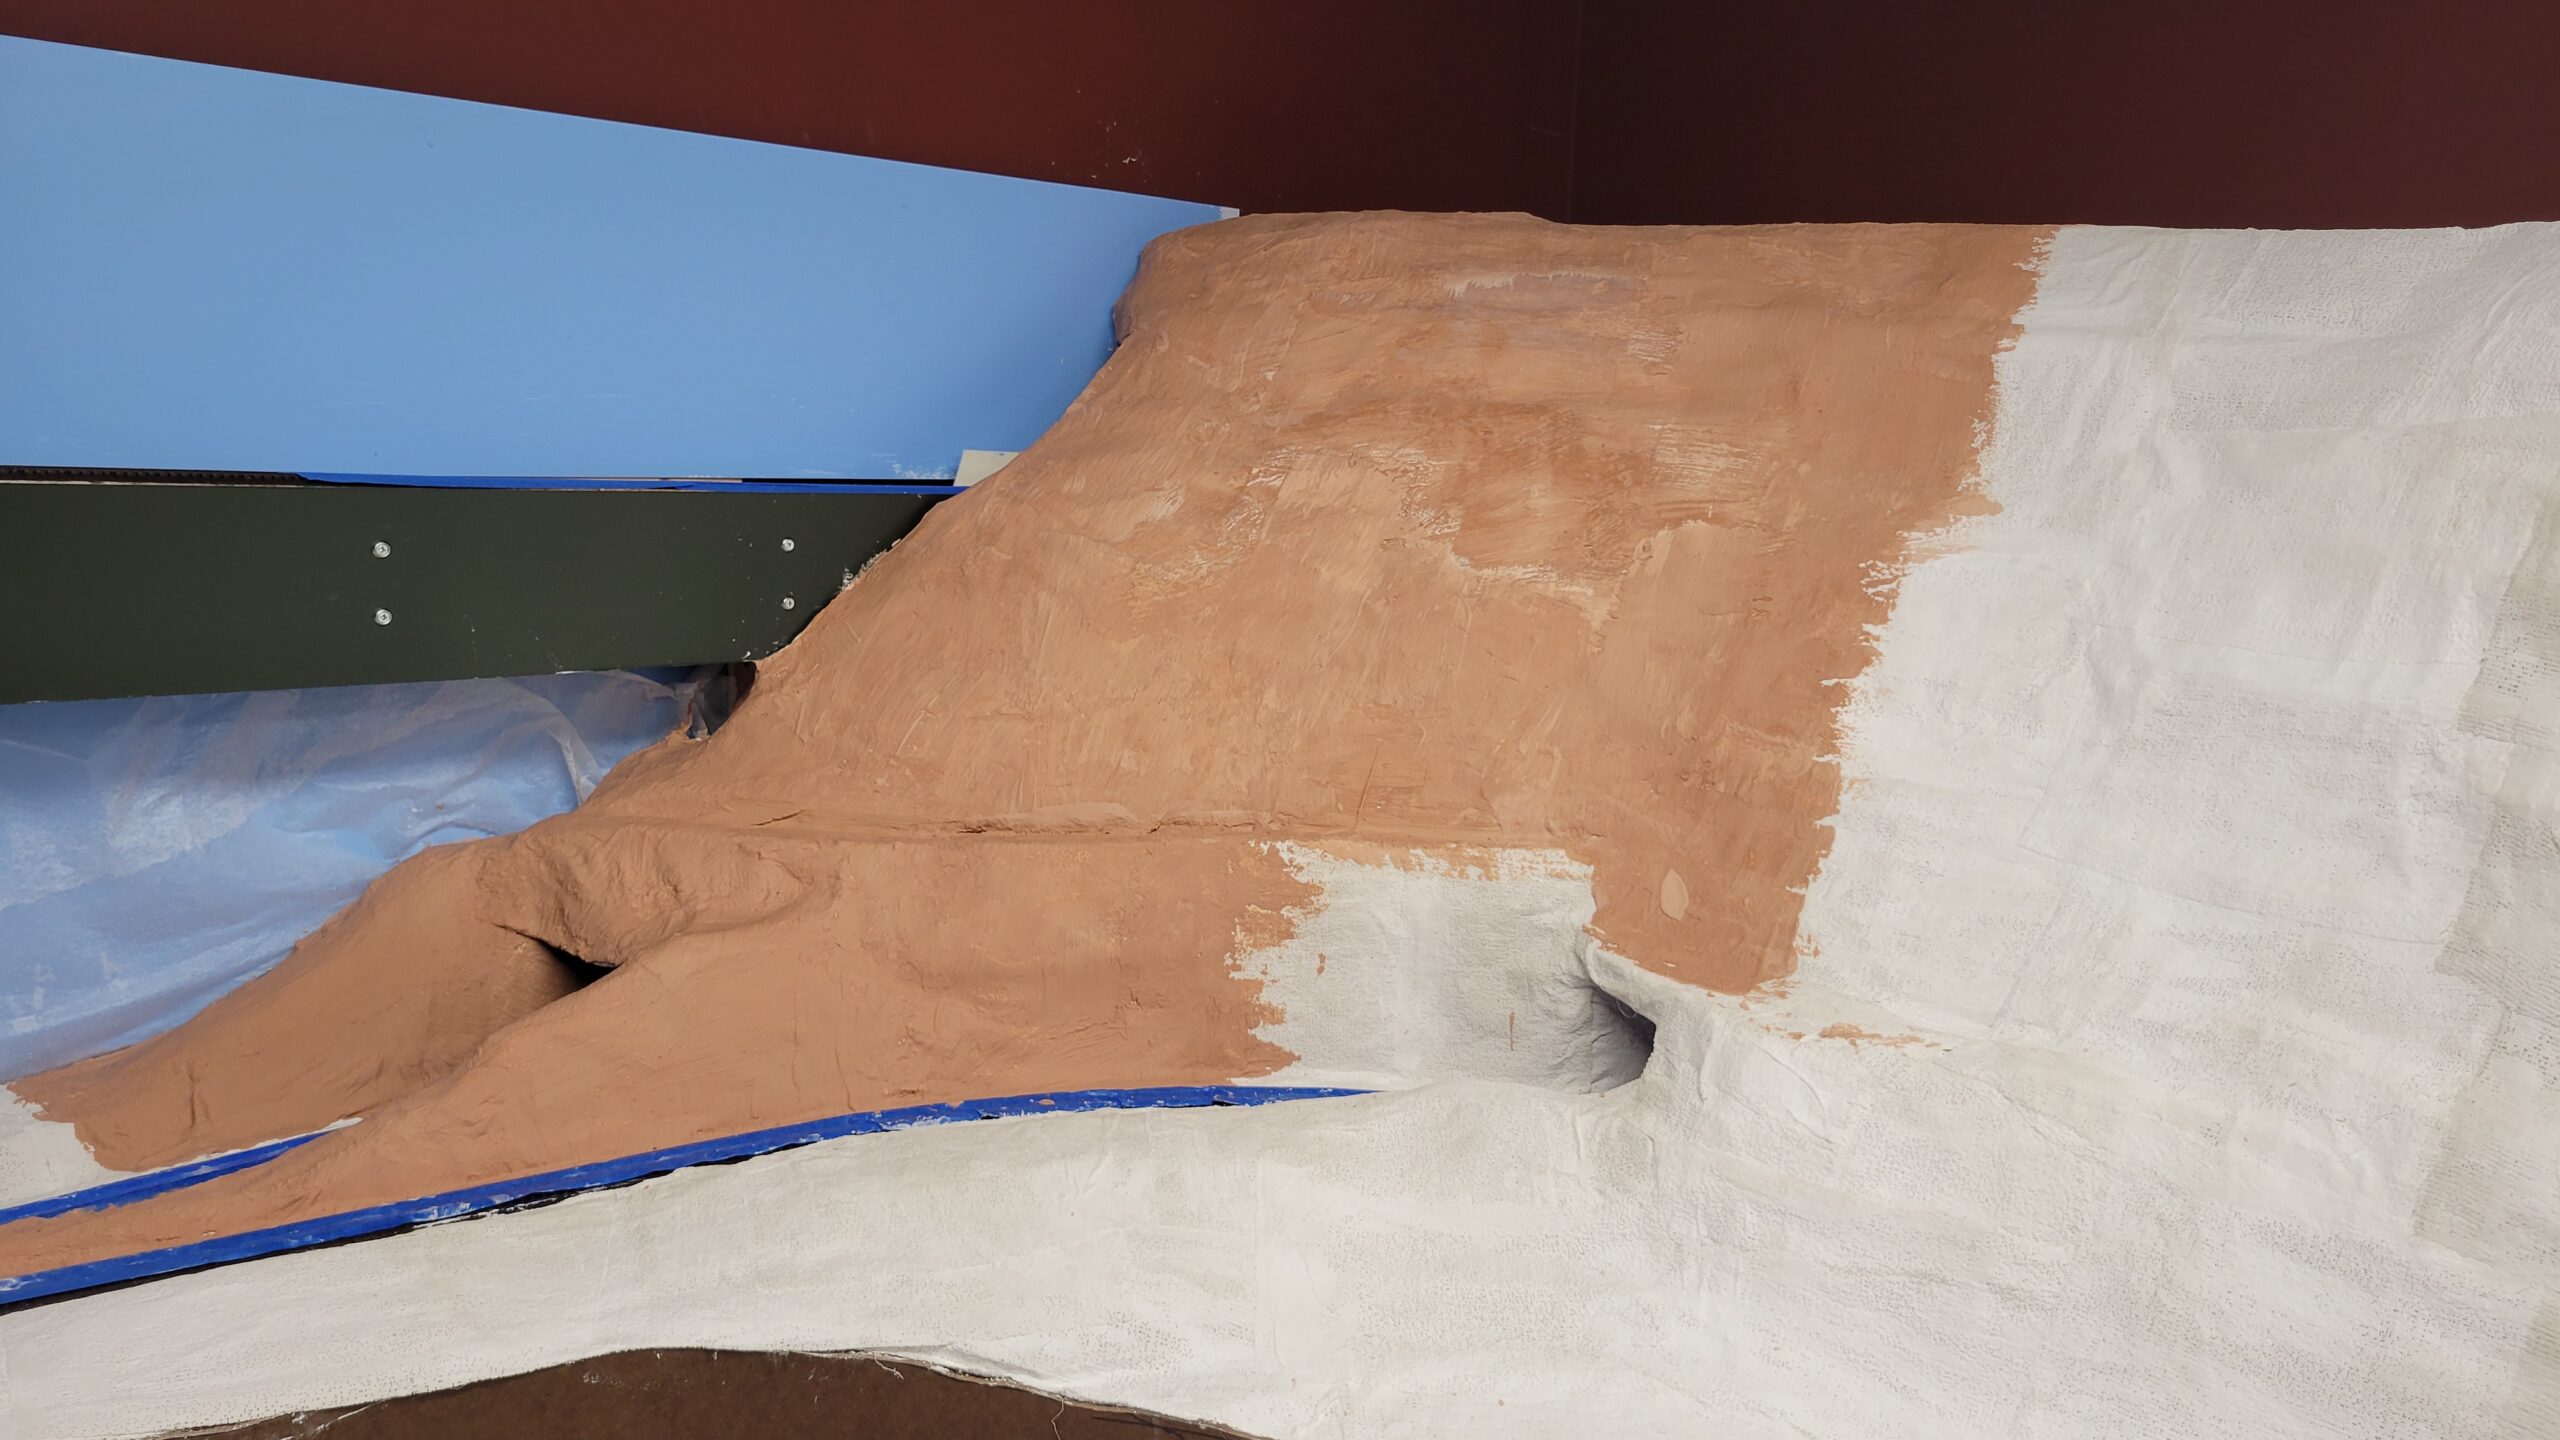
By the end of the day on the 9th I'd added several more layers of Hydrocal to the area at the south end of the canyon.
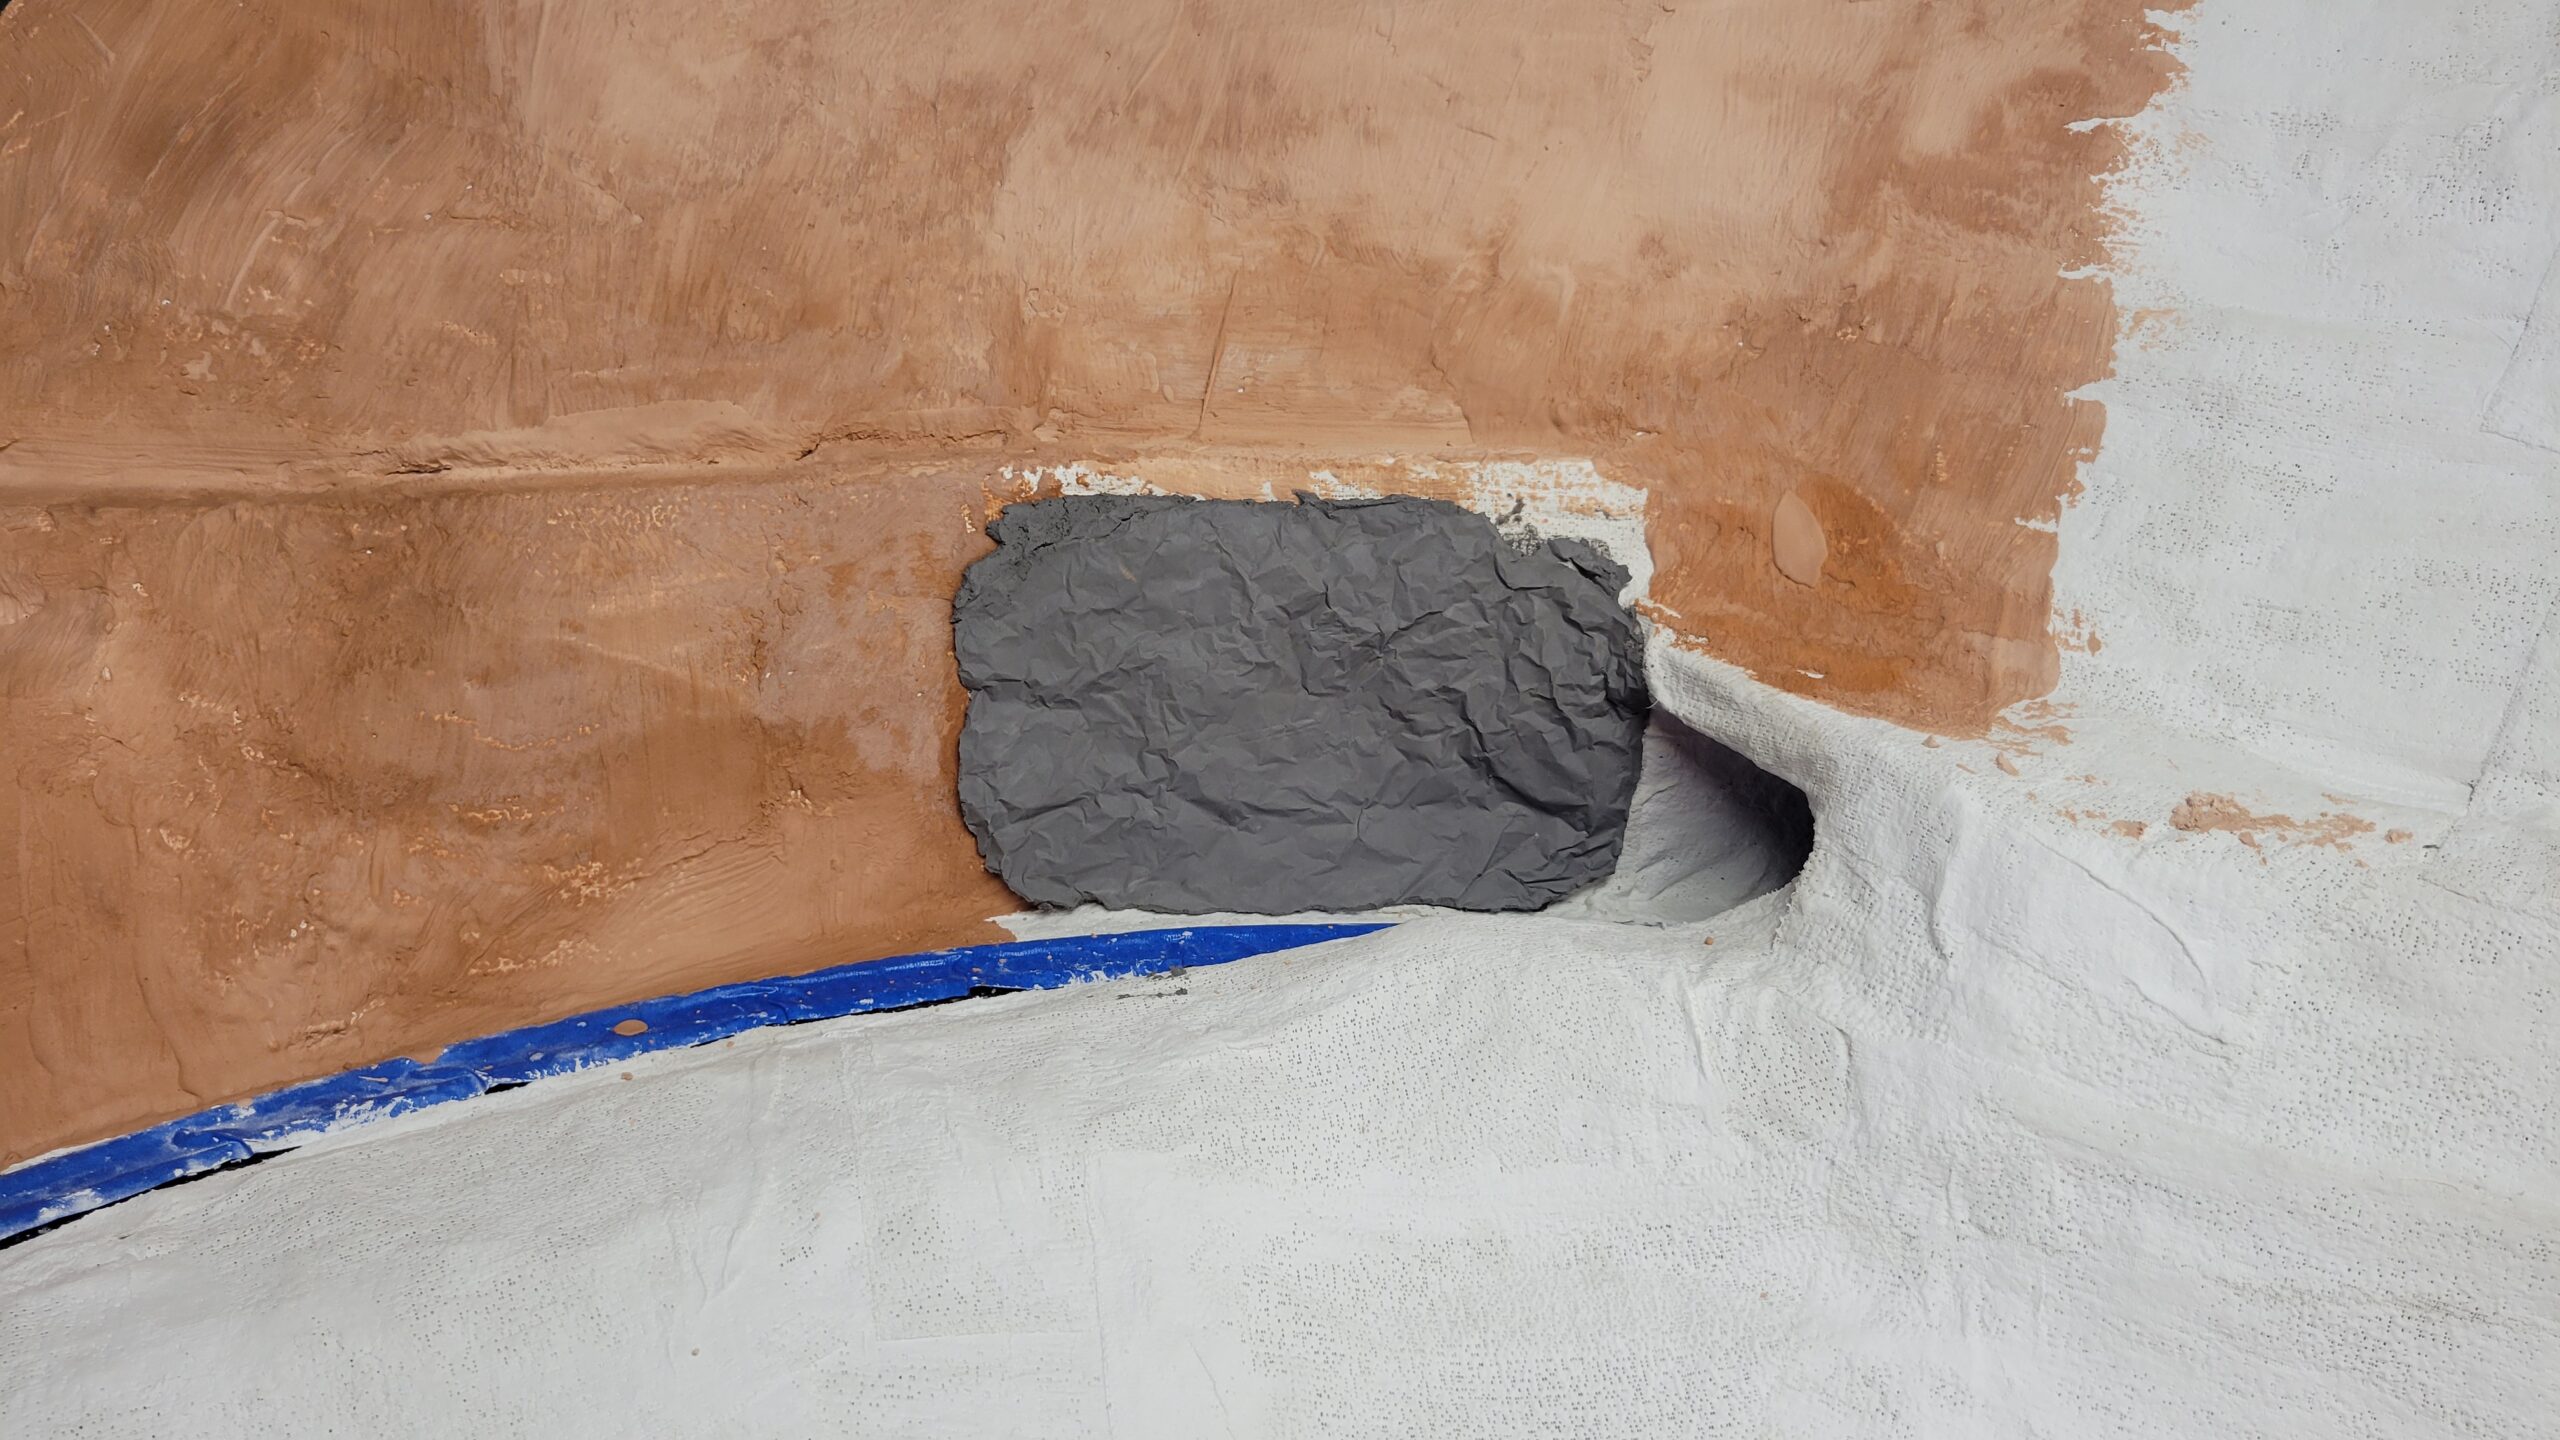
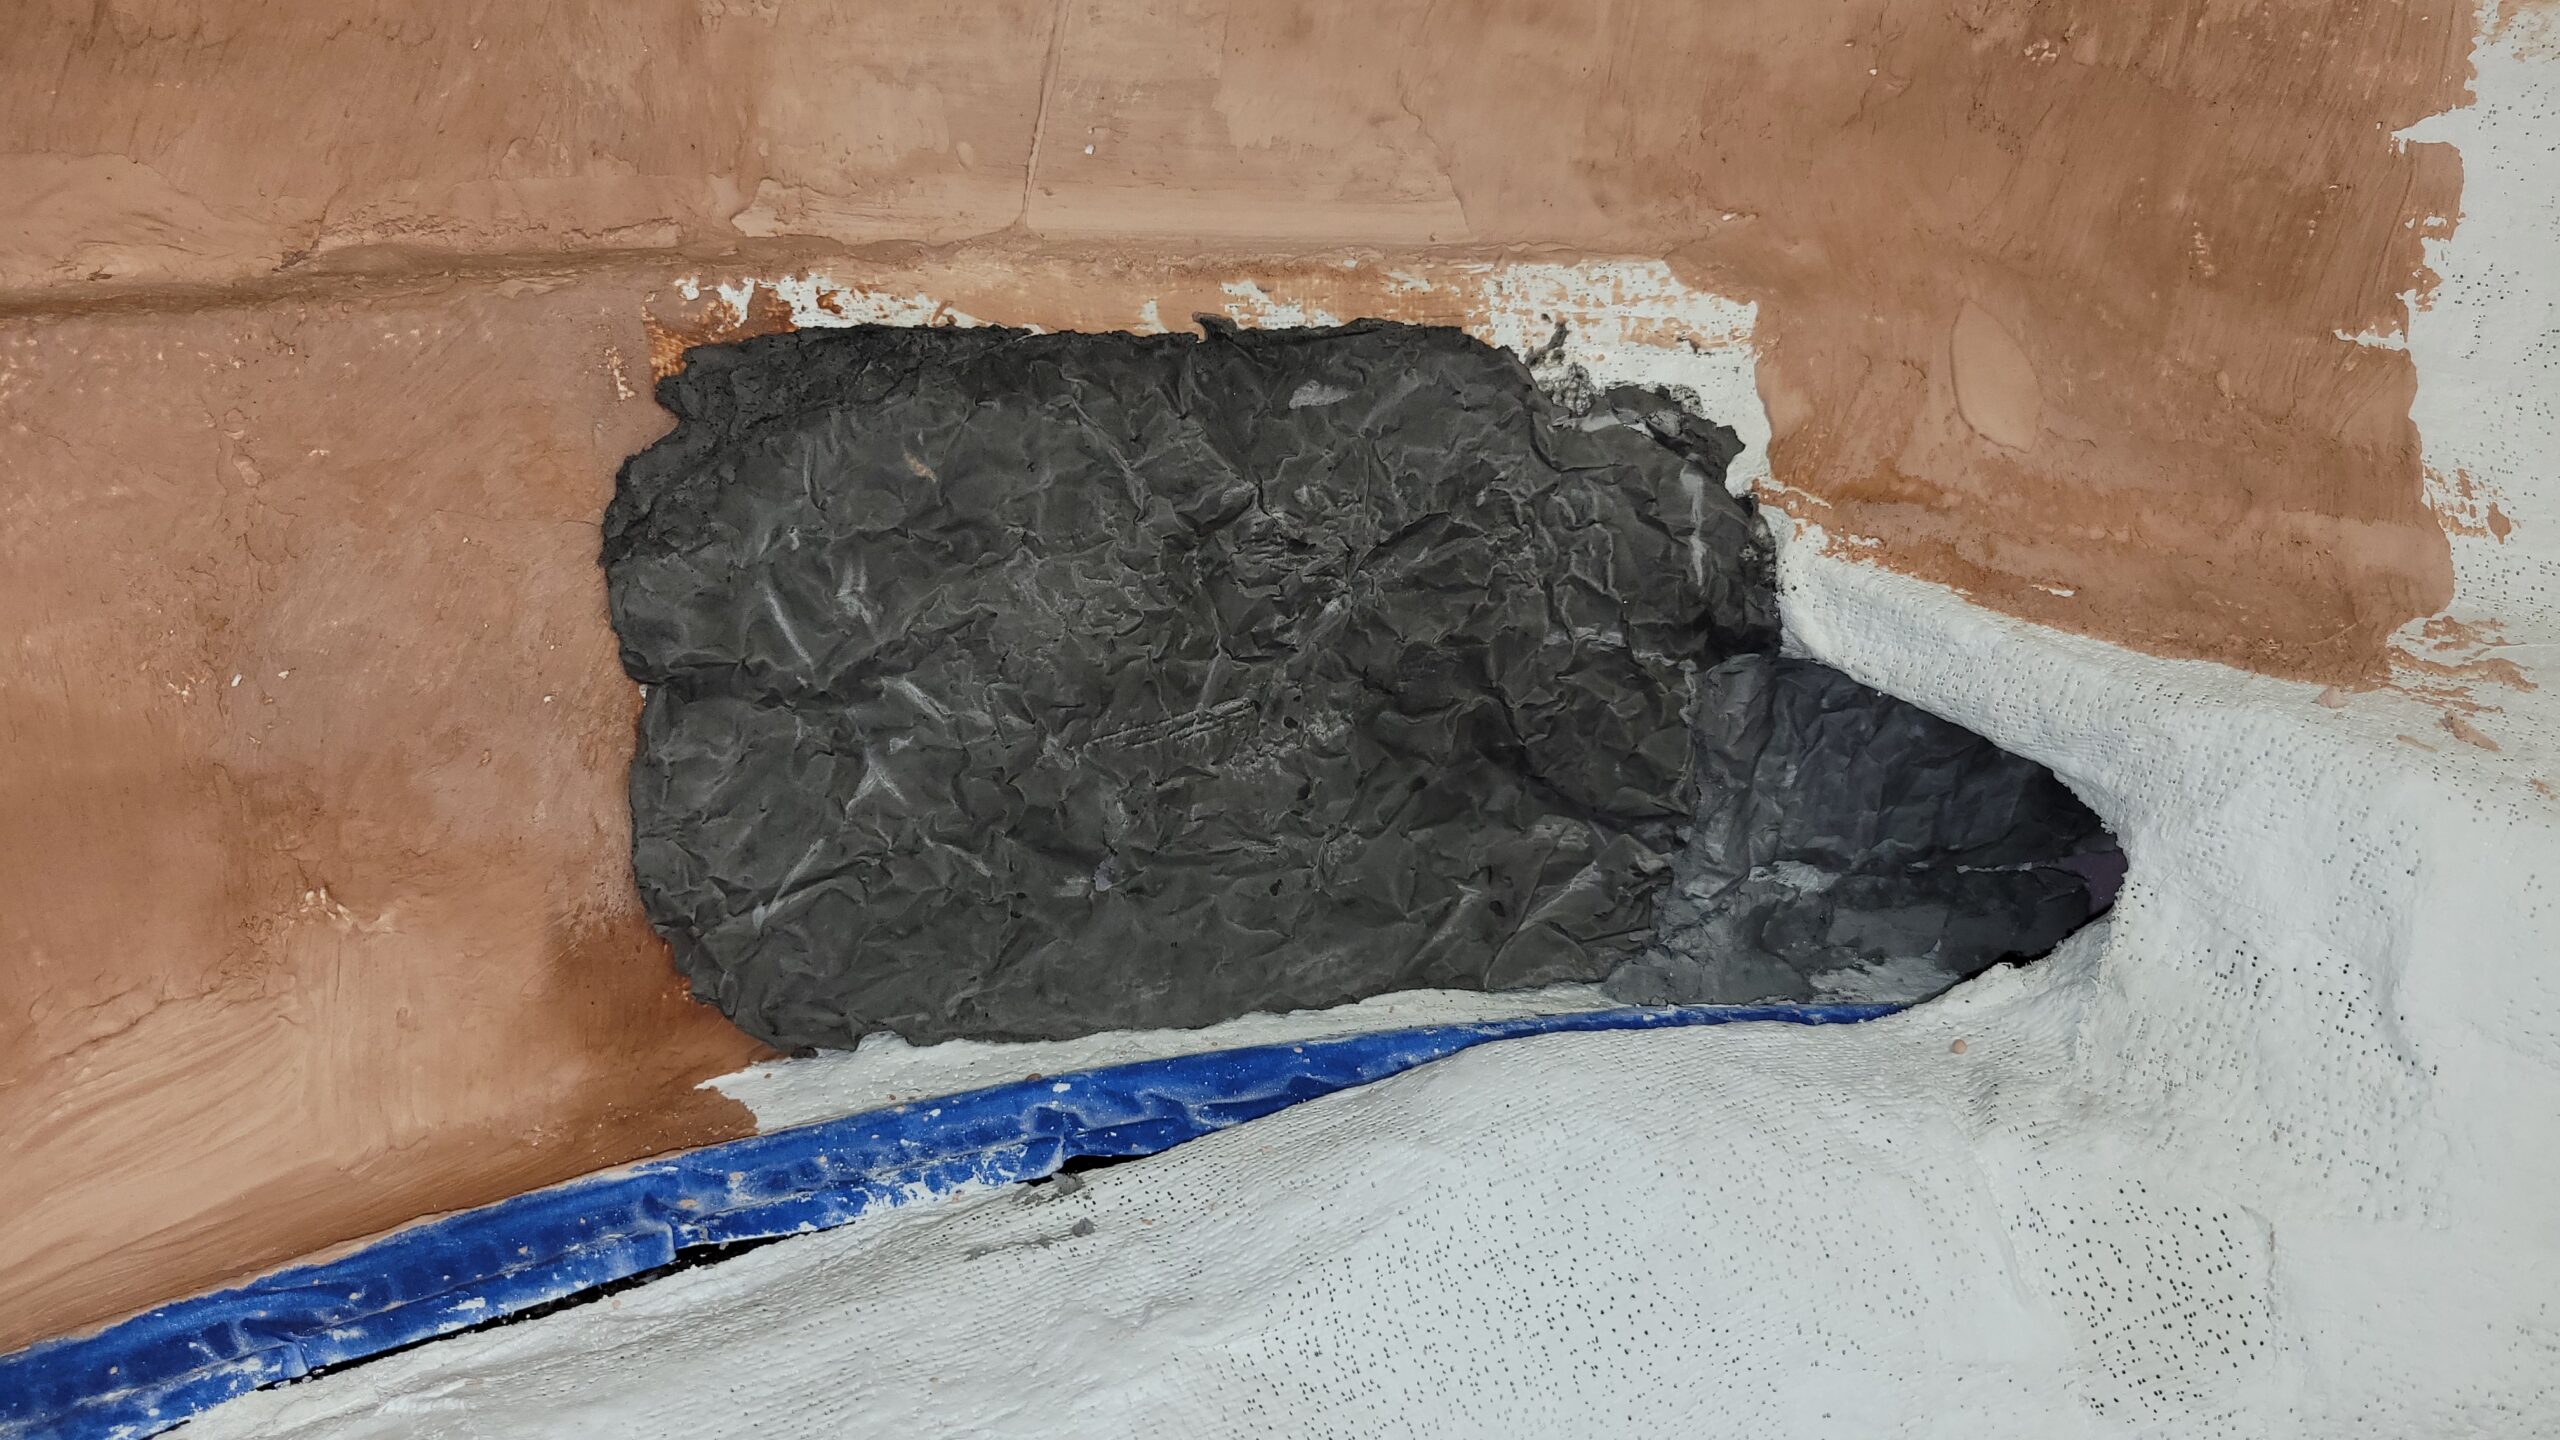
Then it was time to add some rocks to the south portal of the southern-most tunnel in the canyon. I mixed some black dry tempera pigment (the rocks in the area are mostly dark) with the hydrocal and made a soupy grey mix. I poured that mix into an aluminum foil form I made, and wound up with this:

I let the mold set for a few minutes so the hydrocal started to cure. When it was beginning to stiffen up, I slapped it onto the canyon wall next to the tunnel opening. I let it cure for about ten minutes and removed the foil. I had this.
 That worked better than I expected!
So I made a second, smaller mold for the area just inside the tunnel portal. When that one was done, I had this. This was taken after the rocks had been drying for about 12 hours.
Here's a photo of the actual tunnel portal that I'm trying to represent on the model. Note the road along the canyon wall that runs over the tunnel entrance.
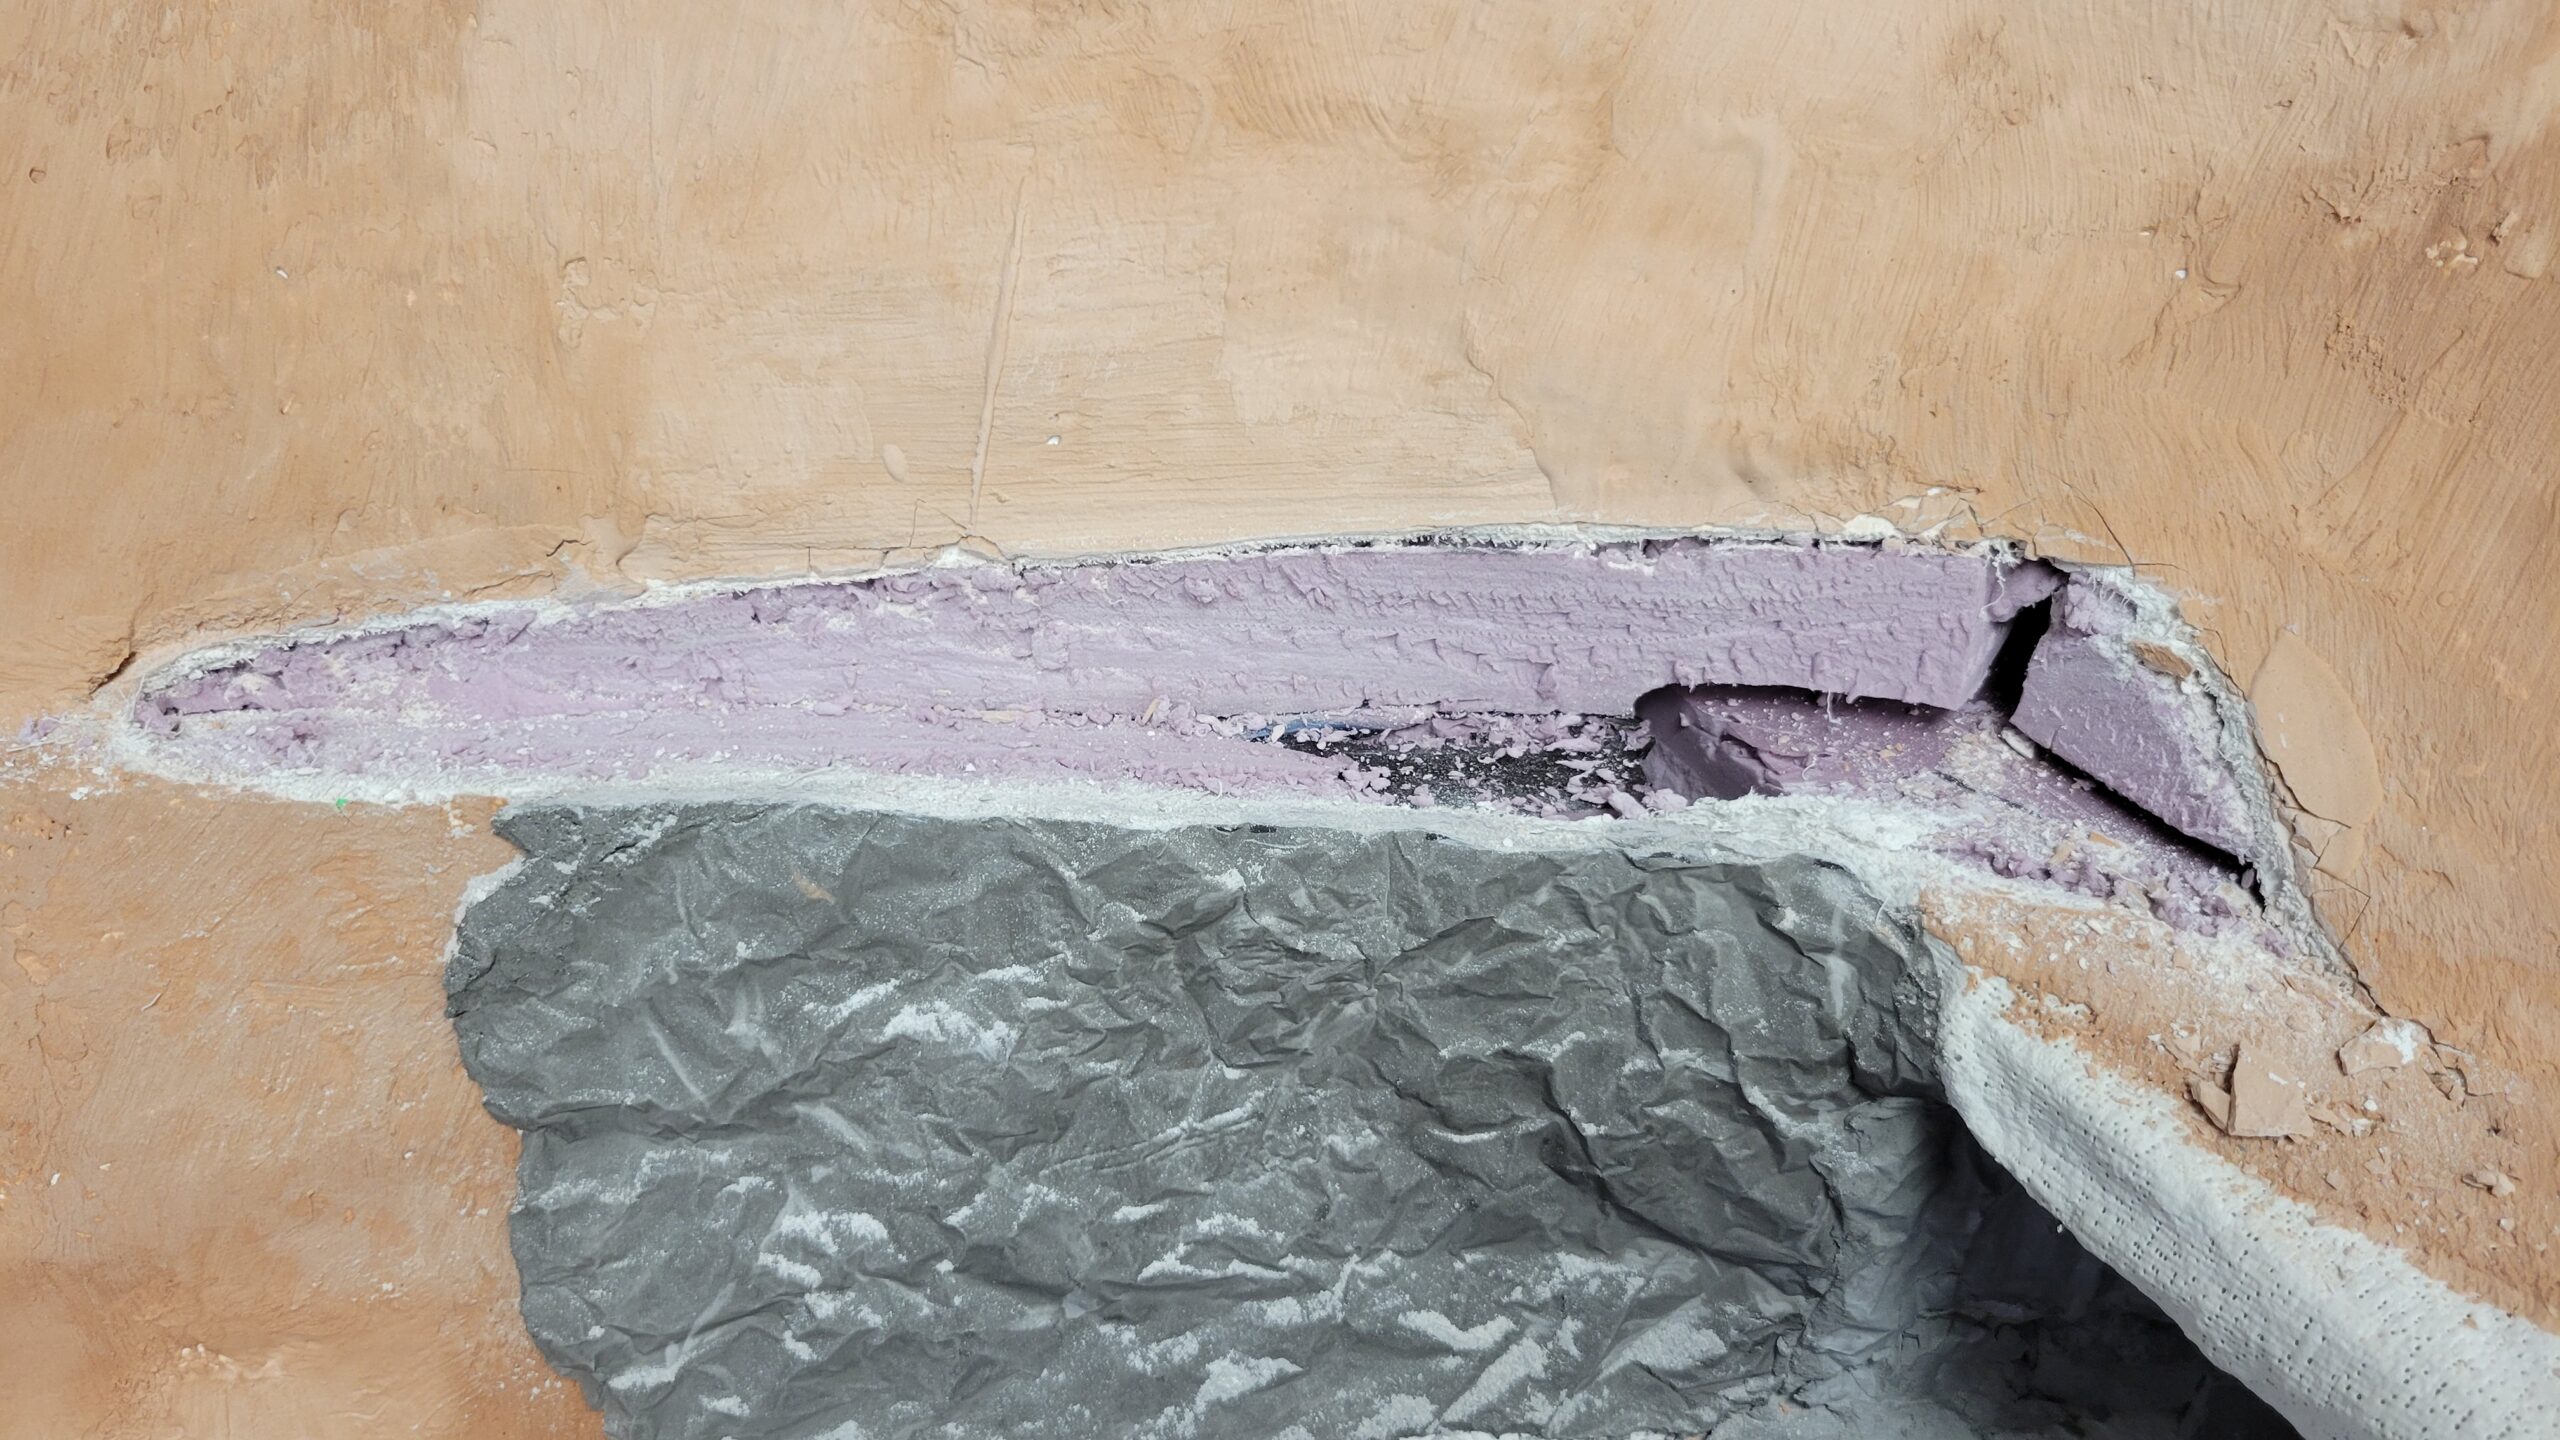
In my model scenery, the road does not run smoothly from the wall over the portal. I decided it was worth fixing, and that would also allow me to trim the top of the rock casting. So I marked out roughly how I needed to trim the rock casting with a Sharpie.

After a bit of work with a utility knife and my big serrated foam knife, I trimmed the side of the canyon into this. A bit of added plaster will patch the wound and I'll have a road that runs straight from the wall over the portal. I'll have the repair completed in the next few days.
 The road over the portal ran to the first Boysen dam just a bit north of this tunnel portal. That dam was removed in about 1948, and the road has been unused since then. Most of the talus that has accumulated on the road wasn't there in the 1930's and 40's, so it won't be there on my layout either. The road will be unpaved but in good shape. On the layout it will peter out to the right of the portal. I won't be modeling the old dam on the layout.