On September 26th I started building the subroadbed for Douglas, the last remaining town on the (modeled) Burlington mainline. Here I'm assembling the 60" radius curve.

After cutting all the subroadbed I began installing it. Since Greybull is couple inches lower than Casper, I set the grade leading into Douglas as I went.

Here I've adjusted the position of that 60" radius curve (subroadbed also carries the Douglas siding on a 62" radius curve) and am ready to mark and cut the tangent section that goes out of frame to the left.

On the 28th I had the subroadbed complete and was ready to start installing the cork roadbed.

Over the next few days I cut the cork and installed it in sections. On October 2nd that was complete.

By October 4th I started track laying east from Casper. Here I'm testing the new curve into Douglas.

I spent a couple of days building the mainline turnouts for the siding in Casper. I also added the top pieces to the backdrop support posts in Thermopolis.

I finished the turnouts on the 8th, and on the 9th I laid the rest of the mainline track in Douglas.

Here is the last section of flextrack installed on the Burlington mainline. I guess you could say this was the spot of the golden spike. The mainline is now complete, and is a giant folded and flattened oval of track (though it won't generally be used as a continuous loop).

Here's the completed Douglas mainline. The siding and industry tracks will come over the next few weeks.

By October 14th I had the Douglas siding lid from the west end of Douglas around the curve. The east end connection will come after the October 24th Operating Session, after I have time to build the switch for the industrial spur there.

Also on the 14th I added temporary roundhouse tracks at Greybull. These will be removed and permanent tracks installed when I scratchbuild the roundhouse.

By the 16th I had the roundhouse tracks wired and the turntable controller mounted at Greybull. The switches above the controller turn power on and off to the roundhouse tracks.

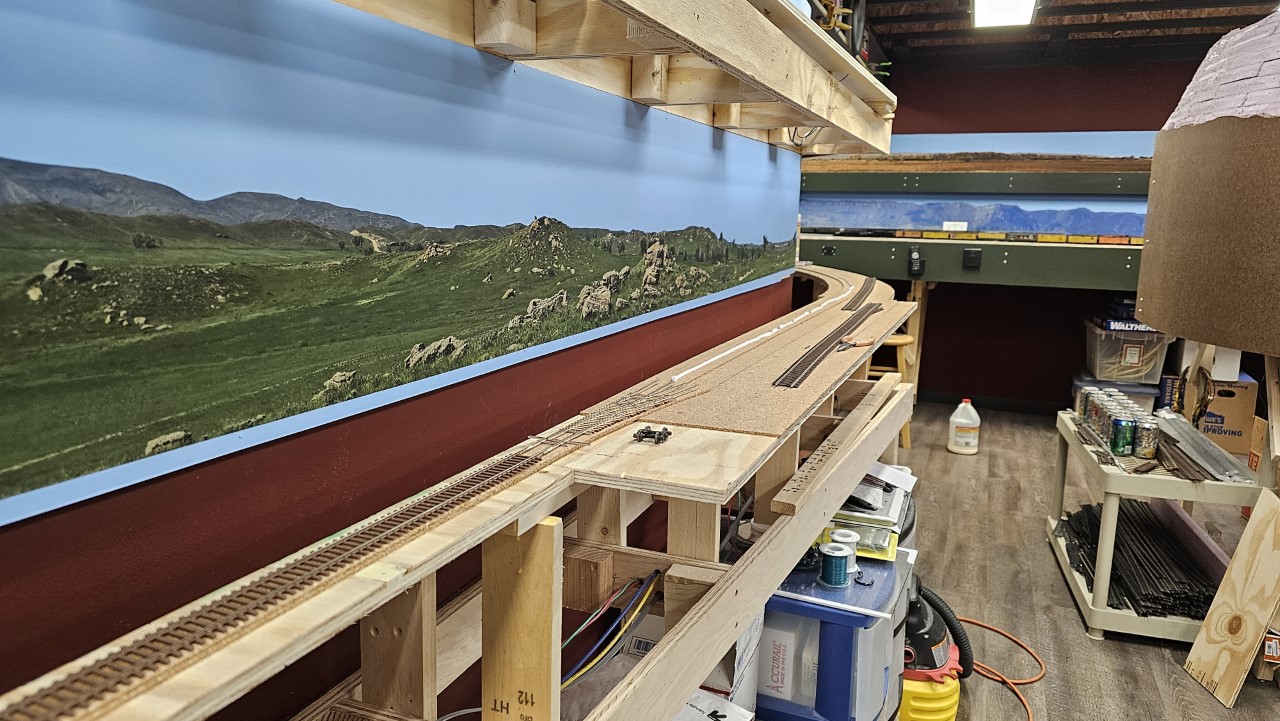
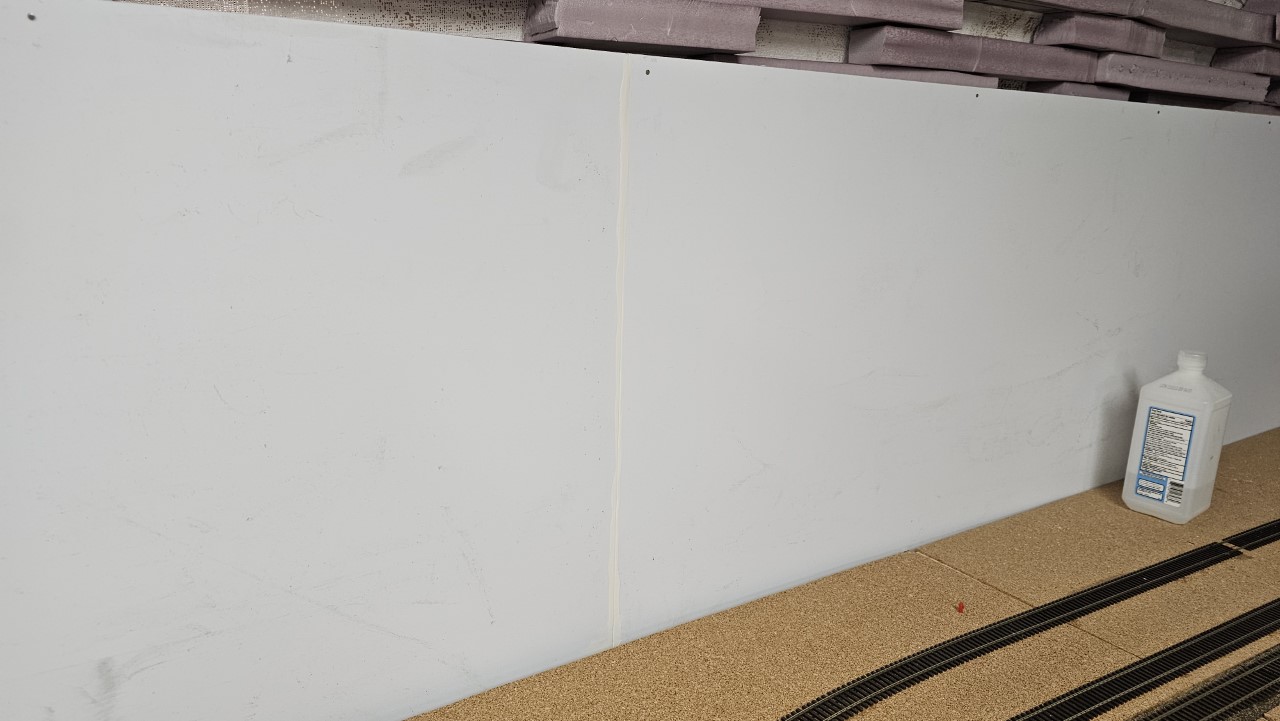
On the 16th and 17th I cut and installed the Thermopolis skyboard. Here it is with the first two sections being glued together.

Here the installation of all three sections is finished. Still to come is filling of the seams and sanding them smooth, then painting the skyboard blue.

After several days of cleaning the train room and layout, then a few hours at JMRI preparing train manifests and such, and finally positioning trains and equipment, the layout was ready for the operating session. Here's Train 29, the westbound Nightcrawler, in east staging.

Here's the Greybull engine terminal, just to show that it really is all cleaned up and the clutter on the benchwork removed.

The clipboard in this shot has the manifests for the Greybull-based locals, plus instructions for the Greybull Yardmaster.

Here are the manifests and instructions for the Casper Yardmaster. This will be a busy job!

The south end of Wind River Canyon.

And here's train 177, the Westbound manifest through train, sitting in Douglas siding, which for this session will act as another spur for east staging.

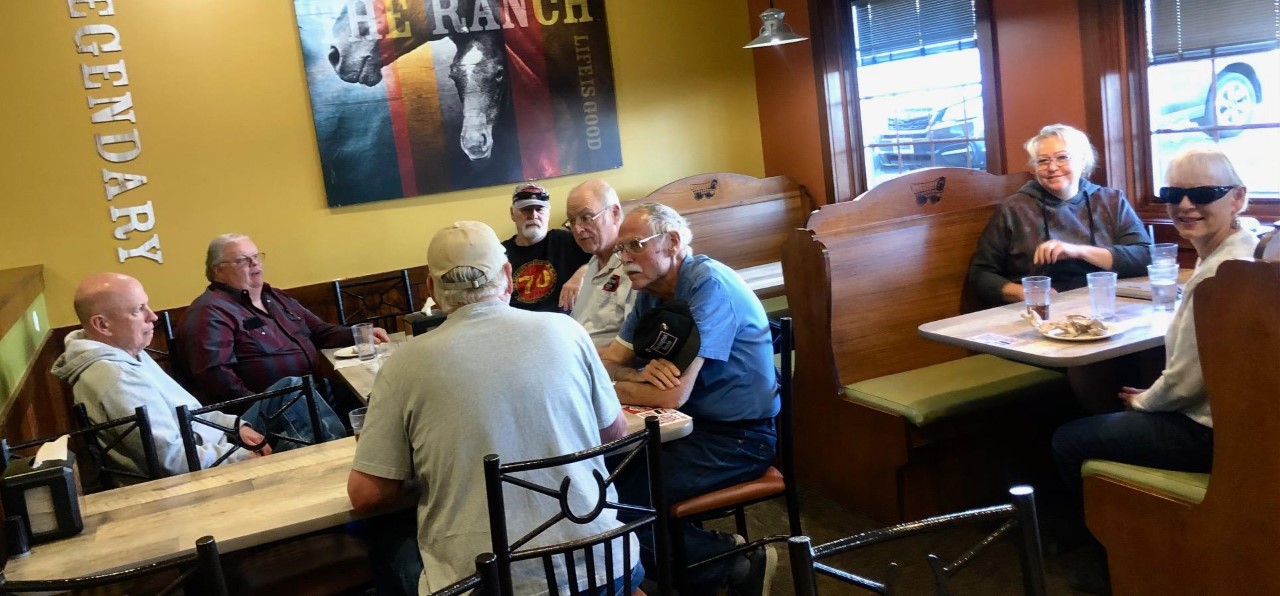
On October 24th I held my Autumn operating session. A few of the guys' wives came with them. All those that traveled to the session and were able to come early went out to lunch at Pizza Ranch before the session. Here, left to right, we have Kevin from Harriman, WY, about three hours away, Dave from Basin, WY, about 3 1/2 hours in the opposite direction, Steve from Evanston, WY, in the southwestern corner of the state about five hours away (he has his back to the camera), Johnny from Cape St. Francis, South Africa(!), about two days' flying time away, me, Bill from Sheridan, WY, about 2 1/2 hours north (Bill is the NMRA Northern Wyoming Division Superintendent), Debbie, Steve's wife, and Doris, Dave's wife. Juying, my wife, is taking the picture.
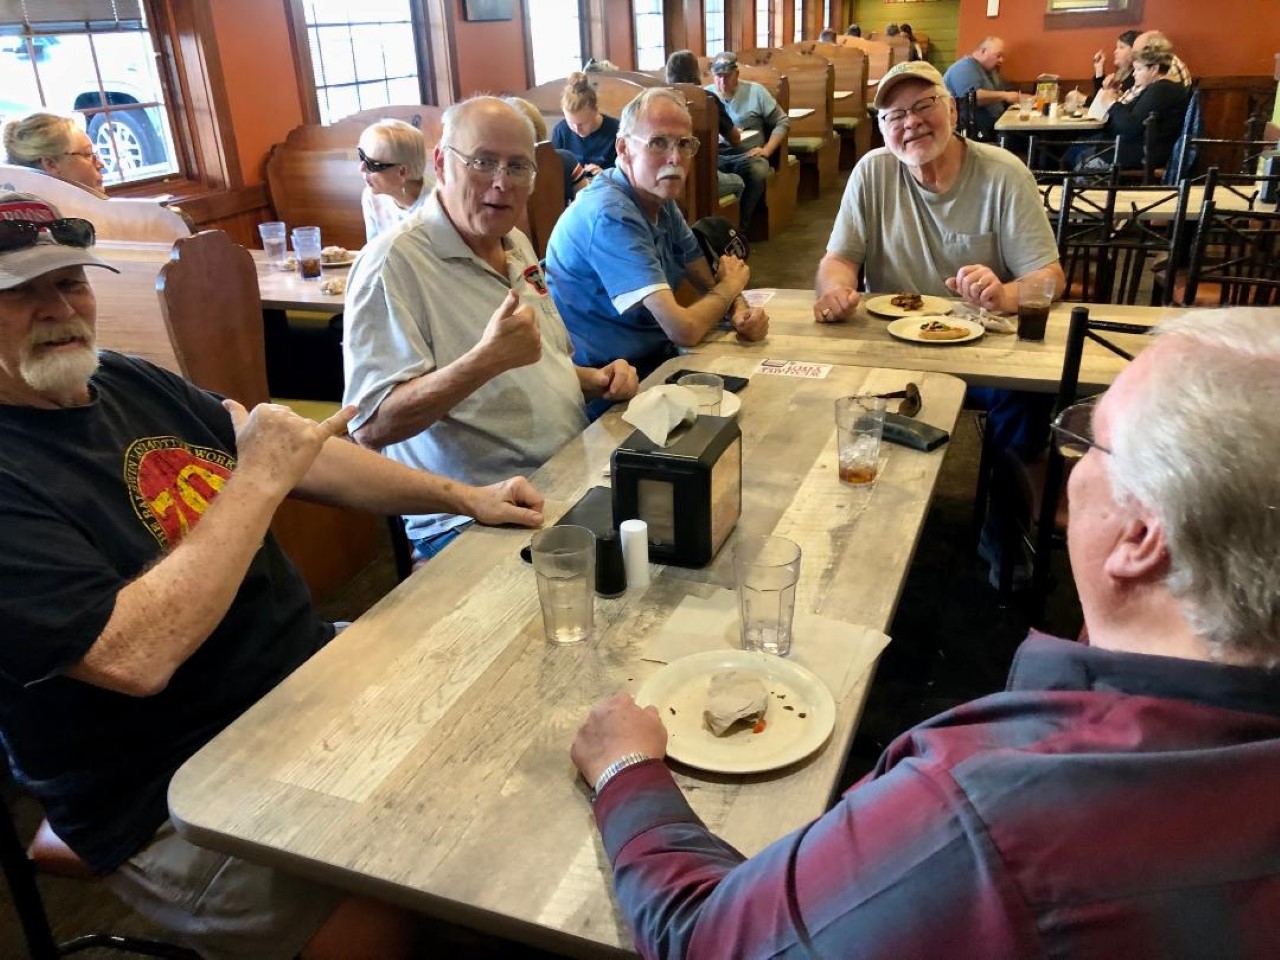
This shot gives a better look at some of the guys (me included, unfortunately for you). That's Johnny on the left, then me, Bill, Steve and Dave.
After lunch we headed over to the house and down into the train room in the basement (except for the wives - they went shopping).
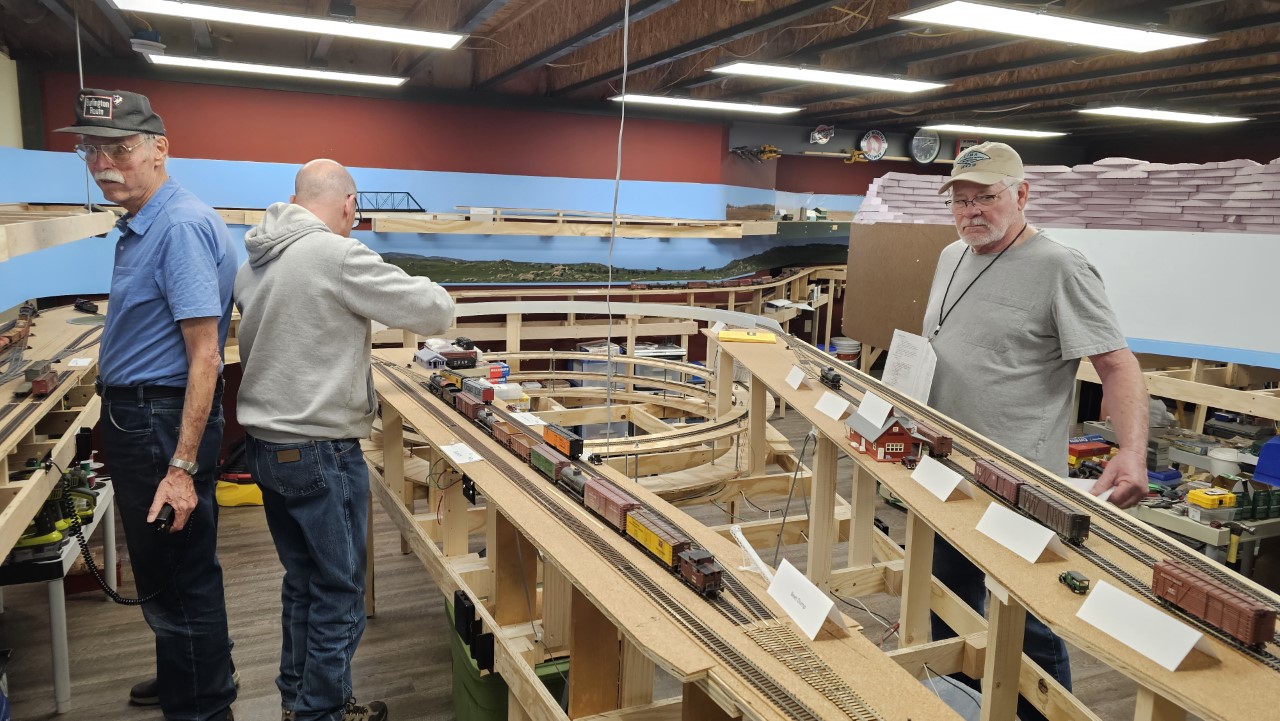
Before we began the operating session I provided an overview of the layout. Here we're standing in the wide aisleway between Powder River and the Wind River Canyon, just beyond the Casper engine terminal. From left to right we have Johnny, who arrived on October 21st and stayed with my wife and I, Bill, Steve, yours truly and Dave.

Kevin is running the first road train of the session, the CNW passenger train from Casper to Hudson. That train is usually a Doodlebug with a trailer, as it was this day.

Johnny, not knowing any better, agreed to be Casper yard operator for the session. Here he starting to break down the westbound reefer train to take it to the icing rack while Kurt, one of the local guys, is bringing his locomotive out of the engine facility.
Johnny proved to be a very accomplished operator and handled the rather demanding task of running Casper yard without a hiccup.

Bill took on the duties of Greybull yard operator. Like Johnny, he proved up to the task, building the two locals that service the Big Horn Basin towns, and coordinating the arrivals from and departures to east and west staging, all of which have to pass through Frannie / Greybull / Orin on their way onto and off the layout. Dave is watching Bill work, while Steve (partially behind the pole) is bringing the eastbound reefer express up from west staging.

A bit later in the session Bill is looking a bit shell-shocked at Greybull while Kevin is running his second train of the day, the Greybull-Worland-Basin turn. Meanwhile Steve, who is handling the Greybull-Thermopolis-Holly Sugar turn, is planning out his switching strategy.
Larry, who arrived a bit later in the session to take on the duties of the Casper local switcher, isn't in any of the photos I took on the 24th.
For the first time we managed to run all trains on the schedule.
The session was a great success. Everyone said they had a great time. Most of the long-distance folks headed for home by five in the afternoon, but Steve and his wife, who were in town for several days, and Johnny of course, stayed after the session for dinner and to visit. The next day we headed down to the Casper train club for a few hours, then Steve and Debbie headed back to Evanston. Johnny and I ran a few more trains that afternoon and again this morning. About 1 pm I took Johnny to the airport (in a dose of Wyoming autumn weather - a snow storm!) for the next leg of his world tour - a visit with his son in the UK, then back to South Africa.
Thanks for coming Johnny! We really enjoyed having you stay with us, and your participation in the ops session was a big help. Your suggestions for future sessions will be as well. I hope we can get together again one of these days!

On the 25th my last major purchase of the year arrived - this Nickel Plate Products brass CB&Q R-1 Prairie, all the way from Switzerland! Now I need to convert it to DCC. Not sure how I'm going to fit a sound decoder and speaker in that tiny little tender.

After the operating session I got right back to work on the layout. I started with Powder River's stock pens.
On 28 October, I gathered the materials needed to mix up some plaster to fill the gaps between the stock pens' base and the surrounding scenery. Here's how the pens looked sitting in the scenery. Note the gaps, especially the large one between the base and the fascia.

I needed to fill those gaps, and I figured I'd do it with plaster. But how to do that without spreading it all over everything?
I have several of these large syringes that are used to provide formula to folks who have a feeding tube. I've had these for years, from when my late was ill.
I realized I could mix up some soupy plaster and use the syringe to inject the plaster exactly where I needed it, with very little spillage.

I tried it out, and it worked great. This is what the area looked like after injecting the plaster and smoothing it out.

 After the first application dried I did another to fill the remaining gaps and low spots.
I worked on other things for a weeks or so, then came back to the pens on 10 November.
I very carefully added new layers of dark brown dirt grout to the scene, making sure I misted on only a little water at a time. While it seemed to work okay, you can see how obvious the edges of the base still are. The grout doesn't fill much in at all!

The plaster had worked well, but I needed something else to smooth the edges and fill the small cracks left when the plaster cured and shrank a tiny bit. So I switched over to adhesive caulk. I laid a bead around three sides of the pens (ballast will cover the back side, which isn't very visible anyway).

Then I smoothed it with my fingers and left it to dry for the rest of the day.

After it dried I spread more grout around the pens. This will be partially covered by the lighter grout, leaving trails of the darker grout (representing dirt churned up by animals' hooves -hopefully) leading into the gates of the pens.
I took a model box truck and tried to make vehicle tracks in the grout. I wasn't overly successful.
It sure did gunk up the wheels on the truck though!

The other big thing I was doing was working on Wind River Canyon. I dug out my large rolls of plaster cloth and got that work table set up.

Then I applied the cloth over the canyon base, adding a second layer to the area that already had some cloth putting on the first layer beyond that (to the right in the photo).

I continued working in that manner until I ran out of plaster cloth again.

Then I began mixing up small batches of hydrocal that I tinted with cheap acrylic paints.

I painted these small batches onto the plaster cloth over several days, until I reached the point where there was only one layer of cloth again.
 More cloth is on order.
Other things going on:
I filled the Thermopolis skyboard seams with Testors plastic putty. I'll sand them in a day or two and prepare the entire thing for blue paint.
The sound stopped working in one of my 0-8-0's, so I had to investigate. Turns out the speaker failed, so I replaced it. Sound is fine again.

And I've added a couple of new cars to the layout. These were given to me by Bill from Sheridan. He always runs sprung trucks and Kadee couplers, so all I had to do was weather these and they were ready to go!


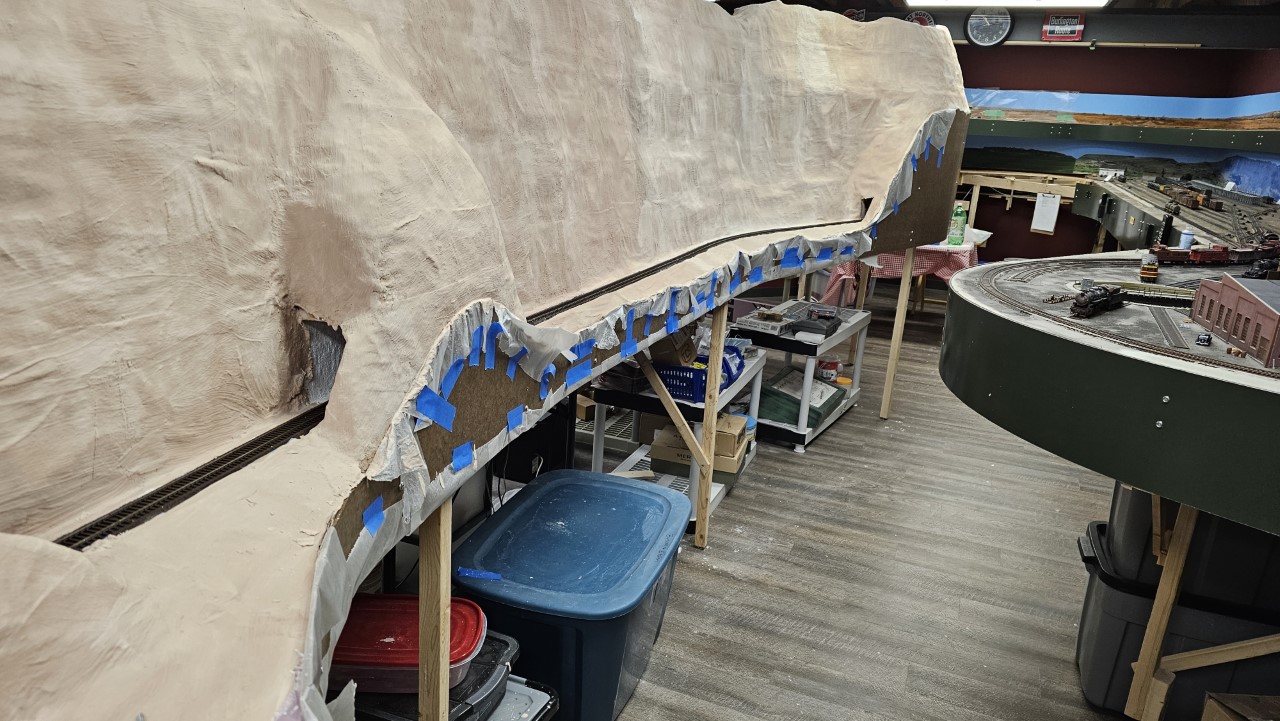
I've continued working on the Wind River Canyon. As of the 18th of November it looked like this.

This is the area near the end of the peninsula. The peninsula ends to the right of this shot.

By the 19th I finished all the plaster cloth for now, right around onto the end of the peninsula. I can't go further to the right since that area, around into Thermopolis, still needs more pink foam added. It will be awhile before I get to that.

I've finished adding the tinted Hydrocal to the plaster cloth to the end of the peninsula. This was on November 22nd.
I removed the tape covering the track as well, but don't have a picture of that yet.

Dave came down from Basin to visit and help on the layout on November 22nd. We focused most of our efforts on scenery around the Powder River stock pens. I'd blended the dark earth of the pens into the surrounding lighter soils before that (didn't take a picture), so the area was ready for static grass and weeds. While we were adding the static grass I caught the fence with my applicator and popped it loose from the corner. The clamp is in place while the glue tacks up on the repair.
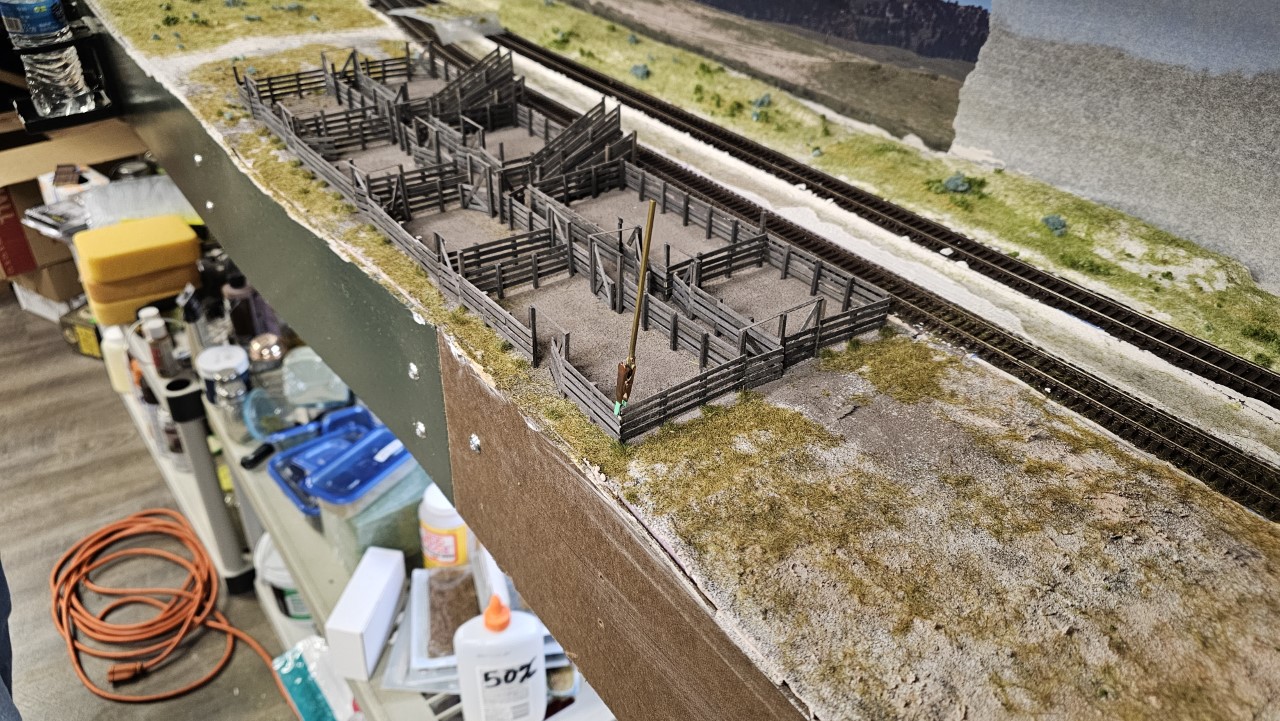
One of the last steps was adding grass tufts at the base of the fenceposts. These hide a whole variety of construction artifacts, like oozed-out glue at the post bases. Here Dave is reaching to pull another tuft off the wax paper sheet for placing by another fence post.

Here's the finished-for-now stock pens. I still have to work on the area between the tracks, improve the dirt road on the far side of the pens, and add barbed wire fencing at the backdrop. I also need to add water troughs and what-not inside the pens.

Since the 22nd I've turned my attention to renumbering the second of the Spectrum 10-Wheelers. Bachmann only produced one road number for CNW - number 236. Since the one is already weathered, I decided to renumber the one I bought earlier this year.
I did a bit of research into which 10-Wheelers worked in the Casper area, thinking that since I'm renumbering the loco anyway, I might as well number it for one that was actually around here. I found photos of half a dozen taken in Casper yard in the early 30's, and decided to renumber the model to 1395. Here's a couple photos of the prototype.


I decided on 1395 because it's the only one of the bunch that has the CNW logo rather than the loco number on sides of the tender. Sine the Spectrum tender has the logo on the tender sides, this saves me a bit of work. If I get anymore of these models (unlikely), I'll remove the logo from the tender.
I started out by trying to use Vallejo airbrush thinner to remove the lettering from the cab side of the loco. This wasn't overly successful, so I switched to 91% alcohol. After a couple minutes you can see the numbers are starting to come off.

Unfortunately the alcohol also took off the paint in the area. I knew this was a possibility, but went with it anyway. I hadn't seen the pictures of the prototype locos yet, so I was focused only on removing the numbers. The panel now looked like this. 
I didn't want to remove the lettering below the area where the number had been if I didn't have to. I repainted the patch of missing paint with Vallejo black, skeptical that it would come out looking okay as I was brushing it on. I was right. Besides, I'd looked at the prototype photos, and saw that the lettering below the number was wrong anyway. The prototypes I have photos of all show a small "R1" (the class of the locomotives) under the number. So I flipped the loco over and removed all the paint on the entire panel under the cab on that side. This looked like a much better starting point for repainting / relettering.

On the 24th I applied the Vallejo black to the cleaned off area. The color is a pretty fair match to the rest of the locomotive, though there's some variation in the sheen. With the addition of gloss coat before the decals, then a dull coat afterwards, plus weathering of the entire locomotive, the area should match the rest of the locomotive just fine.

On the model the plate in the center of the smokebox front also carries the loco number. That would have been almost impossible to fix without damaging the very tiny lettering on the rest of the plate, so I opted to just paint over the number with black paint. It doesn't look very good in this shot, but the unevenness of the paint isn't even noticeable when looking at the loco on the layout.

I also added one more box car to the layout. This is a car I picked up from one of the Casper club members. It was missing the brake staff and wheel, so I added those, weathered it, and plopped it on the layout.

On the 28th I got the right side of the loco decaled as number 1395. It looks a bit rough, but mostly that reflections off the gloss finish. Once weathered it will look fine.

When I did the left side I didn't get the large numbers lined up exactly right, so it looks like they're a bit crooked under the cab window. I expected to have a lot of trouble putting the numbers on the dome, but that was easier than the flat cab side. Go figure.

I built and weathered two hoppers. This first one is the tenth beet hopper from the series I built the other nine of this past January. I really don't like how those renumbering decals from Accurail look. If I do more renumbering of their cars I'll just use standard decals and remove the existing numbers first.

This is the second hopper - the giveaway hopper to celebrate 1000 subscribers on my YouTube channel. I shipped it out to the winner a few days ago.

On the 5th I began assembling a couple of Walthers tank car kits - the ones that first appeared back in the 1990s. These were identical cars, both numbered 1595, so I needed to change the number on one of them.
I took the lazy way out and just removed the trailing "5" from one of the cars. This was easily done by scraping gently with an Xacto knife edge until the ink was removed.

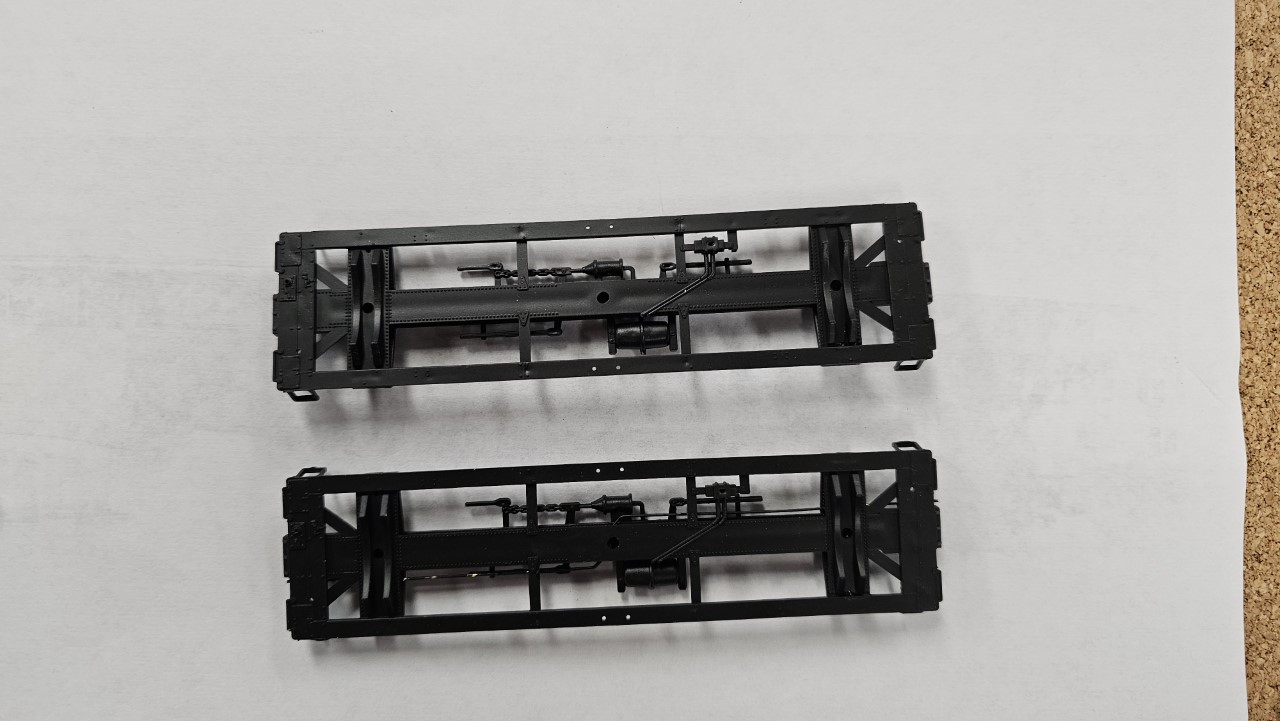
Here's a photo of the two cars' underframes. If you look close at the lower one, you can see that I added a trainline. I took this shot to show the difference between having and not having the line. Afterwards I added the line to the top underframe as well.
The trainline isn't obvious at all, but it only takes a few minutes to do and it's an enhancement to the cars I know is there, even if no one else notices it.
On the 8th I finished the two tank cars and got them on the layout. Here's 1595:

And here's 159.

You can see evidence of fresh oil spilled down the other side of 159.

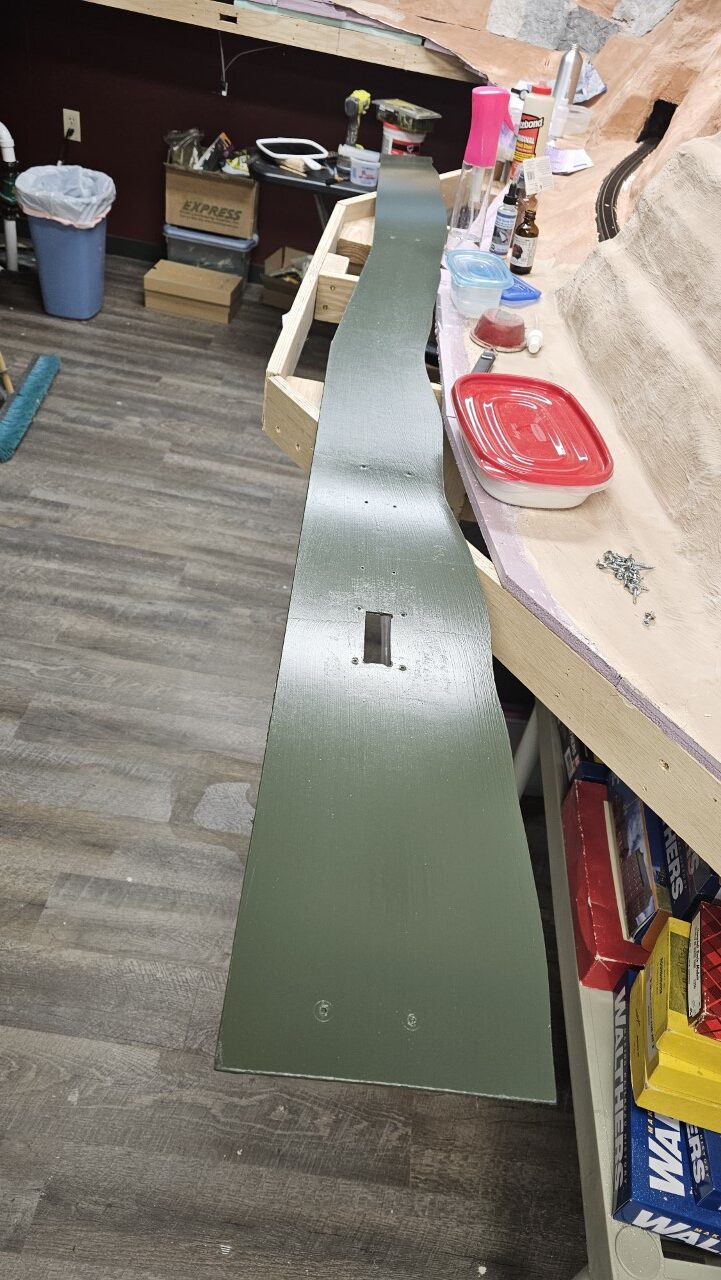
With the tank cars finished up I turned me attention to the fascia from Powder River to Shobon and in the Wind River Canyon. It was about time to put the finishing touches on some of that.
Here's how the fascia at Wind River Canyon looked when I started - the wax paper was there to keep the wet plaster from damaging the hardboard.
First thing I did was remove the fascia and stack it up on a card table.

From there I cleaned each piece and sanded it lightly to give some tooth for the paint to stick. Then I painted all four pieces. Here's the finished one that stretches from Powder River to Shobon.
After letting the paint dry for a couple days, today I reinstalled the two pieces of fascia that run from Powder River around to the entrance to the canyon.
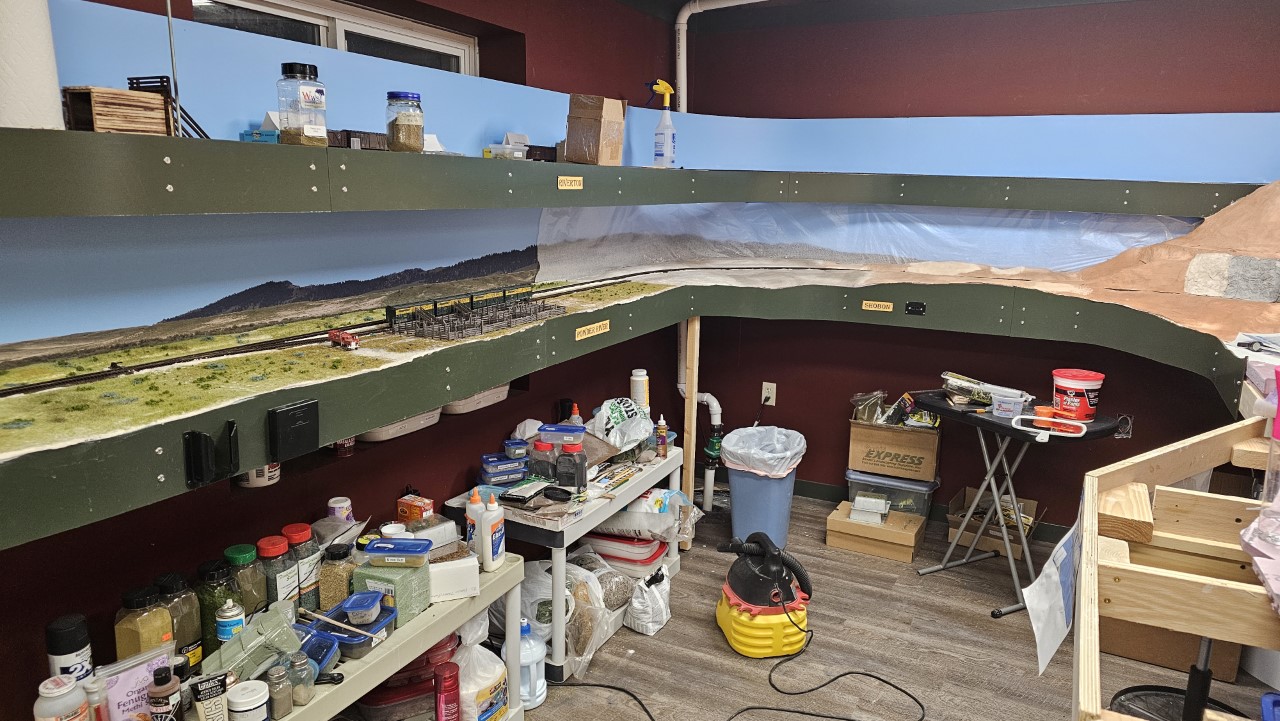
The other two pieces will be installed in a couple more days.
On December 12th I got the two pieces of fascia installed in the canyon, across the aisle from the Casper engine terminal.

After that I developed a cold, so I didn't do much for several days, plus I was a bit burned out from all the effort leading up to and immediately following the operating session. But on the 19th I finally applied the engine number to the aft end of the tender.

And on the 26th I finished installing the decoder in the ten-wheeler. Here's the unit sitting on the track at Thermopolis. Still to come is weathering, but that might be awhile.

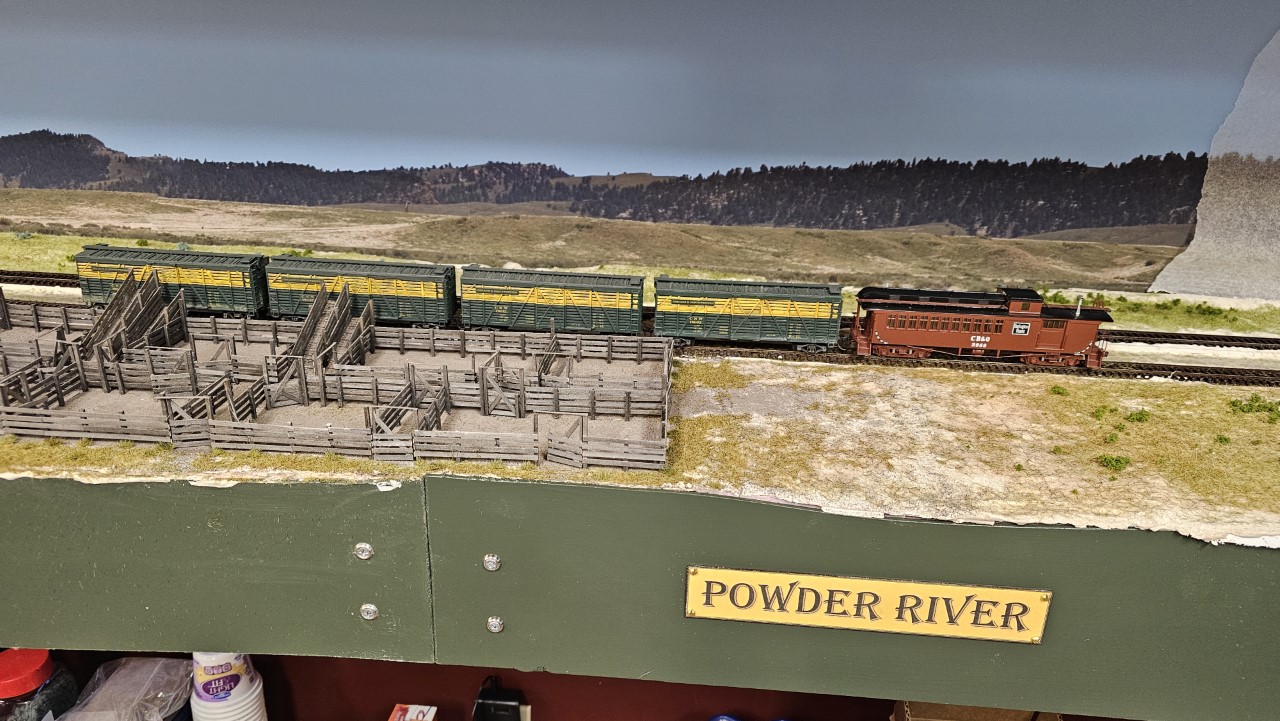
My Christmas gift this year was a brass drover's waycar made by Boo Rim. This thing is a real beauty, but it looked a bit oversized - almost like it was OO rather than HO gauge.

I stuck it at the end of a string of stock cars at Powder River. Looks about the right size after all.
One comment I got at the last operating session was that folks weren't always sure which directions were east and west. I spent some time in December working out some directional arrows, and have put the first couple together. Here's one of the ones for Casper. I still have to drill mounting holes and overspray the sign with Dullcote. This project will take quite awhile, because there are a couple dozen of these to make. I'll get the first few done, then they'll be something I'll work on between other projects.
