I went out to a bare spot of dirt in the back yard and scraped a few shovelfuls up into a plastic bucket. Took about five minutes. Then I took it inside and let it warm up for awhile (it was about 20 degrees F outside). Meanwhile I dug out two cookie sheets I bought a couple days ago at WalMart ($1.49 each) and set them up on the table. I spread dirt onto the cookie sheets at about the thickness of the sheet's raised edges and popped them into the oven at 350° for 20 minutes. This was done to dry out the dirt and kill any insect eggs or seeds in the dirt. After the dirt cooled, I pulled out the cookie sheets and the dirt looked like this - about what it looked like going into the oven.
Then I poured the baked dirt, rocks, lumps and all, into a large pickle jar and shook it vigorously. This broke up the chunks of dirt. I trotted down to the train room with my jar of dirt to continue processing, by sifting the dirt into different sizes. I used two different strainers for this. The coarser one on the right I used to sift out the larger chunks of dirt, rocks and weeds. It has the little vanes that move back and forth across the screen, which helped break up any remaining chunks of dirt. The fine one on the left I used to filter out the really small, powdery dirt.

By sheer luck, the mouth of another pickle jar was just the right size for the coarse sifter to sit in it. I poured half-sifter sized batches of the raw baked dirt into the sifter and began squeezing the handle repeatedly to move the vanes. Filling the sifter more than halfway tended to jam the vanes. As I worked, I began getting a goodly amount of mixed coarse and fine dirt in the jar.
After doing the first sifting operation, I shifted to the finer sifter and ran the sifted dirt through it, giving me two different sizes of dirt particles. Here you can see the difference between them.

When I was done, I had these three jars of dirt. The large jar, which is the stuff that wouldn't go through even the first sifter, I'll probably just dump back out in the yard.

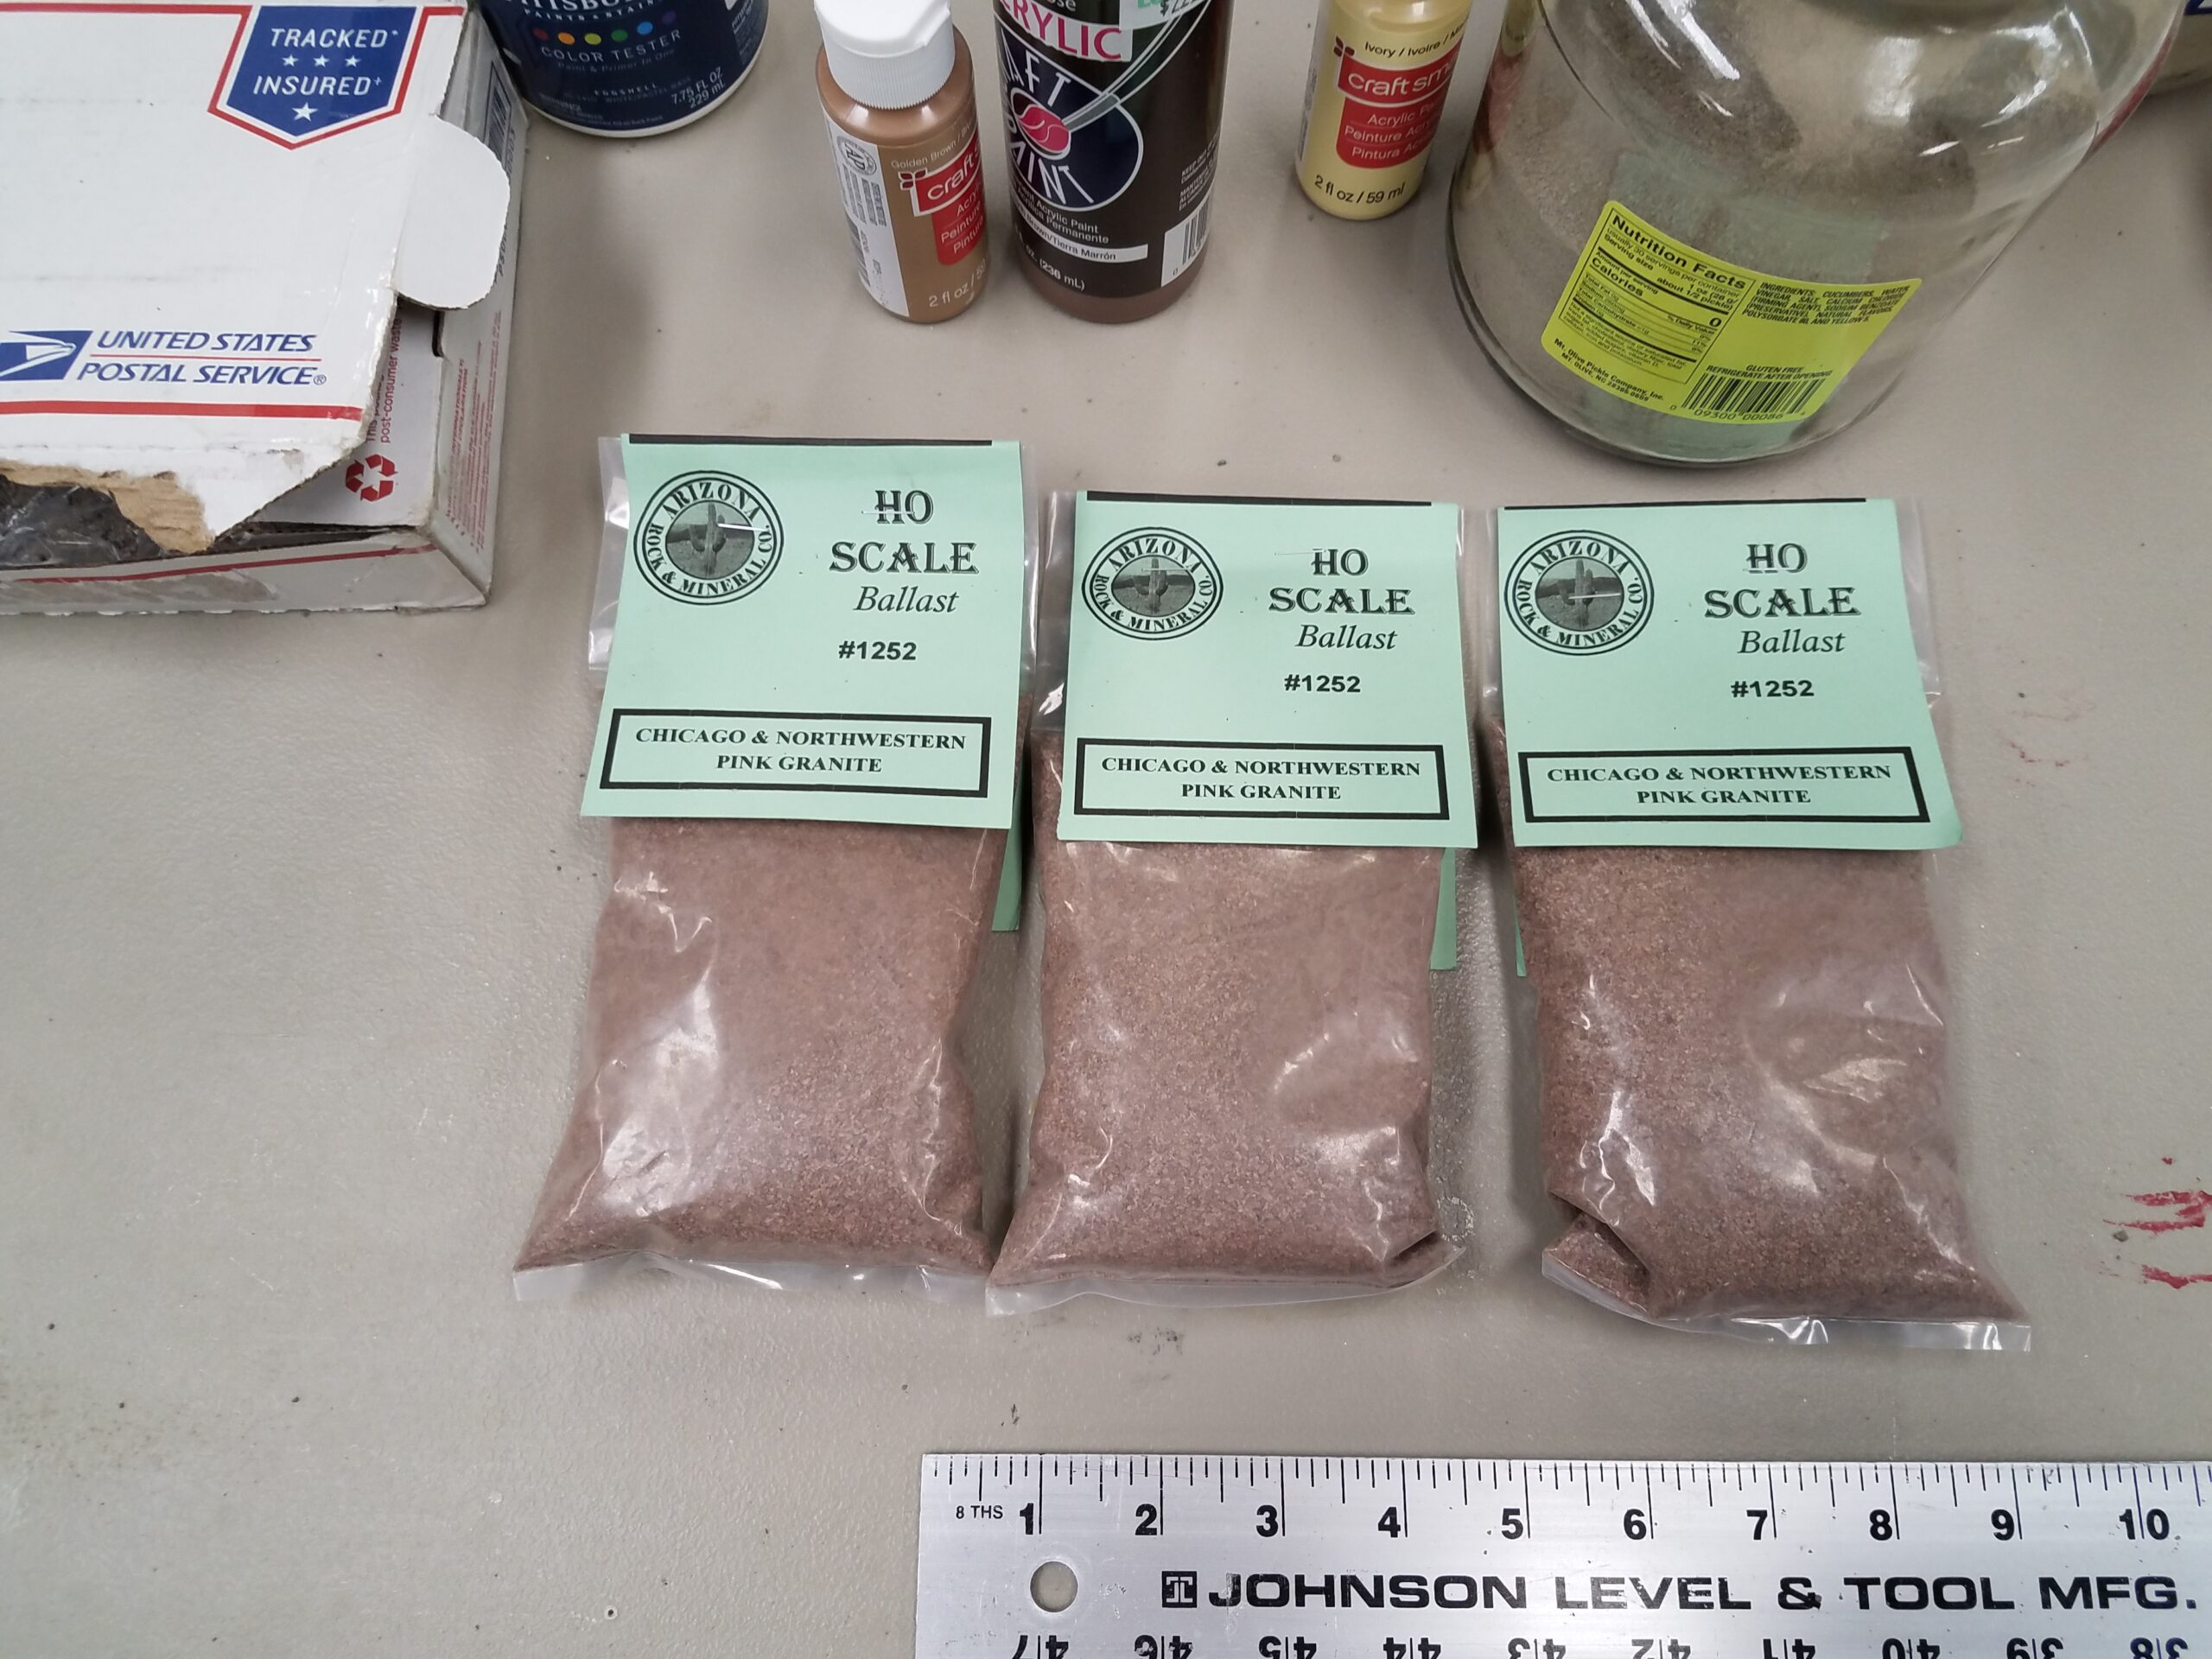
I was getting ready to ballast the CNW track that runs above and behind Casper yard, and now that I had the sifted grades of dirt to go with the bags of "Pink Lady" ballast I'd received from Arizona Rock and Minerals a couple days earlier I was ready to go.
So why did I need the dirt?
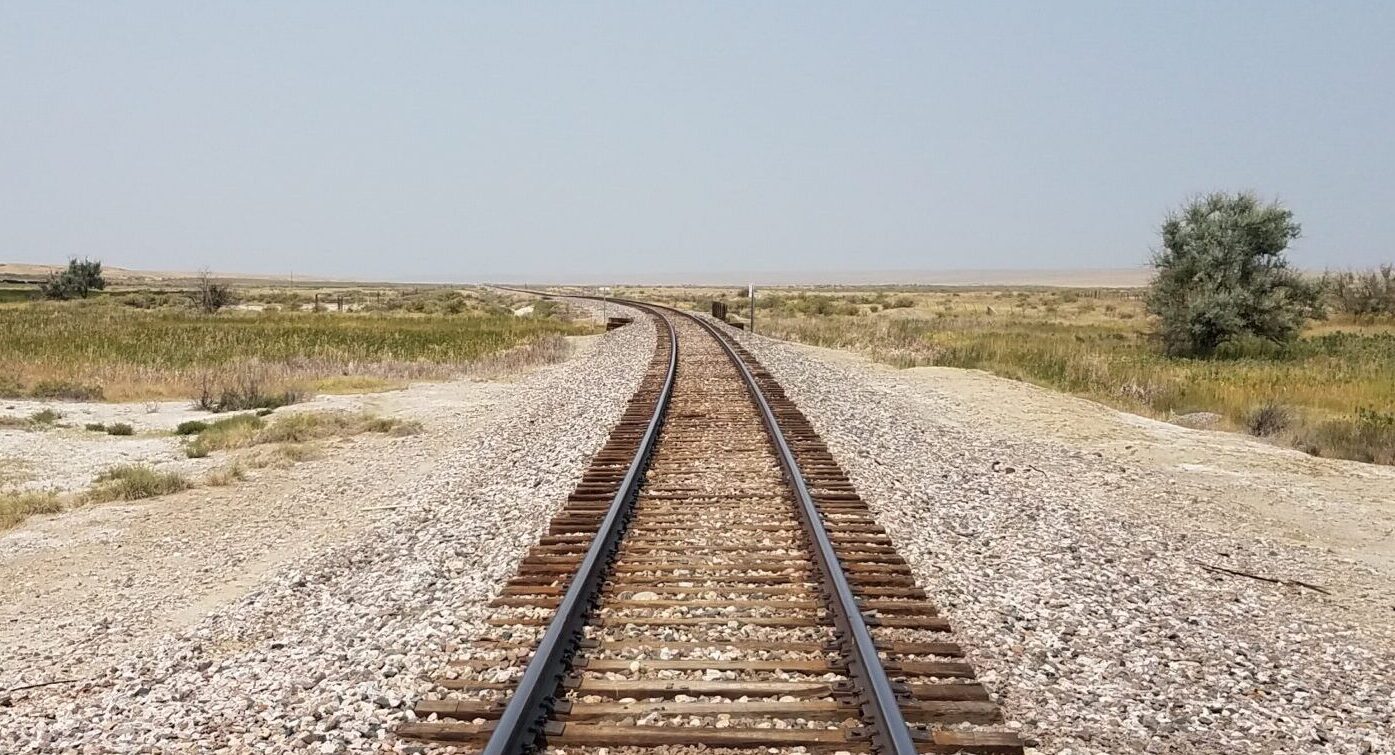
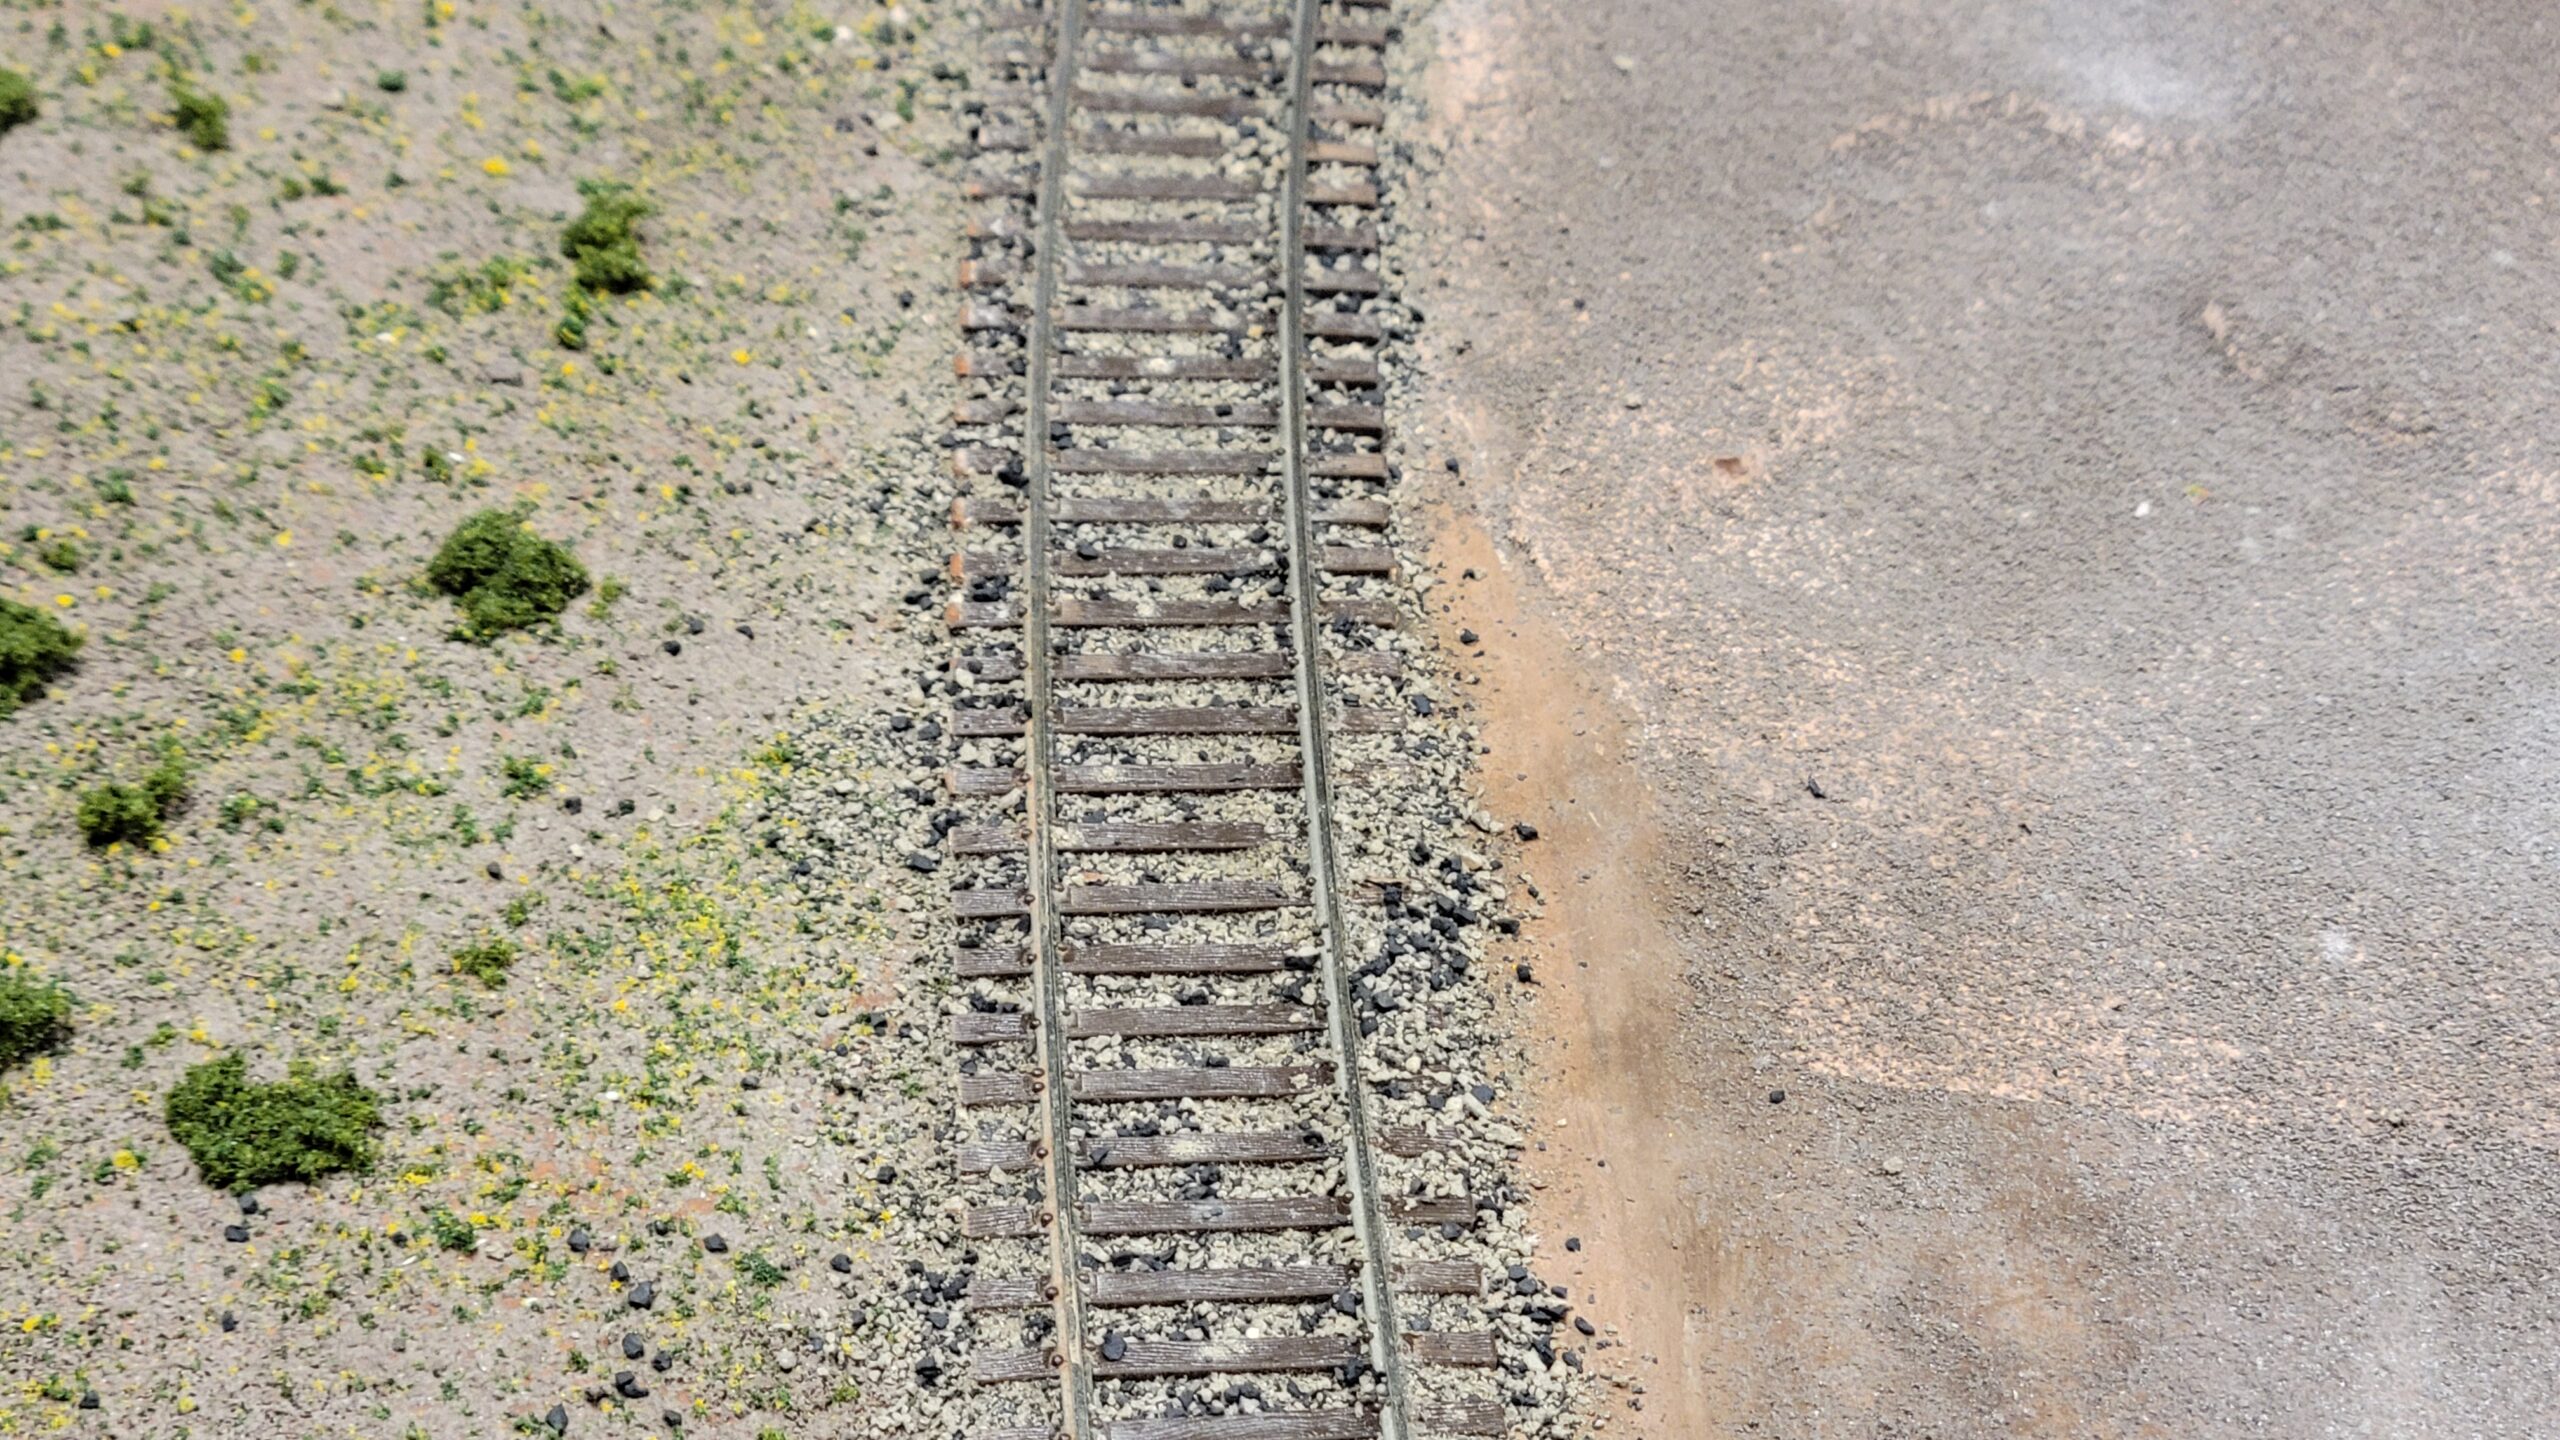
Well, the CNW line to Lander was never a Class 1 mainline, so I didn't want track that looked like this:
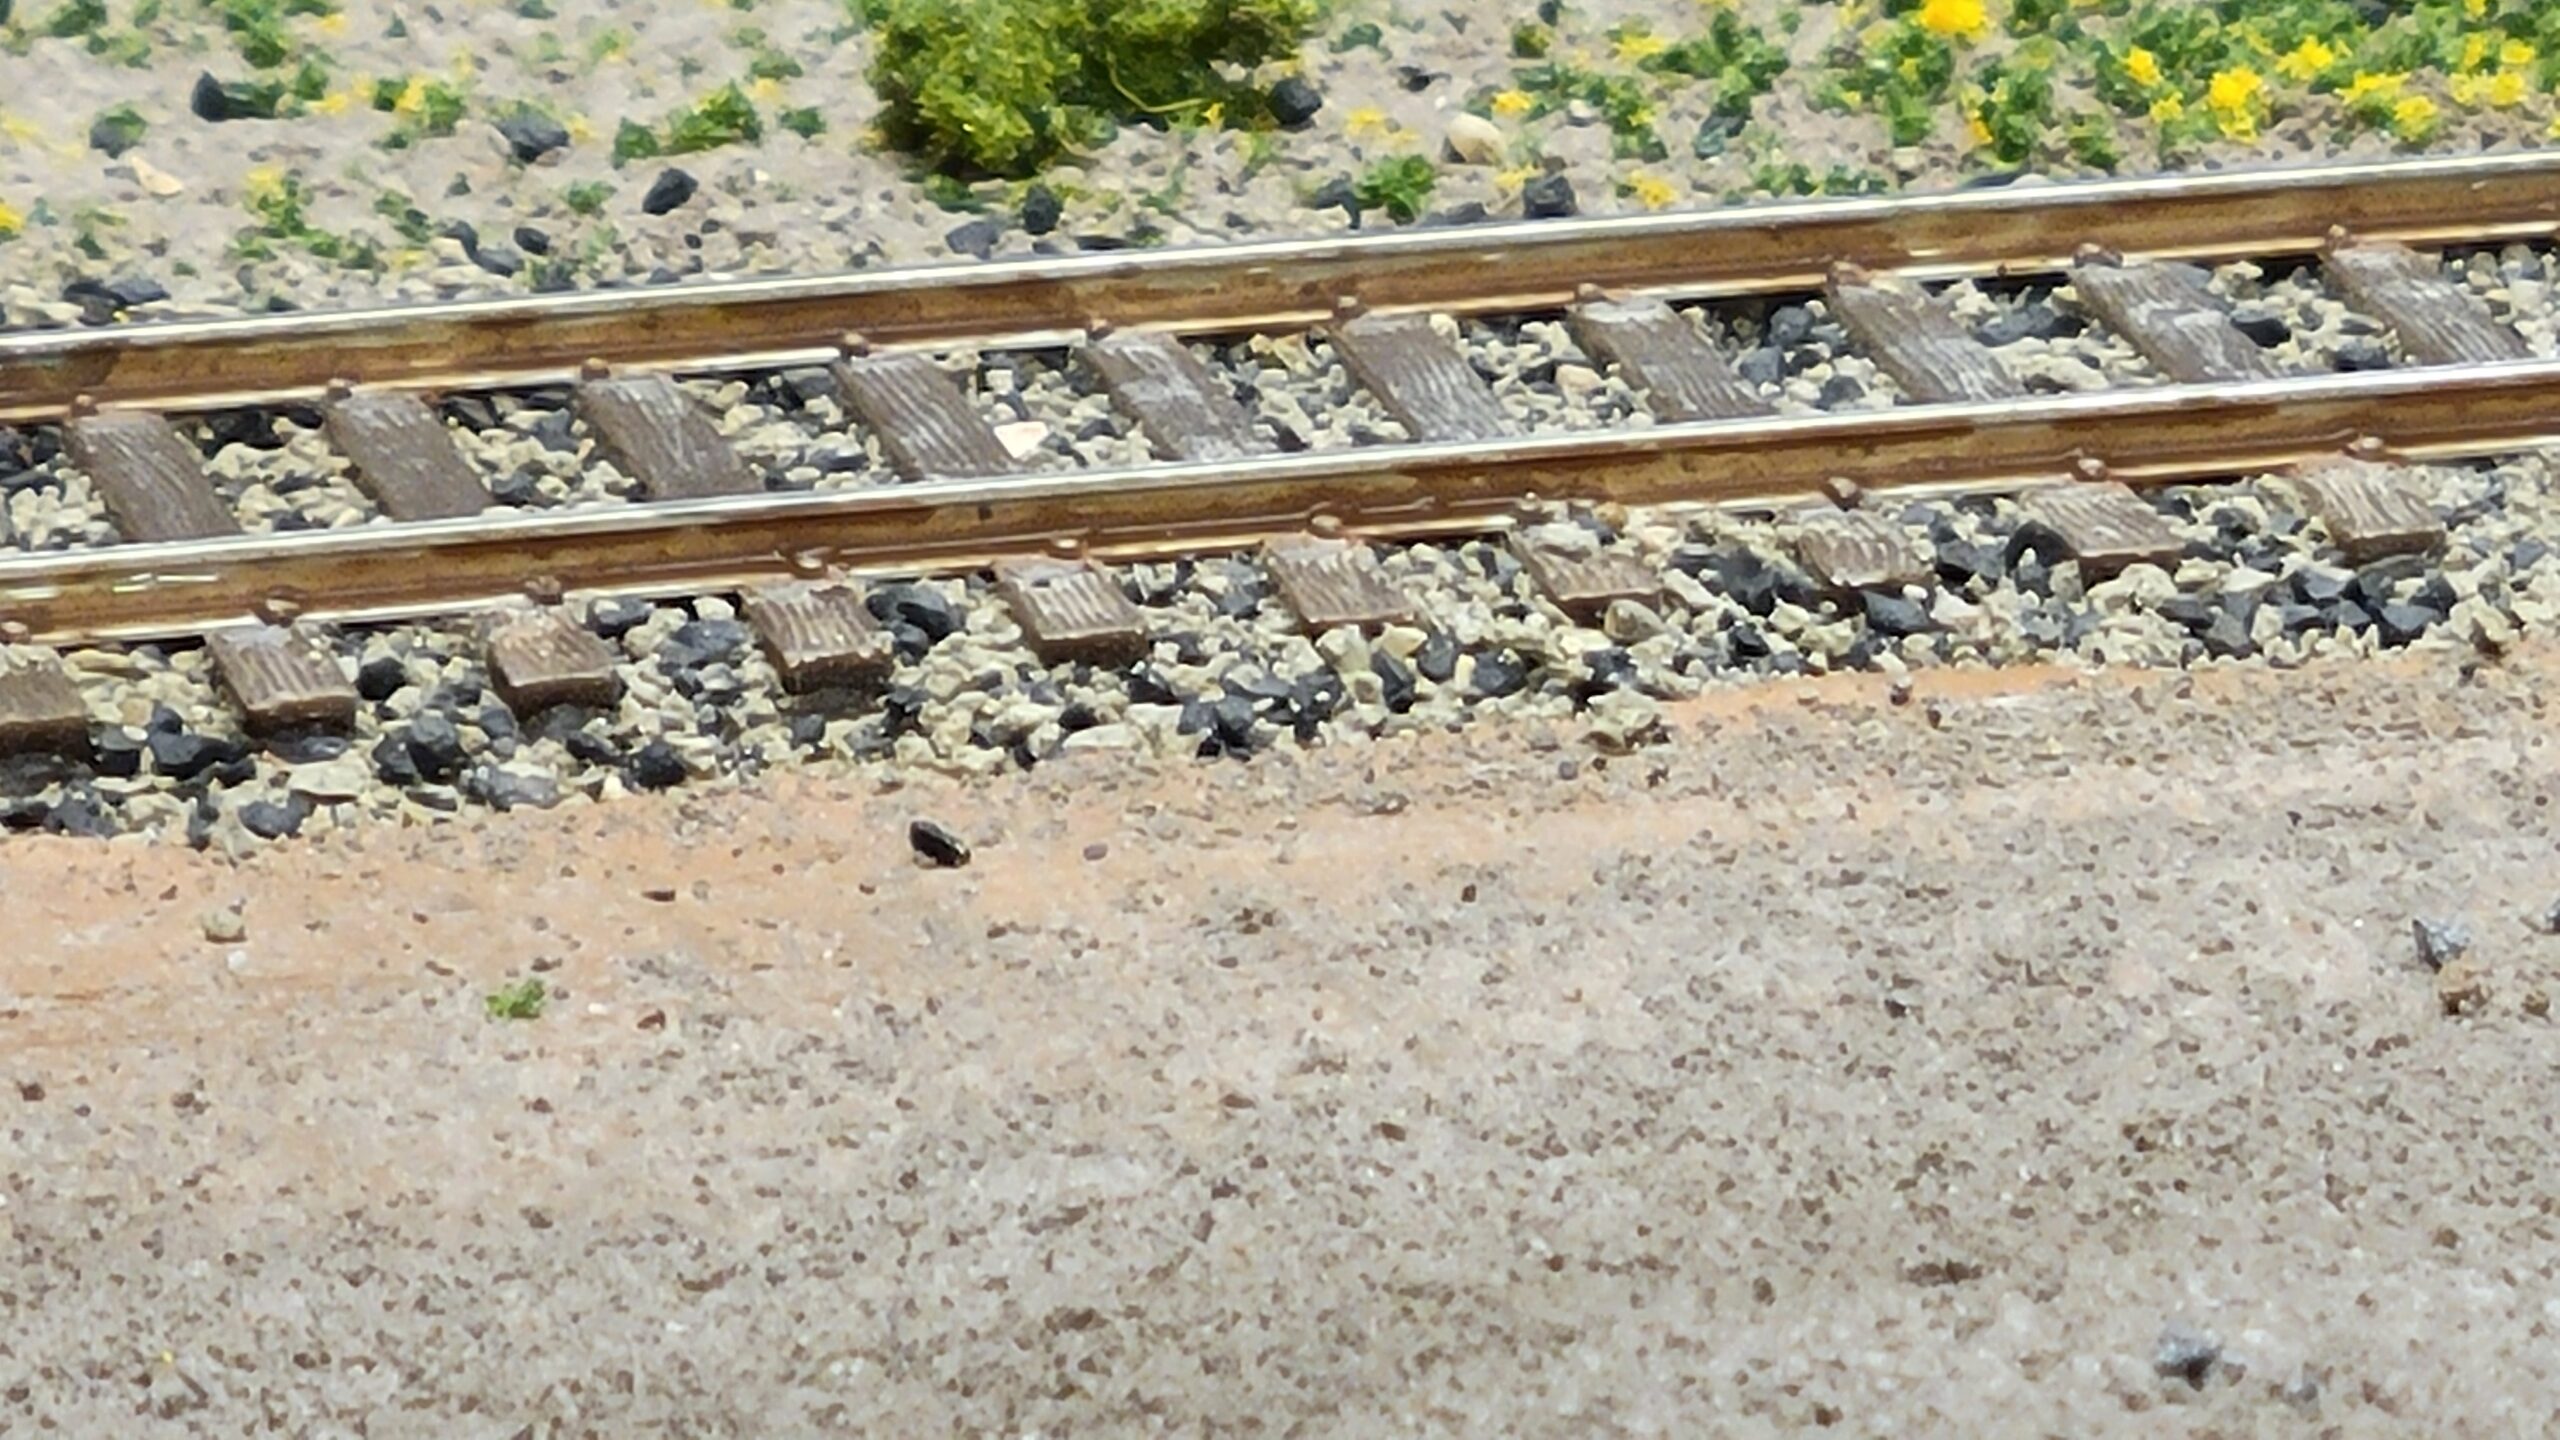
I wanted it to look a bit more like this instead (except for being standard gauge, of course. This pic is from the Cumbres & Toltec narrow gauge railroad), with ballast mixed with quite a bit of dirt. A bit better maintained than this, but this is the overall idea:

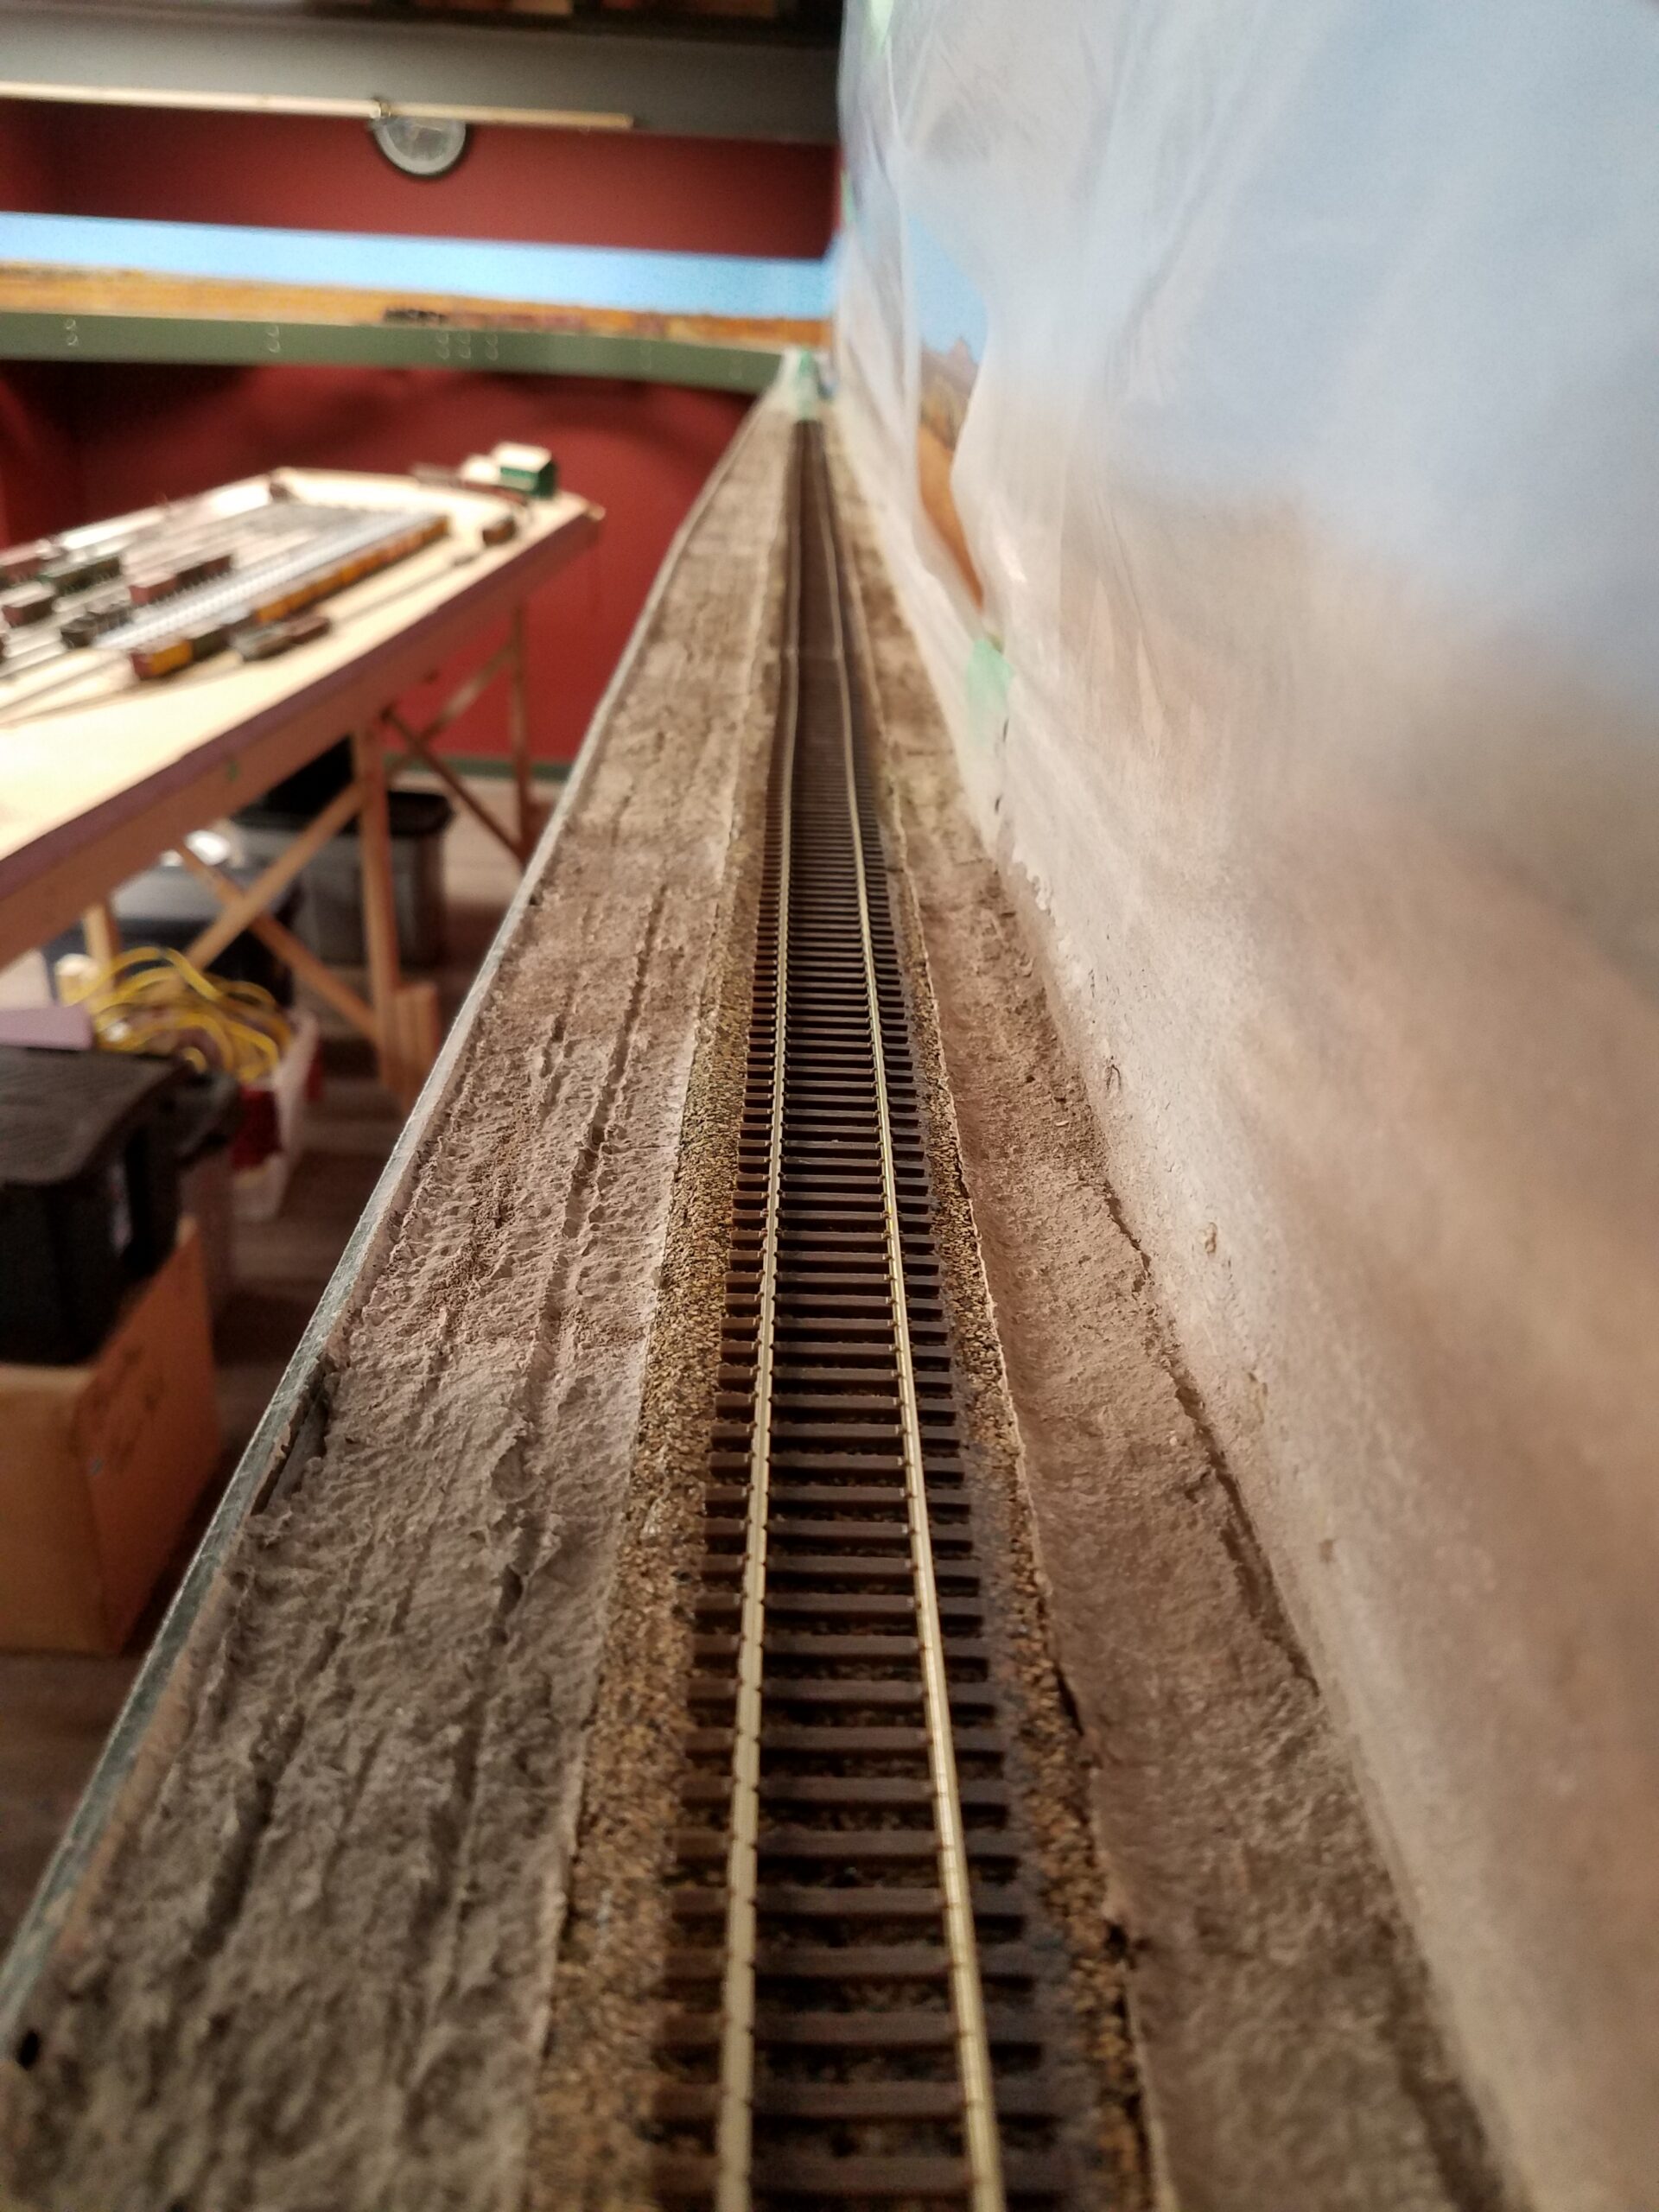
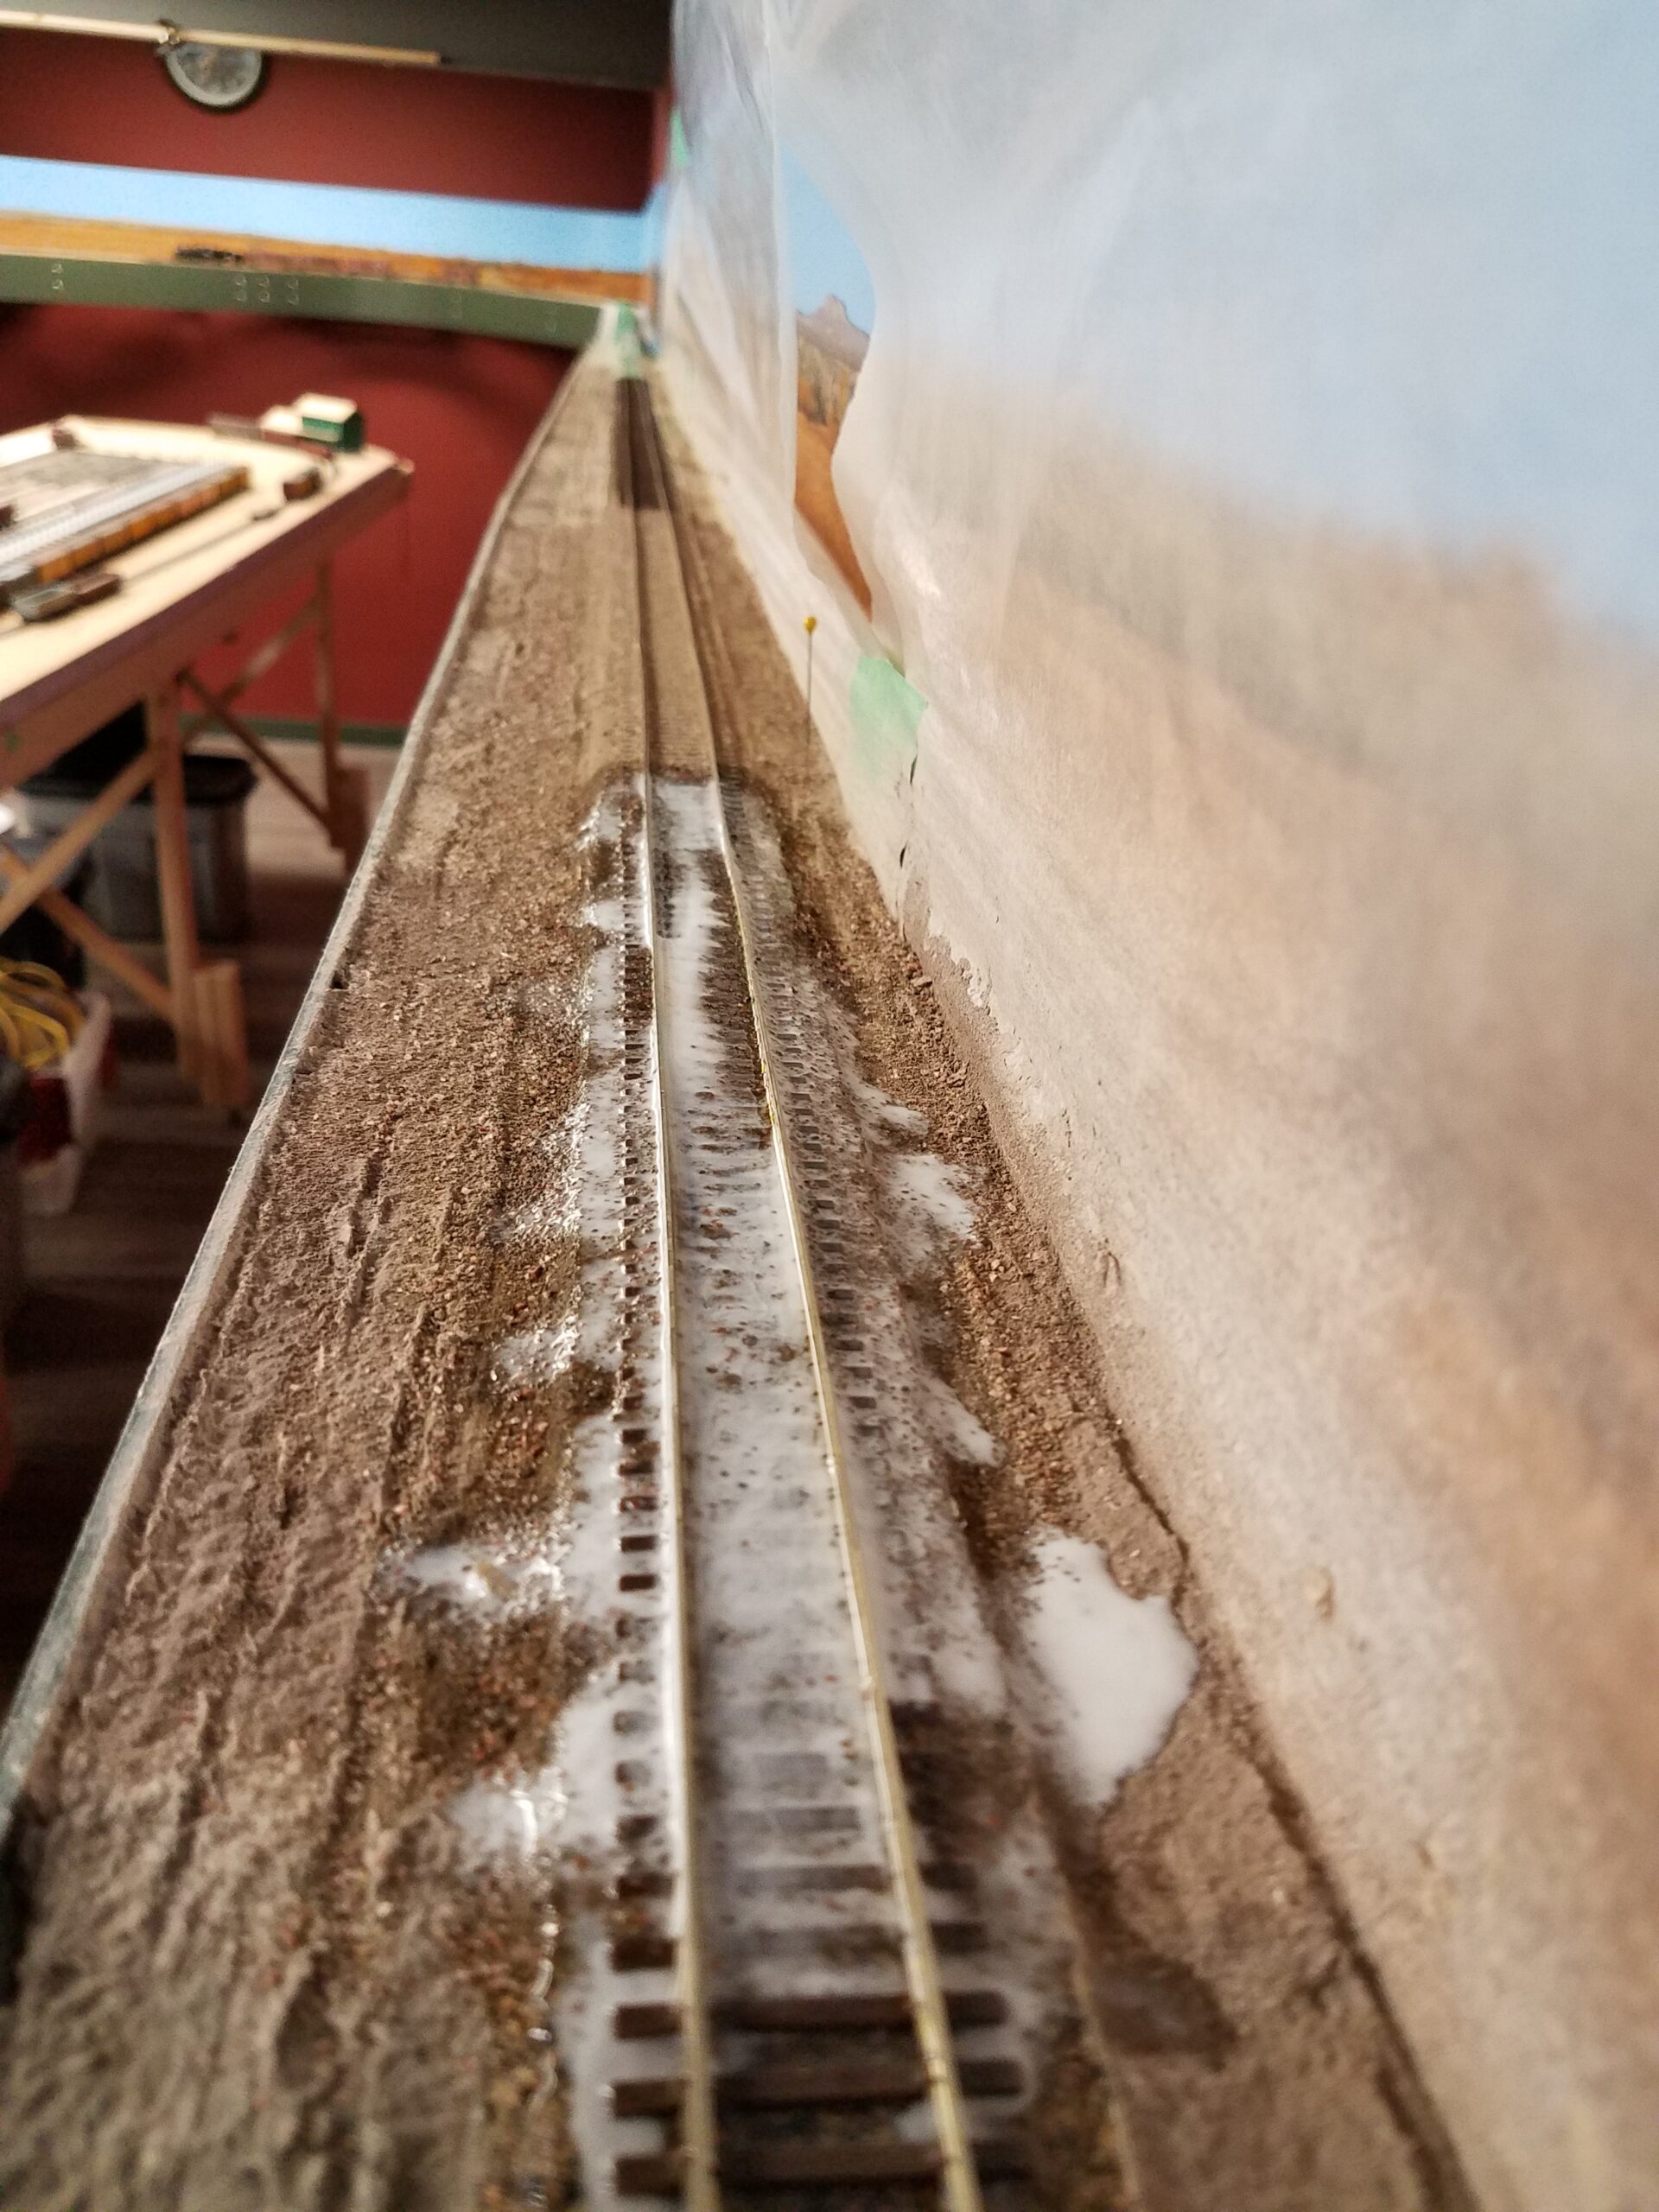
So by trial and error I wound up mixing four tablespoons of ballast with six tablespoons of the fine sifted dirt (from the jar labeled "Dust"), plus two tablespoons of the coarse sifted dirt, which is just slightly smaller than the ballast. The track looked like this before I applied the ballast mixture:
And like this afterwards. Almost exactly what I was going for!
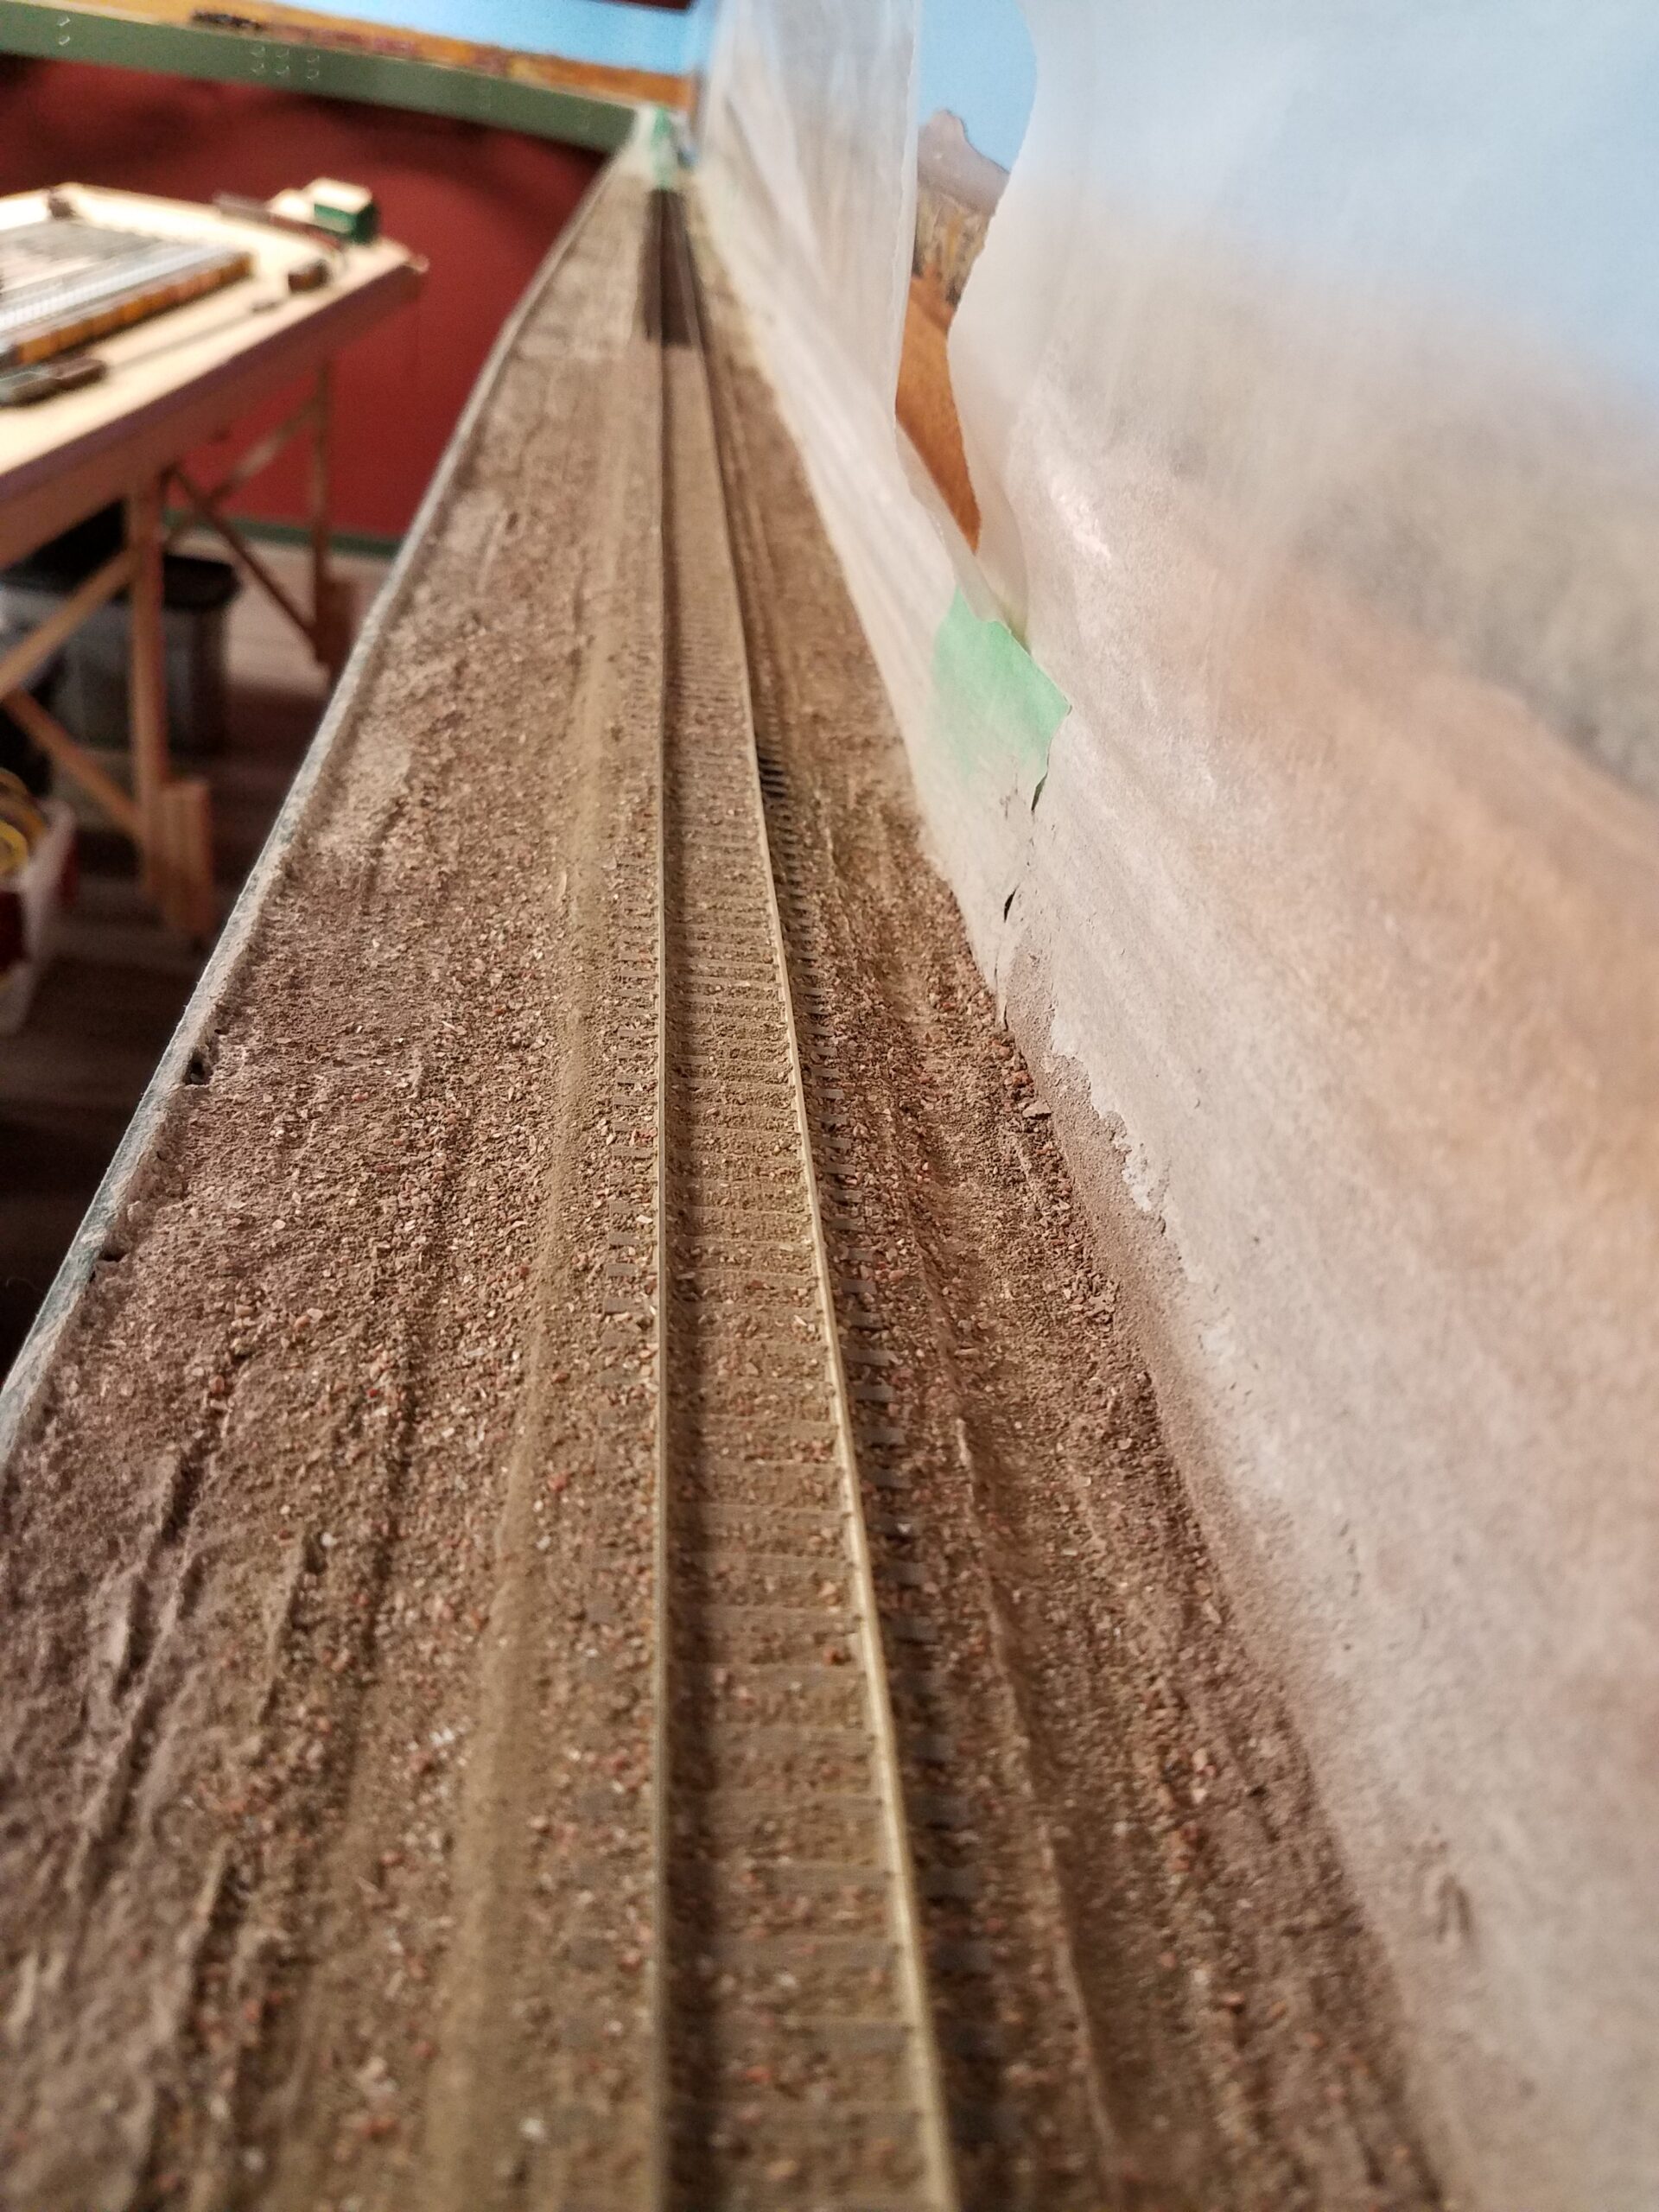
So far so good! Now I just had to glue it in place.
Never having done this before, I decided to just glue down a short stretch. I used the traditional method - wet thoroughly with alcohol, then add diluted white glue as the final fixative. After doing that I had this:
And that's where I left last night. I went to bed not at all sure I would get the desired results. Looked like a mess to me! But this morning I went down and took another look and, other than still being slightly wet, it looks fine. The glued down area looks much darker, but it should lighten up as it dries. More to come later...
About mid-morning today I went down to the train room to see how the glued-down ballast looked.

I'm kind of surprised - it looks pretty good! It isn't completely dry yet, which I think is why it's still darker than the unglued stuff. It's taking longer to dry than I thought it would - after 24 hours it's still damp.
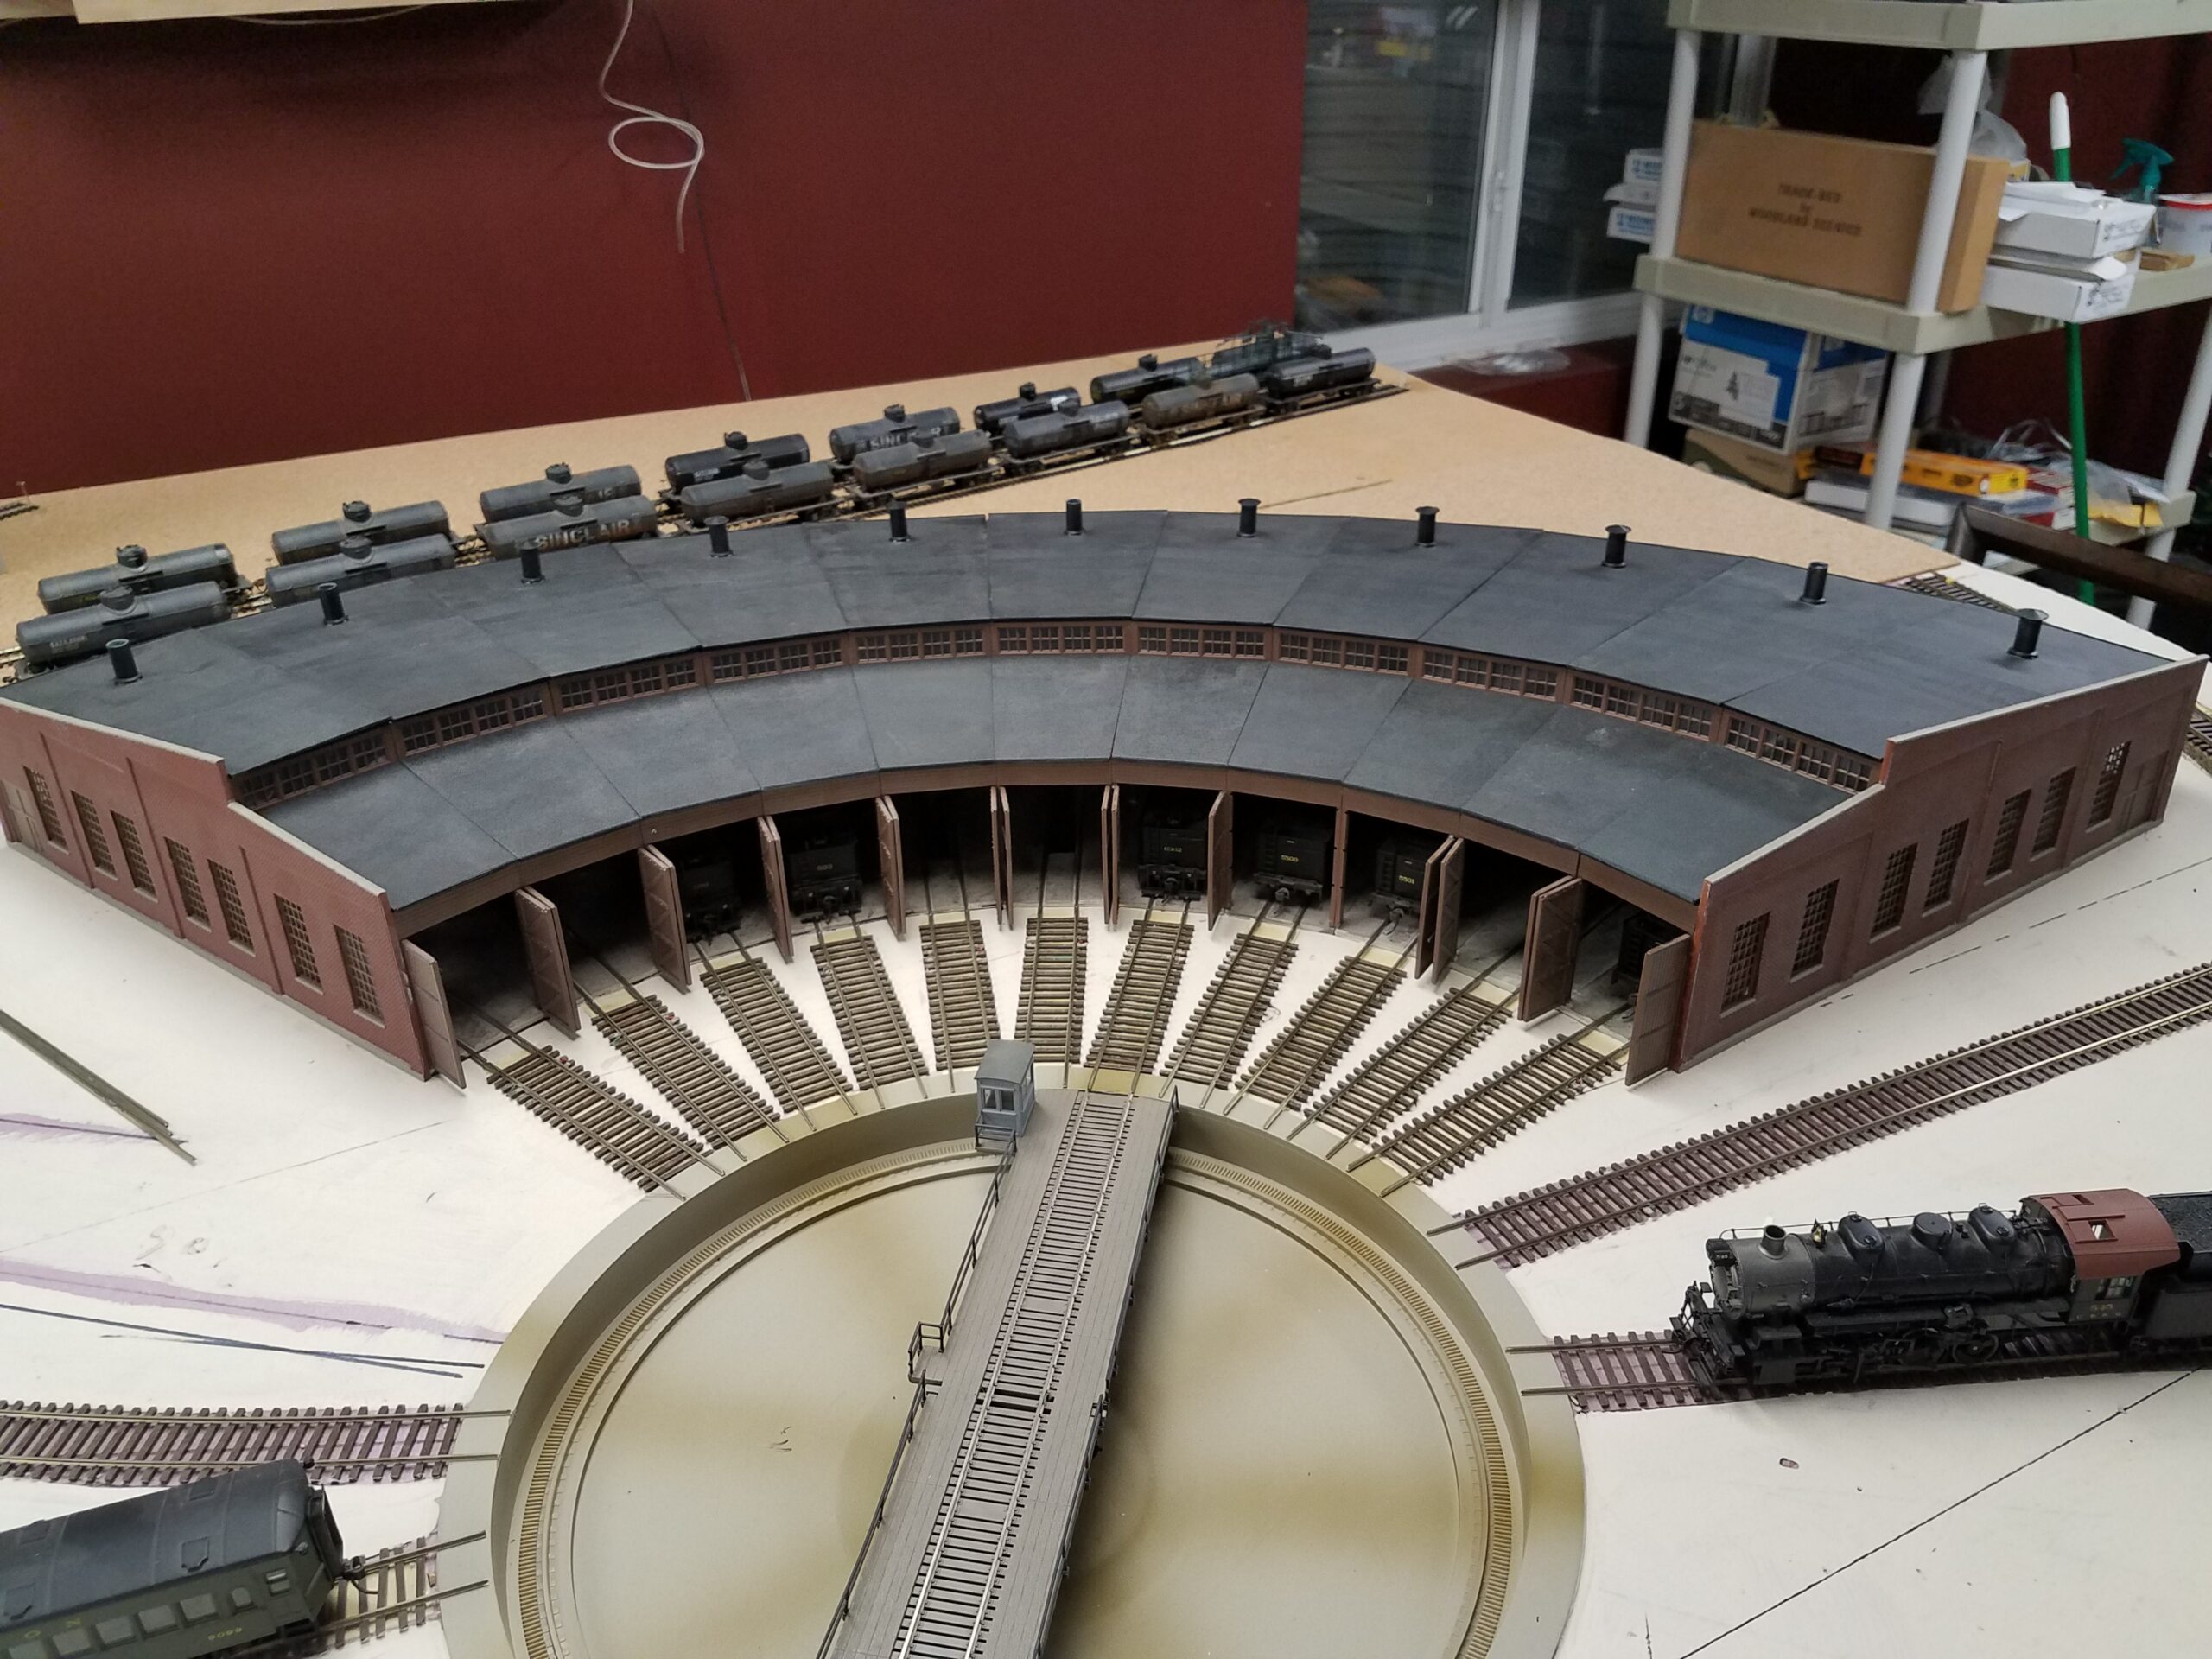
The roundhouse is almost completely reassembled. Just a few doors to reinstall. Is it my imagination or does it look more substantial than it did before?
I've gone back and worked on the C&NW ballast the last few days. The entire strip is done (all six feet of it) with the first try, and it's time to go back over and add more where it's a bit bare. Here you can see that the edges of the cork roadbed are too exposed in places.

So I went back over some spots and cleaned them up by adding a bit more ballast to hide the edges.

I also added a new, slightly weathered reefer to the layout. This makes 20 total now. Another thirty or so and I may have enough!

After the ballast dried overnight, it looked this this morning.
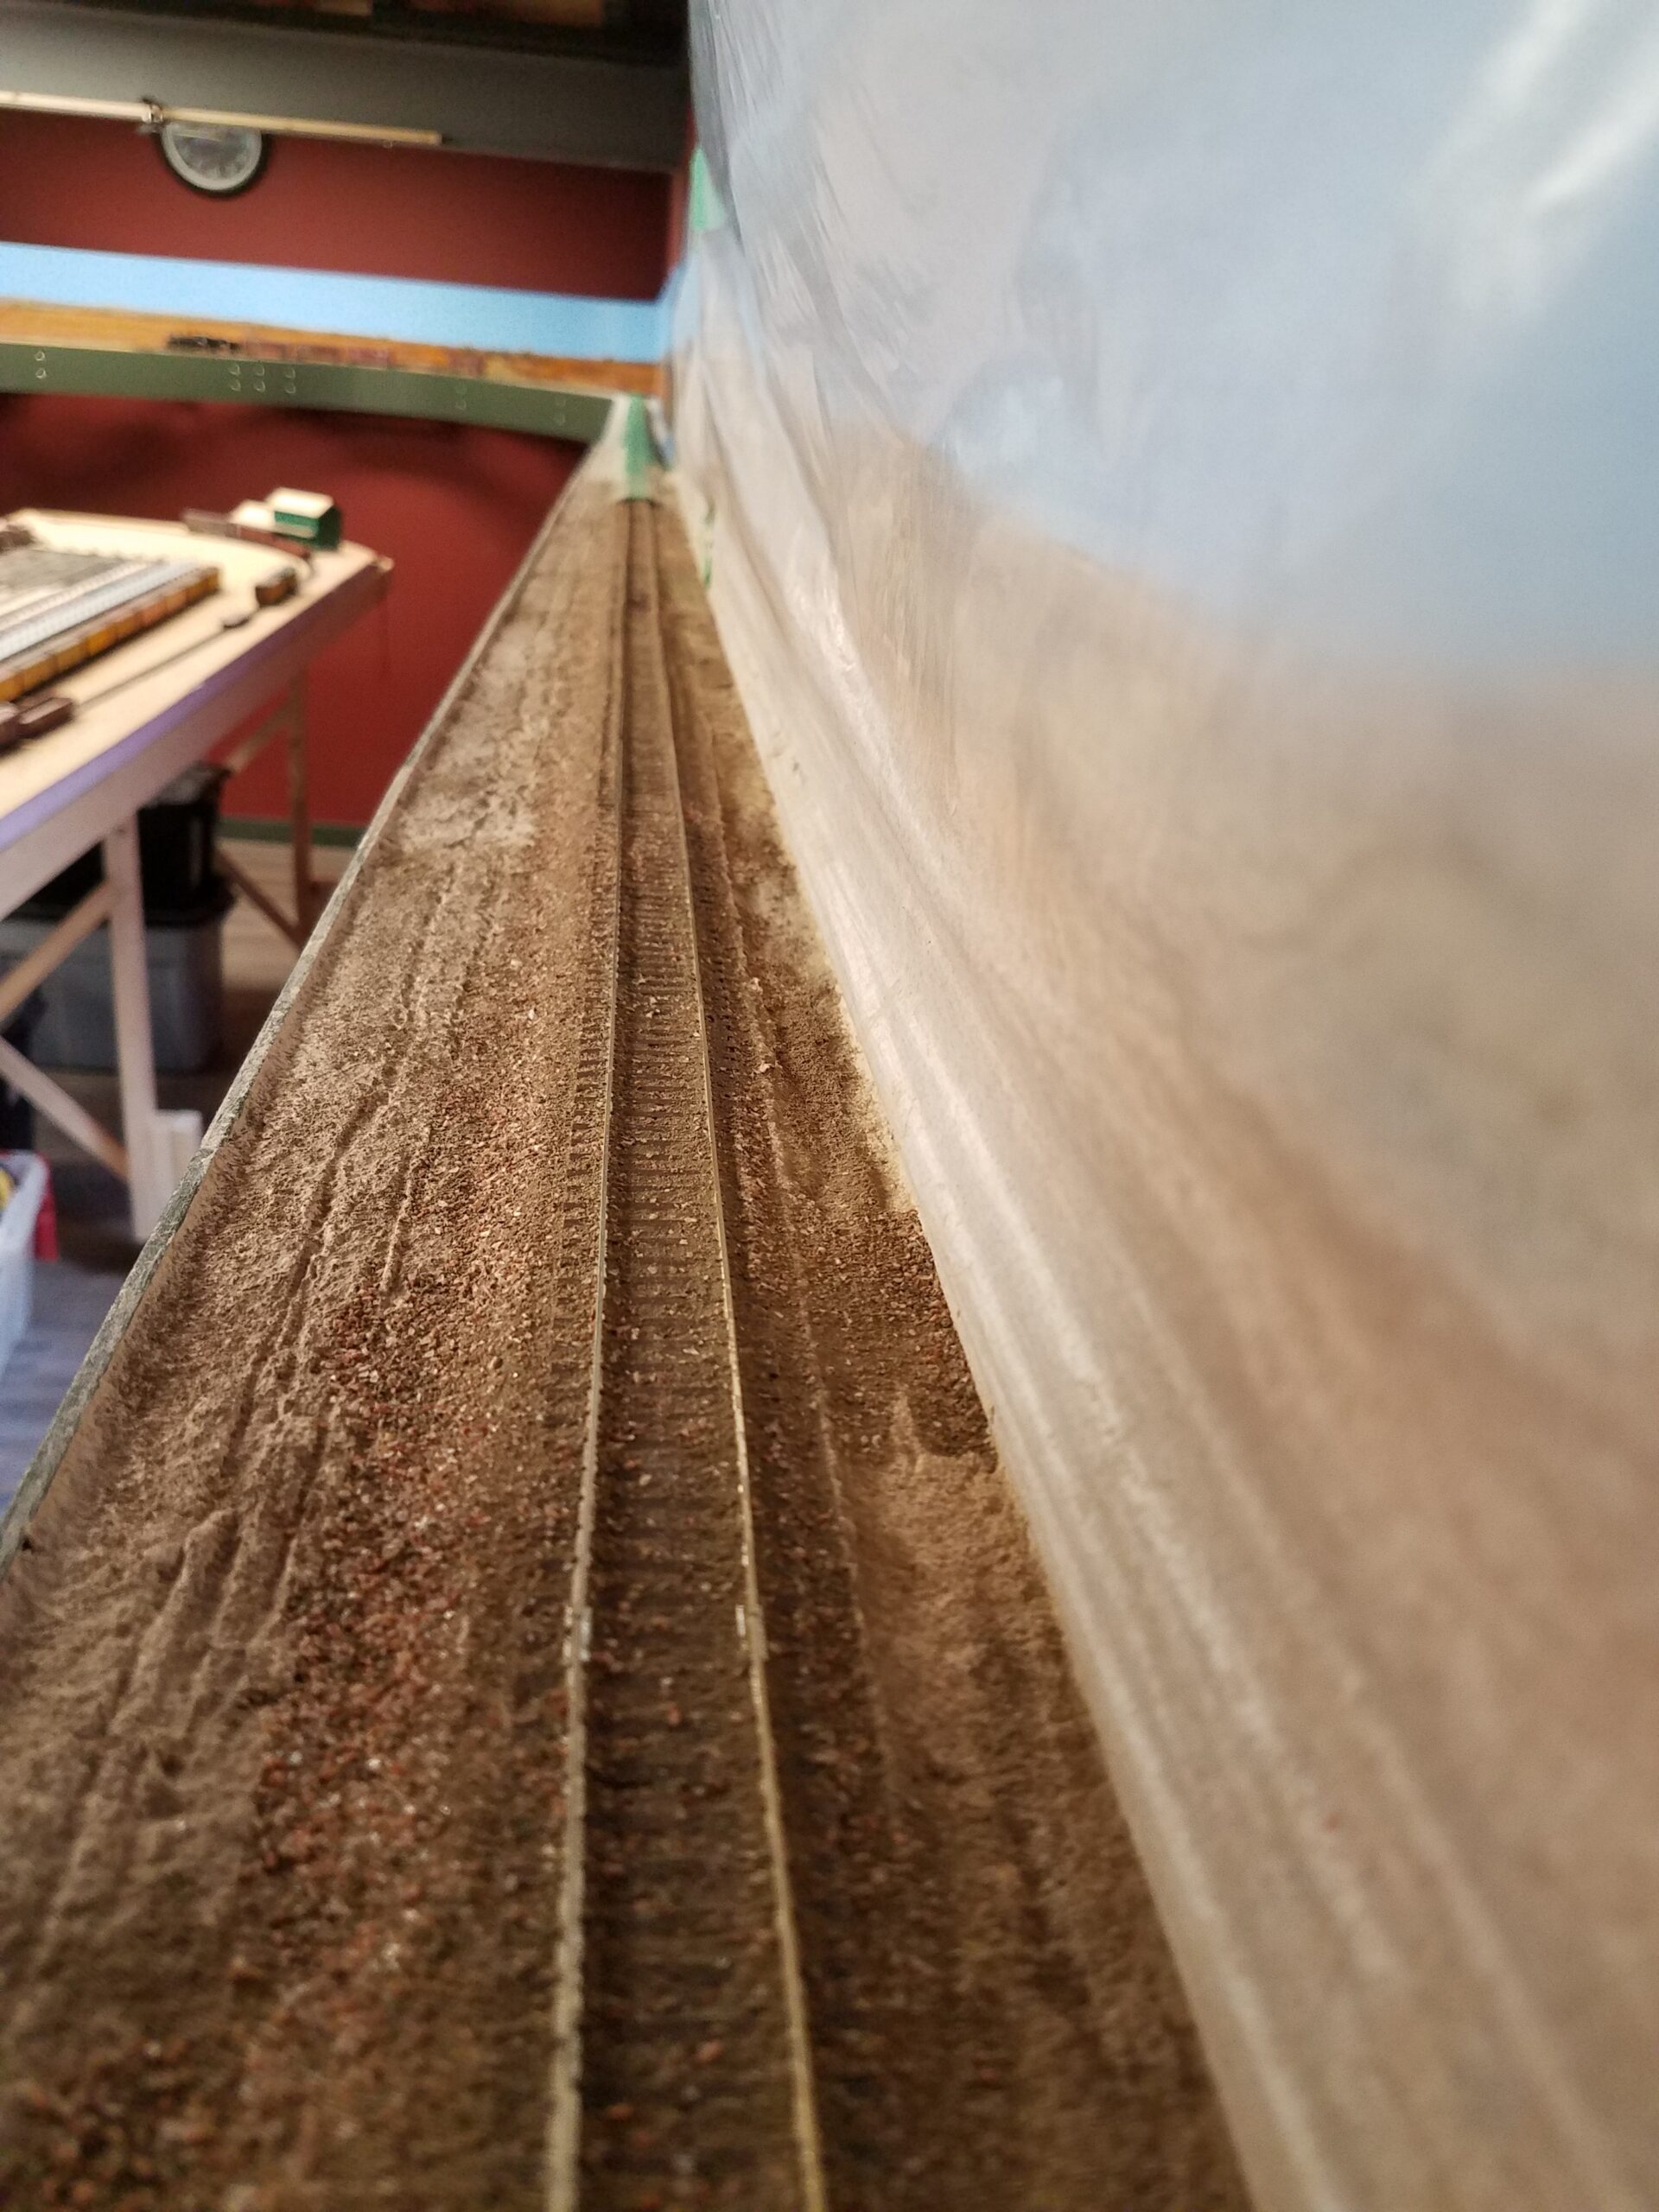
Looks like I'm ready to add scenery around this stretch of track!
Last night I removed the wax paper covering the backdrop in the area where I was ballasting. It took about half an hour to get that six feet off cleanly - the wax paper was pretty well stuck to the Celluclay!
But I did get it off, then posed a train on the track. Here it is:

Today I thought I'd try out my new Scenic King static grass applicator from Woodland Scenics. Since I never did this before, I thought it might be a good idea to test it out on a scrap board first. Hey, thinking ahead!
I got a short chunk of 2X4 out of the scrap wood bin, painted on a bit of diluted white glue (roughly 70% water), and applied some 2mm grass per the instructions that came with the applicator.
I'm sure glad I decided to try it before doing it on the layout. This is not what I expected:

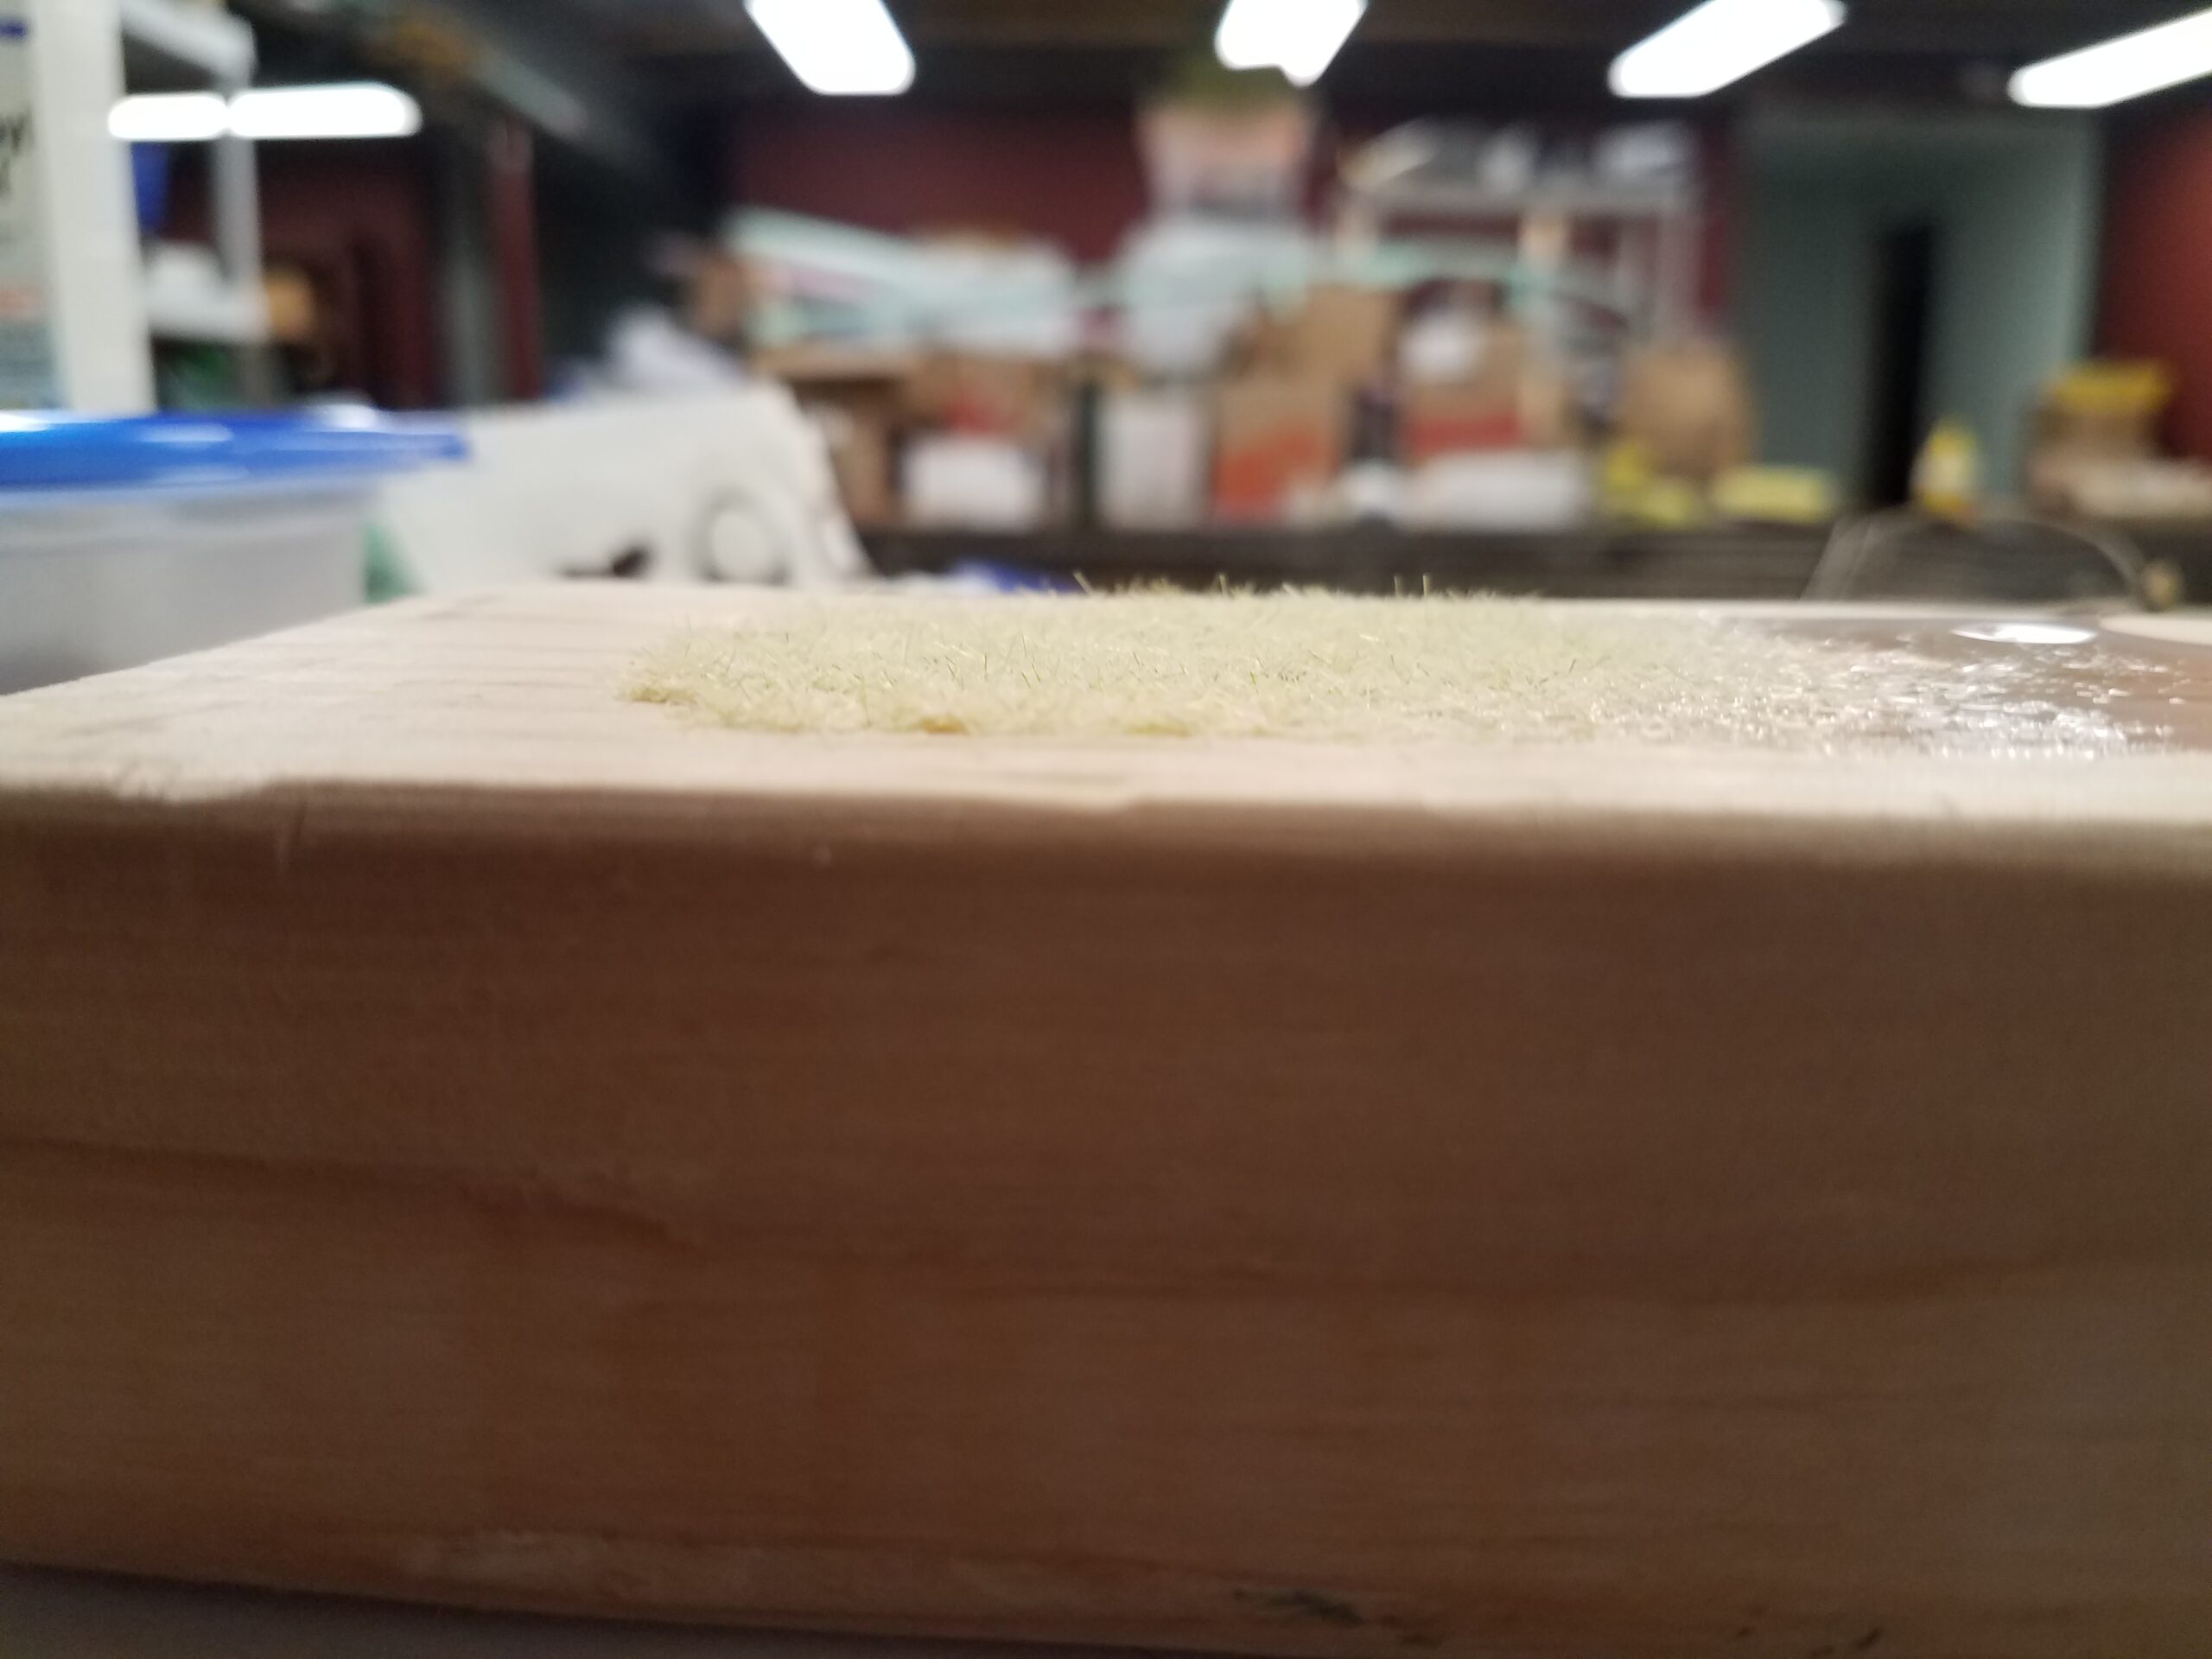
A few strands are sticking up, but mostly the grass is laying down in the glue!
I used a "new" off-brand battery that's a few years old, so even though the light on the applicator comes on, maybe it doesn't supply enough amperage. Or may the diluted glue isn't conductive enough?
In any case, NOT a propitious start.
I did some more experiments with the static grass applicator, and tried a few things suggested by the crew at the Model Railroader forums.
I replaced the battery with a fresh new one and tried the longer (7mm) grass. It worked much better! I also switched to Mod Podge matte glue. I didn't use the "anchor" that came with the Static King; instead I used a small nail tapped into the board a bit. I also tried just holding the ground clip close to the board, and that worked as well! Here's how one of the experiments came out.

So after a half dozen experiments, I dredged up enough confidence to try it on the layout. I spread a bit of Mod Podge along the backdrop and at the base of the ballast and in the "road" (the ruts in the plaster near the front edge) and applied first some 4 and 2mm grass, then switched to the 7 mm grass. Boy that stuff goes all over! Here's what it looked like before I cleaned it up.
 Wow. More grass on the track than anywhere else!
After I vacuumed up the excess (which was about 3/4 of what I actually put down, it looked much better. Here's what it looked like along the backdrop.

And here you can see how pitifully small an area I did. But it's not too terrible. I'm heading in the right direction. Now I just need to figure out what order to do things in. I have to add some random green weeds and other ground detritus. Probably need to do that before I do the static grass.
I think I'm getting the hang of using the static grass applicator.
I found an appropriate wall wart to power the unit, and that works much better than even a fresh battery. It generates quite a static charge on external power!
So I've added more to the scenery mix that I'm doing on the Lander branch, including some dark green bits to represent the occasional weeds that stay dark green well into the start of winter, and some oregano shavings that seem to work well for dead, dried organic material laying on the ground.
So here's the latest but of work along the rutted road, completed with a few posed elements to make the scene more complete.

I'm improving with the static grass applicator.
I've finished everything I can do for right now, so I put the applicator away. Here's how the "finished" area looks:

I covered the backdrop with wax paper all the way down to the curve at the end a couple days ago, and began applying more Celluclay yesterday. One more batch will have it complete to the curve, and I can go ahead and add the finish scenery (dirt, ballast, etc.) along the rest of the wall.

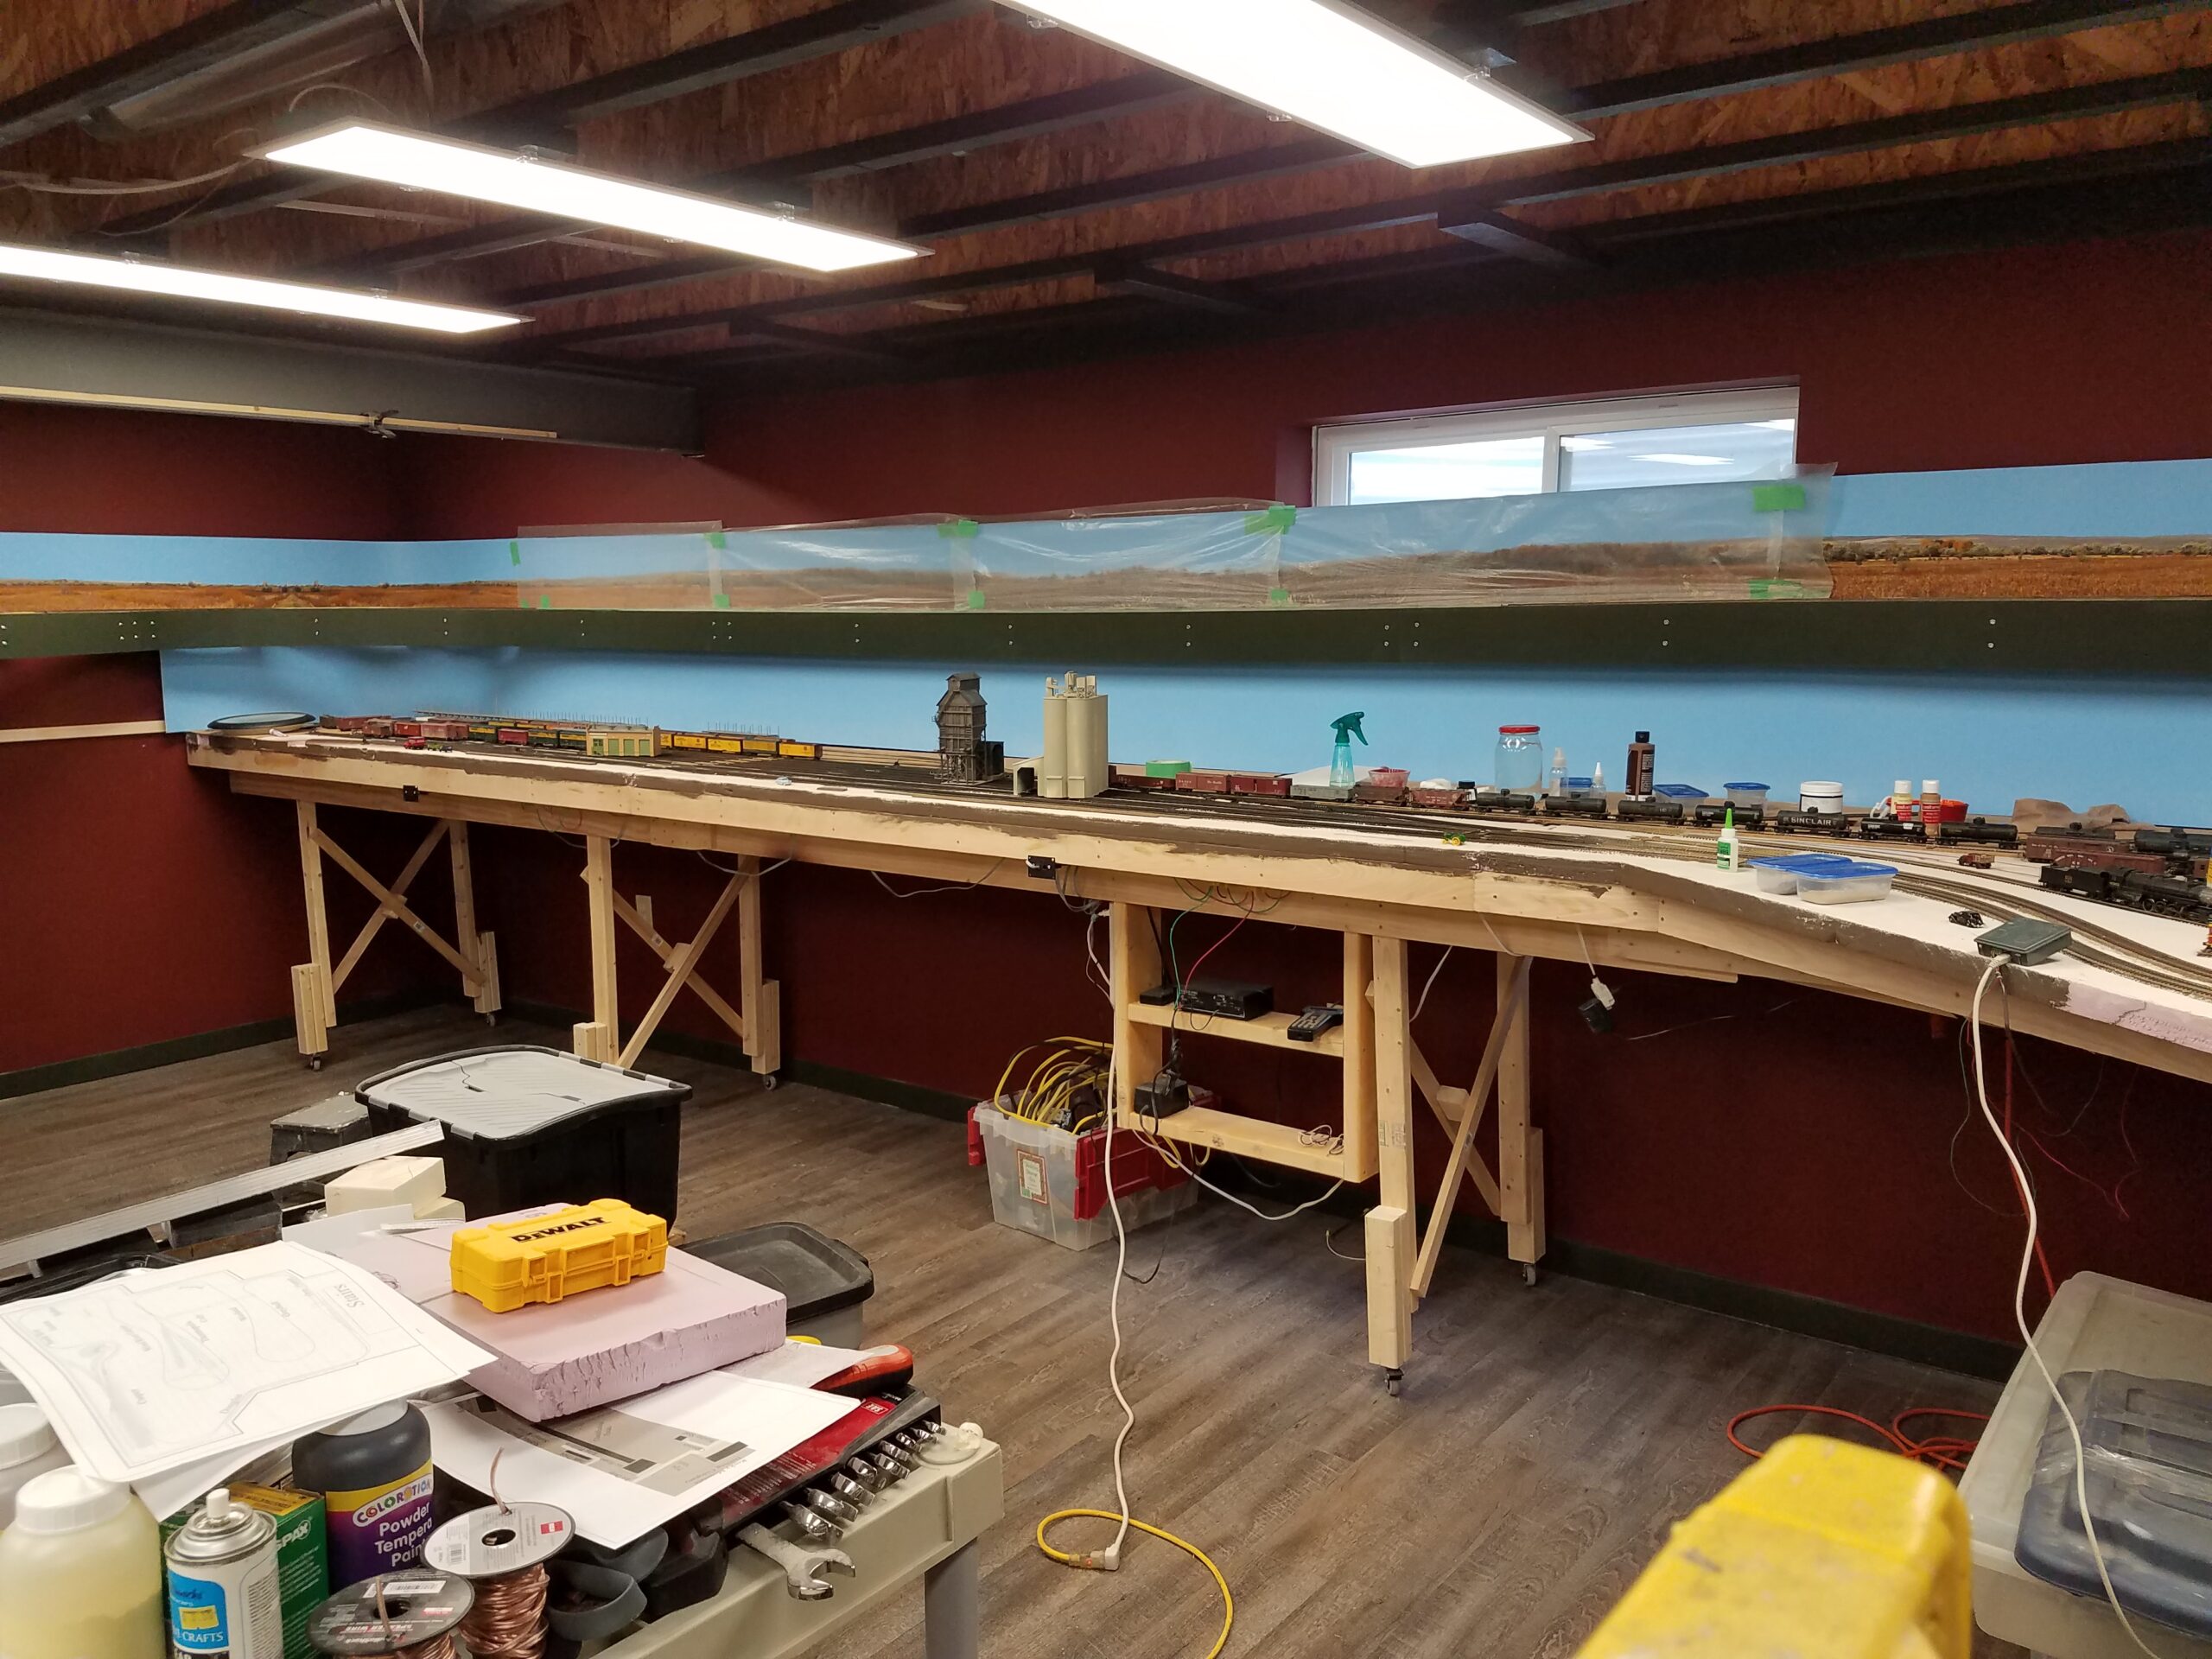
This past week has been spent on a variety of different tasks, including adding the Casper skyboard and starting on assembly of the tank car loading racks for the refinery that came in from Walthers this past week.
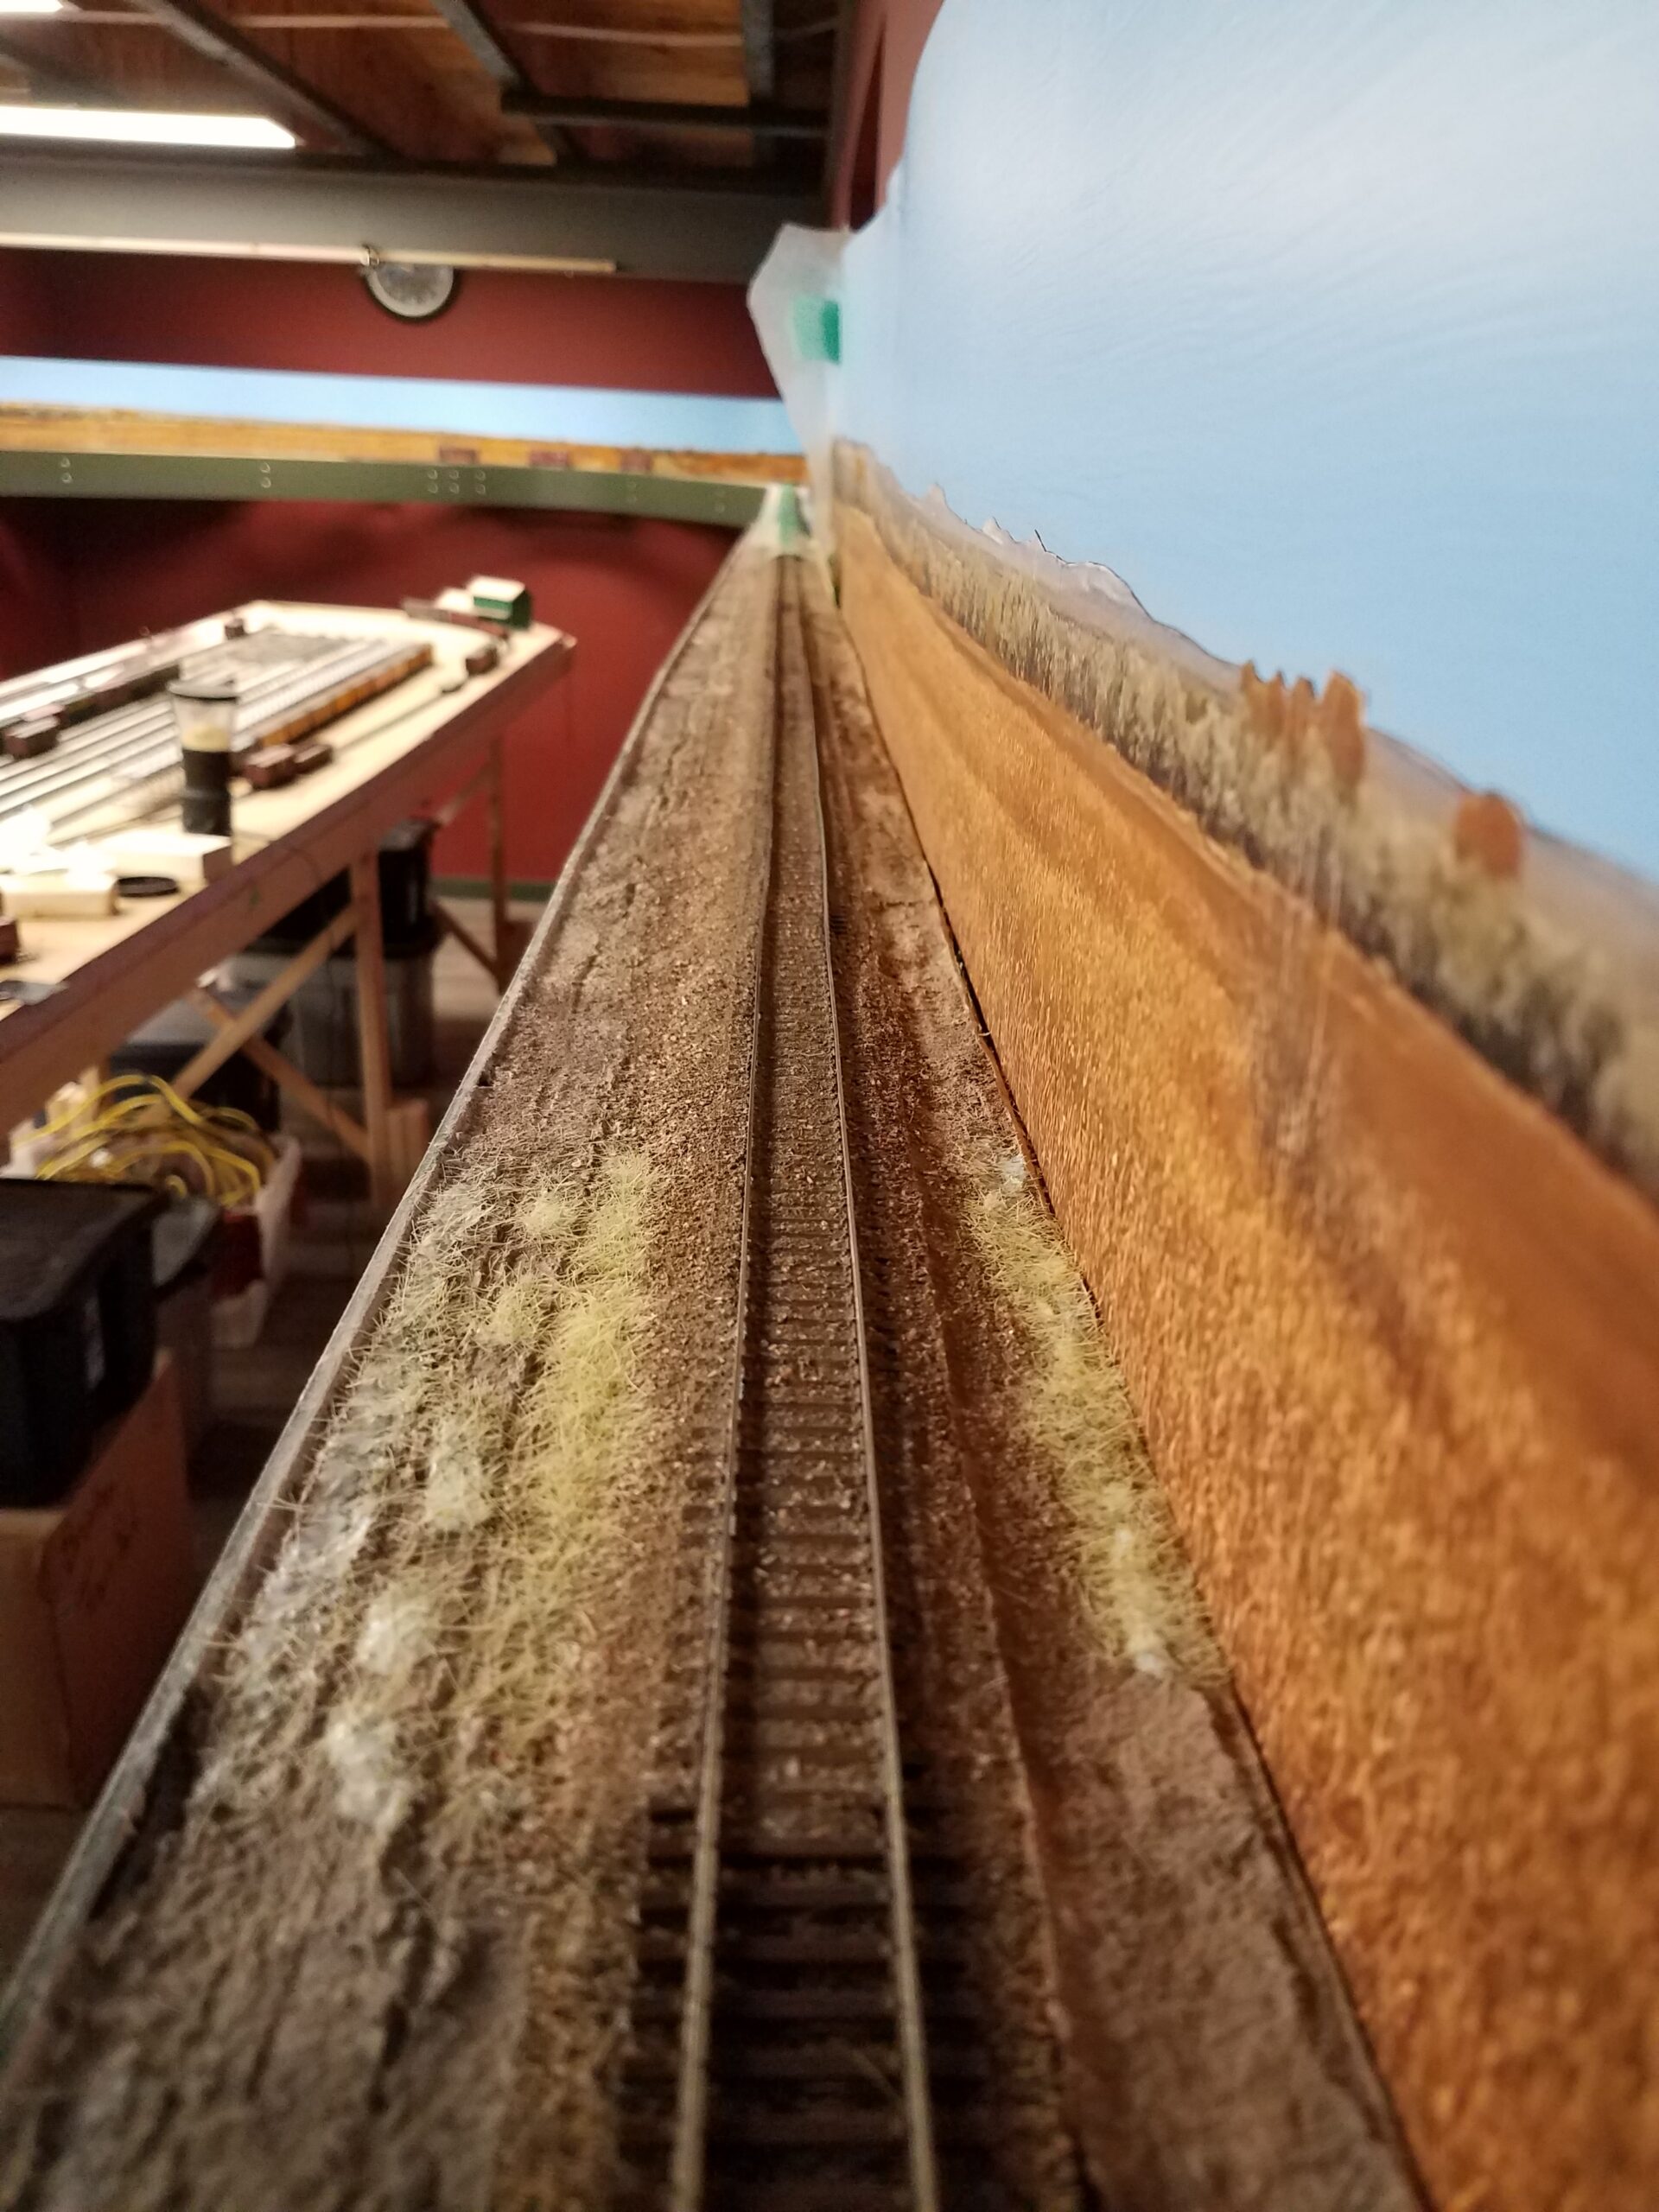
Here's a shot of the current state of the CNW line cropped so that only the scene shows (no fascia or wall above the backdrop).

As you might imagine, the Casper skyboard took most of the time. Here's a few shots showing the installation process.
First I had to mount the support frame.

I reused the skyboard from the previous layout in New Jersey. First I cut it to the new height - 12 3/4 inches, then installation could begin. Here the roll of styrene is positioned and ready to start.

Juying helped out as we got started actually attaching the skyboard to the wall.

The backdrop tucks up against the bottom of the CNW benchwork, and we learned very quickly that it was much easier to install with the fascia off, since the fascia hangs down below the benchwork about an inch and a half. Here the first piece of fascia has been removed and we're progressing down the wall.

The next day we removed more fascia and continued backdrop installation.

I was really careful with the heavy roll of styrene as I went past the icing platform location. I had a recurring vision of a repeat of the roundhouse debacle if I wasn't very careful. Fortunately, there was no disaster.
By the end of the day the backdrop was completely installed and fascia was reinstalled as well.

Then, just to see how it would look, I pushed Casper into position in the corner.
 Casper is usually out in the middle of the room, so it's kinda different to see it pushed back into its final position. It leaves a lot of open floorspace!
And I also got started on the loading racks. I'm following more of an assembly line process with this batch of kits - seven in all to be assembled. I'm going to assemble them into three-kit sections before making the whole thing one big rack on the layout.
Here's a veritable forest of stands - enough for all seven kits.

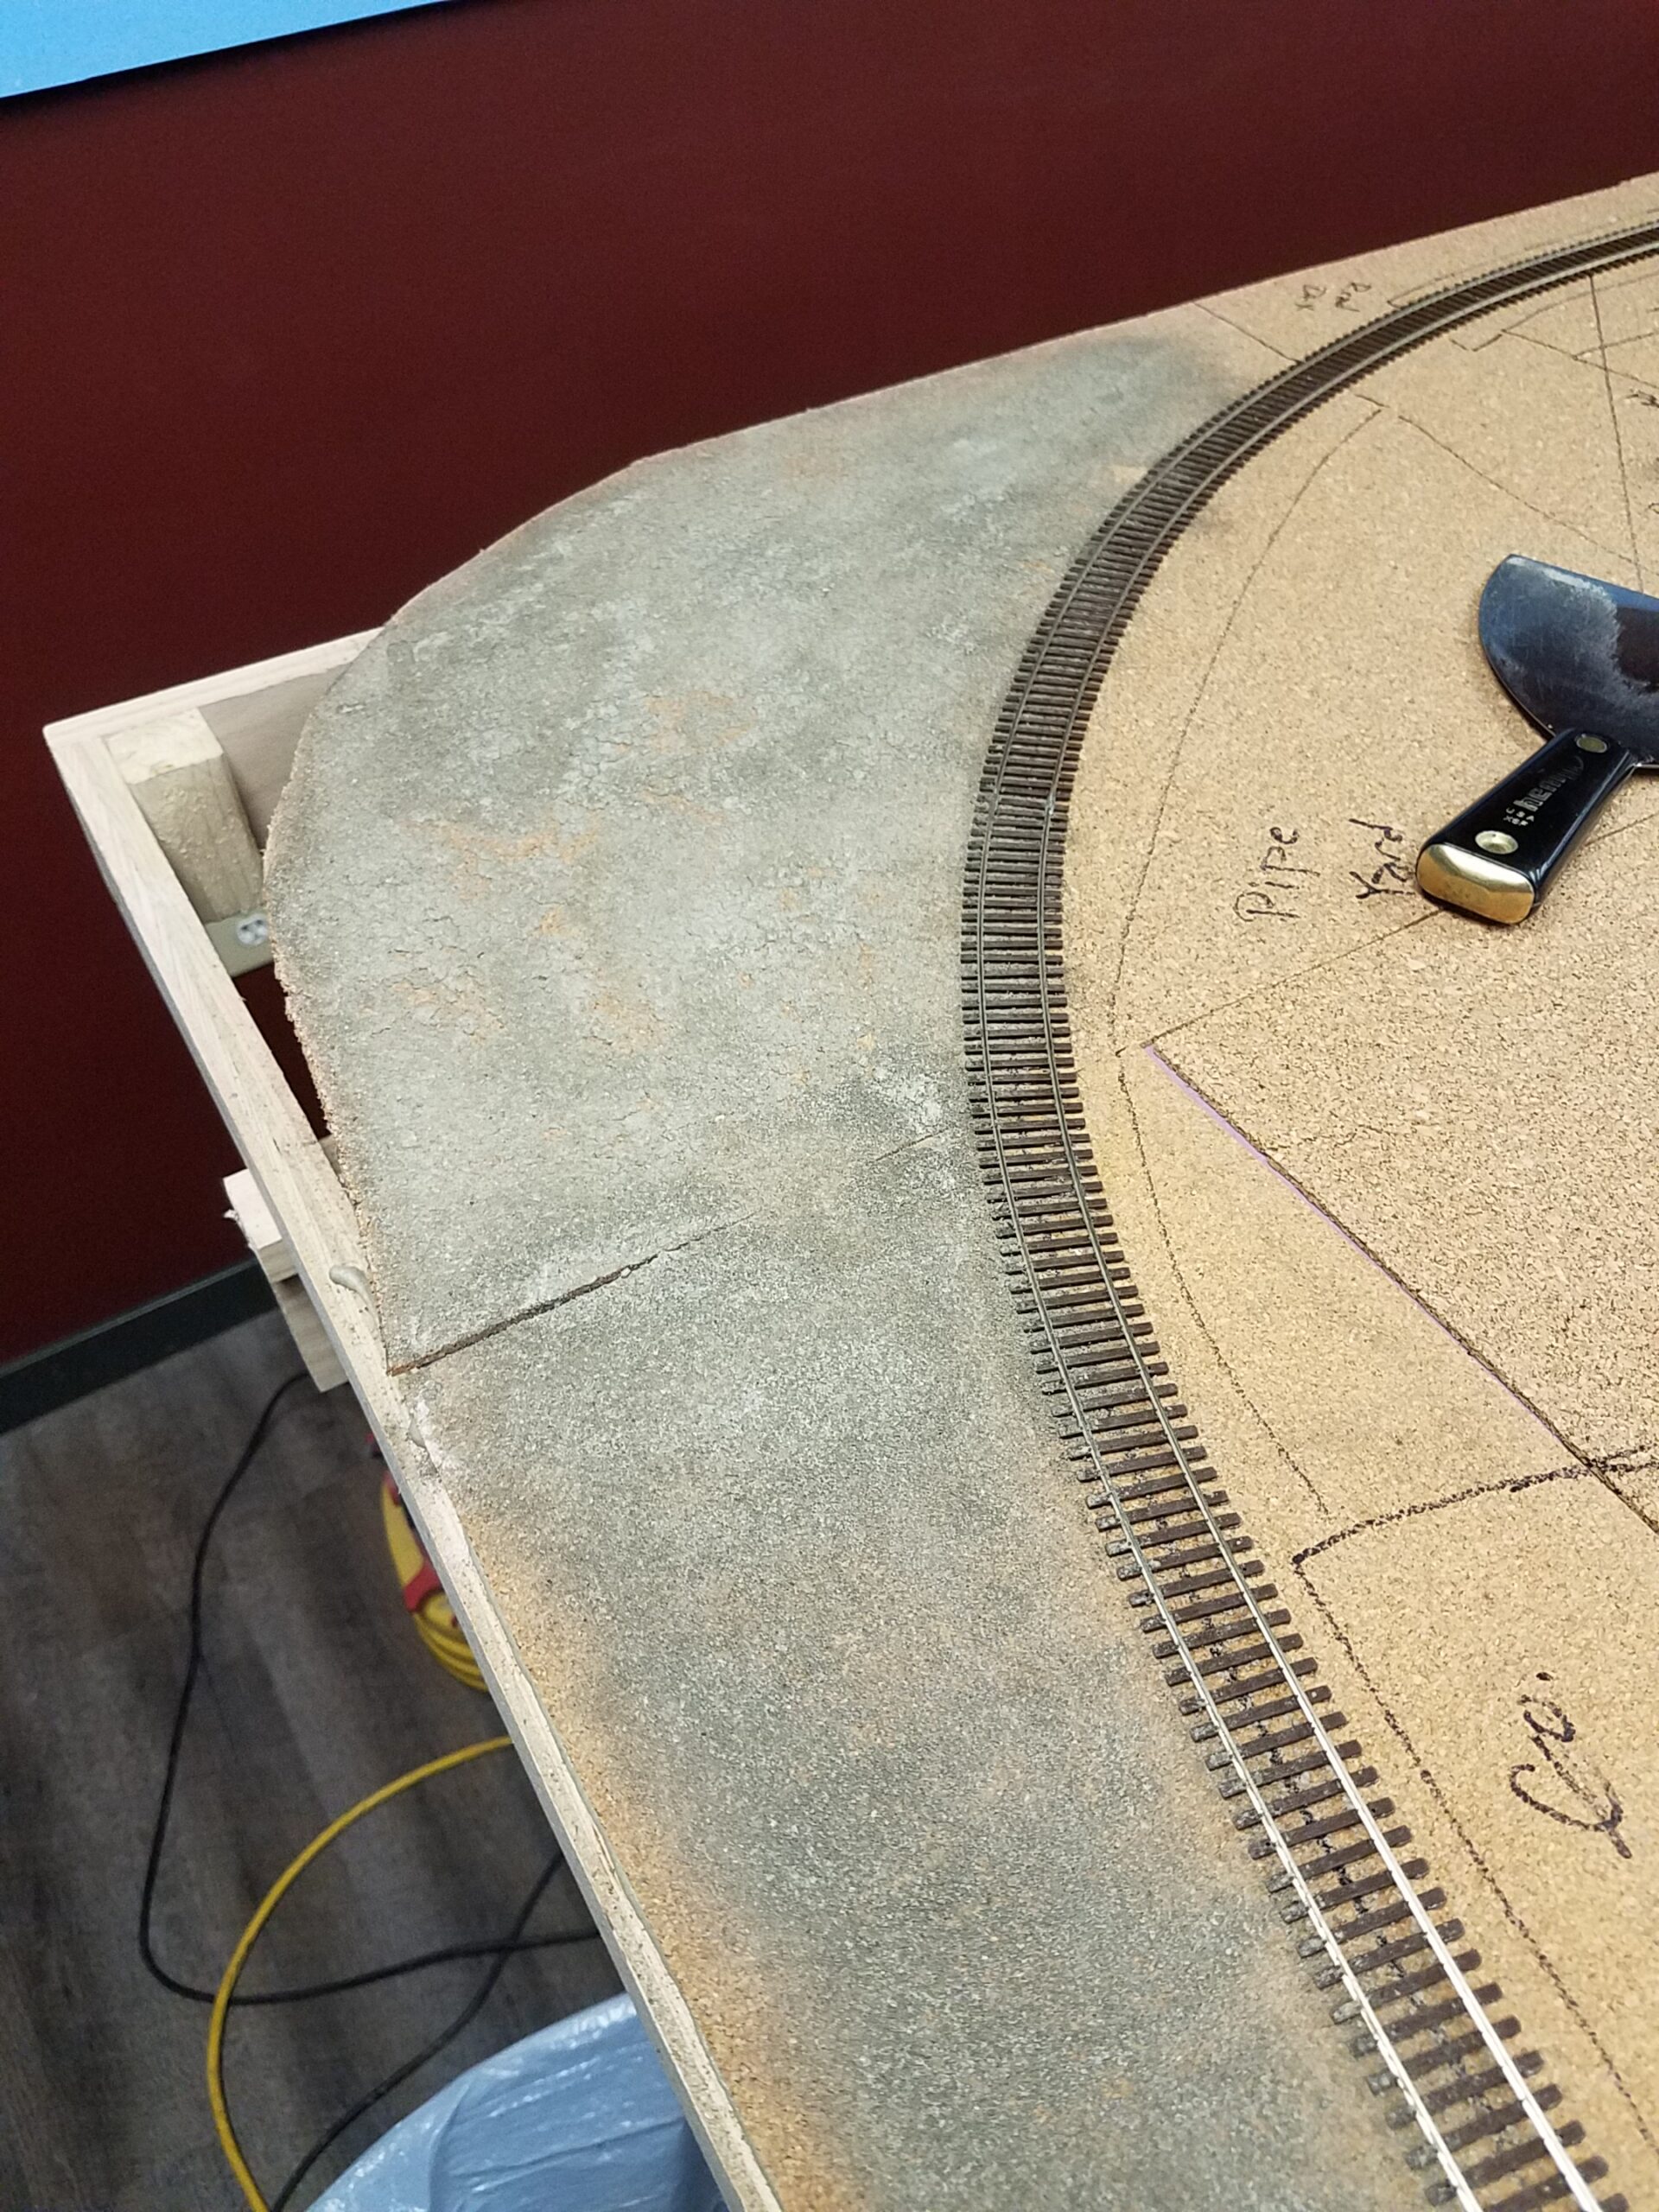
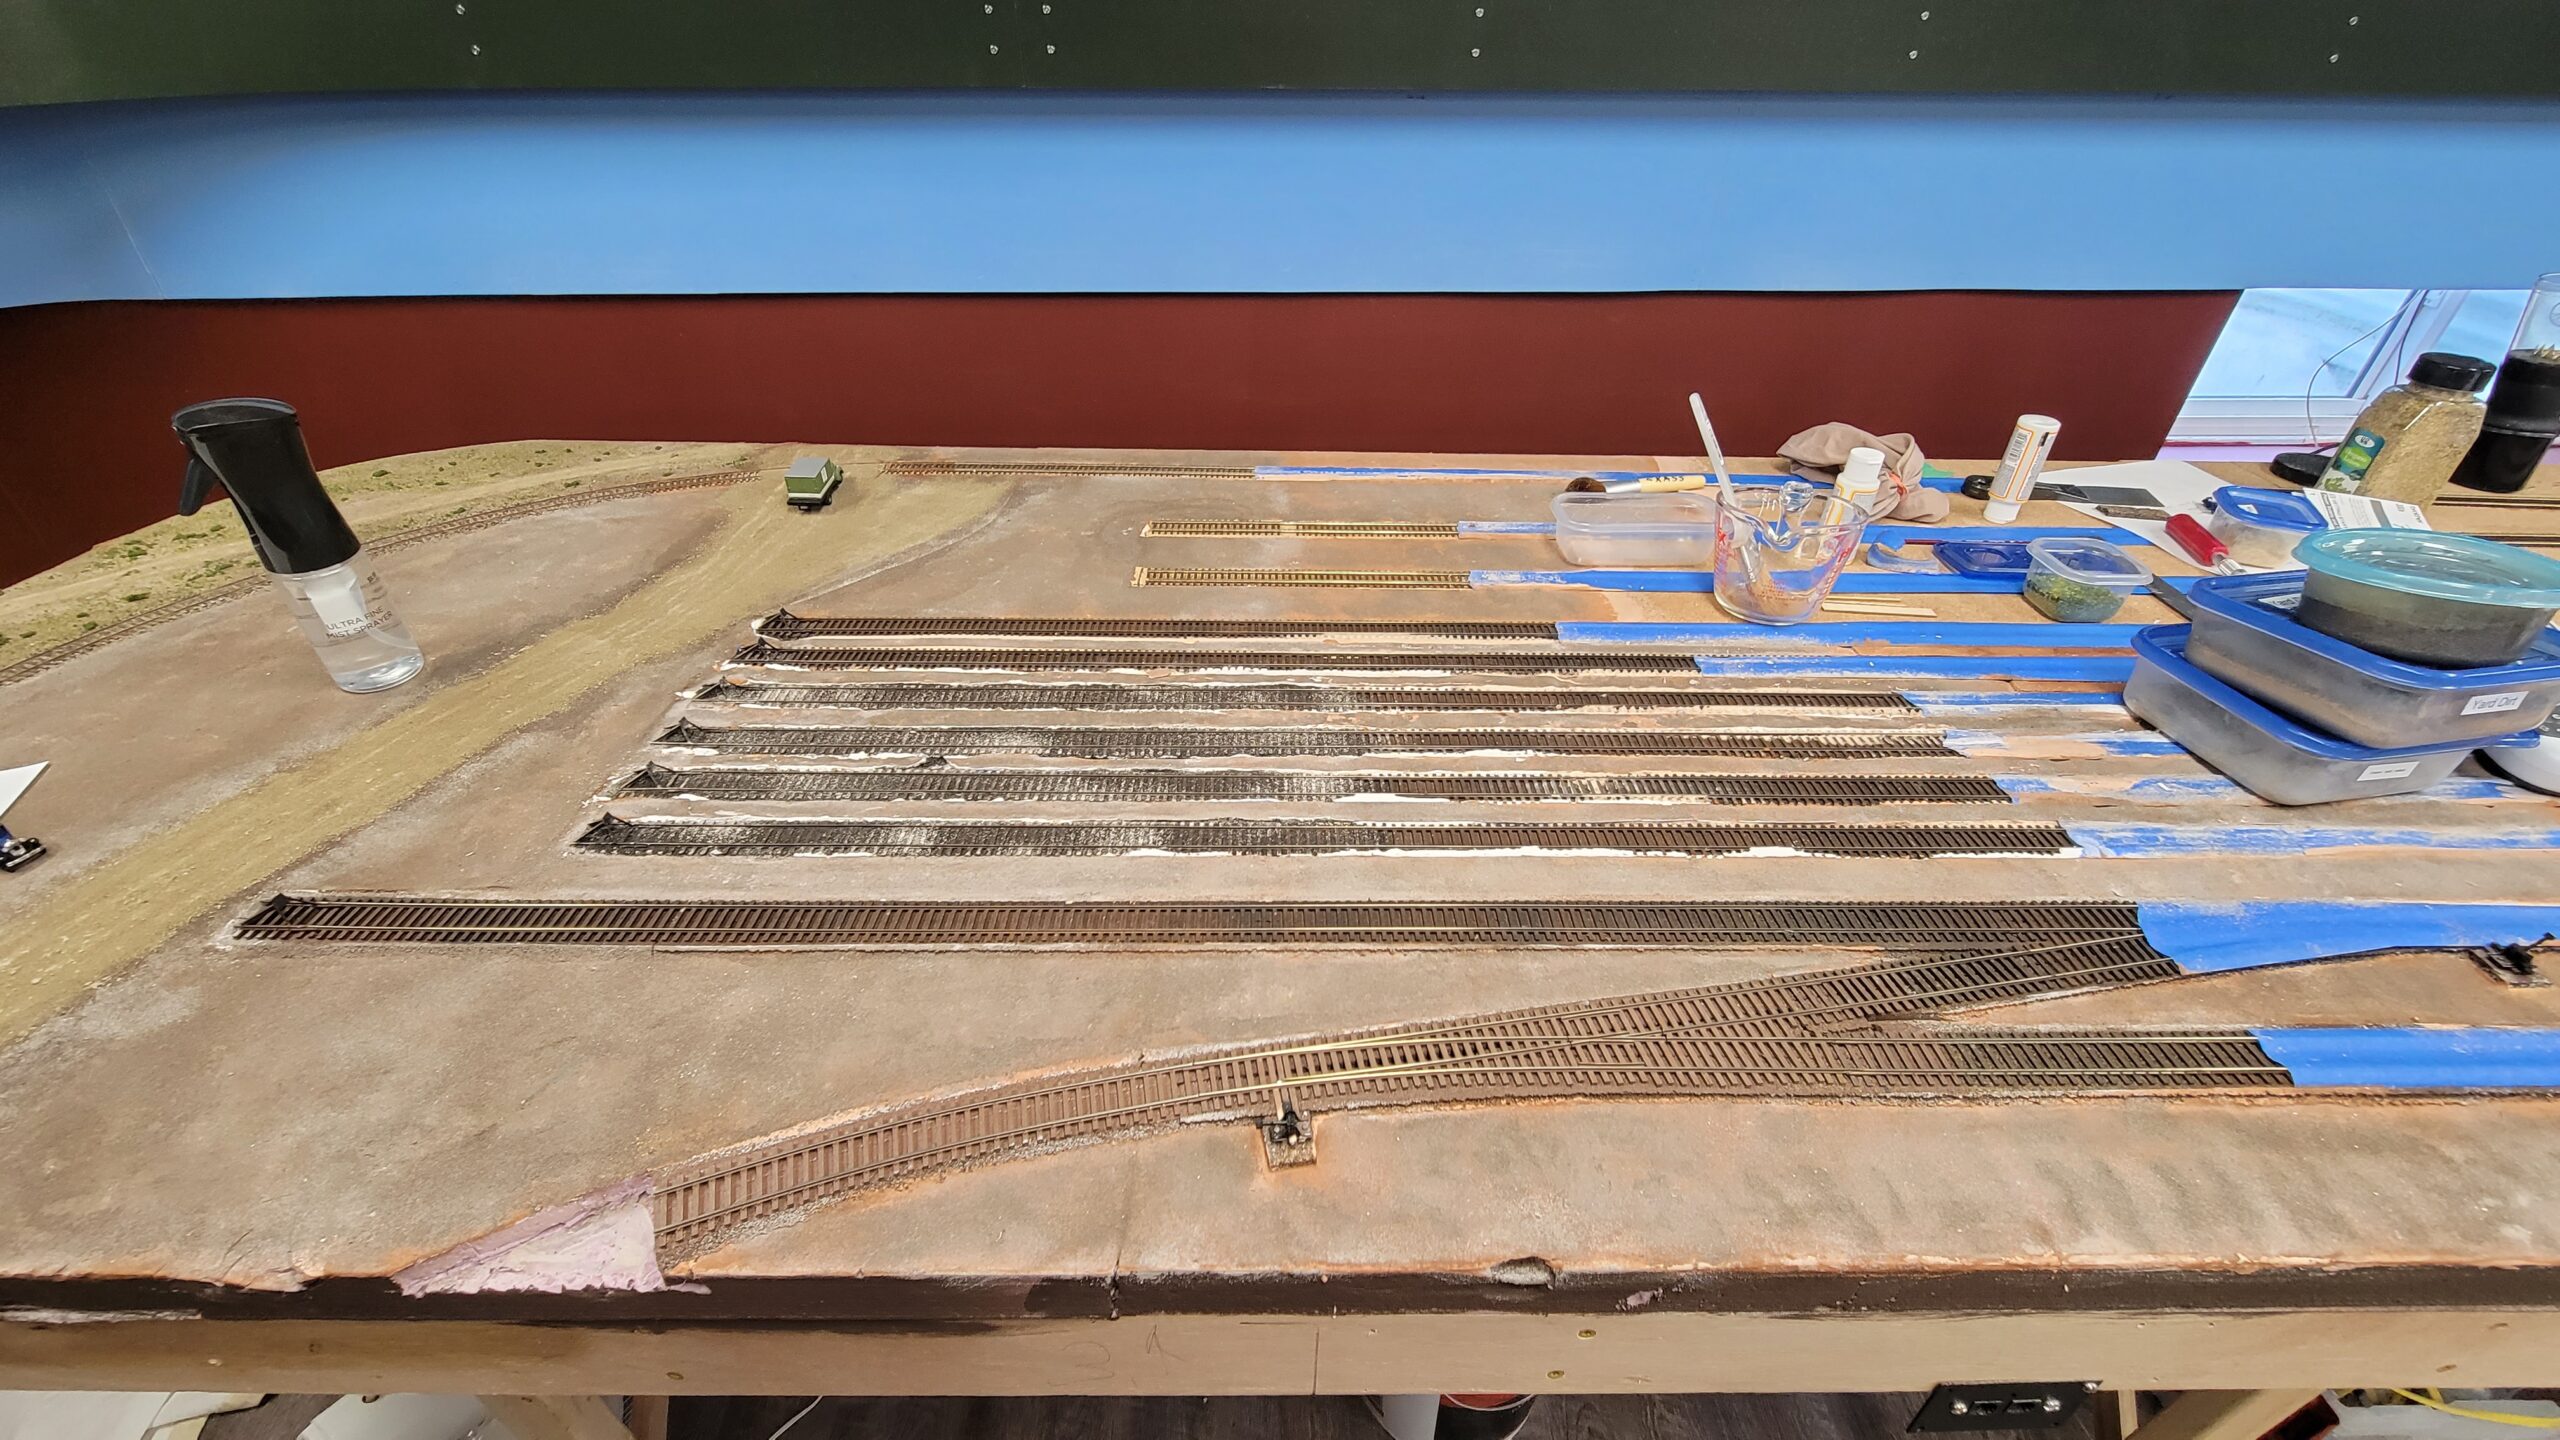
Yesterday I started experimenting with ground cover for Casper yard. You might remember my first (failed) attempt, when I tried to ballast the classification tracks in 2018:
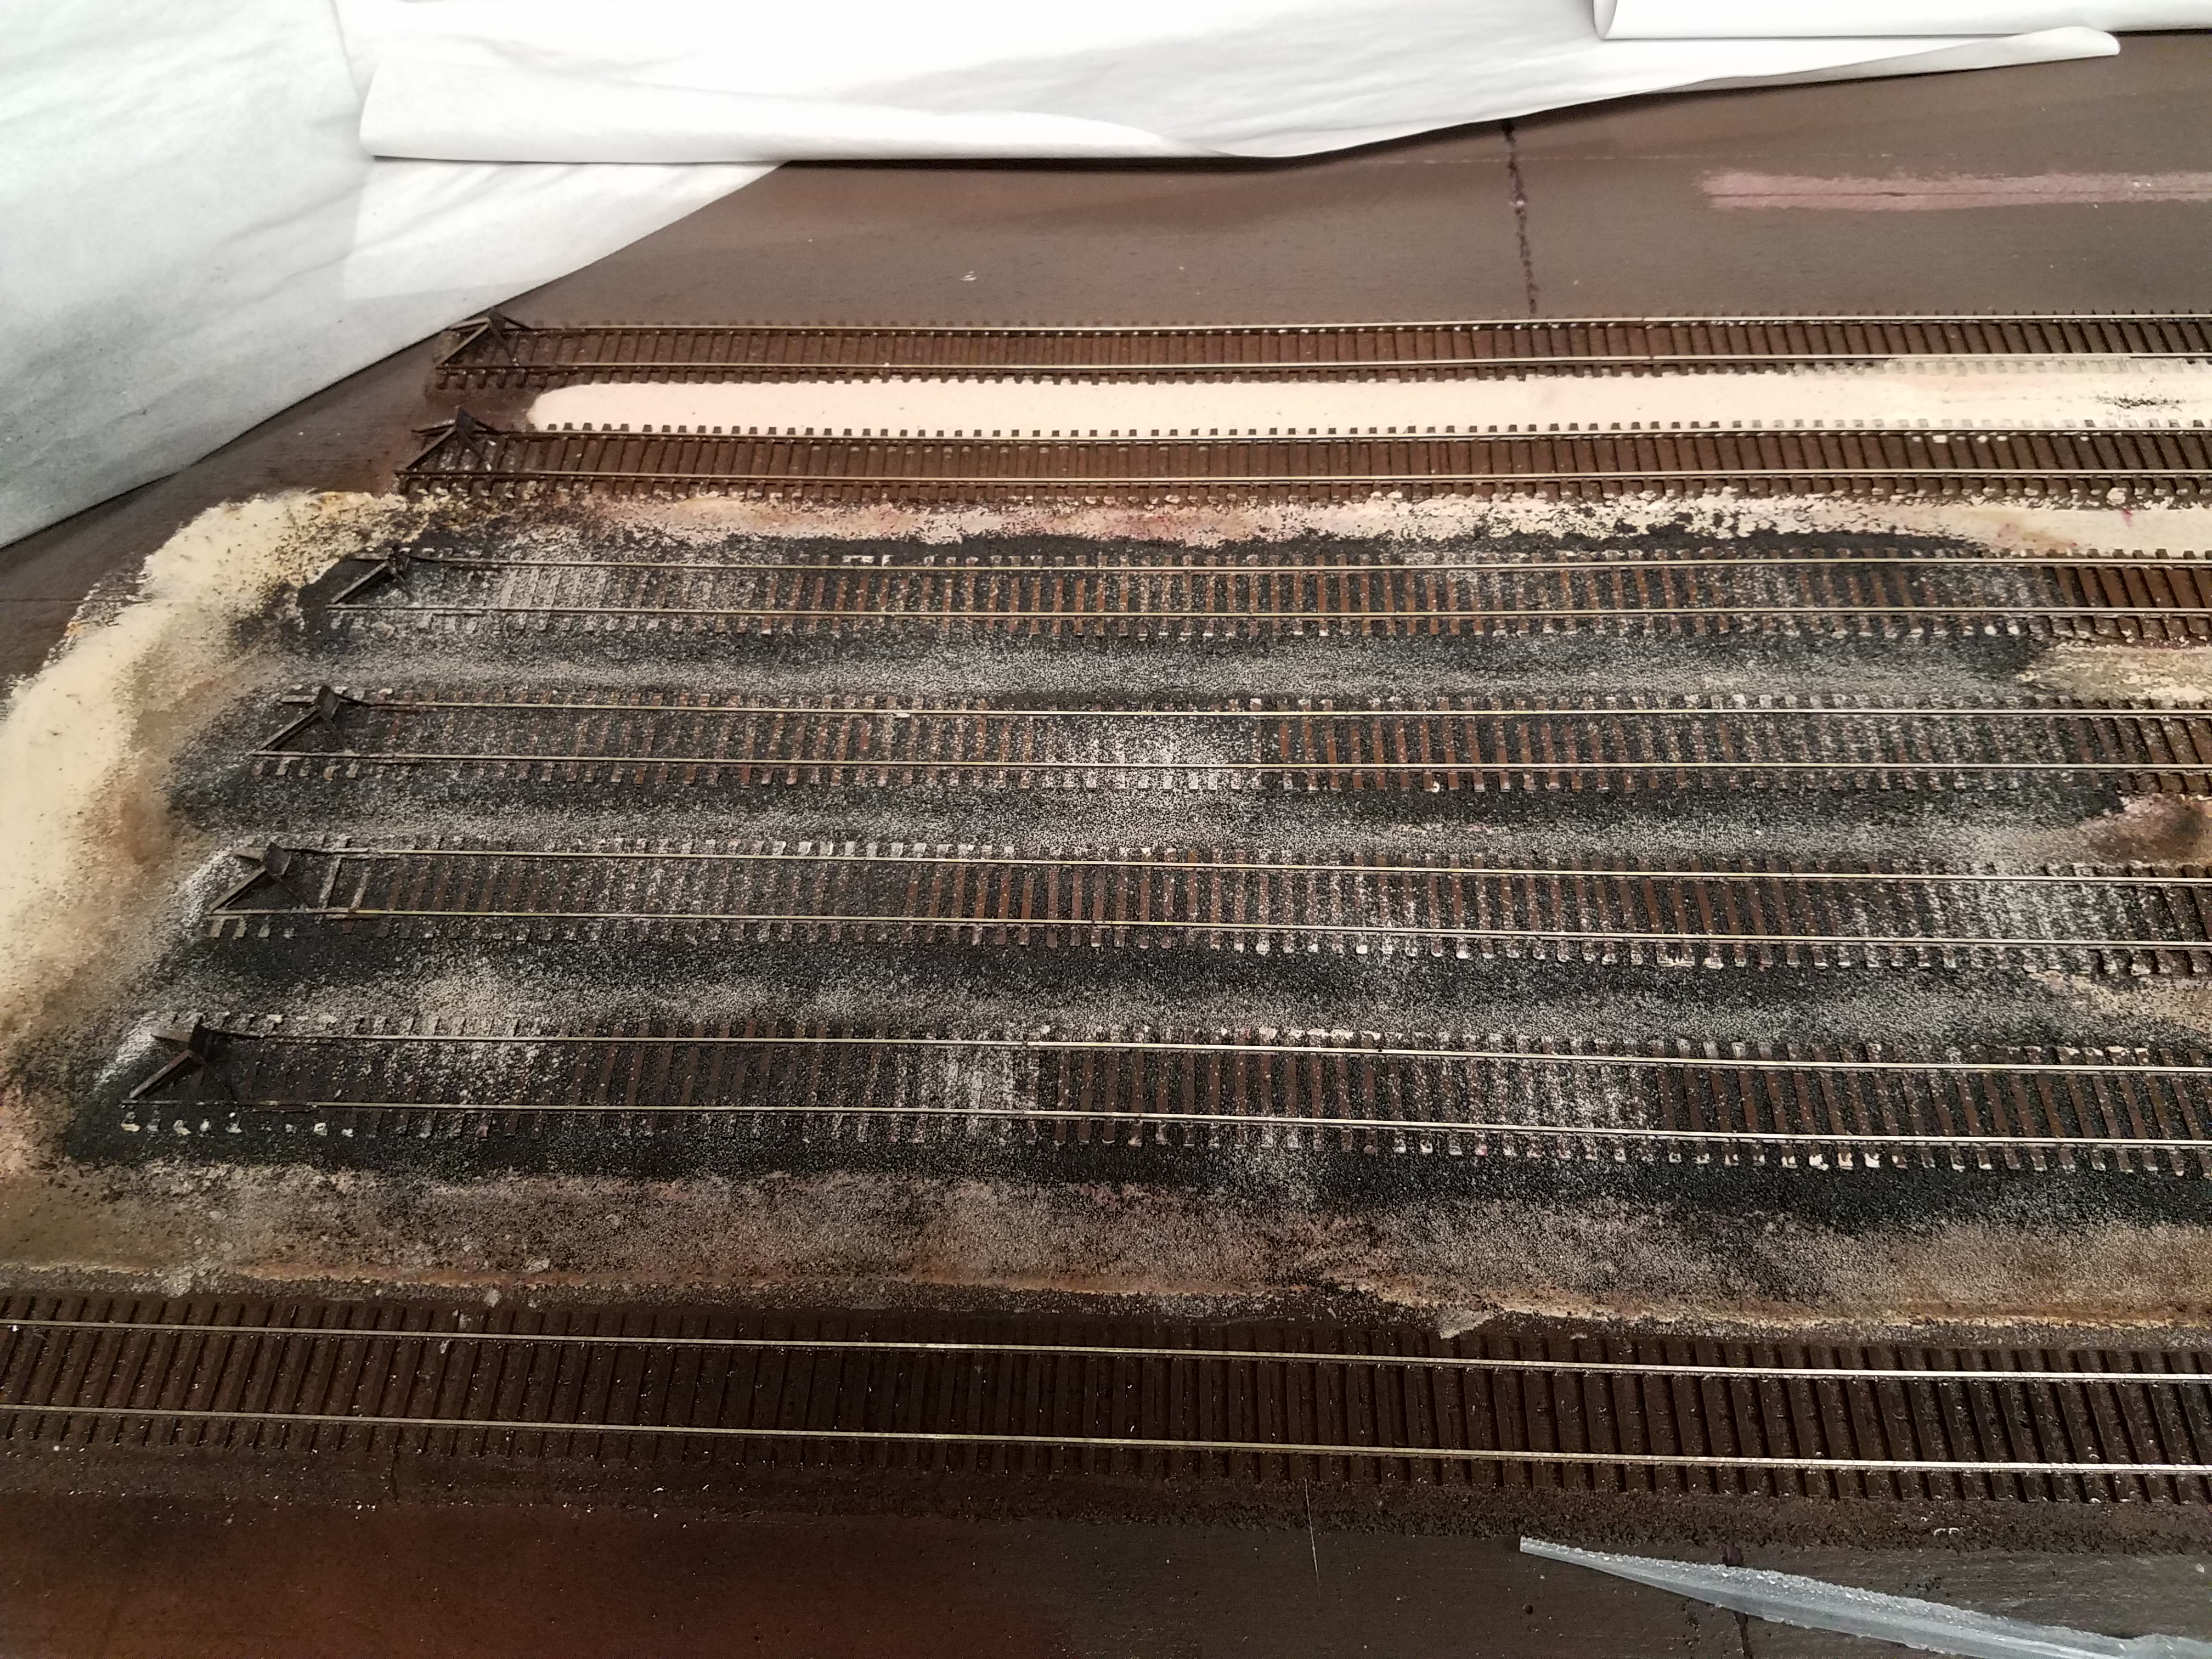
This time I'm taking a different approach, similar to how I'm ballasting the CNW line above Casper.
First I'm putting down a basic layer of my sifted dirt. It's composed of real dirt, dry wallpaper paste and a bit of black tempera paint to "dingy" it up a bit, as if steam loco soot and ash have been ground into the area for decades. Here it is after it's been laid down, before wetting to activate the wallpaper paste:
 Okay, it looks like dirt. I mix the yard dirt like this:
- Five tablespoons "fine" dirt (the particles that goes through a flour sifter but not a fine sifter)
- Five tablespoons "dust" (the stuff that makes it through the fine sifter)
- Two tablespoons powdered wallpaper paste
- One half teaspoon black powdered tempera paint (this stuff goes a long ways!)
Then I soaked it with water from a fine mister held a decent distance above the dirt, so that the mist just sort of floats down onto the dirt. It's still wet in this picture.

See the small cratering? That's because my mister chose this time to kind of "thpst-st-st-st" out the water, with a combination of fine mist and larger droplets, kind of like a Windex sprayer does. I played with it a bit and got it back to a fine mist only, but the damage was done. I think I'll be able to dust on a second layer of dirt in the cratered areas to fix them. I'll find out today.
I went down and took a look at the dirt I put down last night. Didn't go so well. This morning I found this.
Not exactly what I was looking for, so out came a putty knife and I scraped away all the loose stuff. I was left with this.
So I'm thinking I need to put down thinner layers, since the thicker ones crack as they dry. The problem - the dirt almost pours through the coarse sifter, which is the one I used to sift the dirt in the first place. But I tried to put down a thinner layer, using, of all things, a salt shaker. You can see where I'm working on the next small corner at the bottom of the picture.
With that layer down, I added a second layer a few minutes later. I'll leave this until tomorrow and see what sort of mess I have at that point.
Well, I gave up on the real dirt in Casper Yard. It looked OK in photos, but not so much in person. The dirt has a lot of clay, and when wetted the granules swell a little, then leave big cracks when drying. I'm not sure if you can tell here or not.

So I decided to bite the bullet and start over. First I scraped off all the dirt I could.
A friend who has an almost fully scenicked layout came over to show me how he does it.
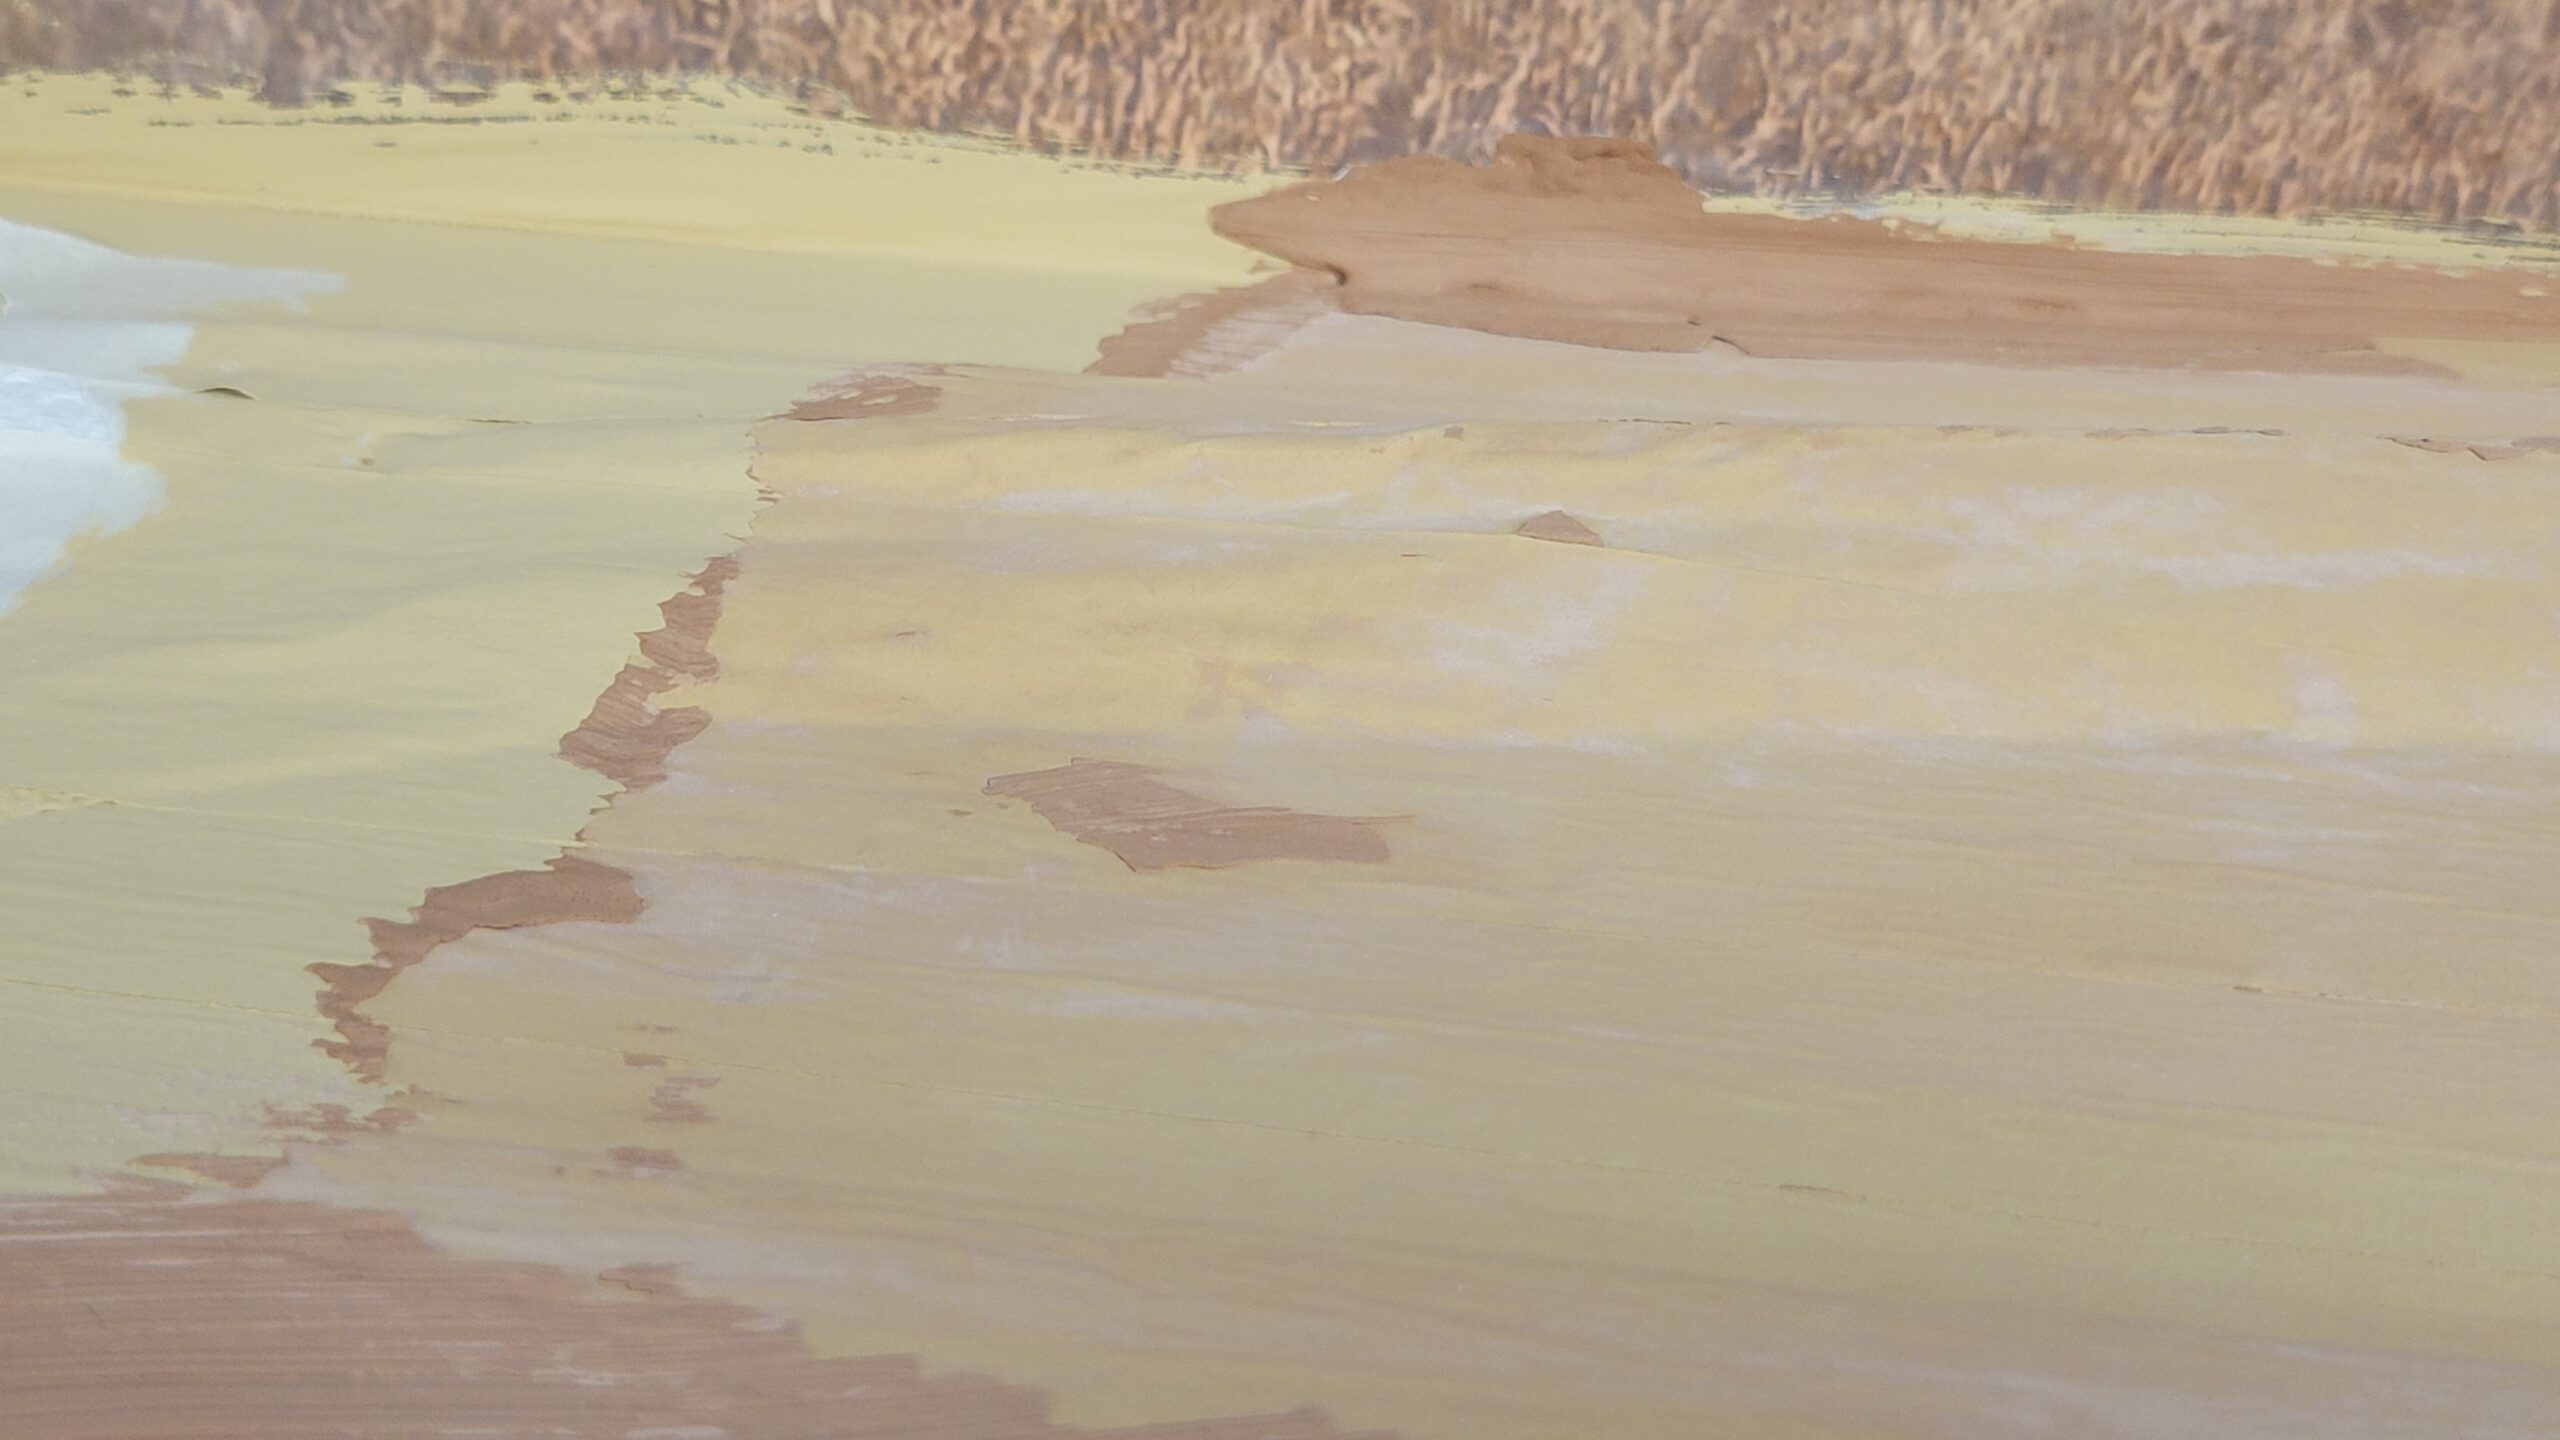
First he painted the area where the dirt was with a very thin plaster "soup."

Then he painted it with brown tempera paint to make sure the "dirt" layer wouldn't show through white where it might be a bit thin. His name is Kurt, by the way.
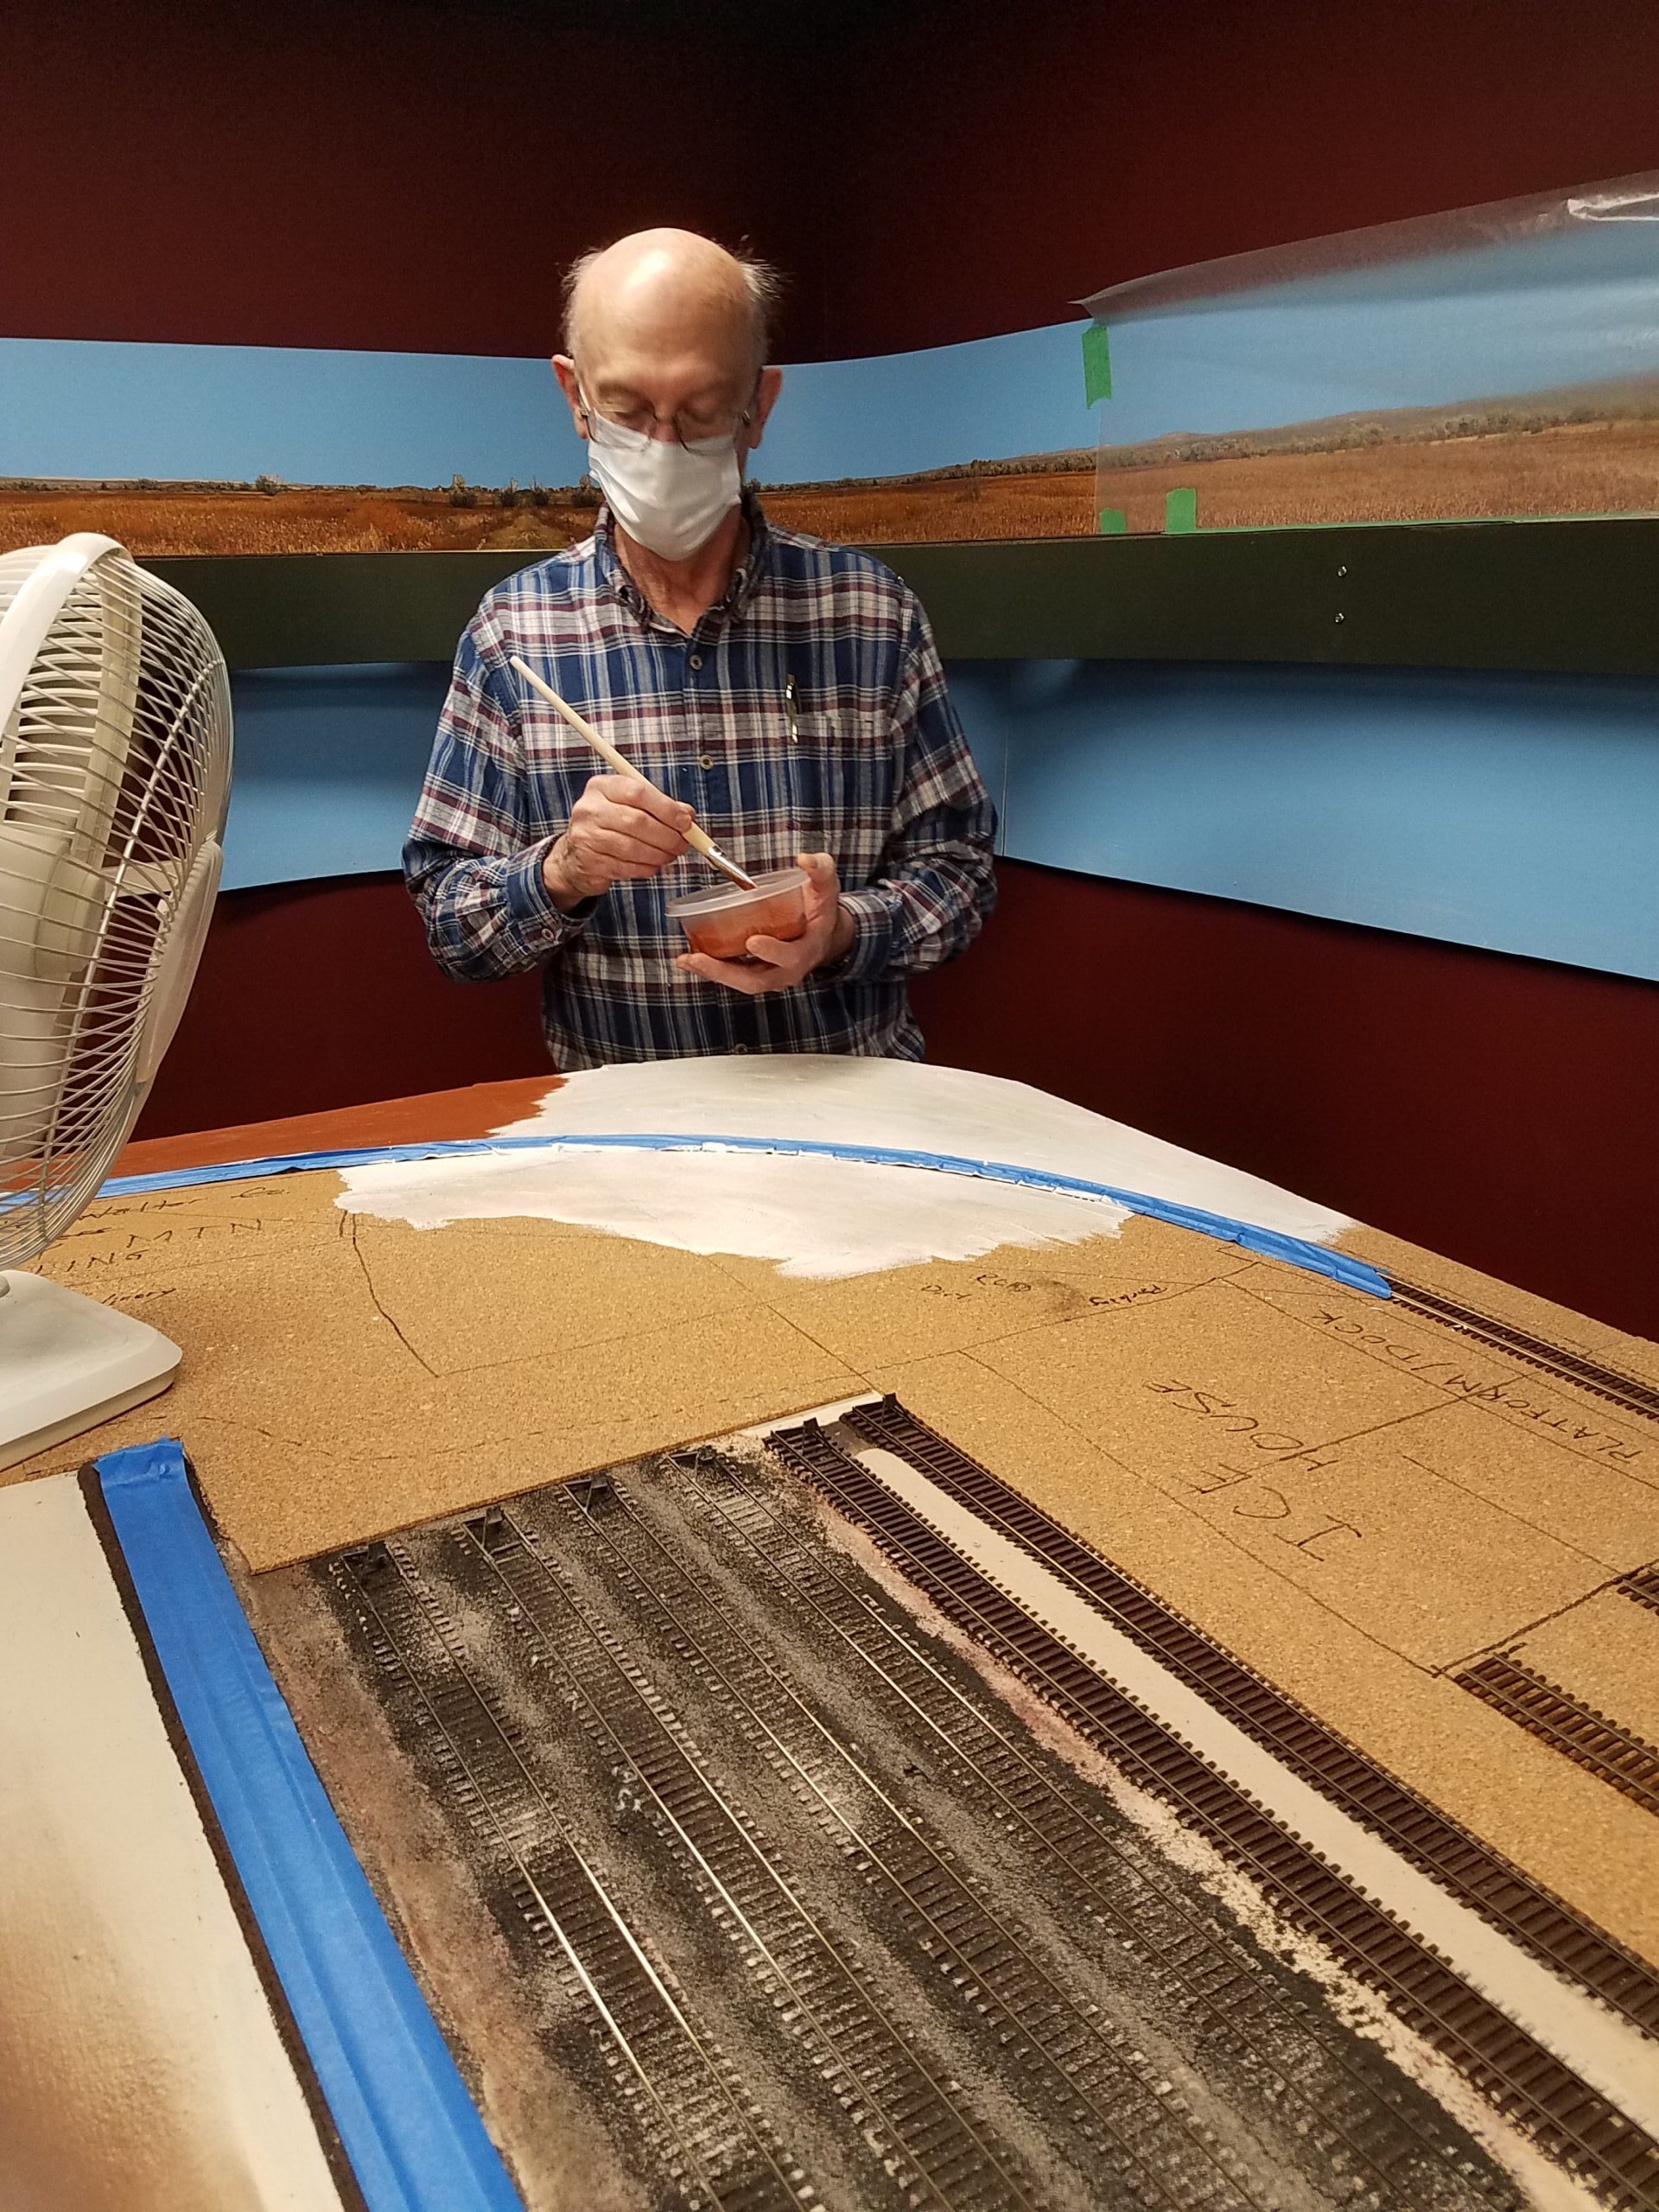
Then he sifted on the dirt, which is a mix of tempera paints with Plaster of Paris mixed in to act as an adhesive.

After that came a variety of greenery (including a variety of different products from several different suppliers), and the beginnings of a dirt road.

After drying overnight, it looked like this:

Over the next few days, when everything was Dry, I "improved" the dirt road by adding some of my sifted dust (at least that part is useful!) and sculpting it.
Here I've just sifted on the dirt and have yet to glue it in place. For that I used the old standby - diluted Modge Podge.

It looked like this yesterday after it was mostly dry, so I added quite a bit more dust after this shot was taken.

This morning I pushed a model truck back and forth over the road a bit to scrape in some tracks, and used a Brite-Boy to raise highlights in the wheel tracks and enhance the dry, dusty look. This is how it looks now.

That little section of scenery wasn't everything. I finished ballasting the new section of CNW on the shelf over Casper, and removed the wax paper protecting the backdrop. The new ballast is at the far end of this picture.

I still need to add ground cover and static grass in that area, then scenery will be complete on the shelf, and I can start on the curves on the far wall.
I also continued to make progress on the tank car loading racks. Here are some of the assembled units, all but the left two sans risers and spouts, in place between the loading tracks.

And finally, after about two years, I started repairing the area of the classification yard where I put the horrible ballast. Remember?
Hopefully in a few weeks this will look much better!
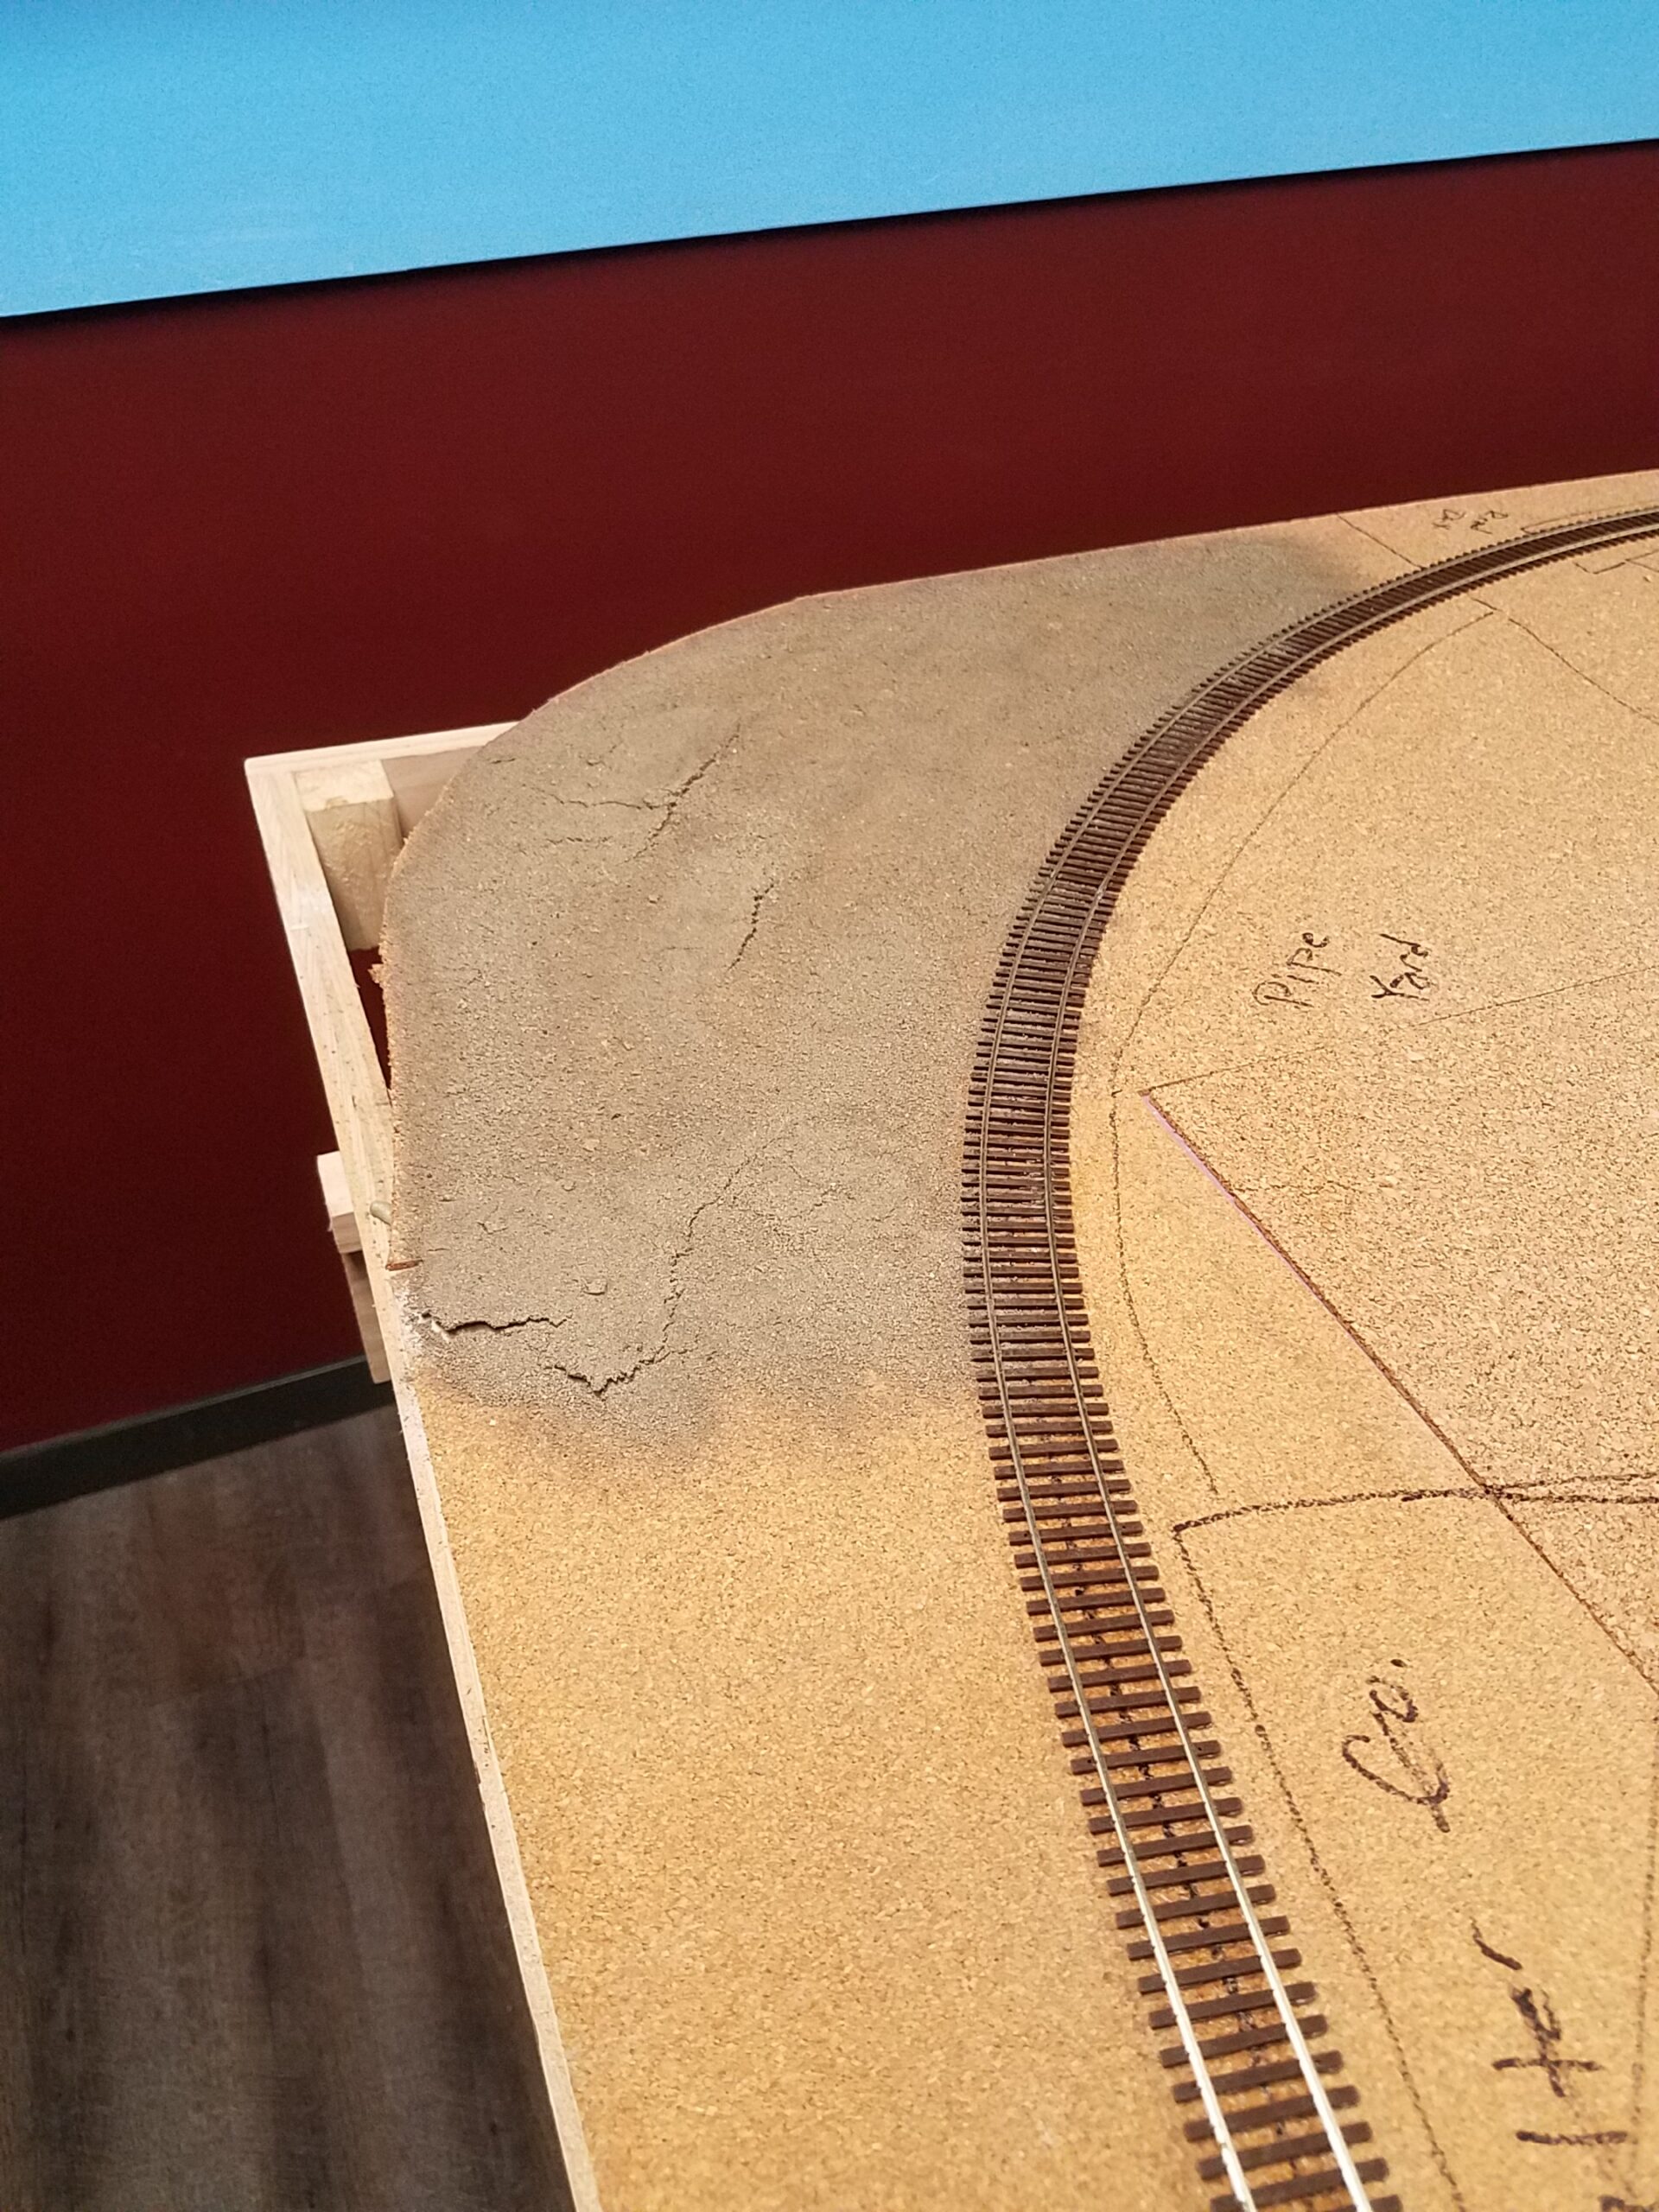
With the apparent success of the ground cover creation in the far back corner Casper yard, I decided to press on from there into the yard proper. It's a big yard, so it's going to take some time to complete, but I did get started. Here's the east end of the yard, where I applied a thin plaster coat a few days ago. I also filled in the deep areas between the classification tracks at this end of the layout.

Then I painted the plaster.
 Hmmm... I think the paint in this section is a bit too dark. It may be alright near the engine terminal, where a lot more soot and cinders would be ground into the dirt over the years, but out here it shouldn't be quite so dark maybe.
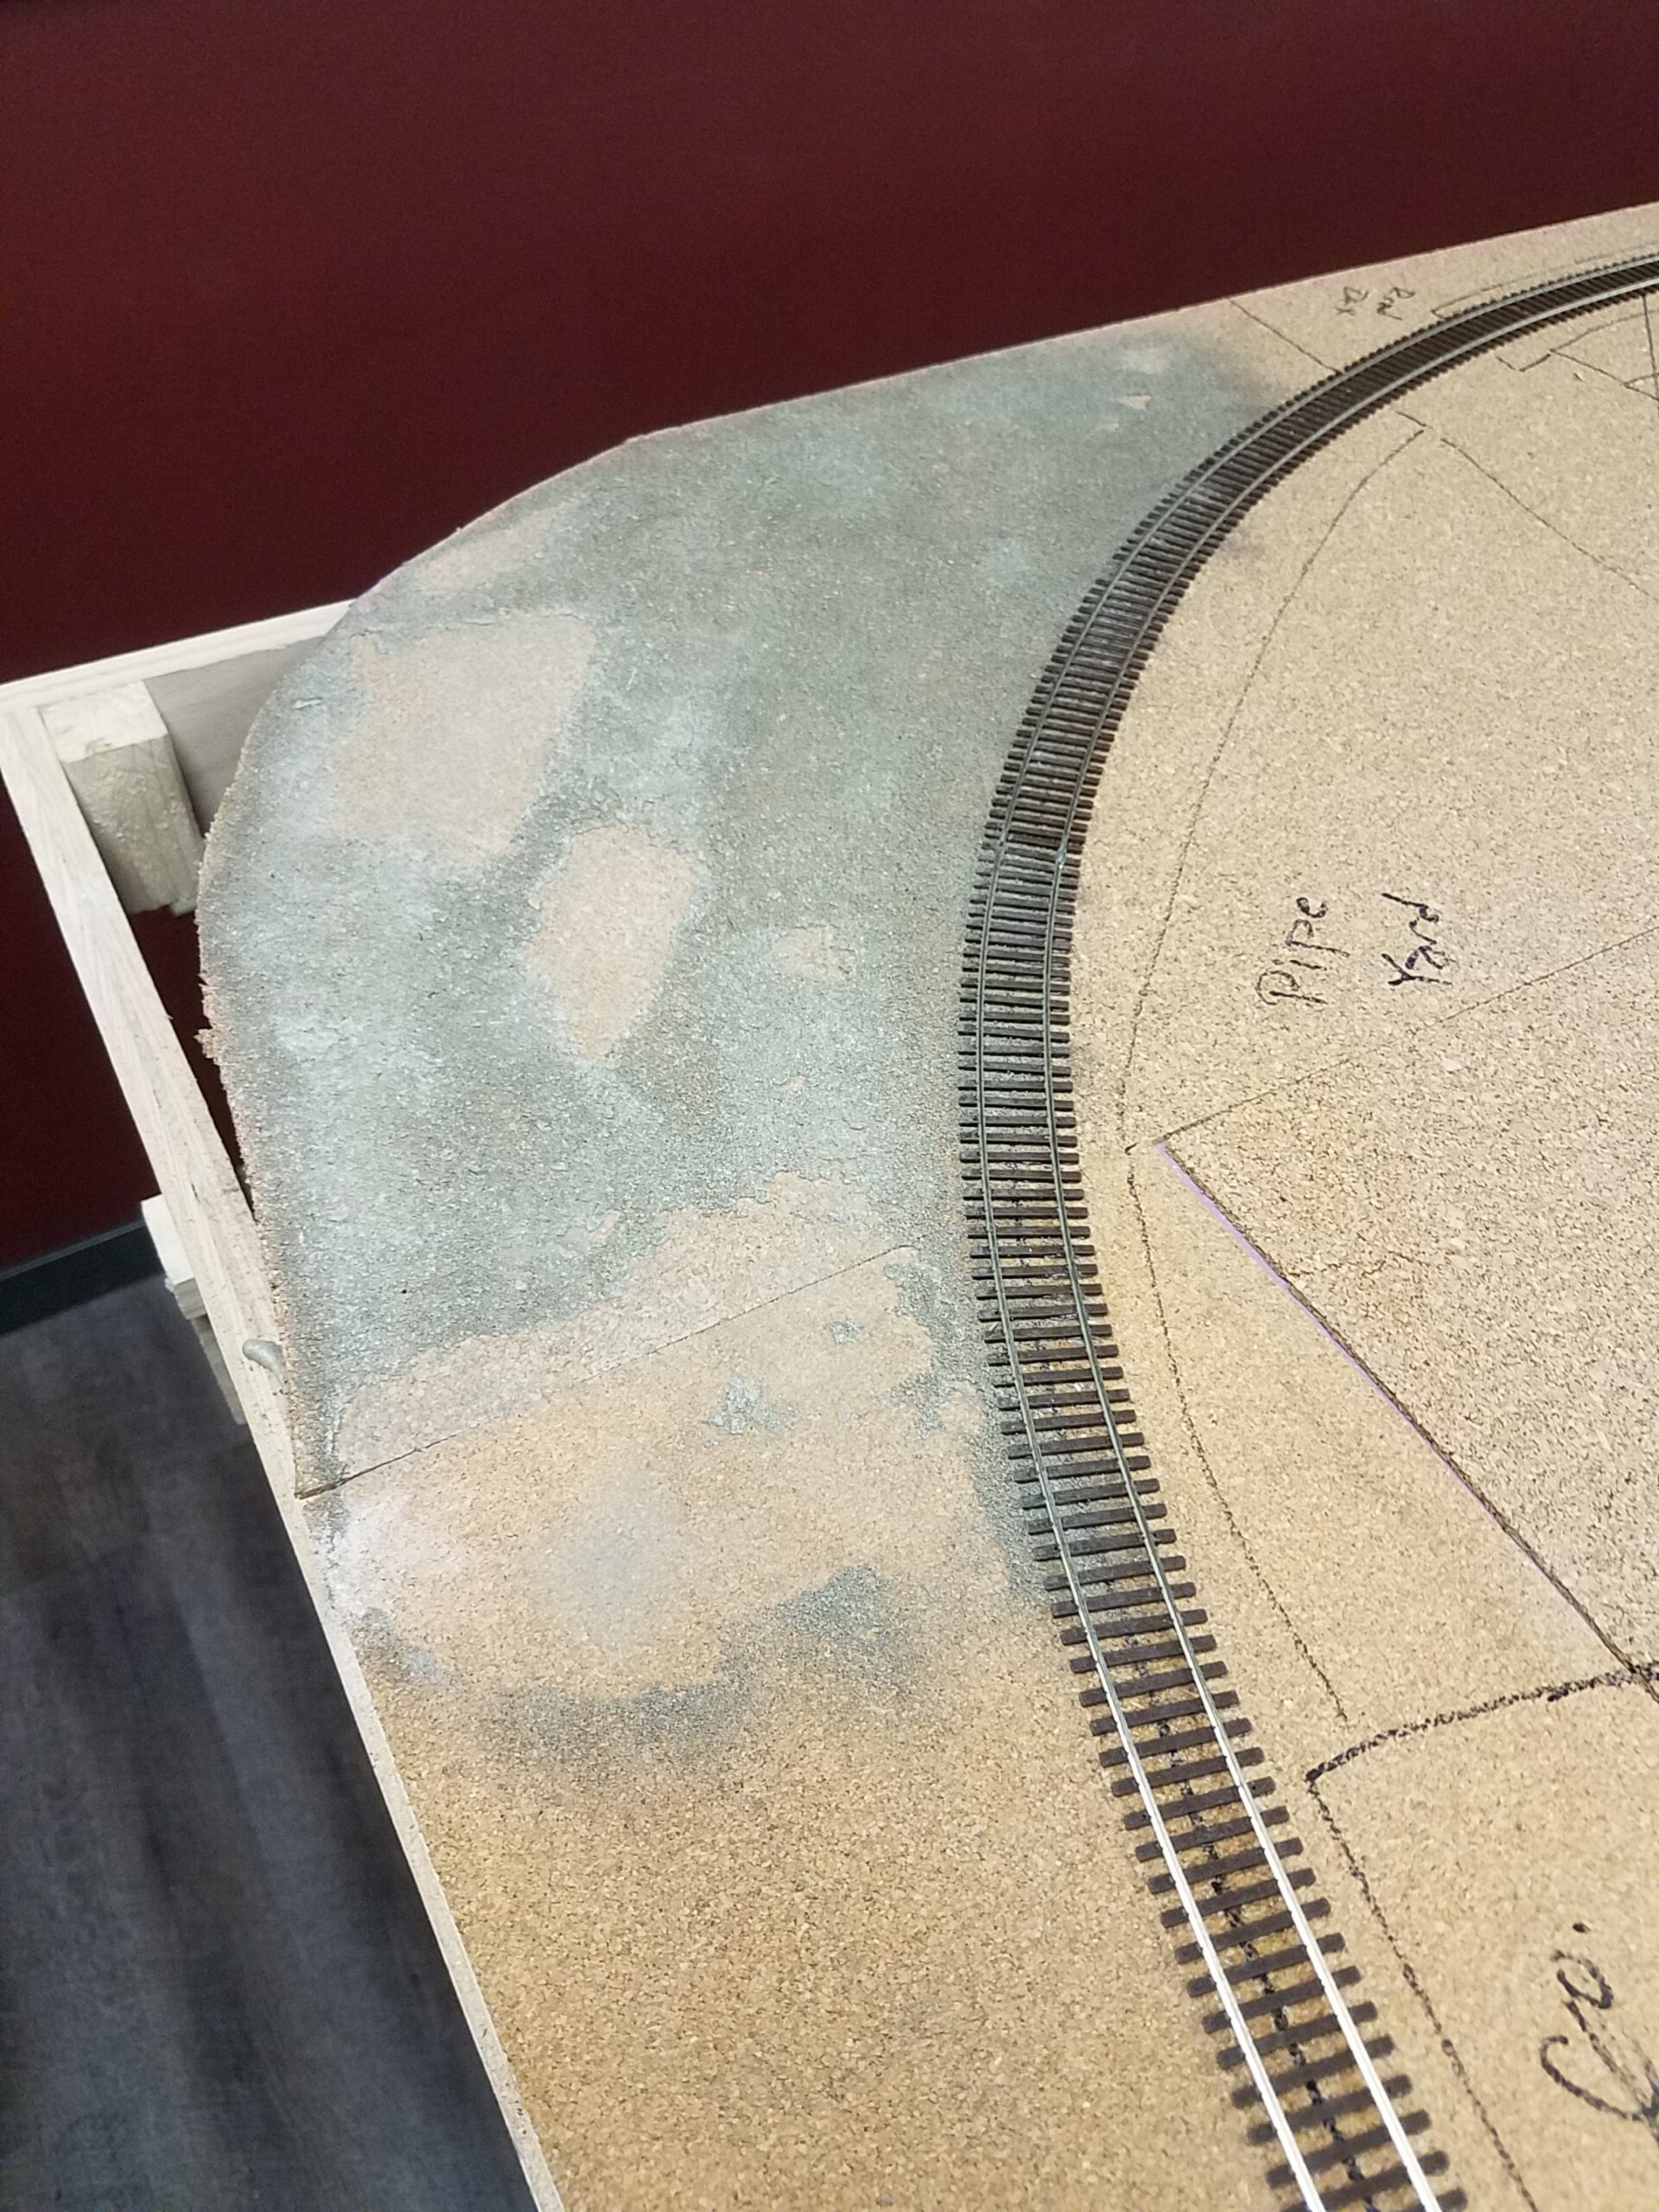
On the ninth I extended the skim coat further, and this time tinted it so it wouldn't be such a stark white.

After a couple of days spent on the tank car loading rack, I came back to the yard and painted the newly-placed plaster. I also recoated the dark paint with this lighter coat.

Last night I sifted on the dirt.

Now I'm not sure how to proceed in this area. Lots of details to be created, including the pipe yard for the drilling company, the building(s) for the company itself, and the ice house needs to be built. I might go ahead and build the grade crossings and dirt roads in this area, and leave all the other stuff for later. But what little bit of greenery and grass and what-not that will be in this area has to wait for all the other stuff to be built.
Here's the loading rack as of a few days ago.

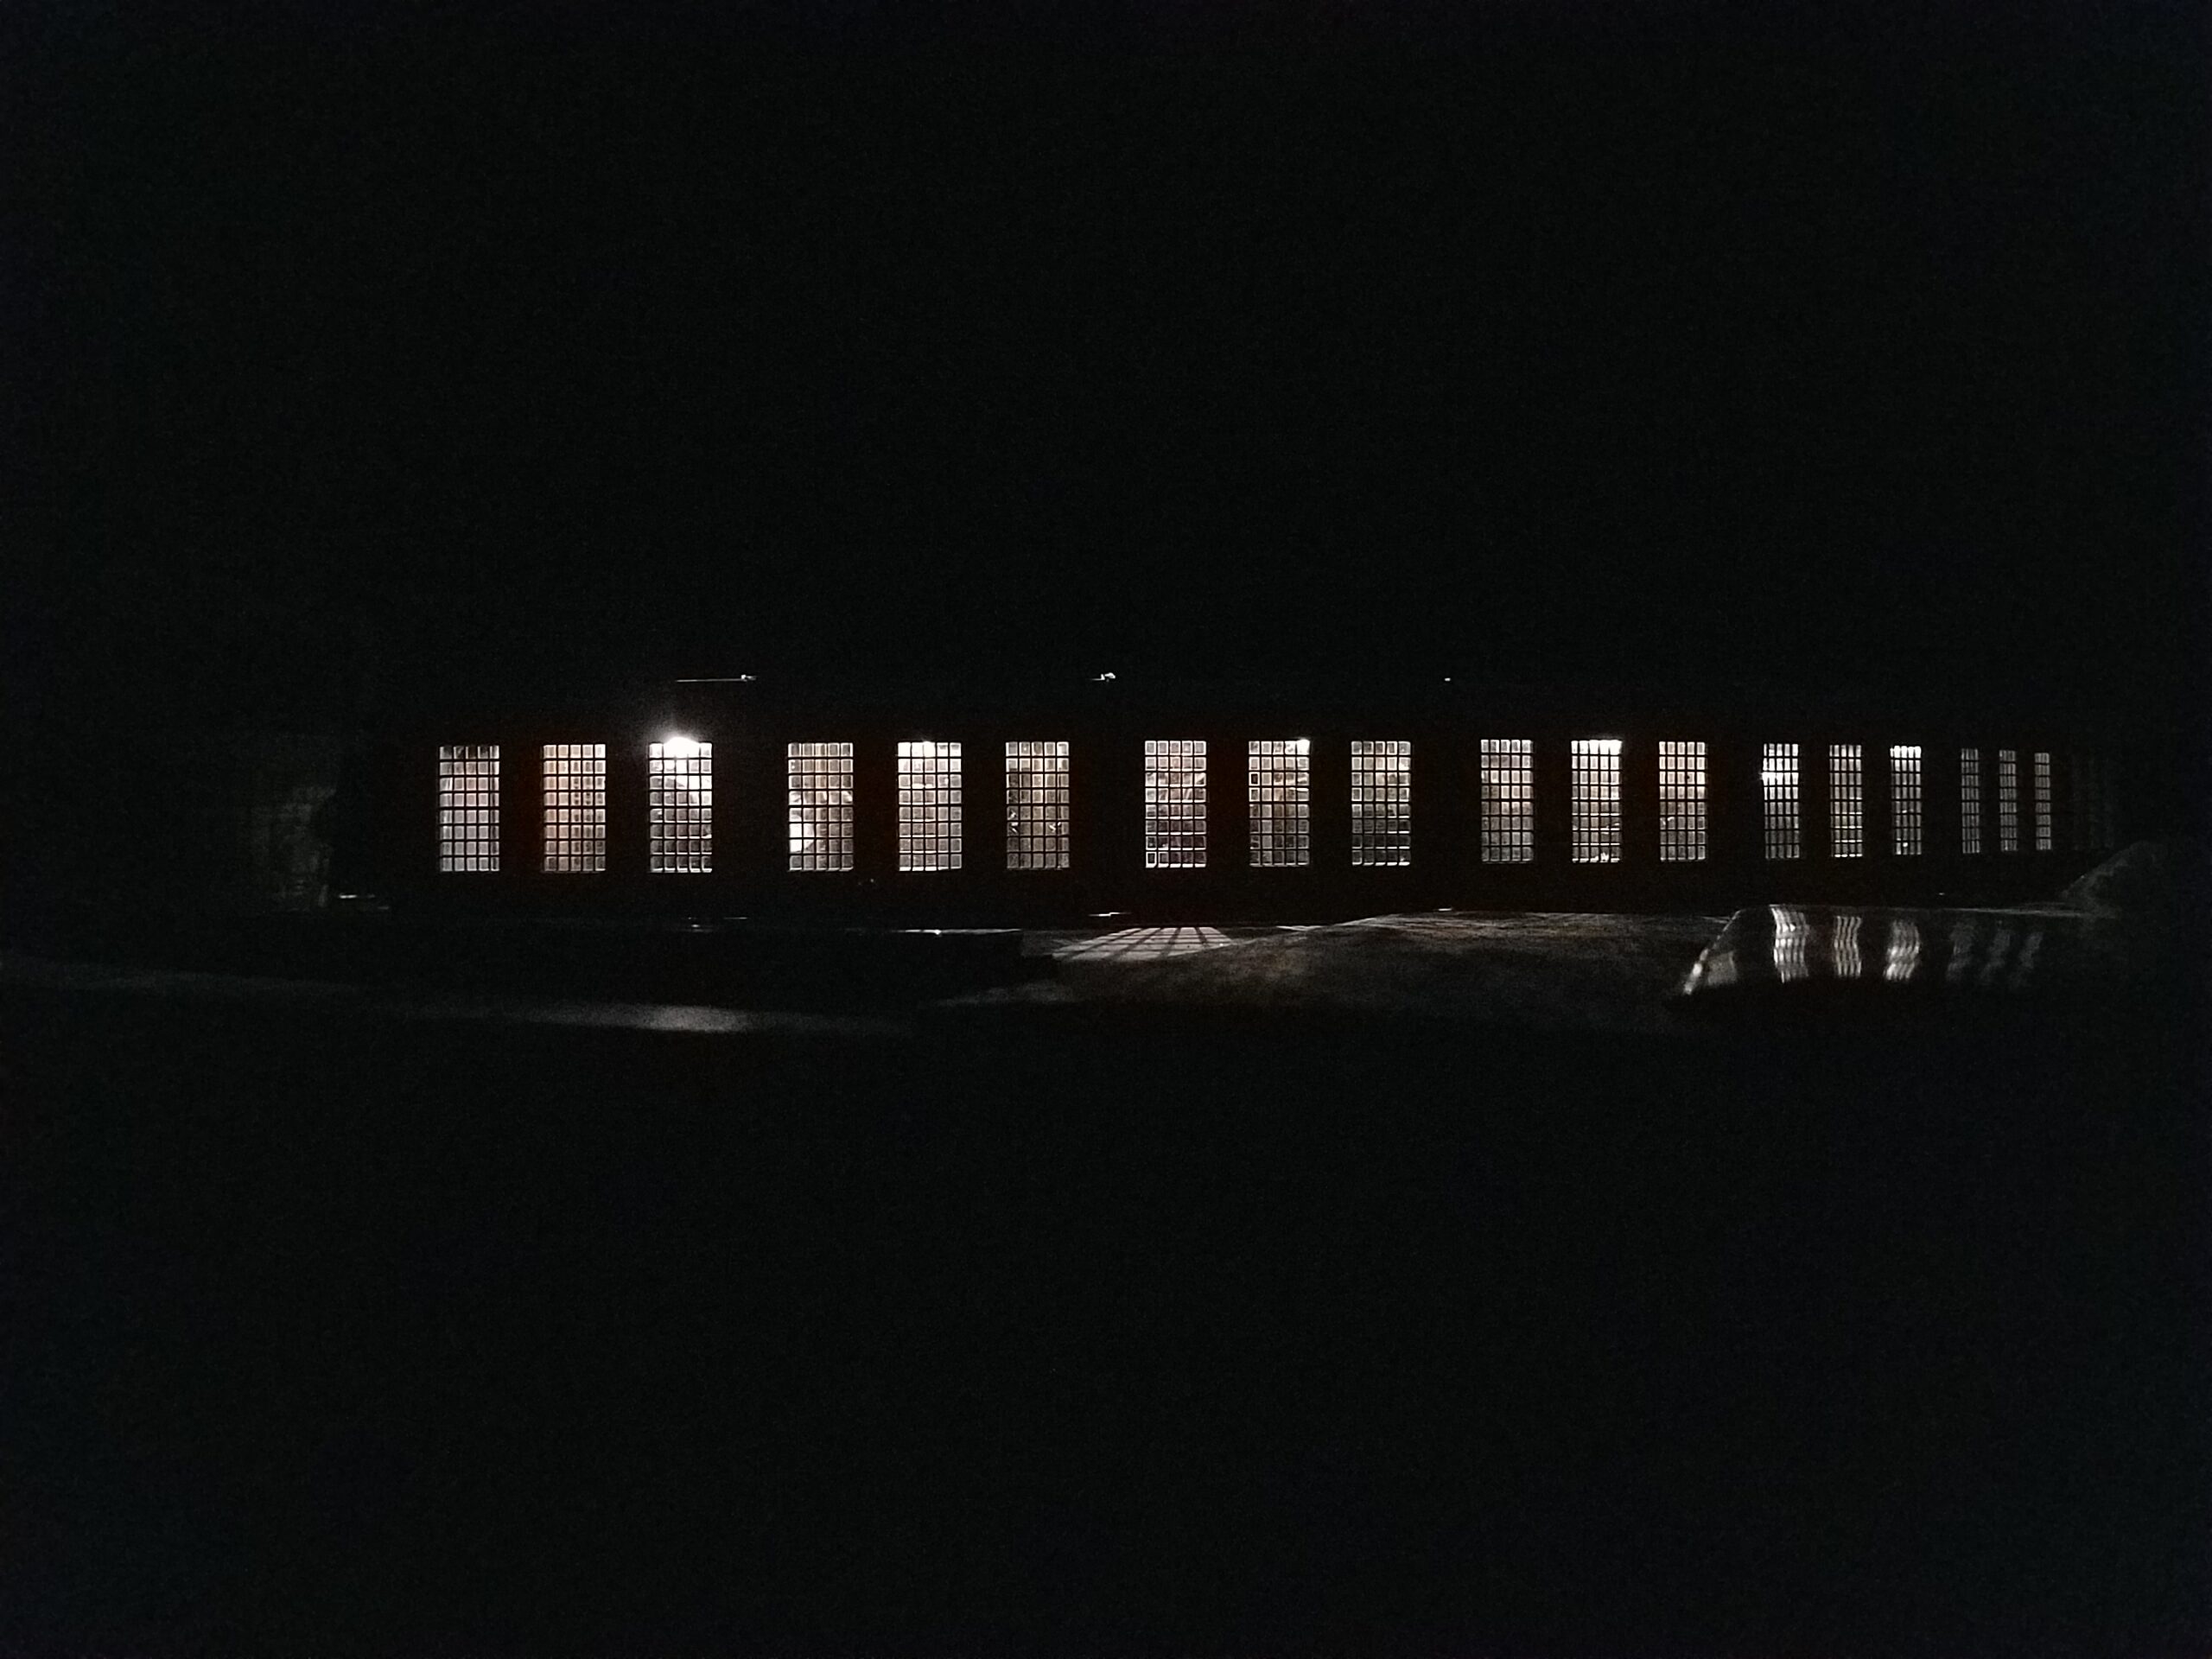
And I also finished the first round of plugging light leaks in the roundhouse. Better than before, with remaining leaks in this front view coming mostly from warped roof panels.

The rear view has a few leaks left from gaps and, again, one or two warped roof panels.
A higher elevation corner shot looks pretty good, though!

Here's the current state of the oil loading rack:

One more section and it will be done for now. Later on one final section will be added when the tracks are extended. The benchwork will have to be in place towards Powder River for that, though.
On the 13th I discovered that the dirt I glued in place the day before didn't stick! It was all loose. I had done everything - wetted the area, placed the plaster-laden dirt (the plaster was supposed to act as a bonding agent), wetted it again to activate the plaster, then let it sit and dry.
Turns out the problem was that I wetted it with alcohol. Apparently that completely deactivates the plaster! Now I had to start over. I vigorously (too vigorously) scraped off the loose layer with a putty knife. ALL the dirt came up, and I managed to rip a couple of holes in the cork sheets, too (I did say "vigorously").
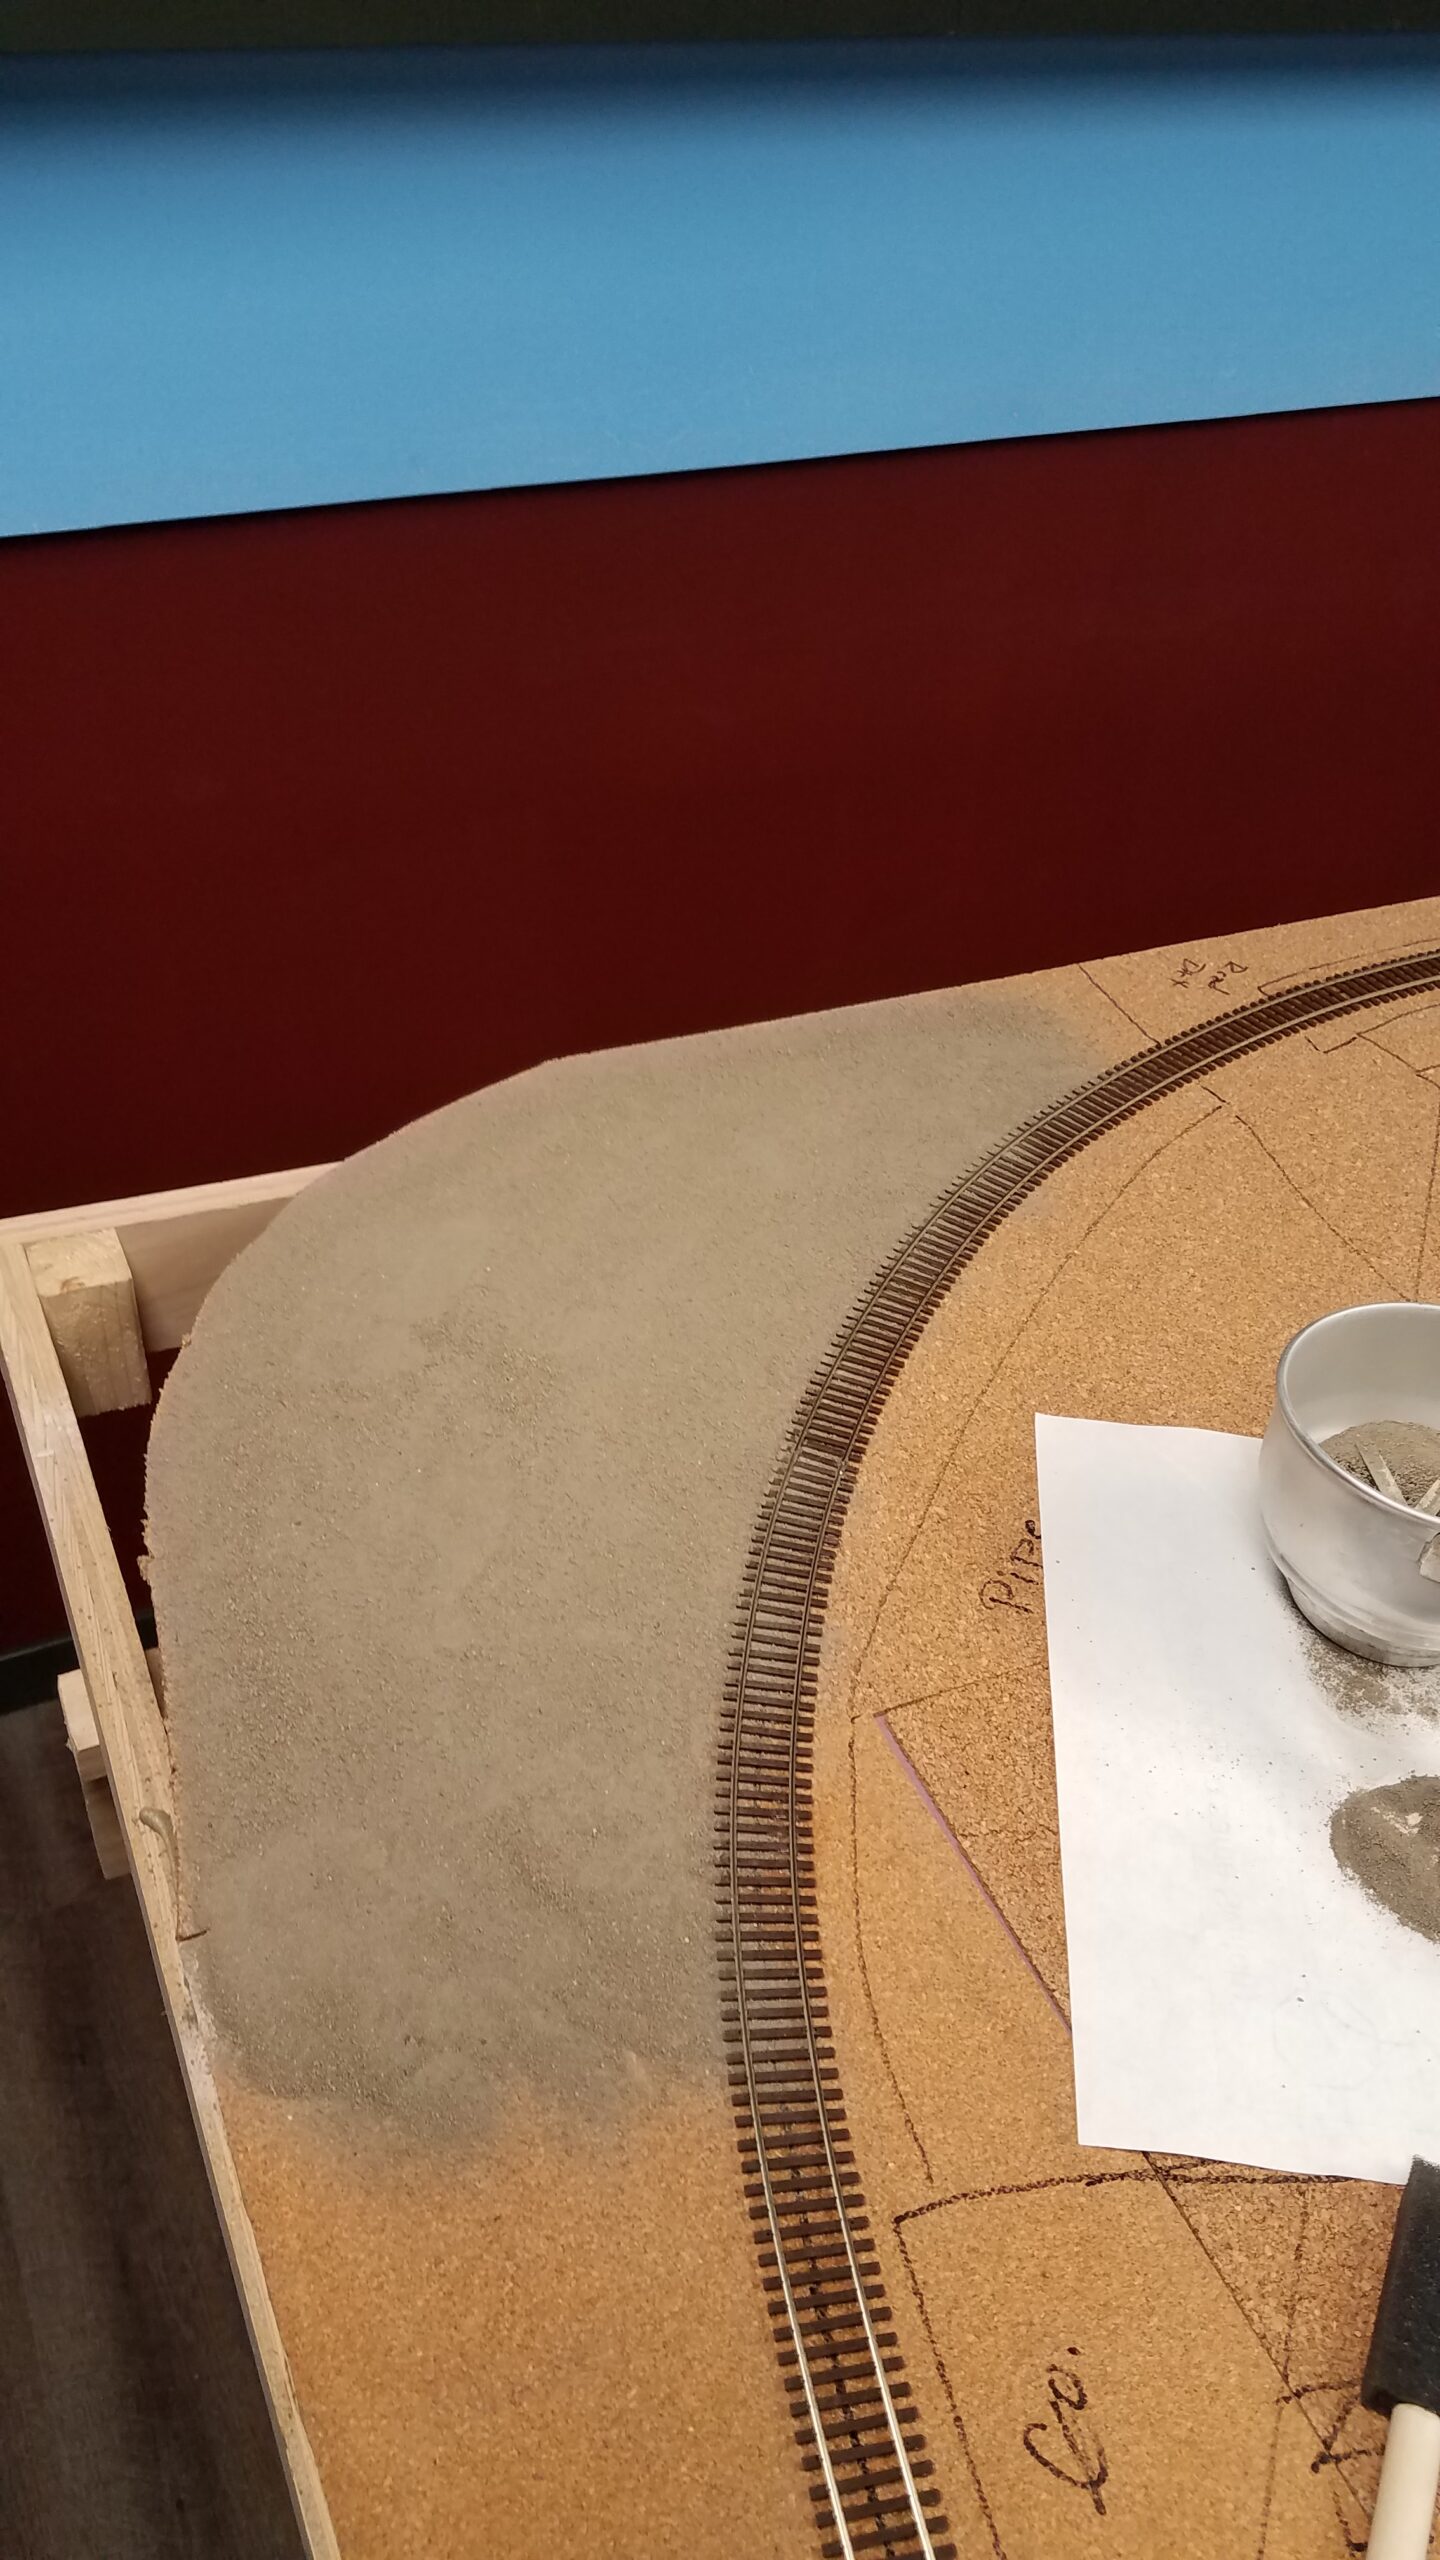
But on the 14th I started again, this time with a smaller area:

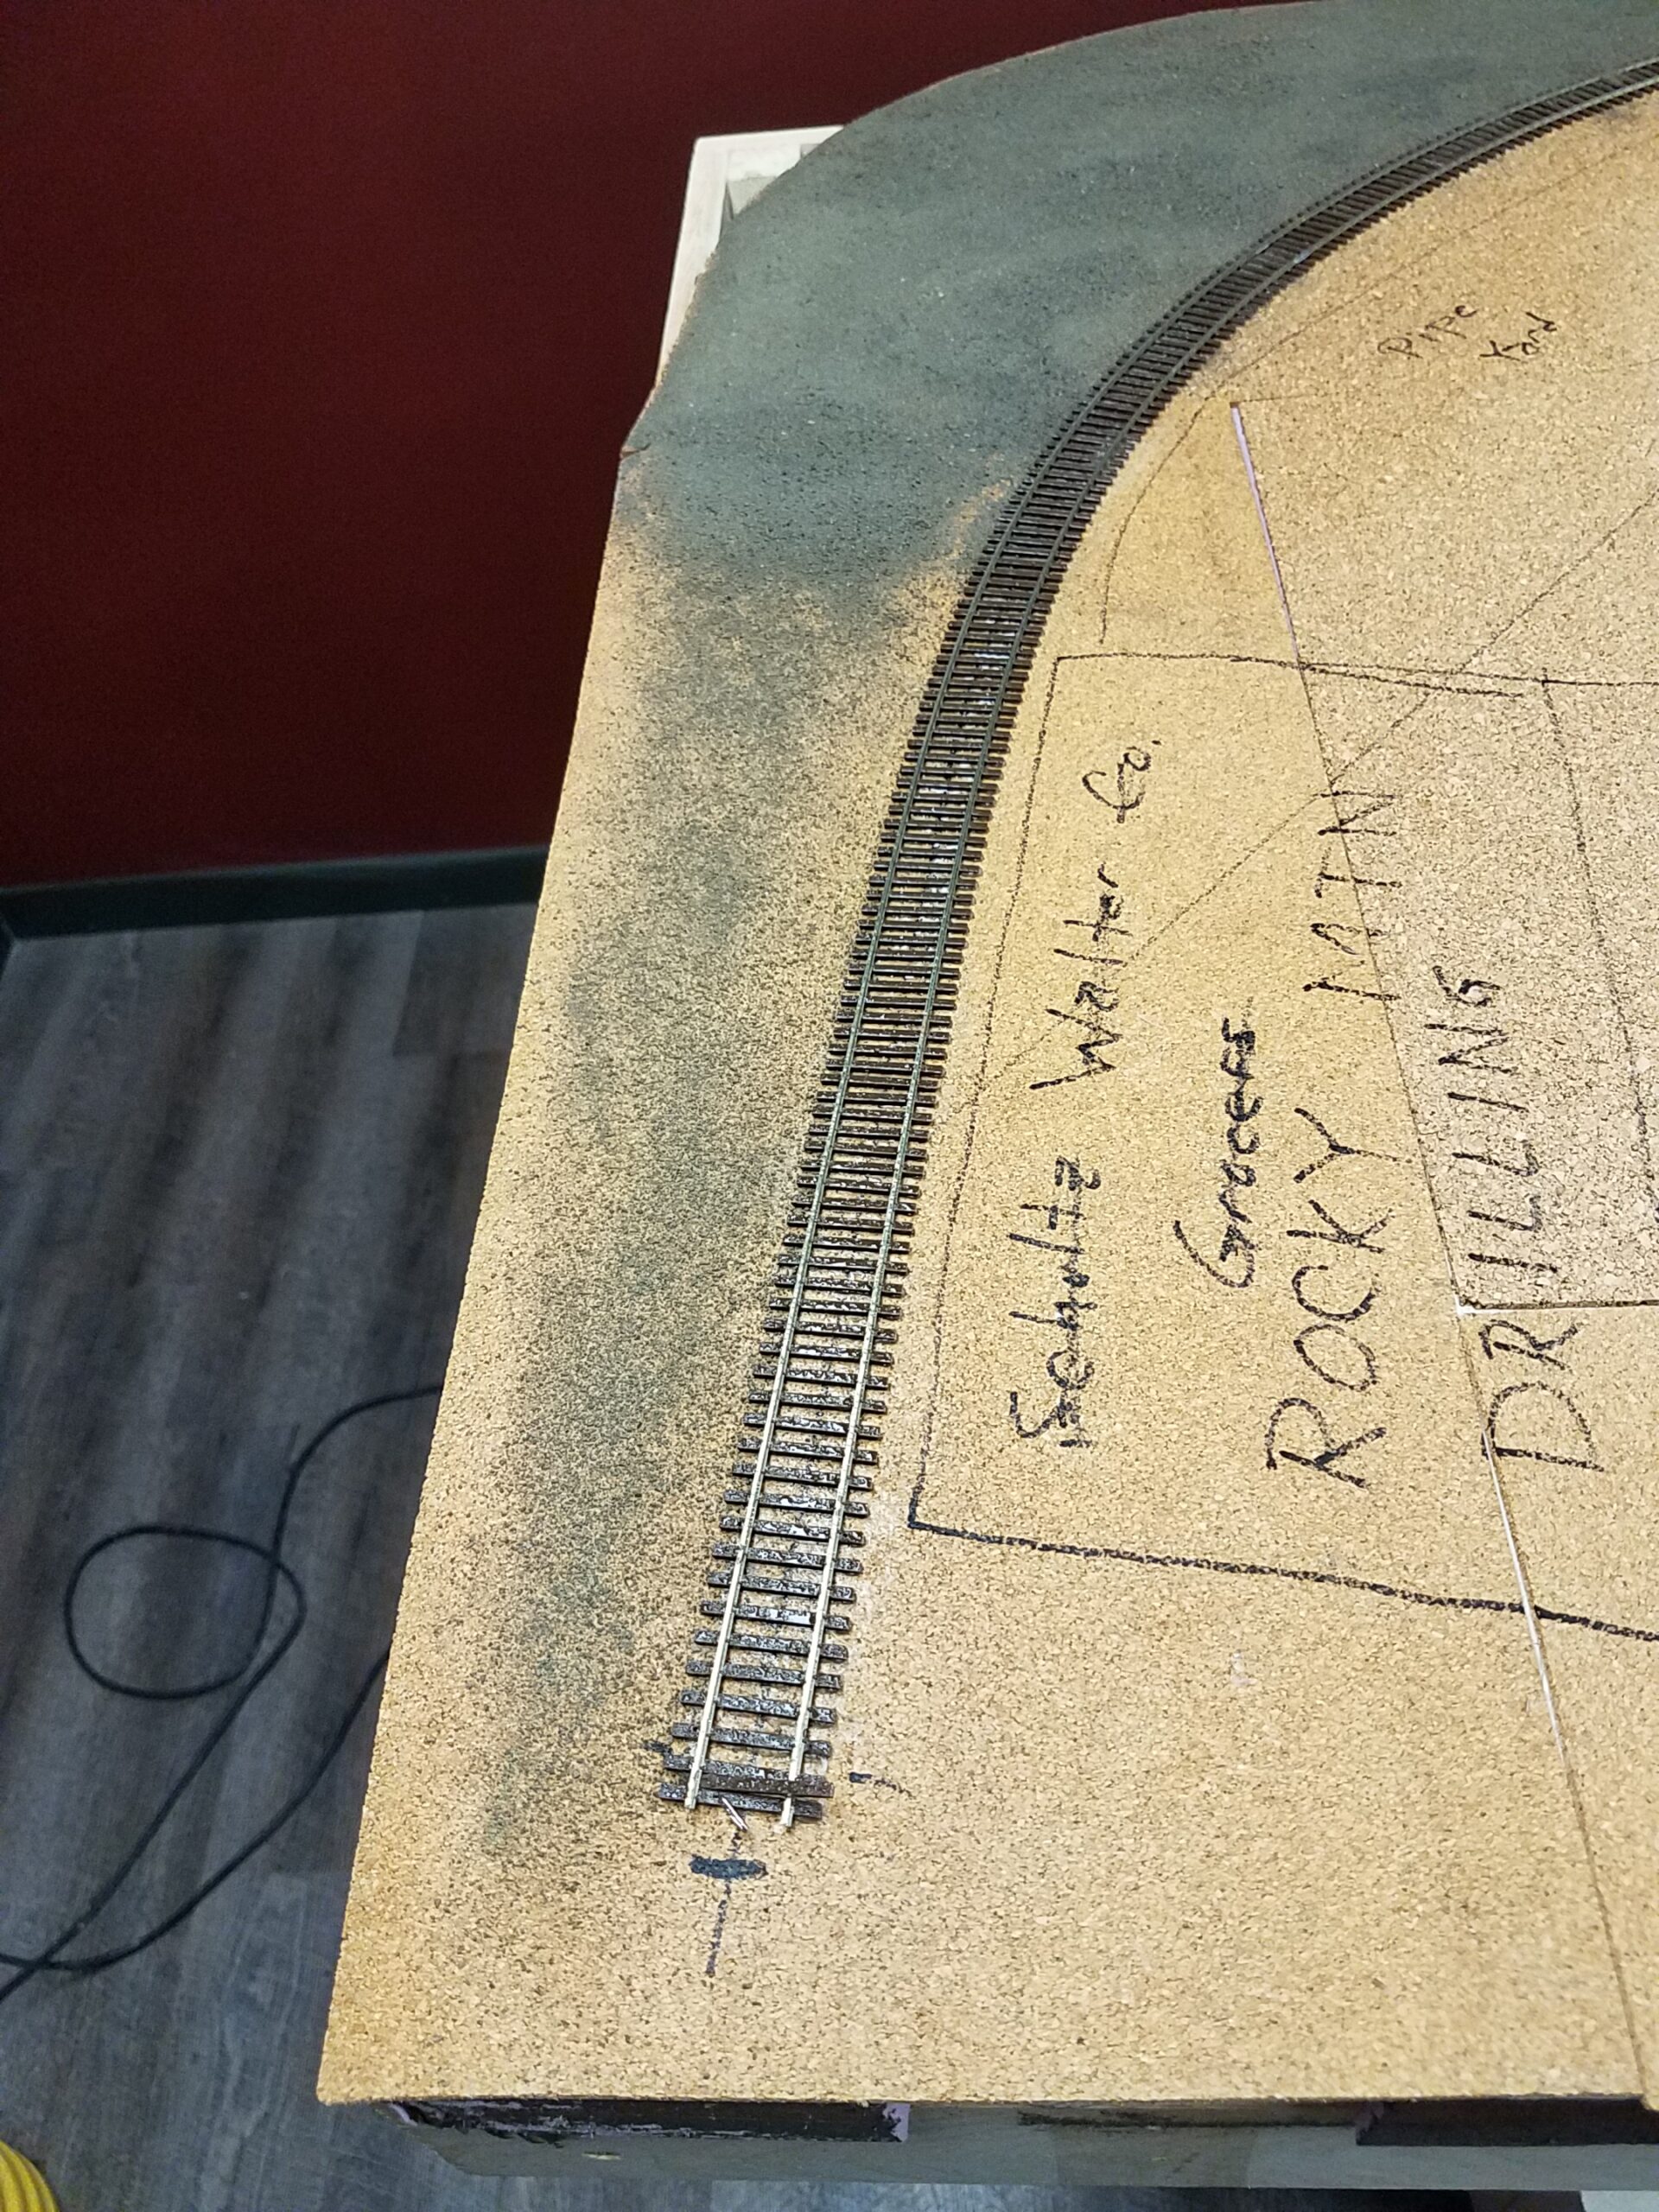
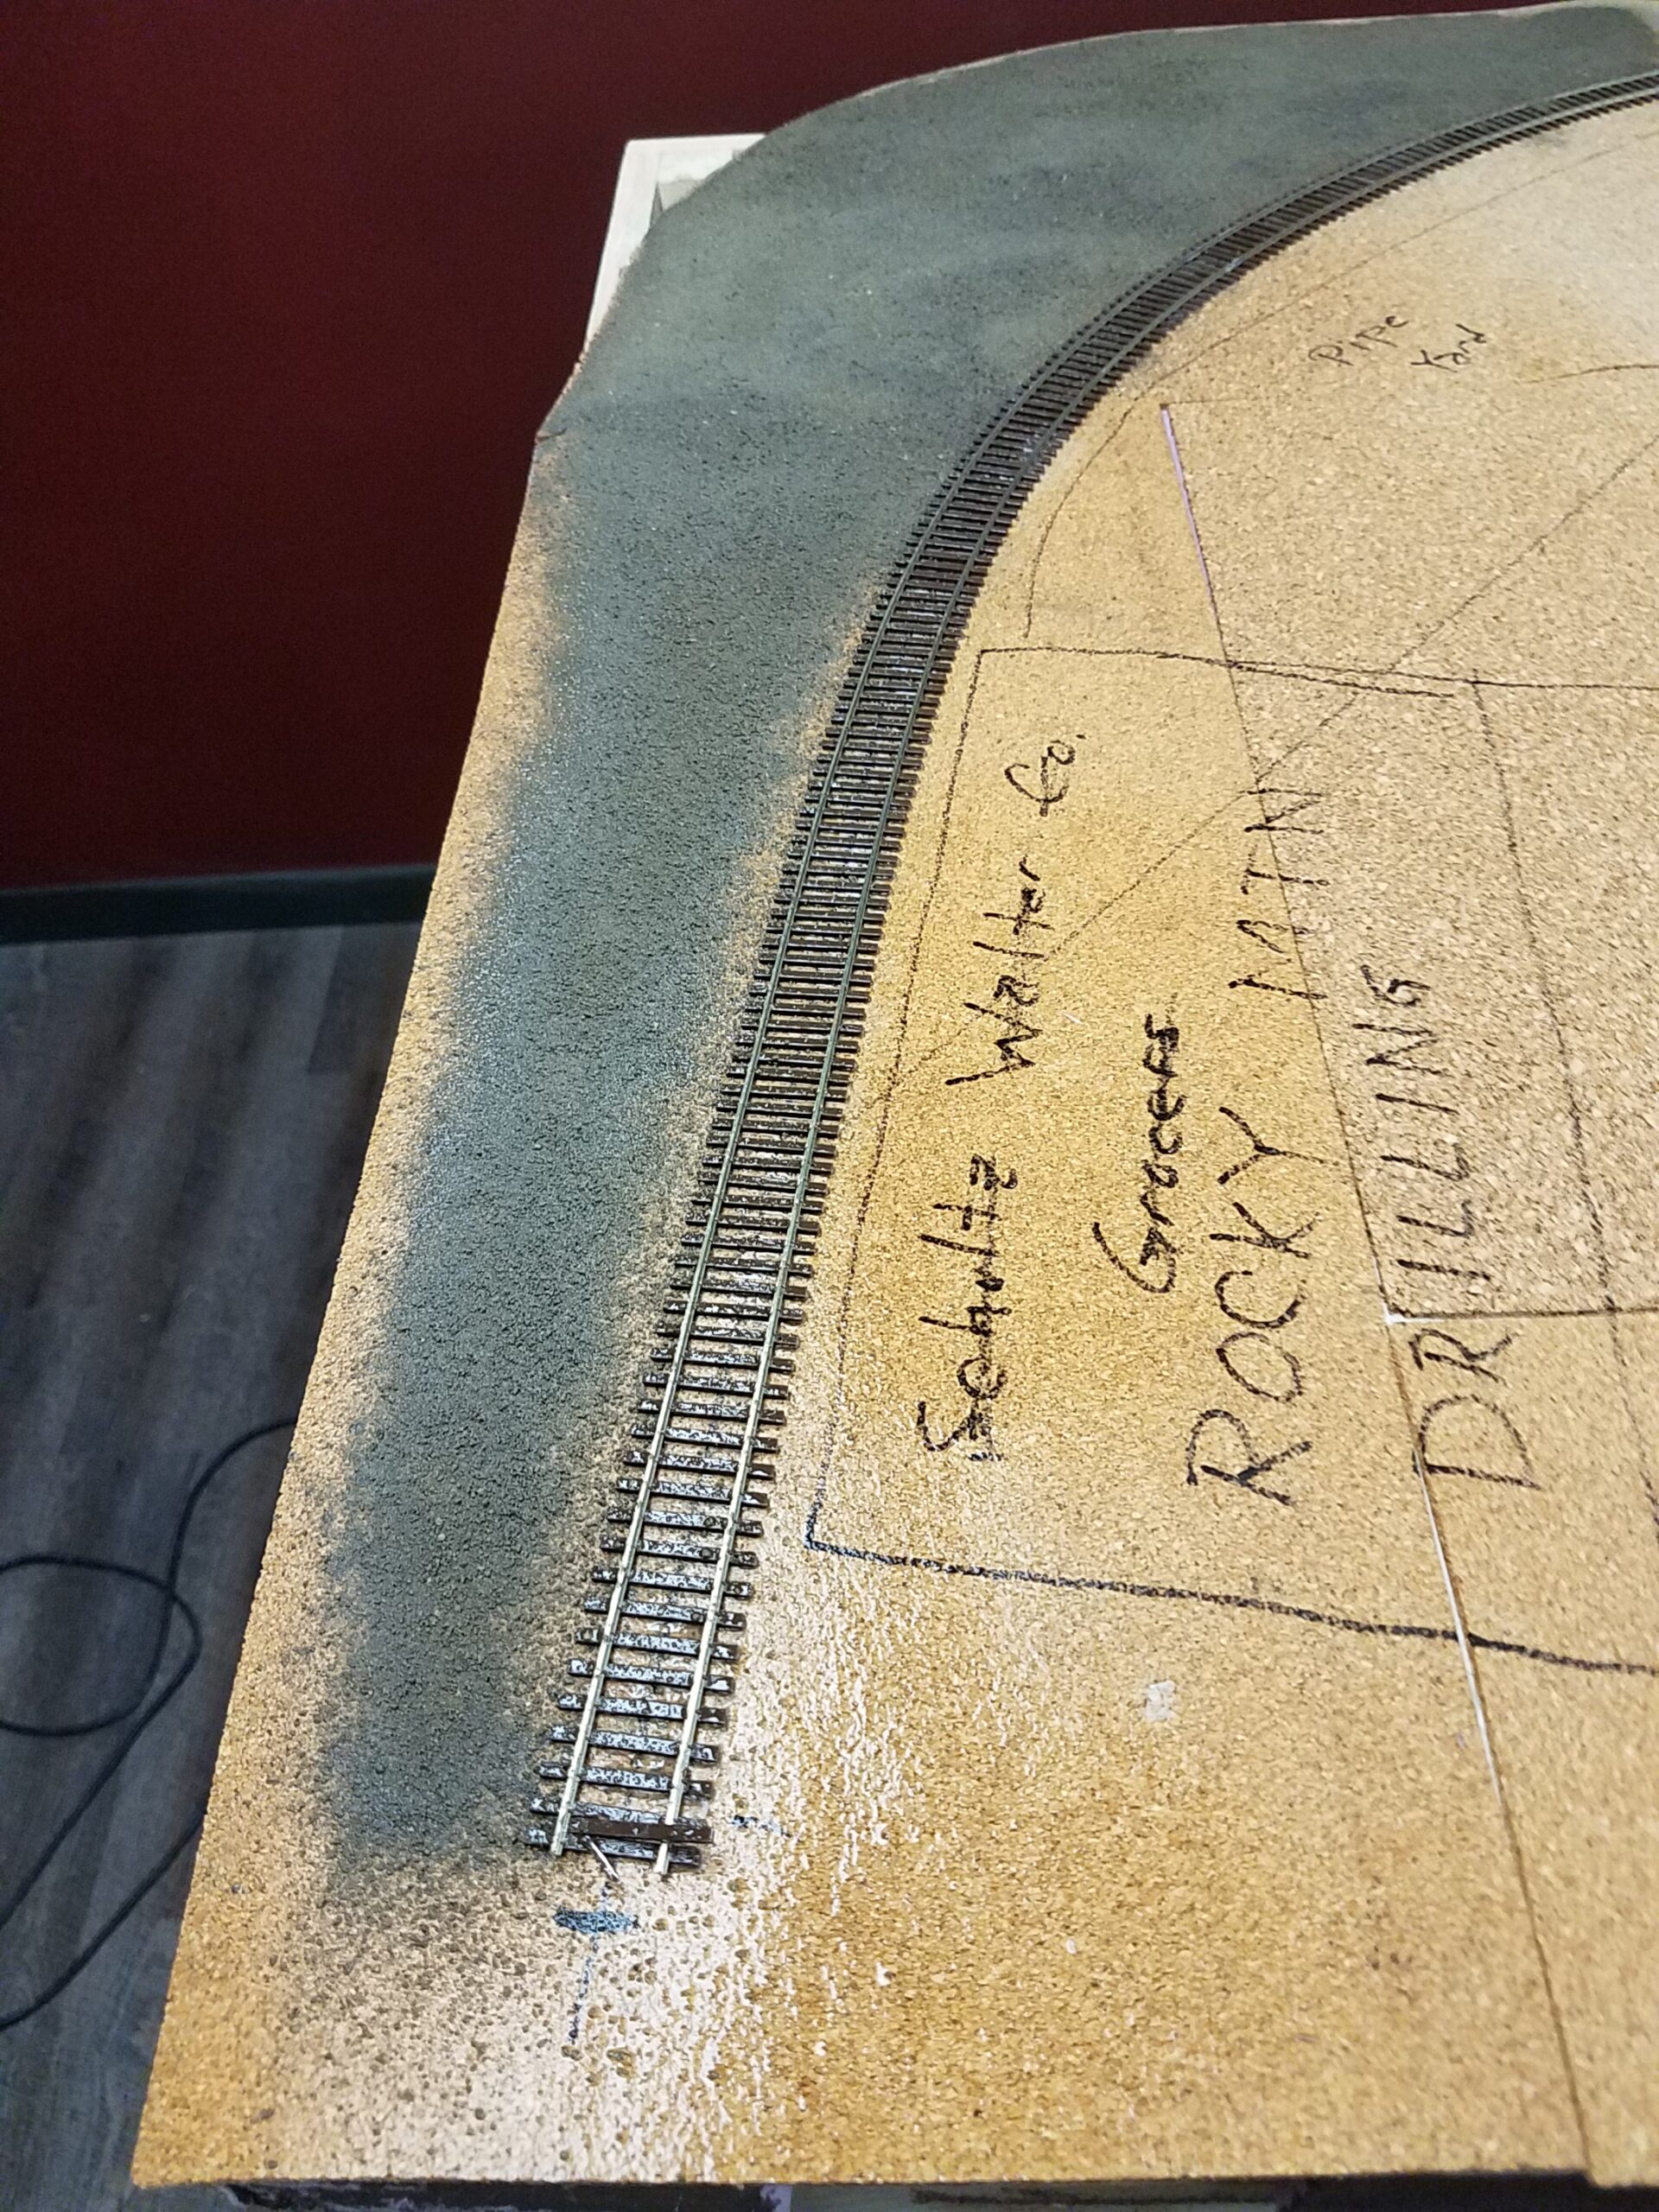
On the 15th I checked the new section of dirt and it was solid! No more alcohol in this step! I could move on. I added plaster to smooth out the rough edges of the torn up cork, tinting it this time with tempra paint in the hopes I would be able to skip the painting step (that worked - I was able to skip the paint). By the 16th the plaster was dry, and I was able to progress with adding more dirt. By the 15th I had that entire area redirted (is there such a word? Well, you know what I mean).

In the center of this shot is the bigger area where I gouged out the cork sheet. Can't hardly even see it, can you? This will be in the middle of the Rocky Mountain Drilling pipe yard. I'm going to try to make it look like the depressed area is often a muddy morass.

At this point I was chomping at the bit to start ballasting that spur, so I ripped off about three feet of the blue tape and got to it. I mixed up a batch of my sifted dirt about half-and-half with Woodland Scenics coarse and fine cinder ballast, and added about 20%wallpaper paste powder for the fixative. Using the traditional spoon and foam brush, I began adding ballast.

In short order I had this.
 I think I shoulda darkened up the dirt part some with a bit of black tempera powder. Oh well, next time. I'll darken it up in stages as I get closer to the engine facilities, where it will be really sooty and grimy.
It looks like I'll also need to add a bit more dirt alongside the tracks. There's a few bare spots there.
I doused the ballasted track with some water to activate the wallpaper paste powder and stopped for the night.
The next morning it looked like this, before I cleaned stray ballast chunks off the rails and ties:
Yeah, I should have darkened the dirt.
Just for laughs, and still before I cleaned off the excess ballast, I placed a flatcar and the end of the spur and took this shot.

Then I cleaned off the excess ballast and painted the rails near the end of the spur. Here's how that came out:
I'm kinda likin' this so far!
And here's the entire 12" section I painted. This is very tedious - it took me 20 minutes to do just this! But that does include shaking the paint and opening the jar...)

Lots happening the last three days!
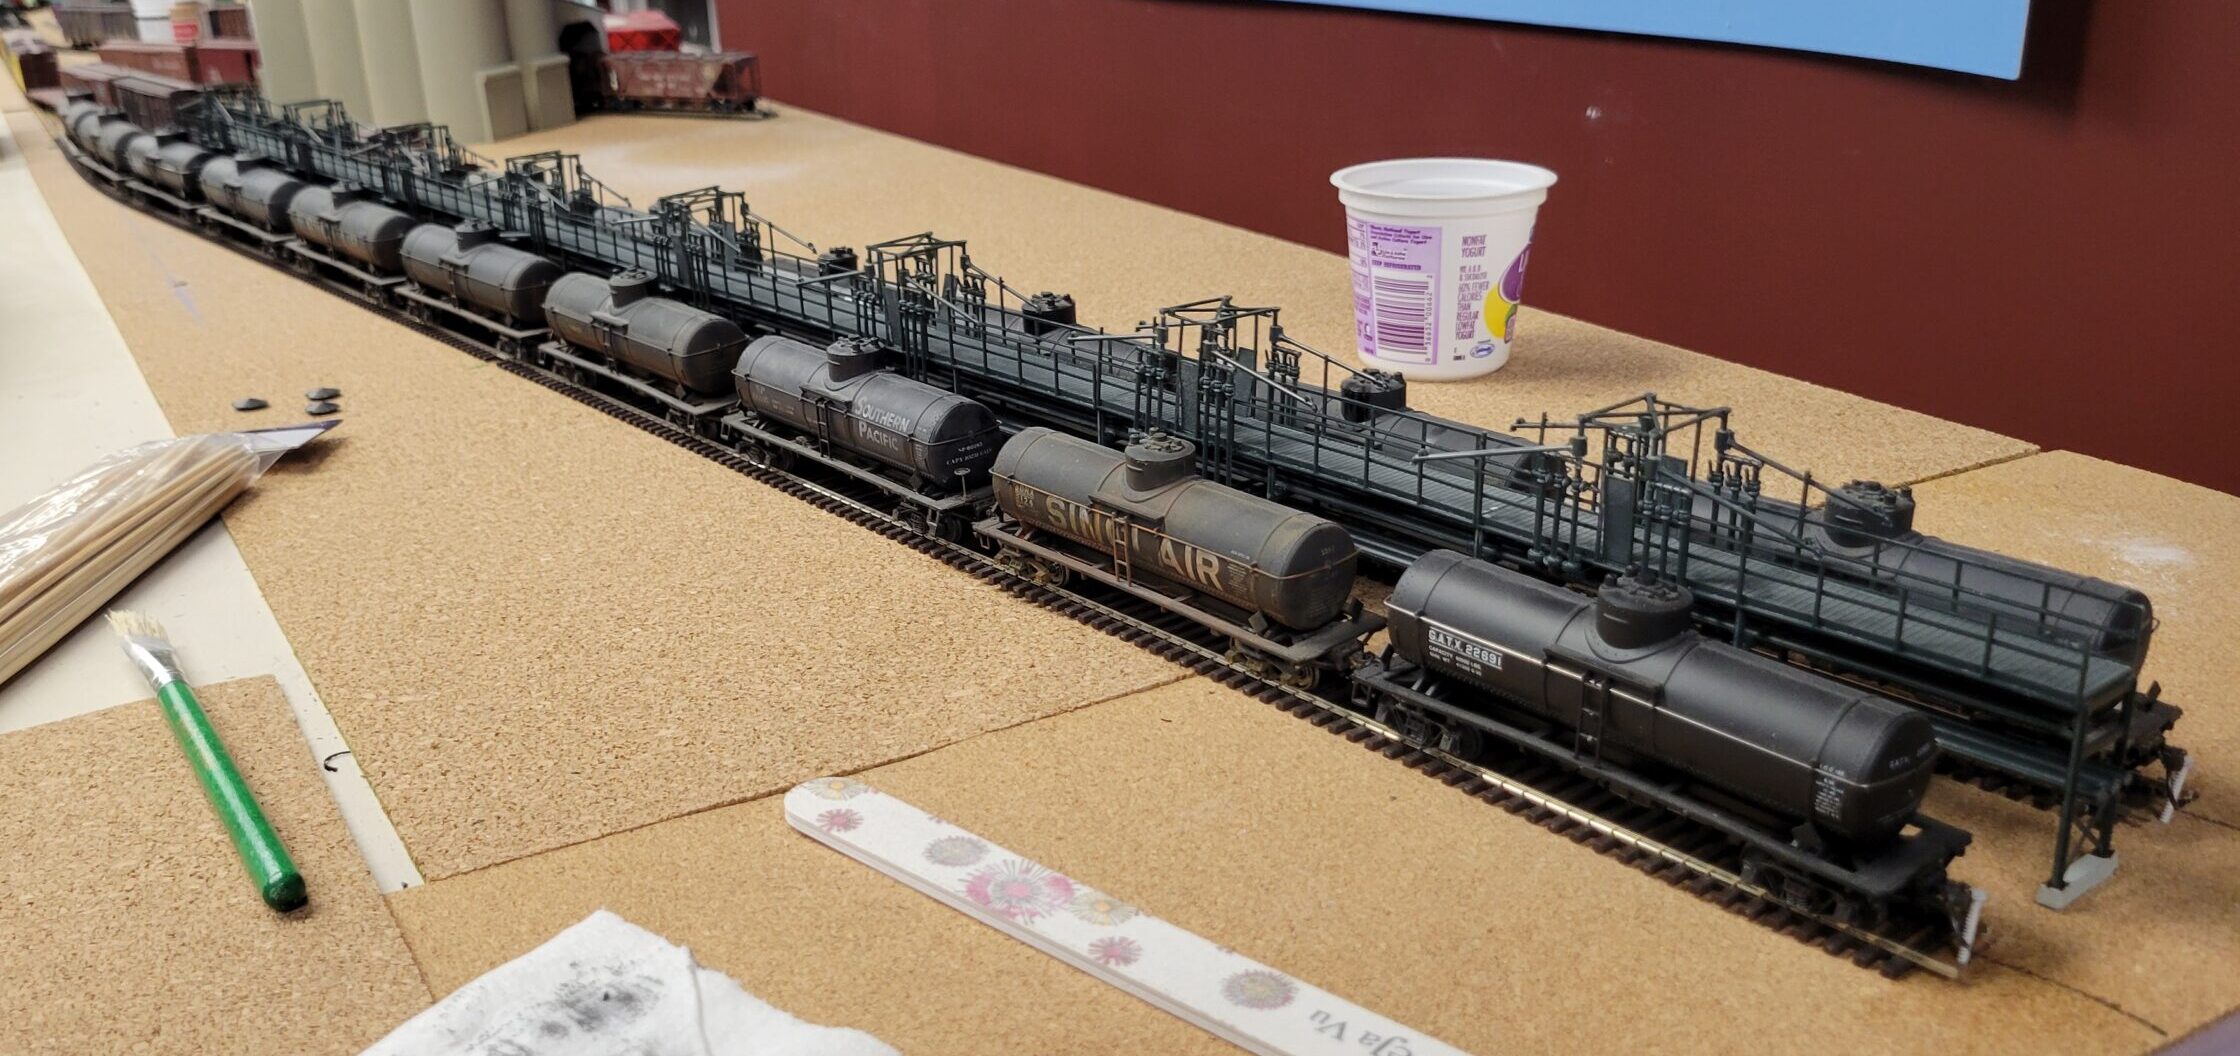
I continued work on the Standard Oil tank car loading racks, and today "finished" the chain of eight loading stations. I'll be adding a ninth when benchwork towards Powder River is built. I still have to attach the access stairs and supply lines to the rack, which will go on the end of the ninth station. I also need to decide how to paint the whole thing. Silver and grey are the most common colors for metal racks now, but I think black was pretty common back in the 1930-1945 timeframe. In the photo I have of the Midwest Refinery in Casper the racks appear to be black, and the in the photos of the Standard Refinery they're either dark grey or black, so I'll probably go with black (which will be pretty easy, since the entire model is molded in black plastic).
After painting I'll add lights, and finally plant the whole thing permanently in it's home on the layout. Until then it will be set loosely in place there.
Here's the entire rack sitting next to the mainline in Casper yard.

And here it is in a 3/4 view.

Then I set it in place between the loading tracks and took a couple more shots.
And here's a closer view of a couple of loading stations.

Yesterday I started adding a dirt road near the locations of Rocky Mountain Drilling and the ice house. I finished the bottom layer today and glued it down. Right now it looks like this:
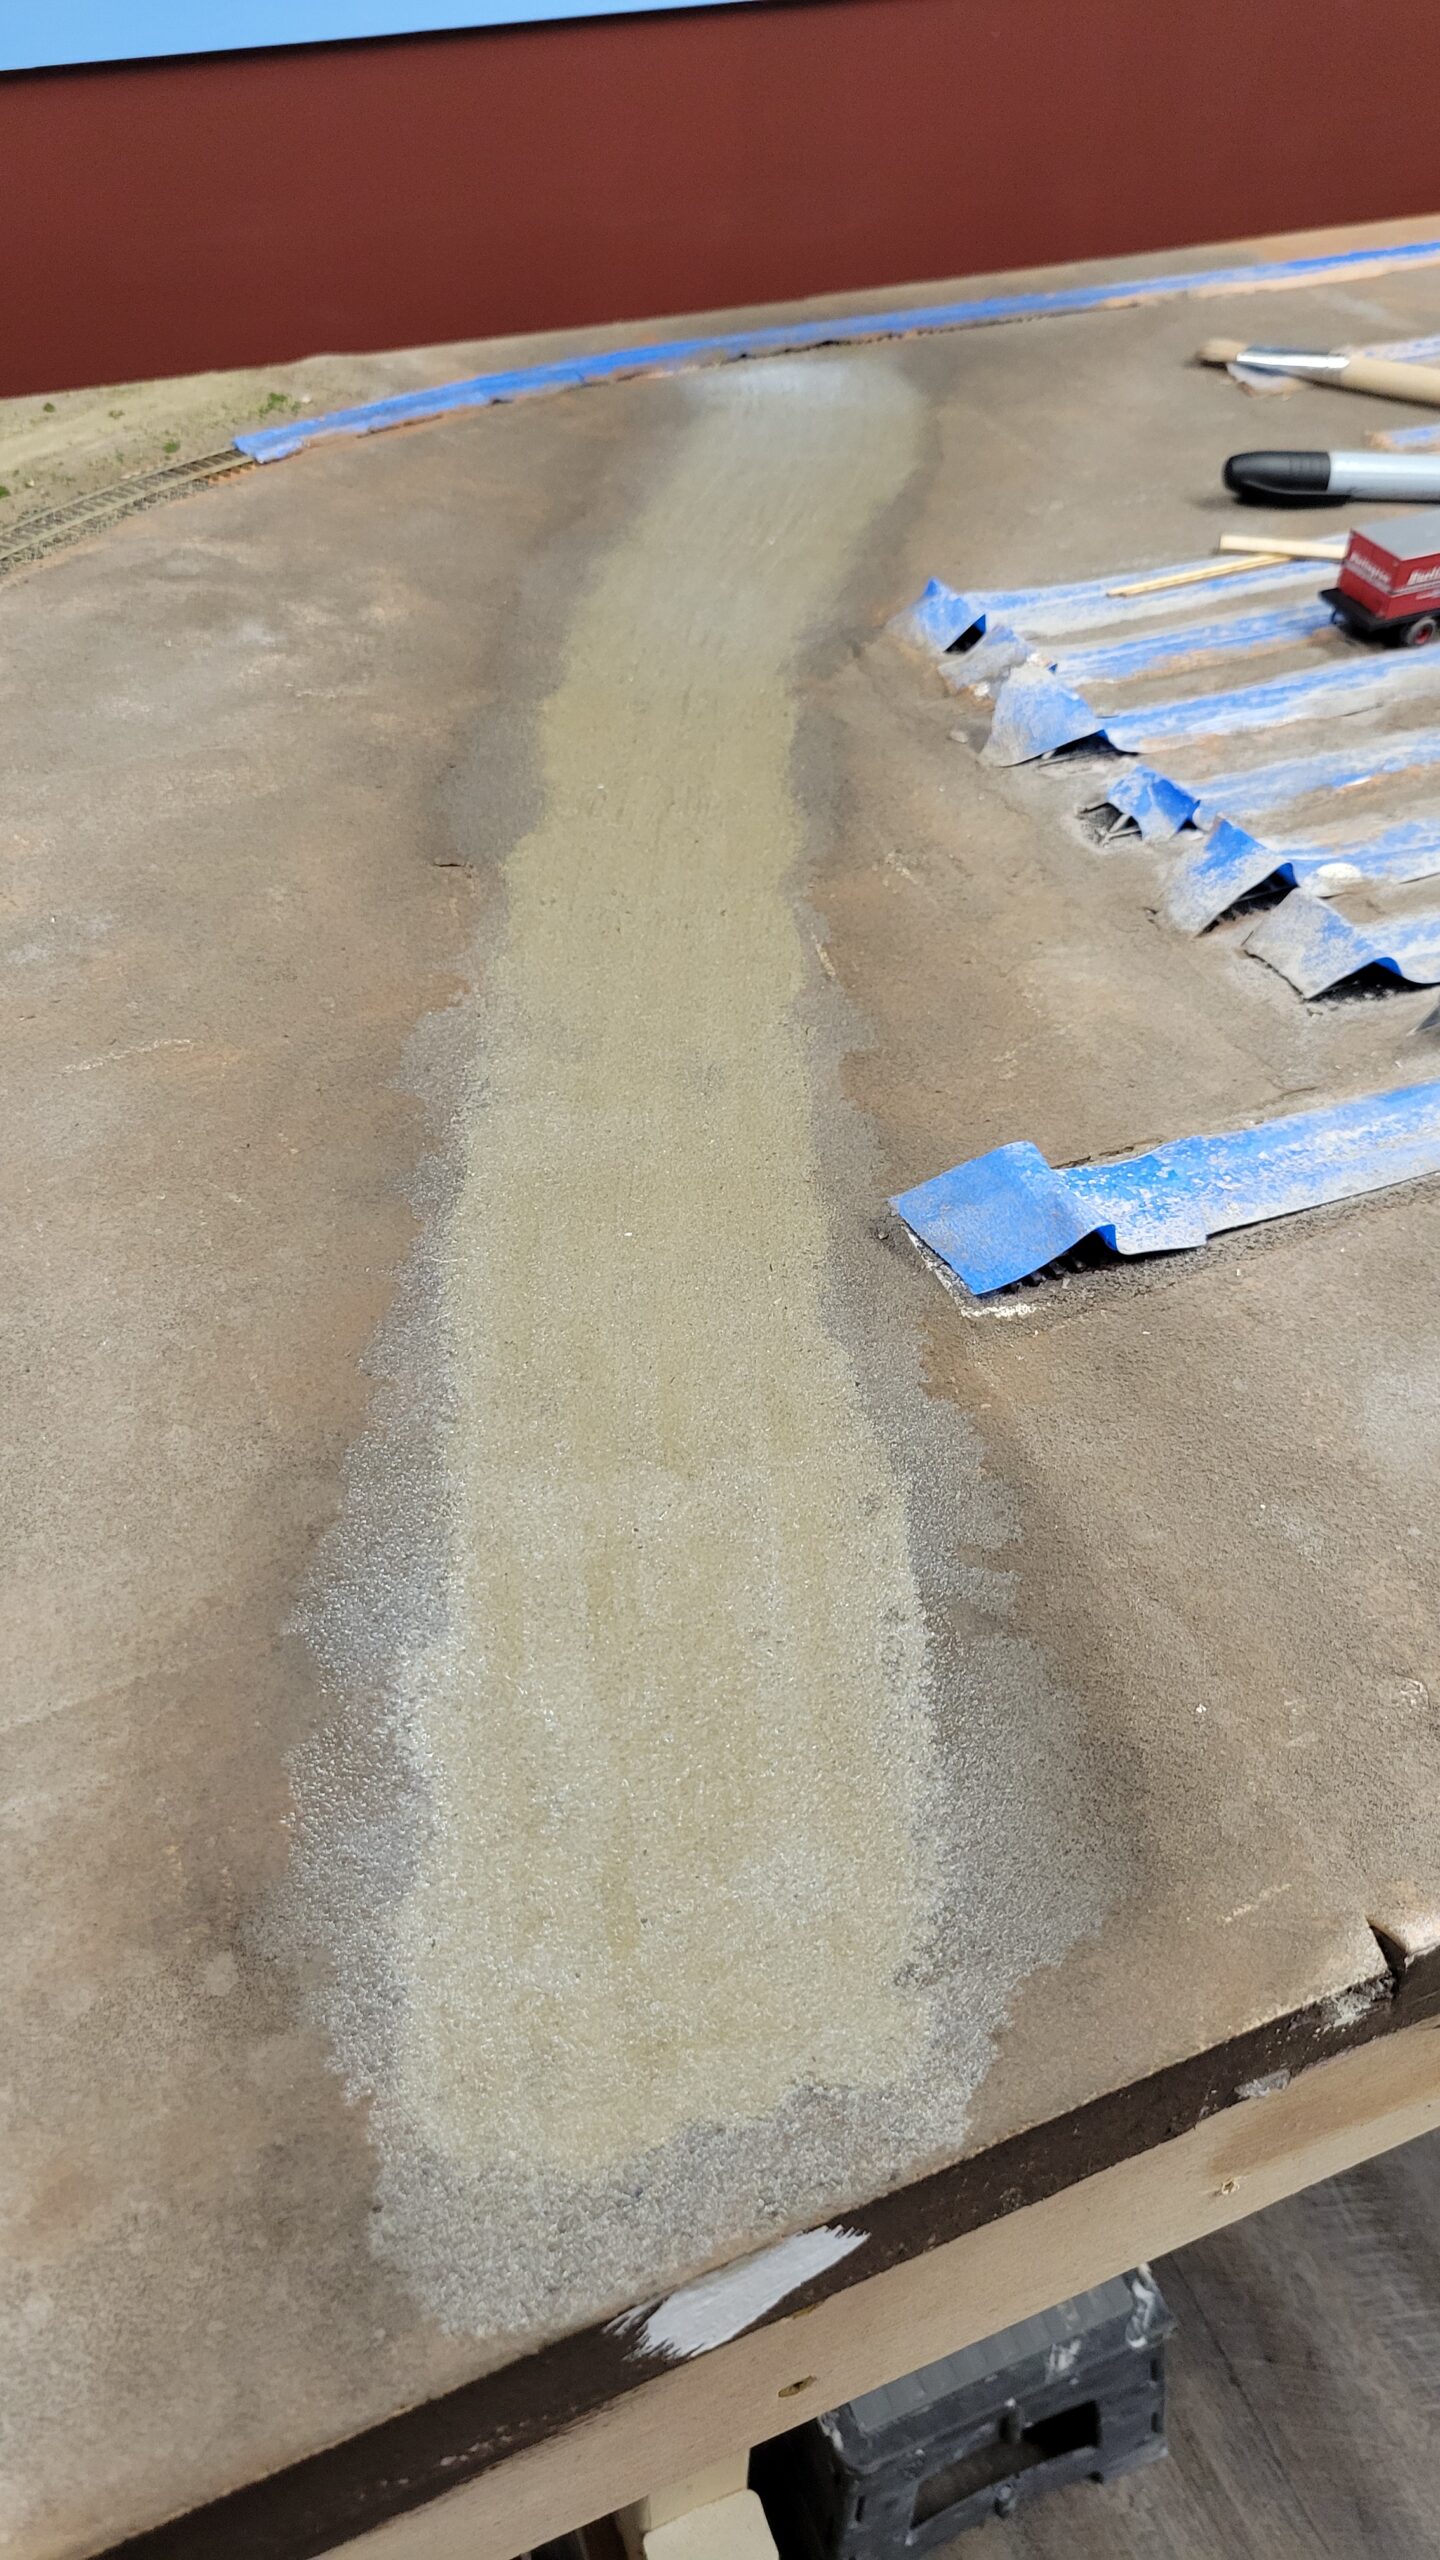
Tomorrow after it dries, I'll go back and add some slightly larger rock and such down the center of the road and the lanes, plus along the edge.
I've continued working on the dirt road, adding coarser dirt between the rusts and off to the sides. Odd thing - where the diluted Elmer's glue seeped off the sides of the road the dirt darkened, and it looks like it won't lighten back up. It's not real noticeable from this angle, but from a higher perspective it's pretty obvious. I'm not sure what to do with that, but maybe ground cover, sparse though it will be, will hide it sufficiently.
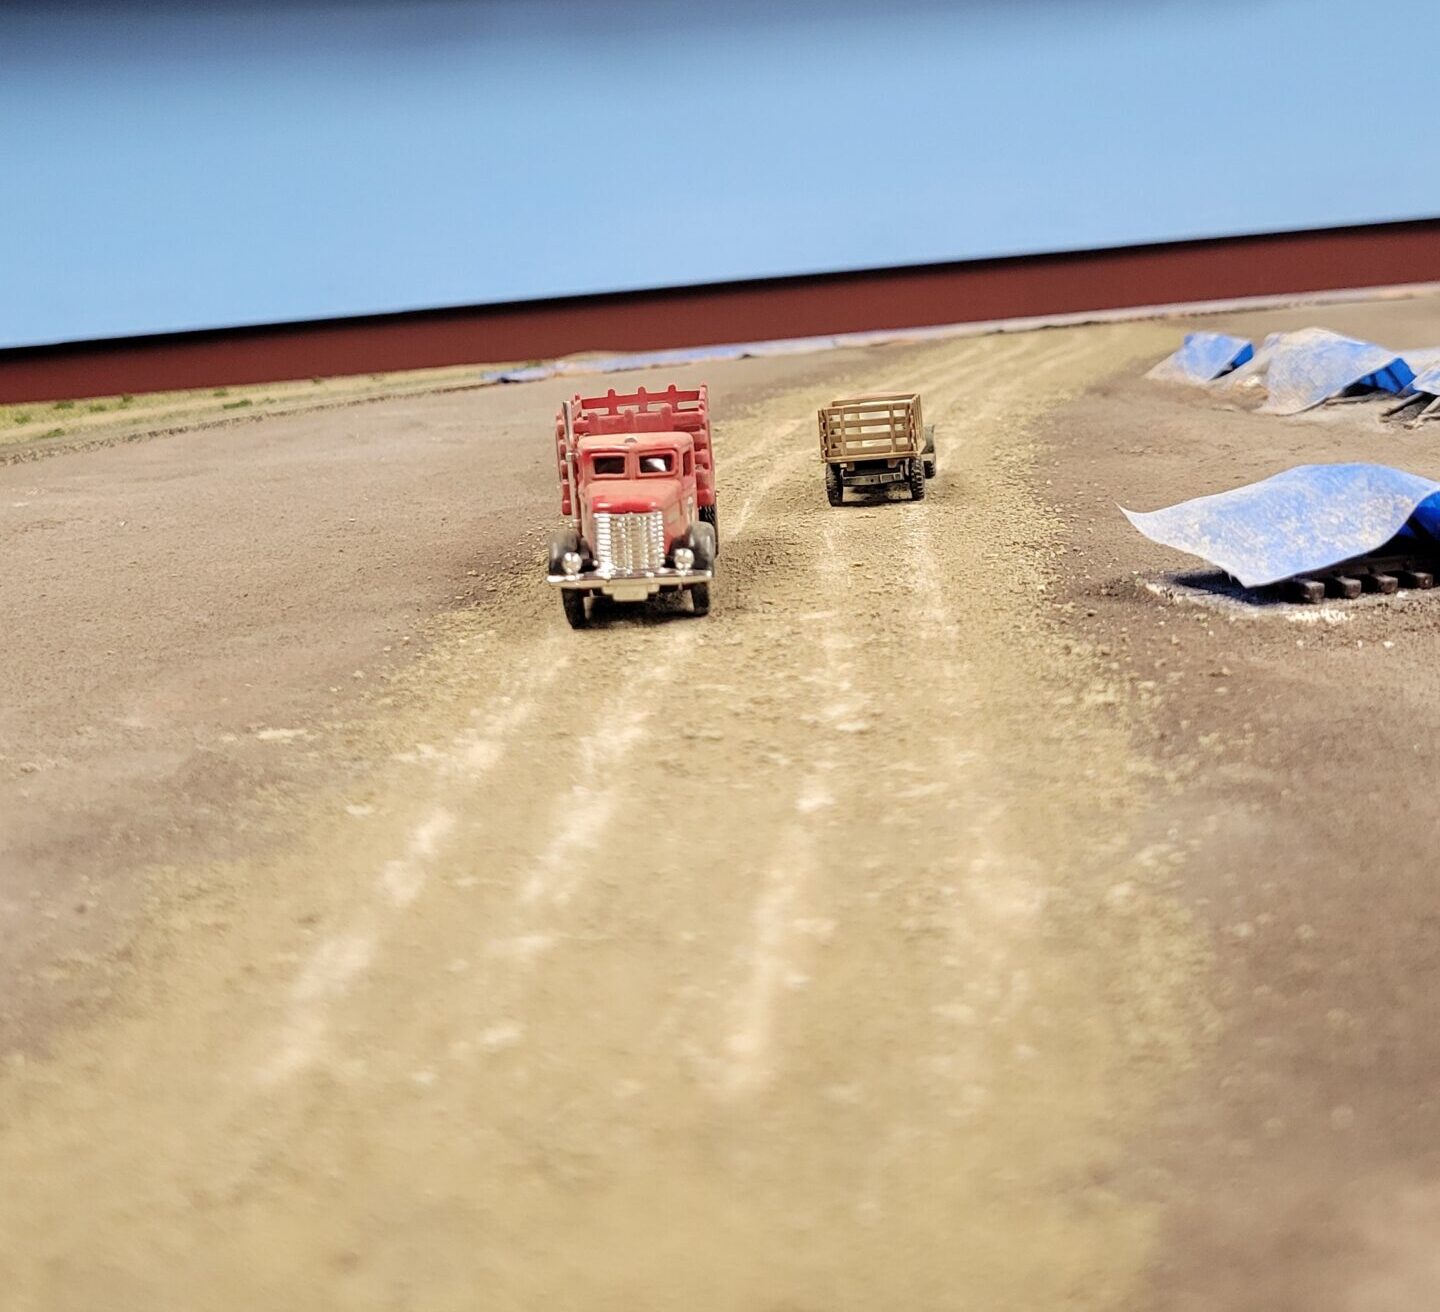
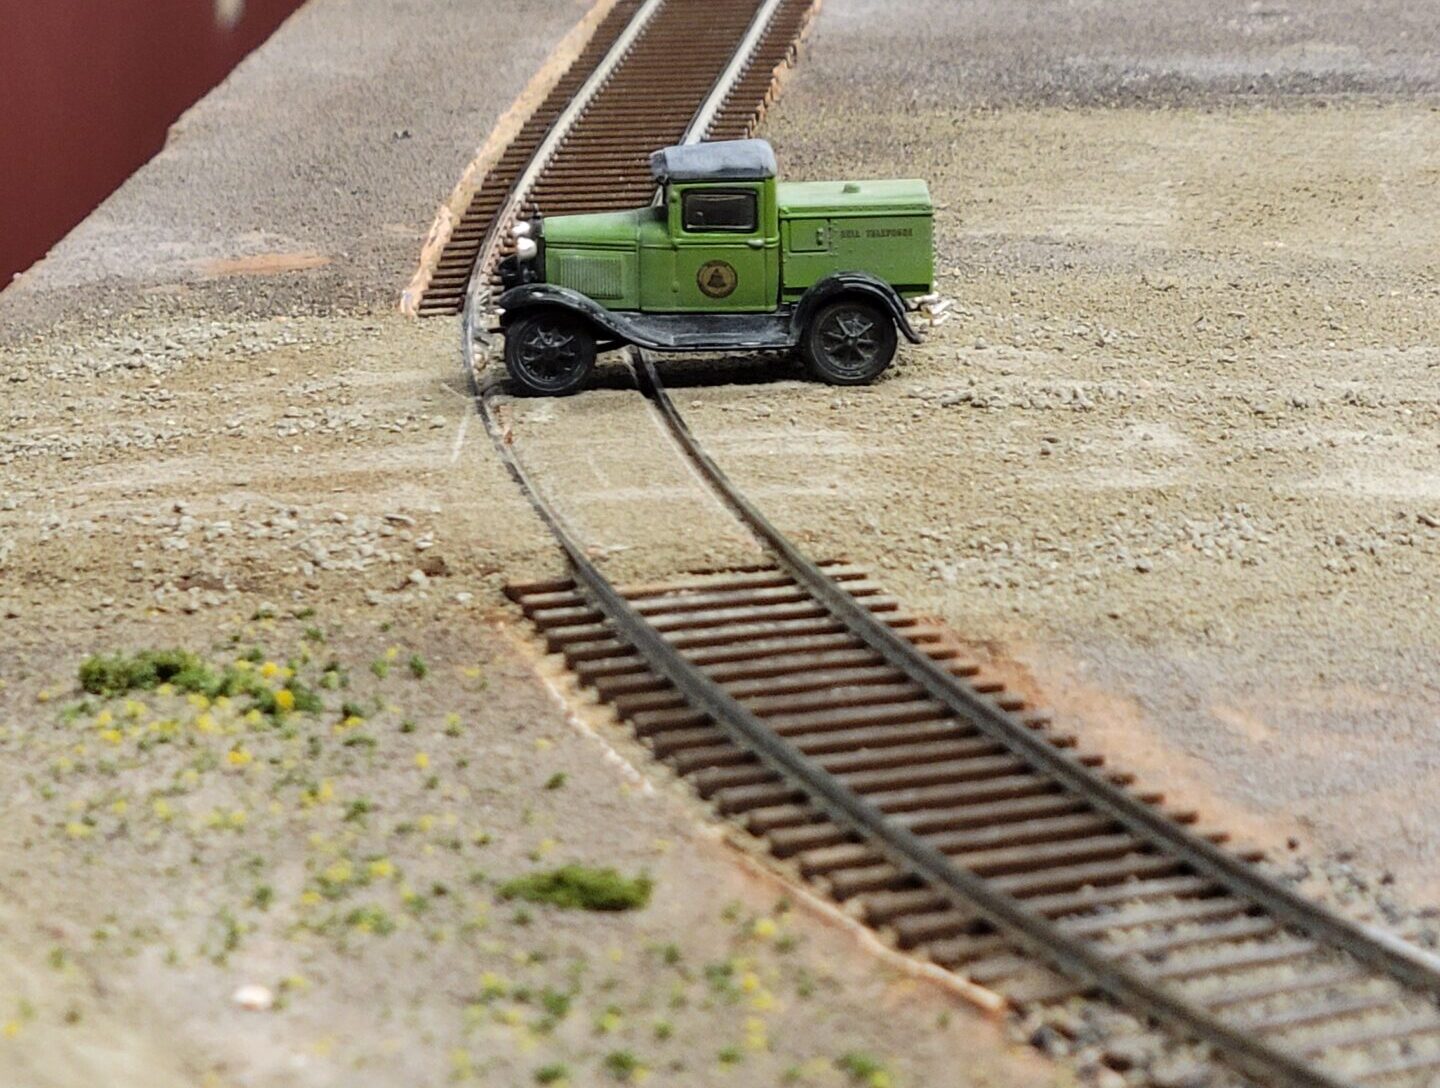
Here's a close-up of the traffic on the road.

And here's a different truck on the road.

In late February and the first couple days in March I added some more to the scenery on the CNW line over Casper.
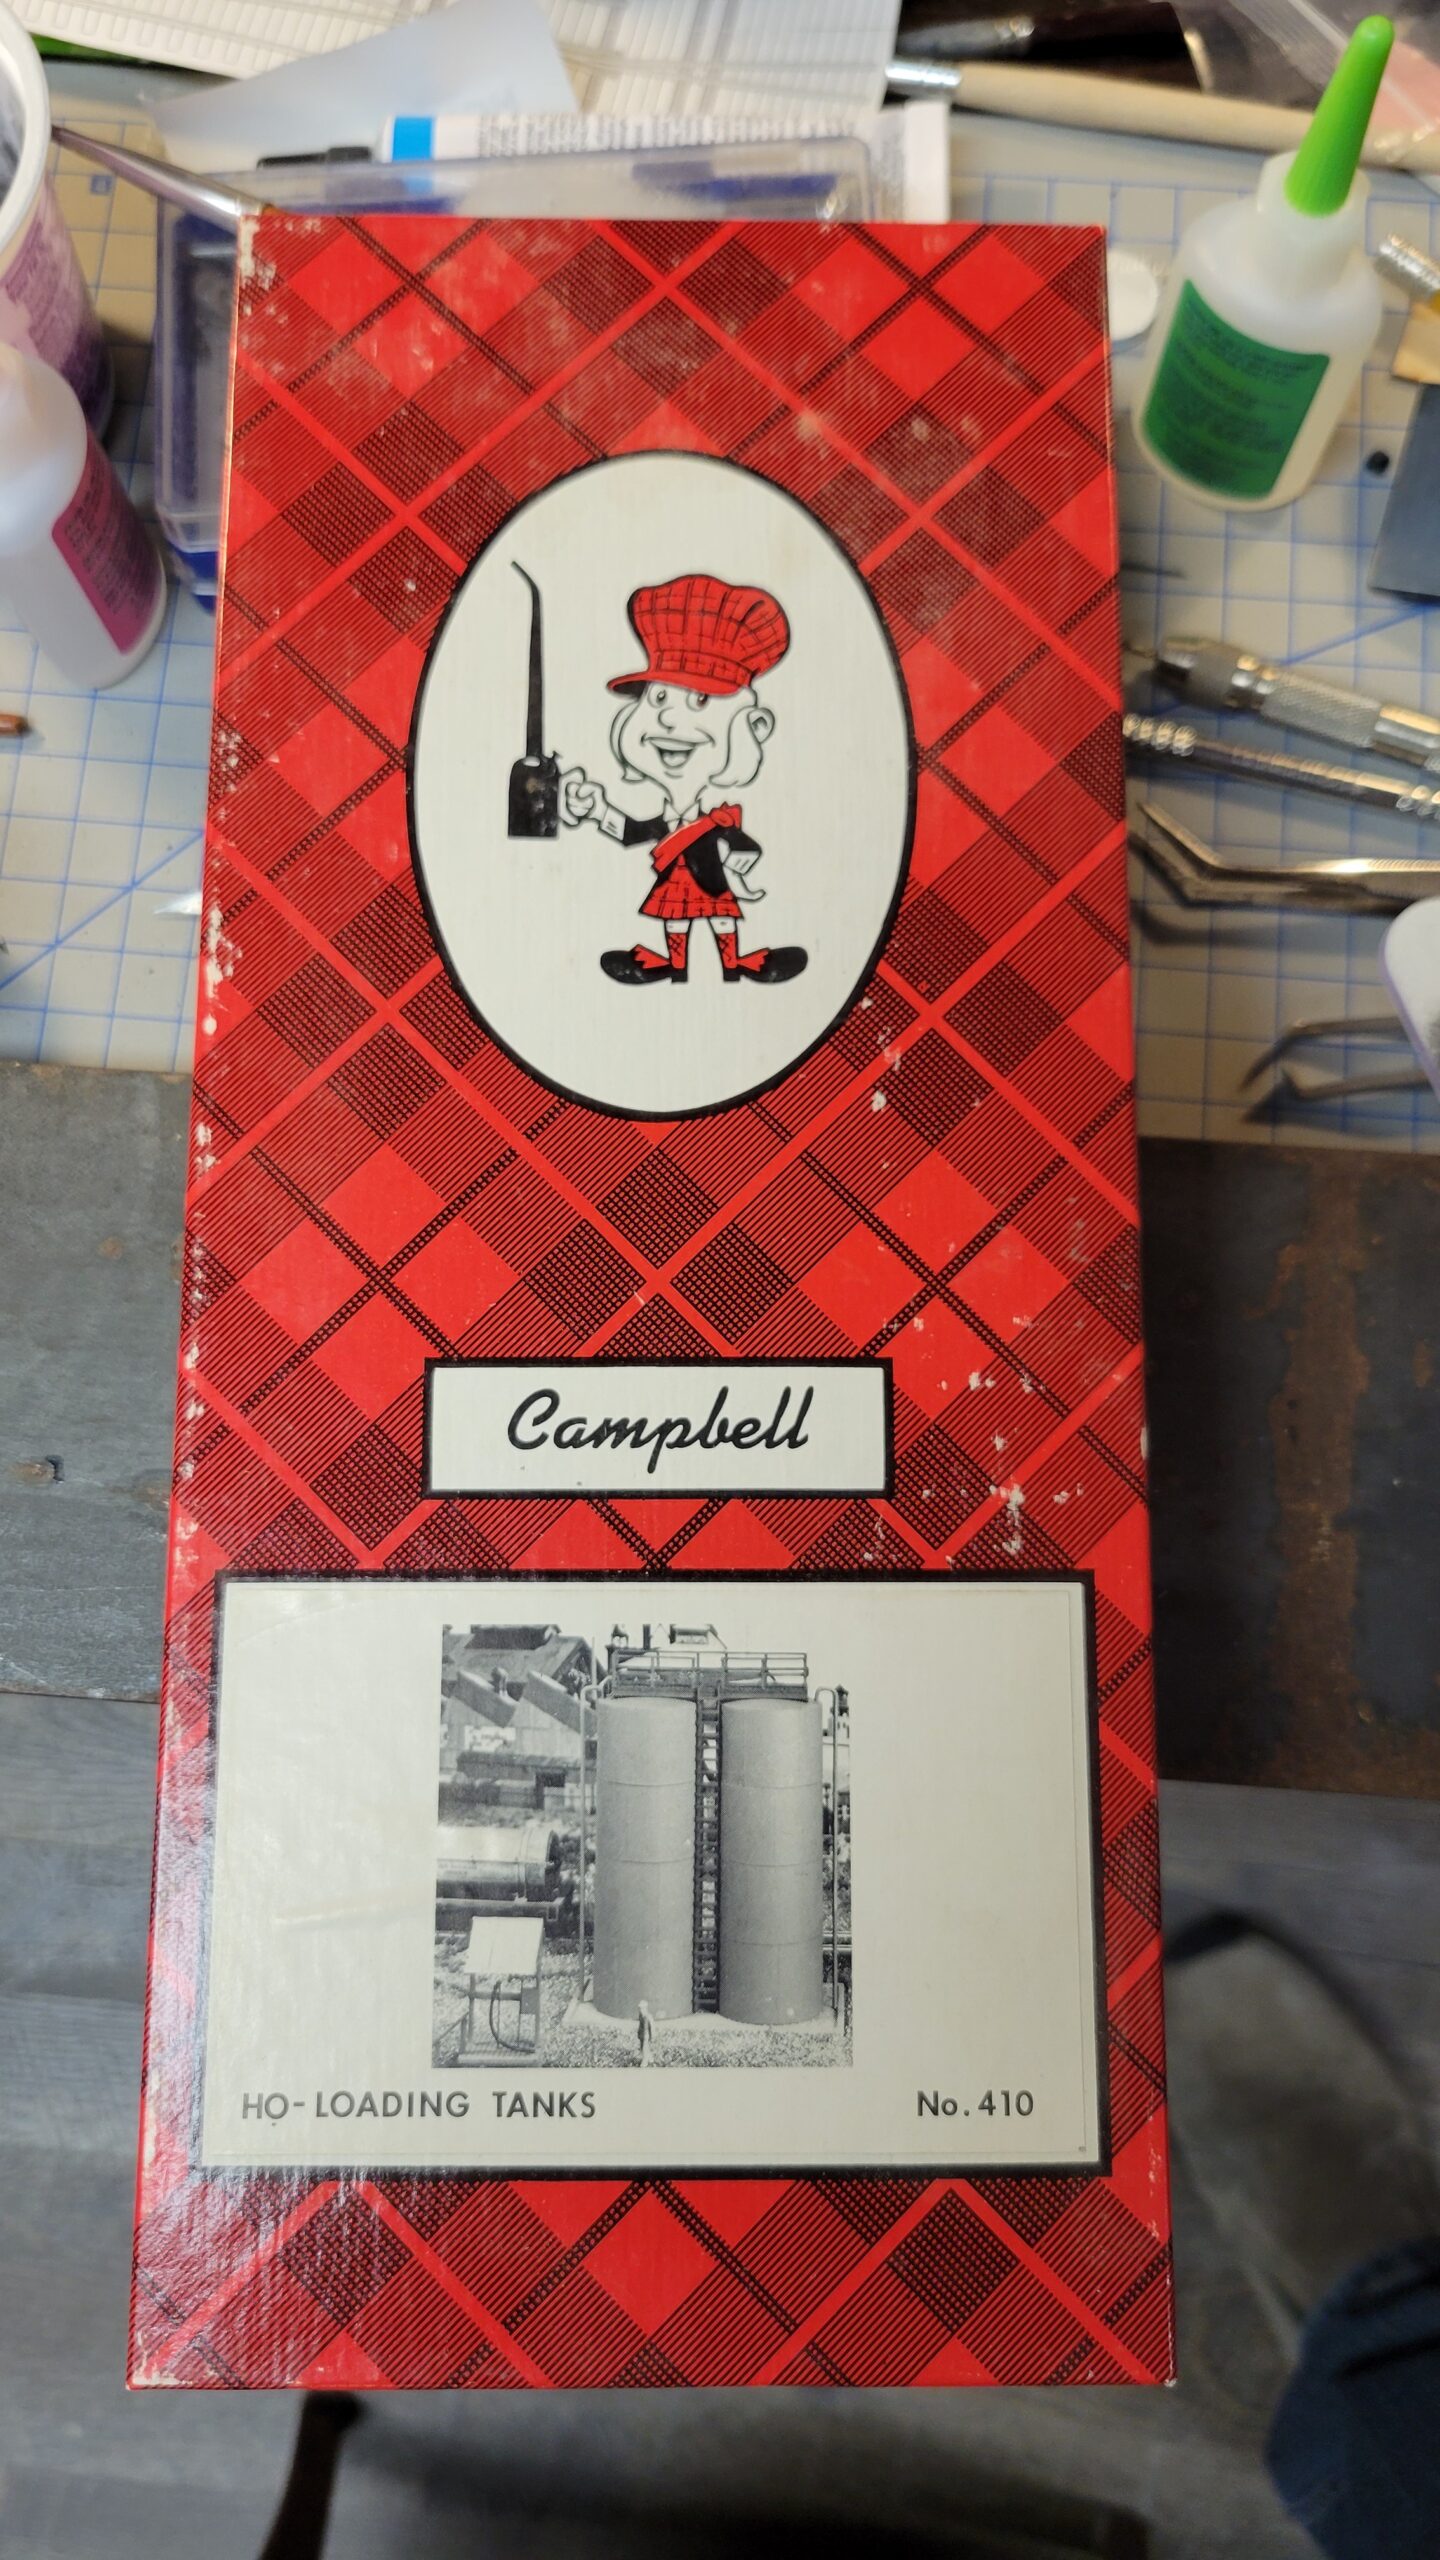
The first of March I started building an old Campbell kit - HO Loading Tanks.
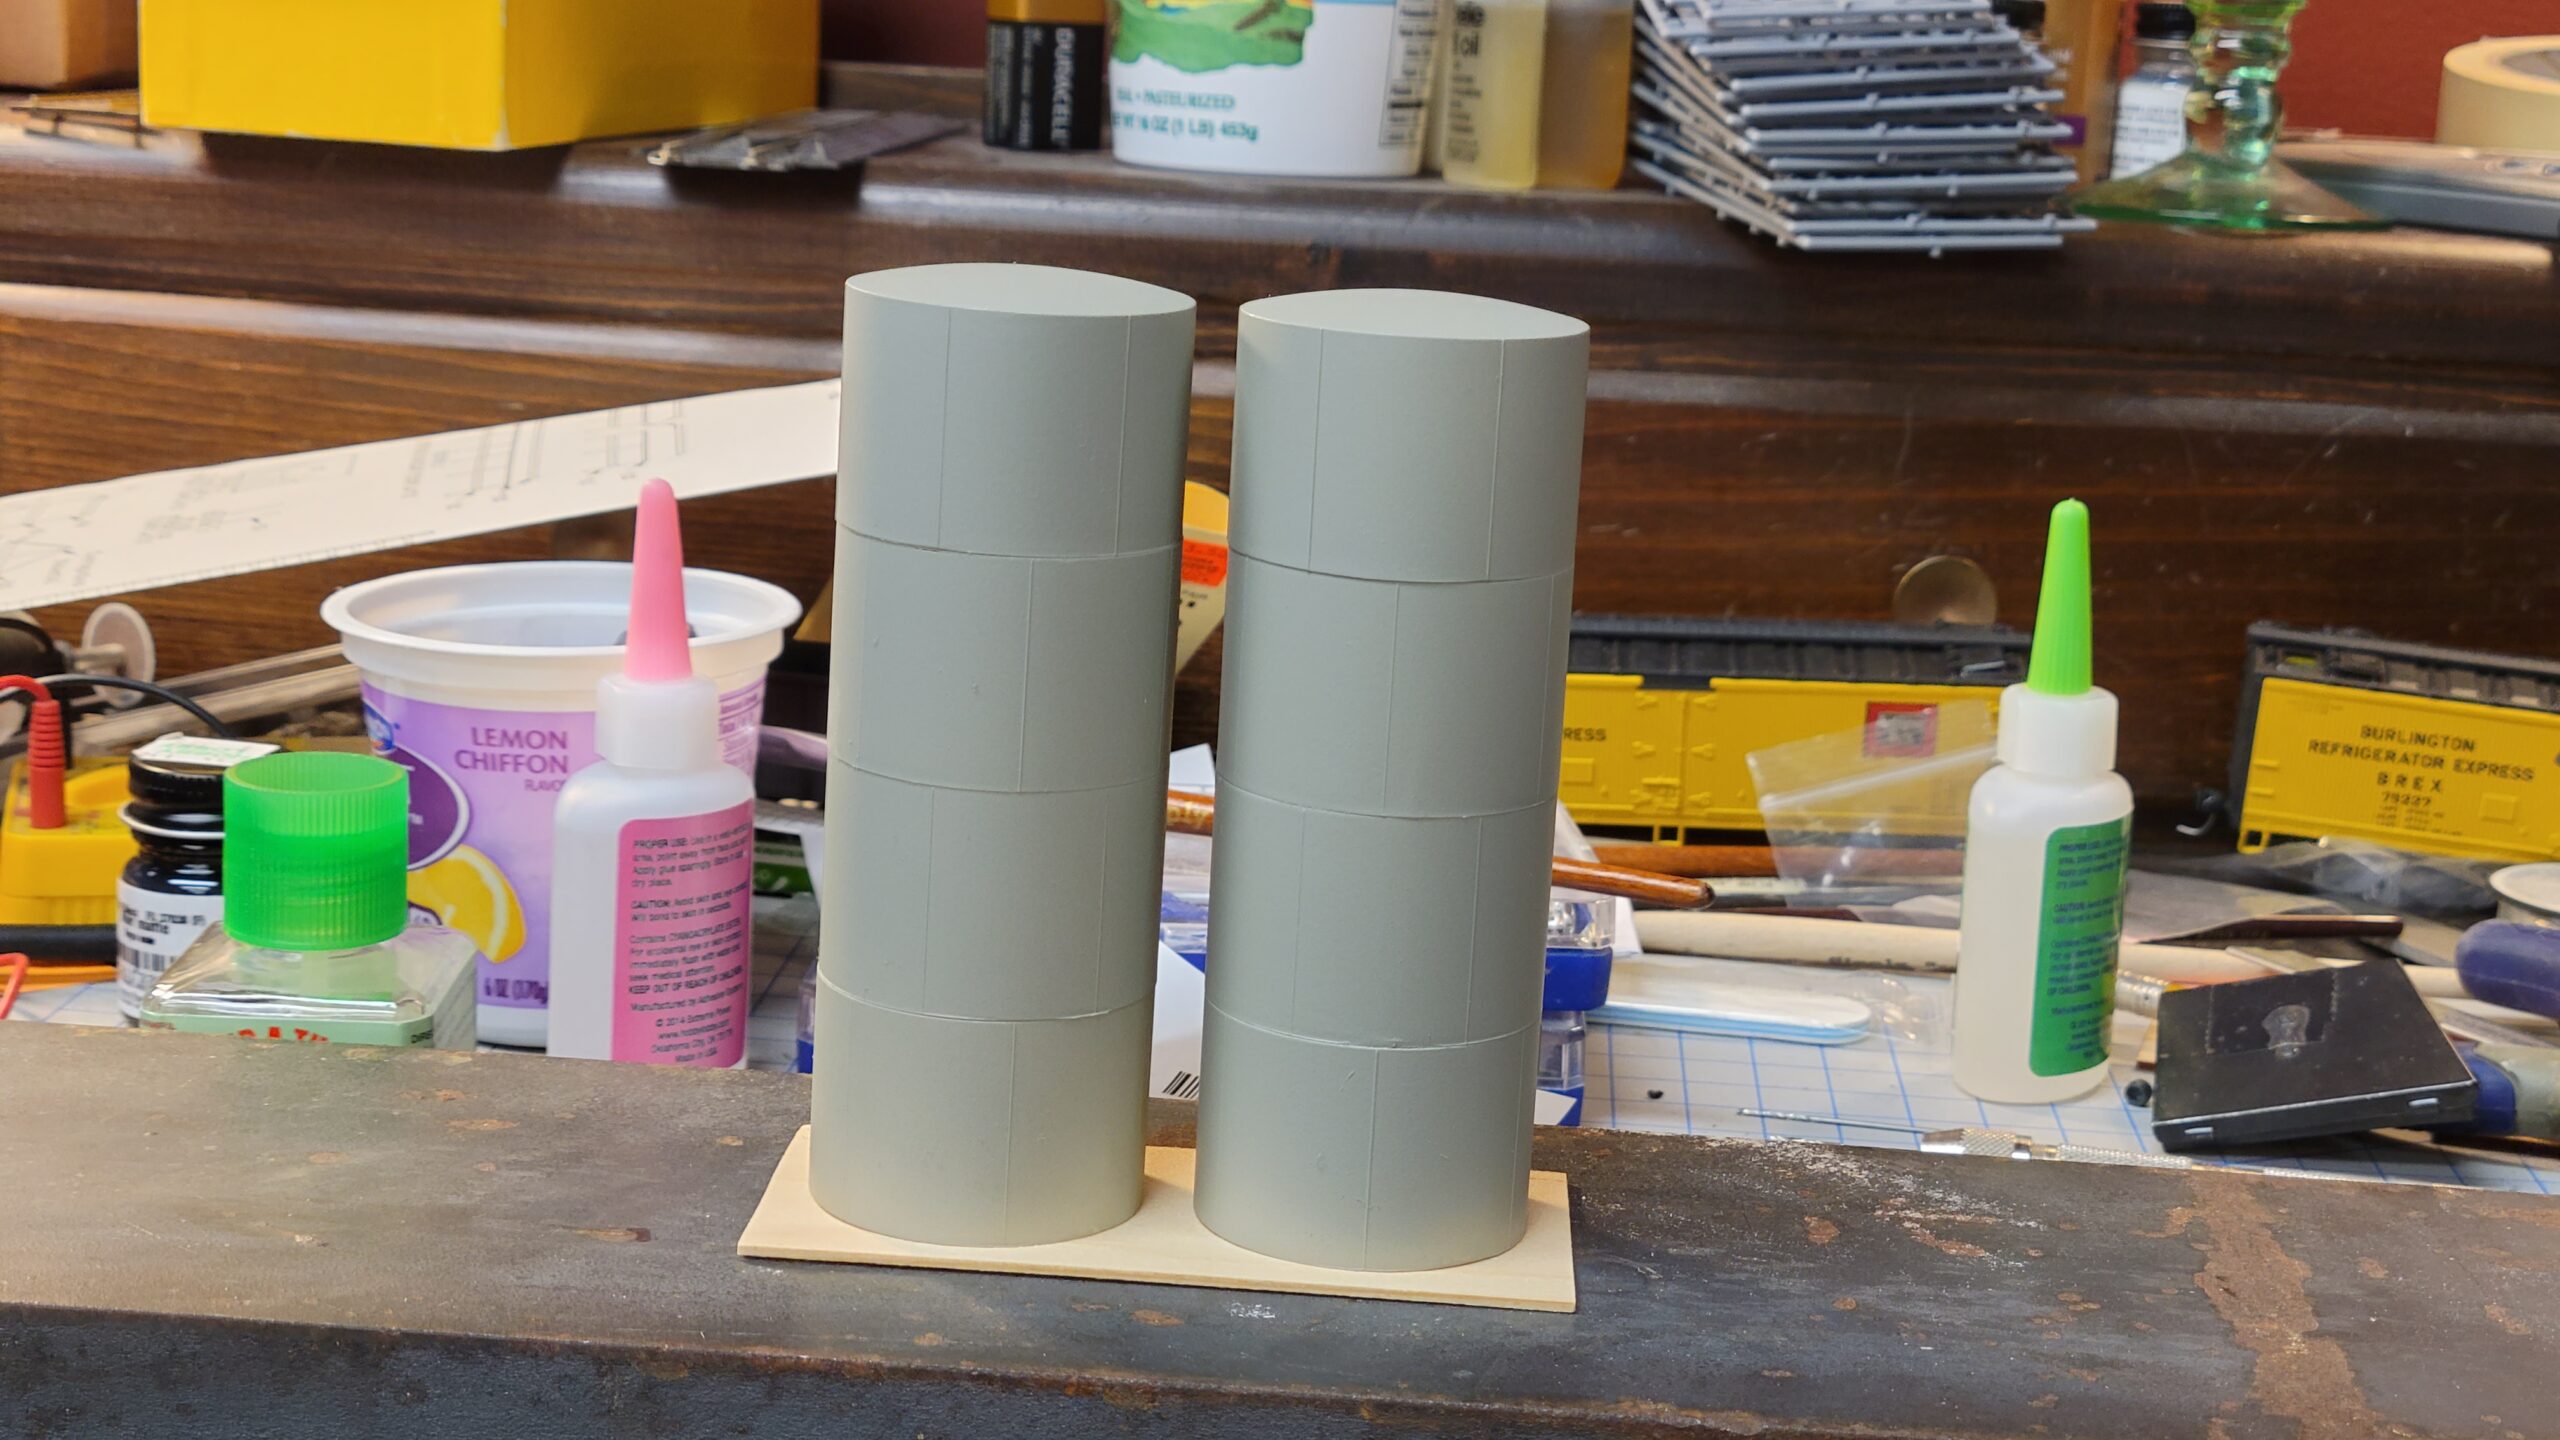
First I assembled and painted the two vertical tanks. Here they're standing on the base.
Progress has been slow, but today I began assembling the handrails for the platform on top of the tank.

I also glued the now-detailed tanks onto the assembled and painted base, and began installing the piping.

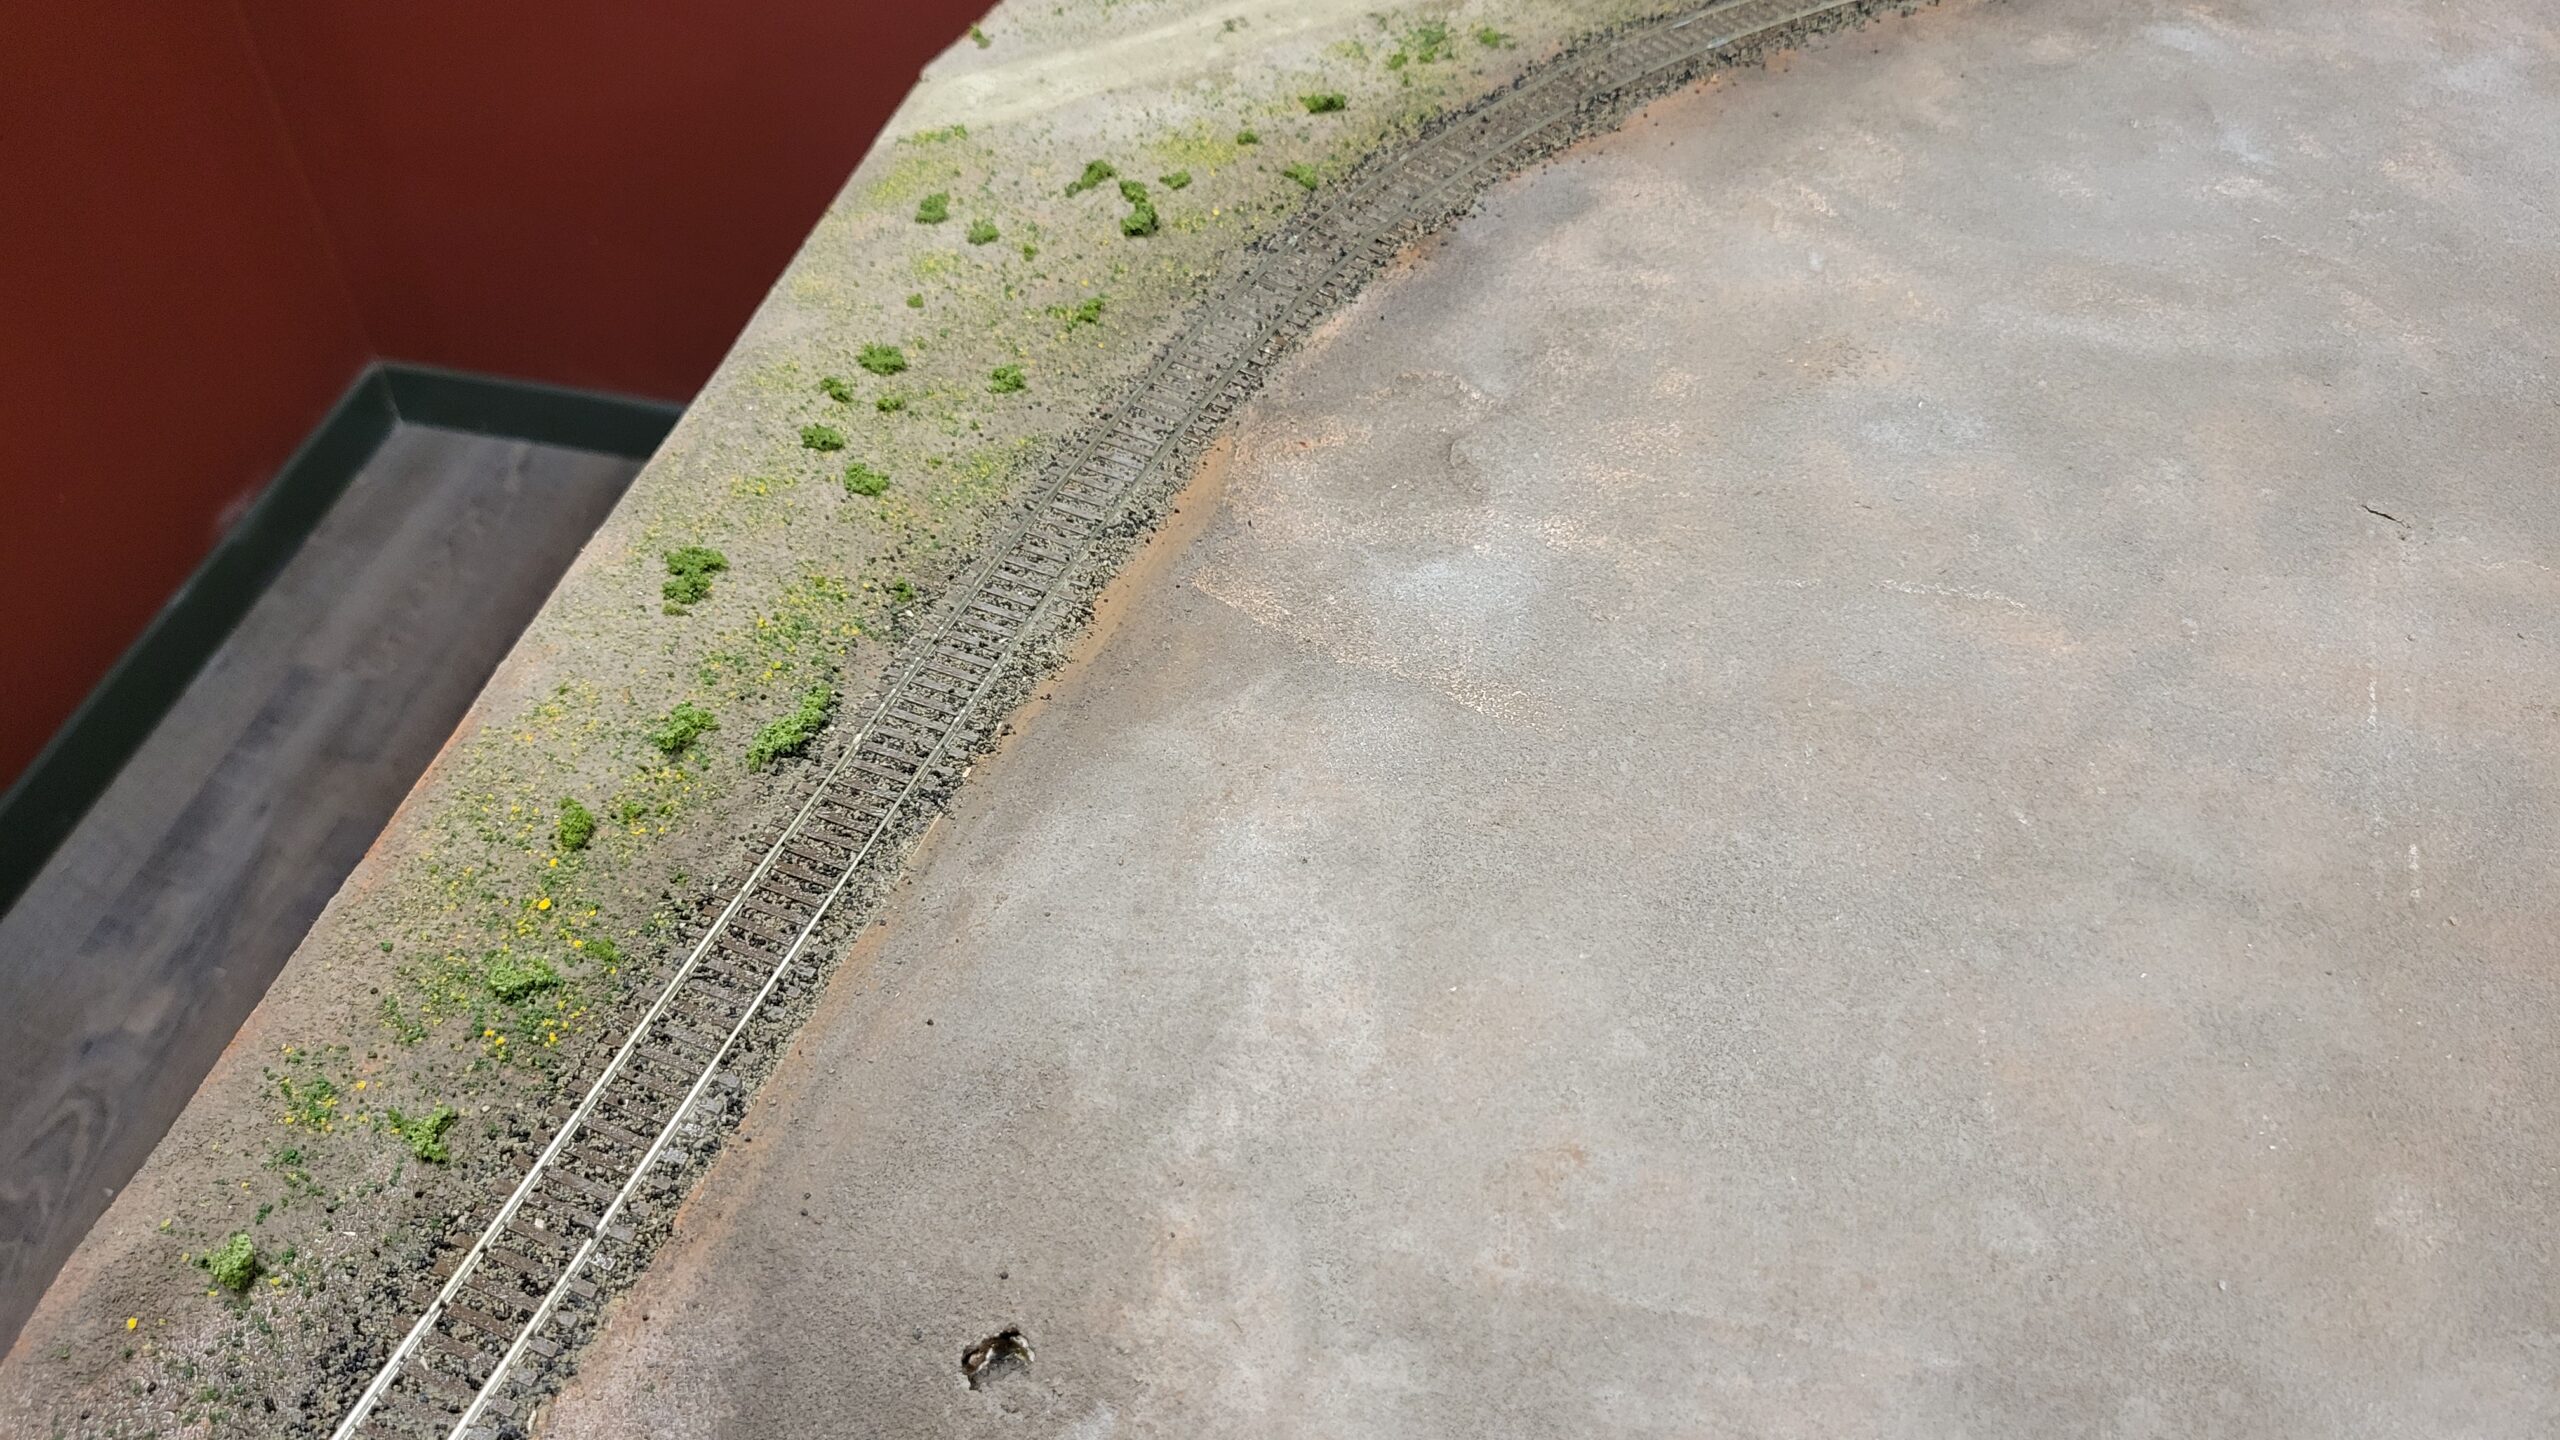
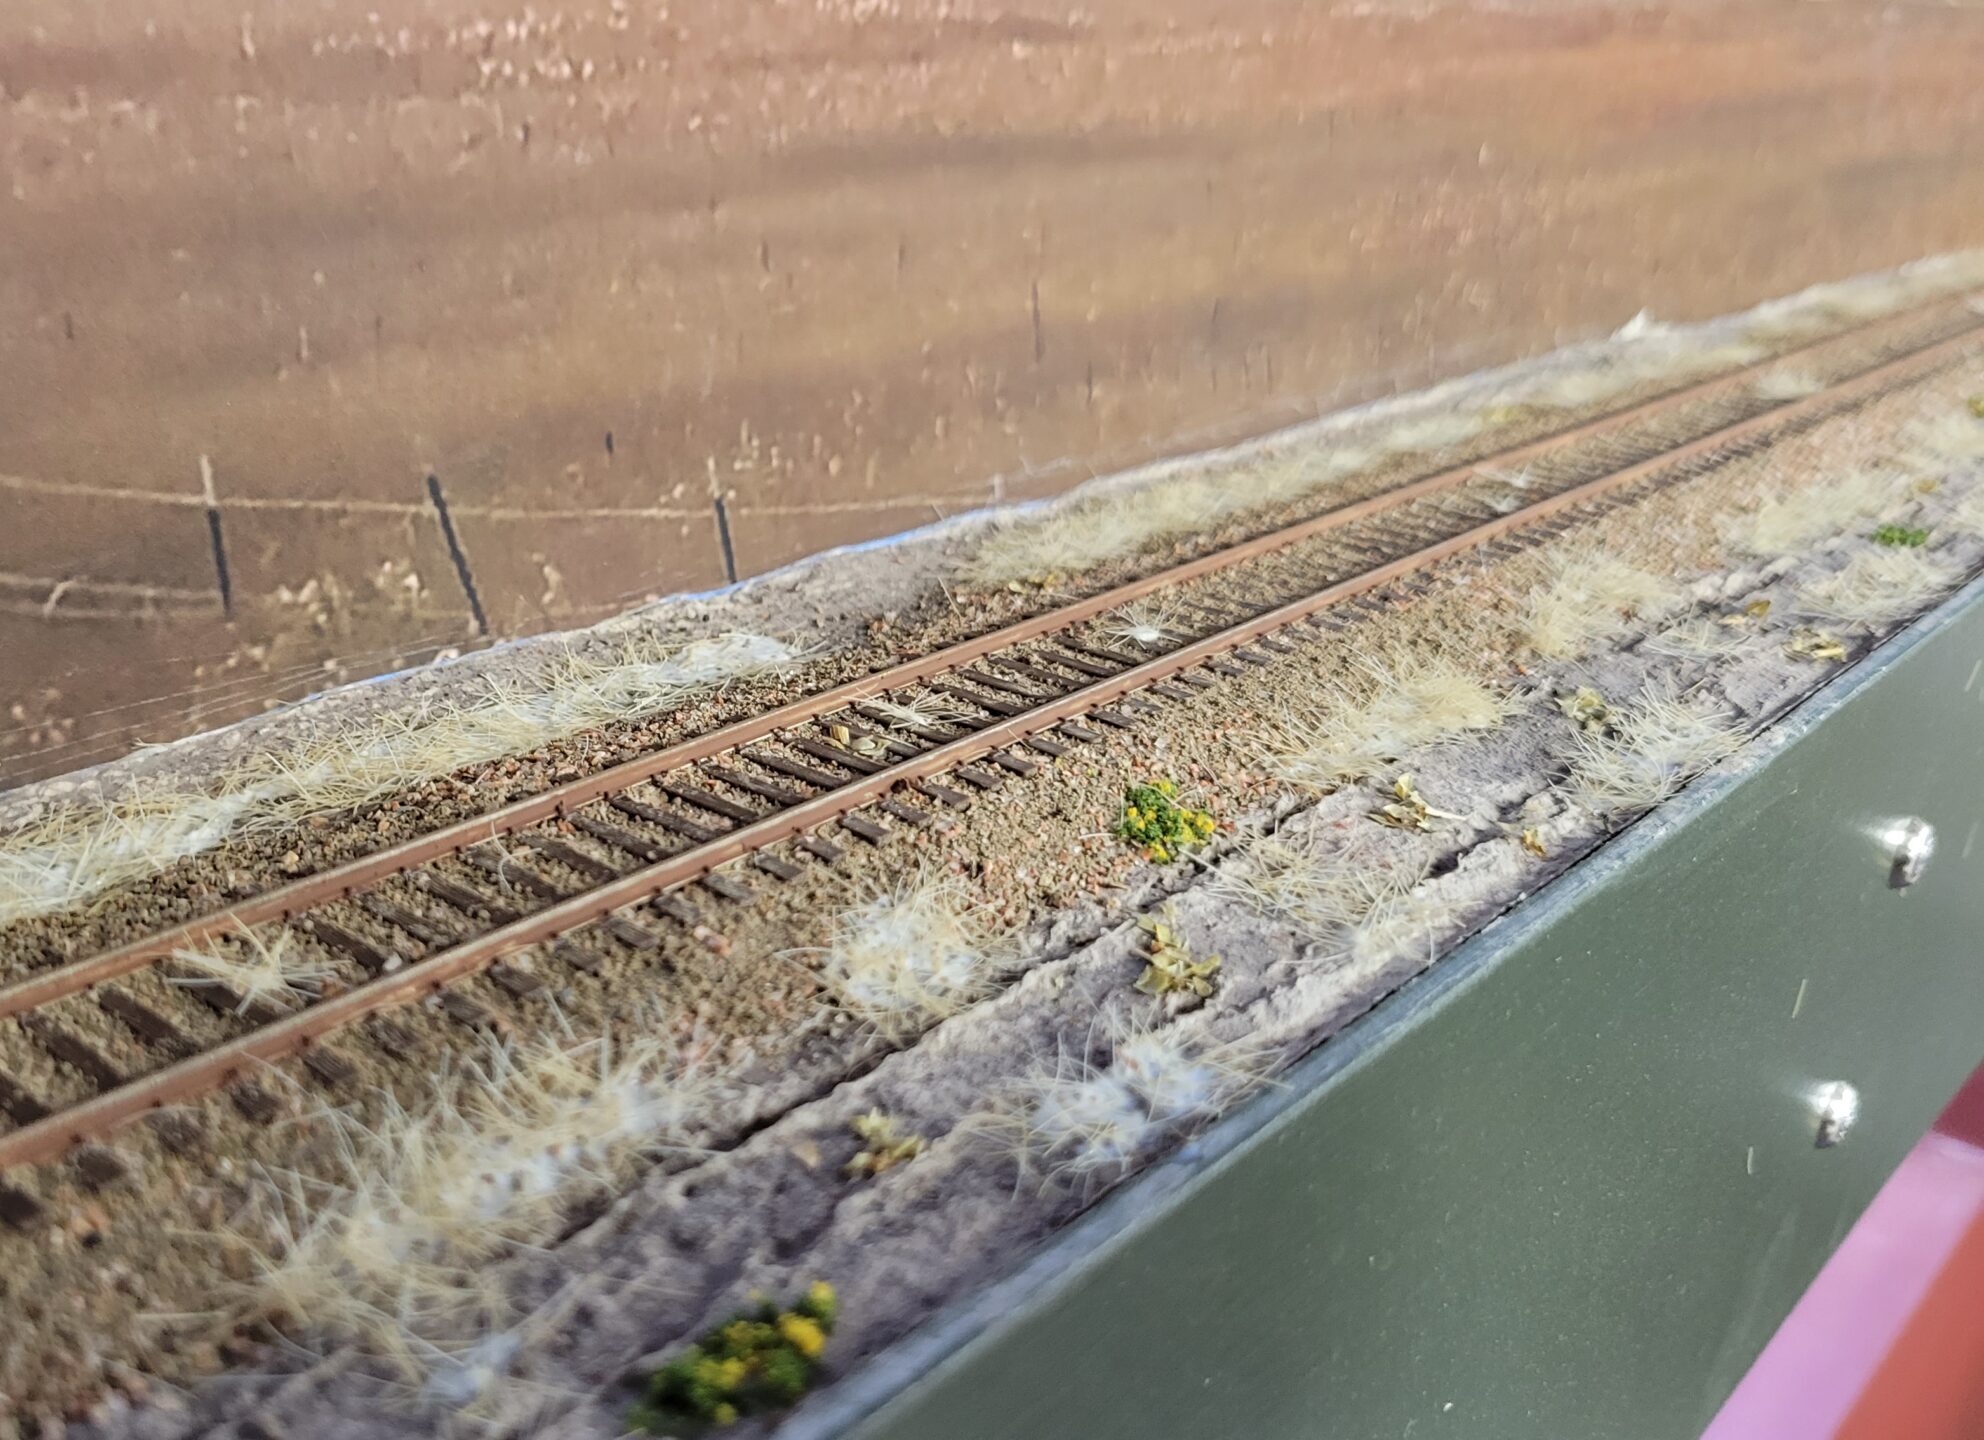
I did a bit more ground cover and static grass on the CNW line over Casper a few days ago.

I also started removing part of the dirt road at the east end of Casper. I forgot about the ice house, and put the road right through where it has to go! The wet part in the distance will be rerouted to the left.
Much progress was made on the vertical tank kit. Here the top platform is completed and weathered with Hunter's Weathering mix, but not yet painted.
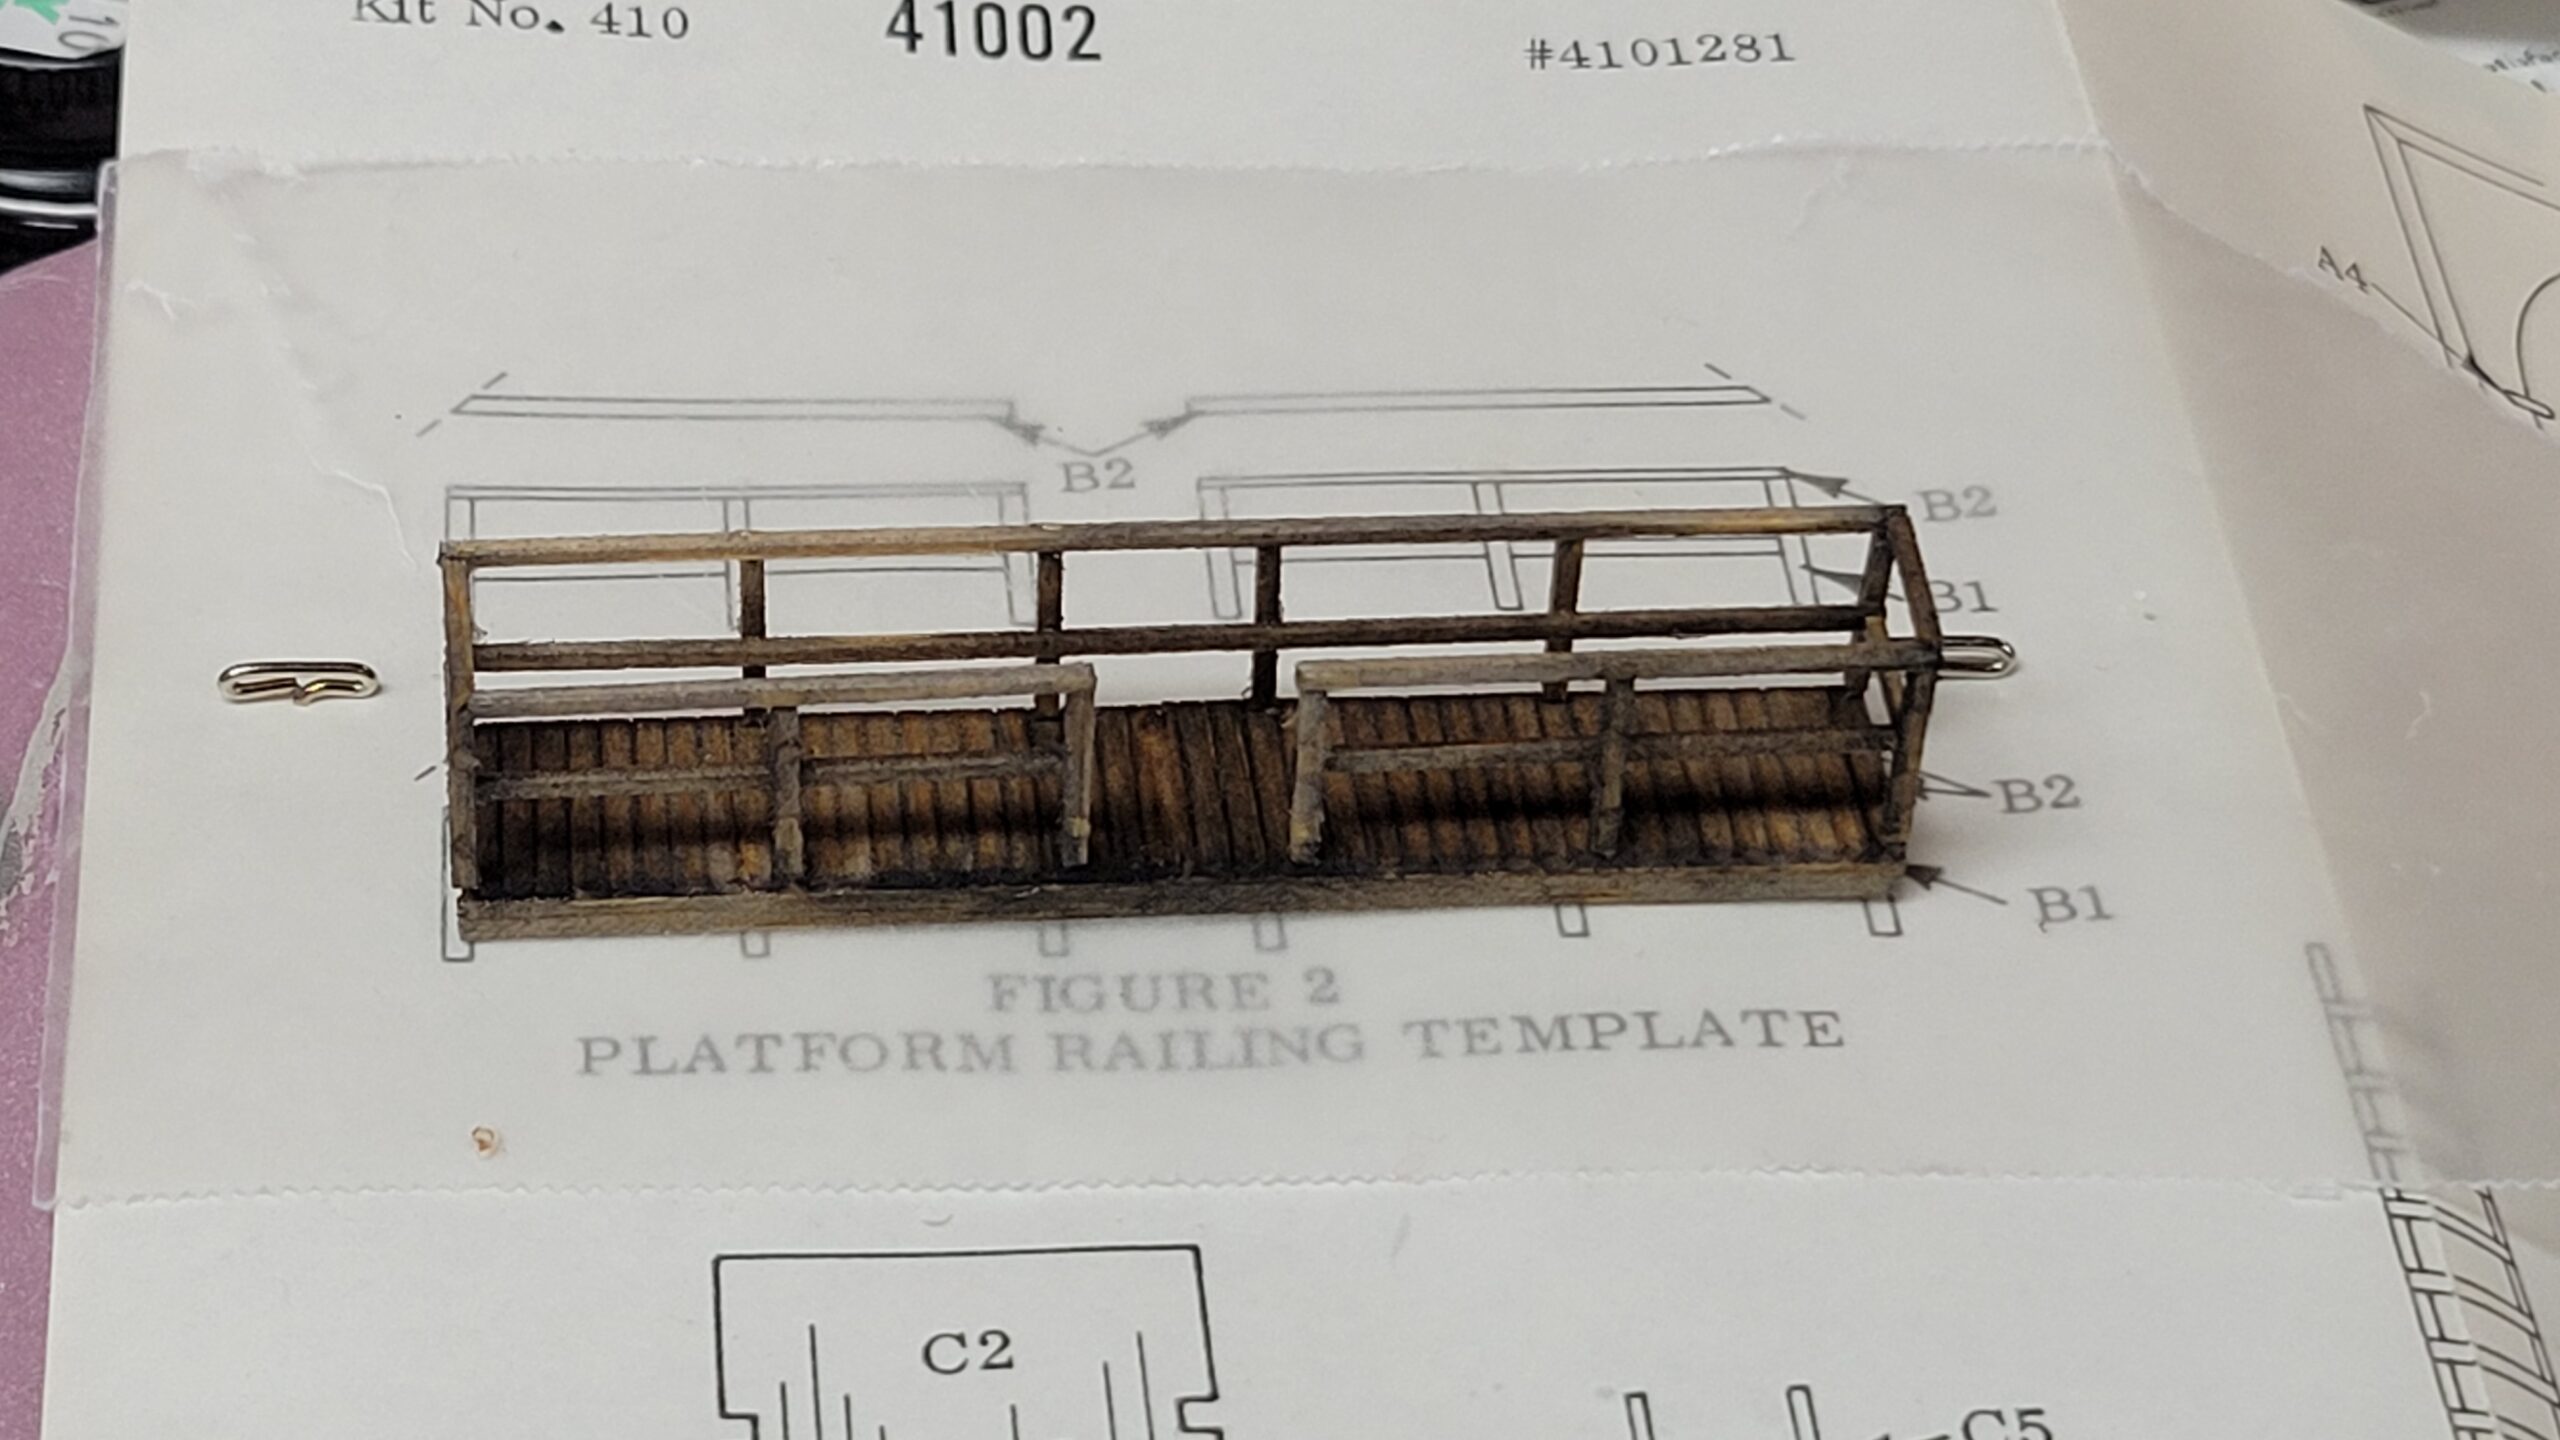
I expected the ladder to be very difficult, as it required building it up from stripwood. Here the rungs are in place on the drawing, but side rails are not installed yet.
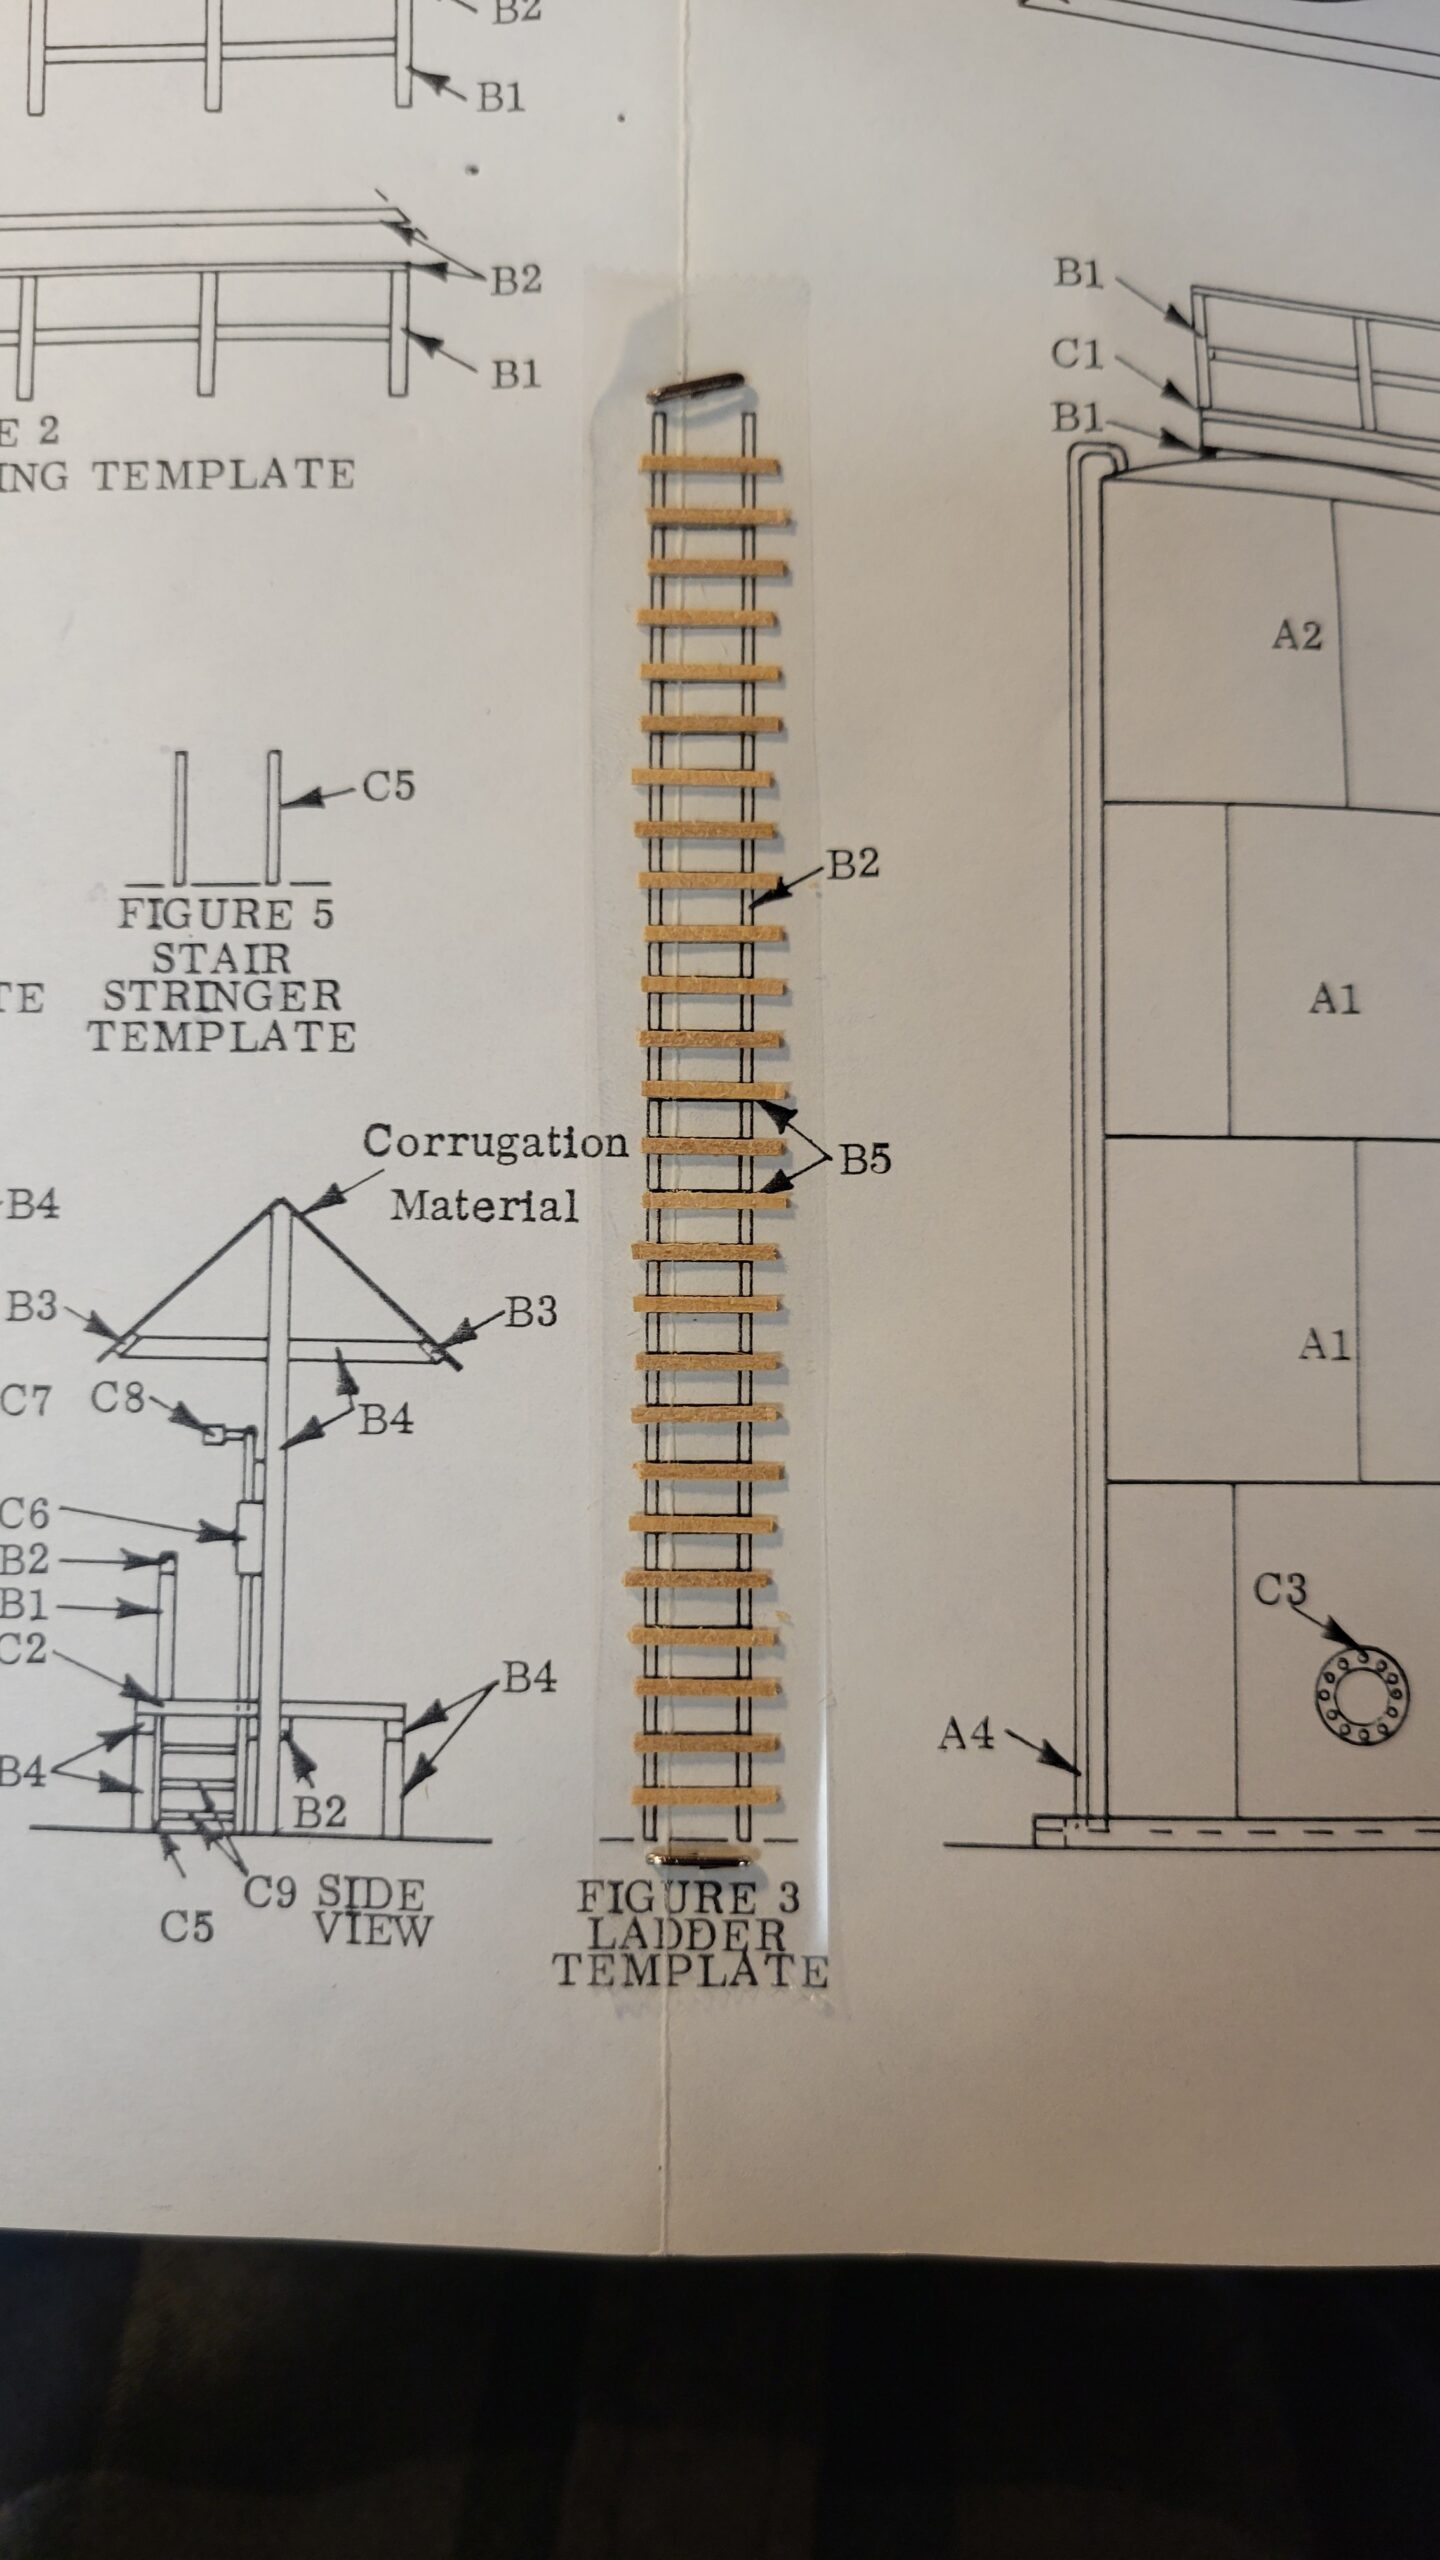
Ladder turned out to be pretty easy by following the instructions. It turned out much better than I anticipated.

Then I turned to weathering the tanks. It looks pretty garish at this point, but I haven't taken the steps to tone the weathering down yet. Platform is now painted and set on top just to see how it looks.

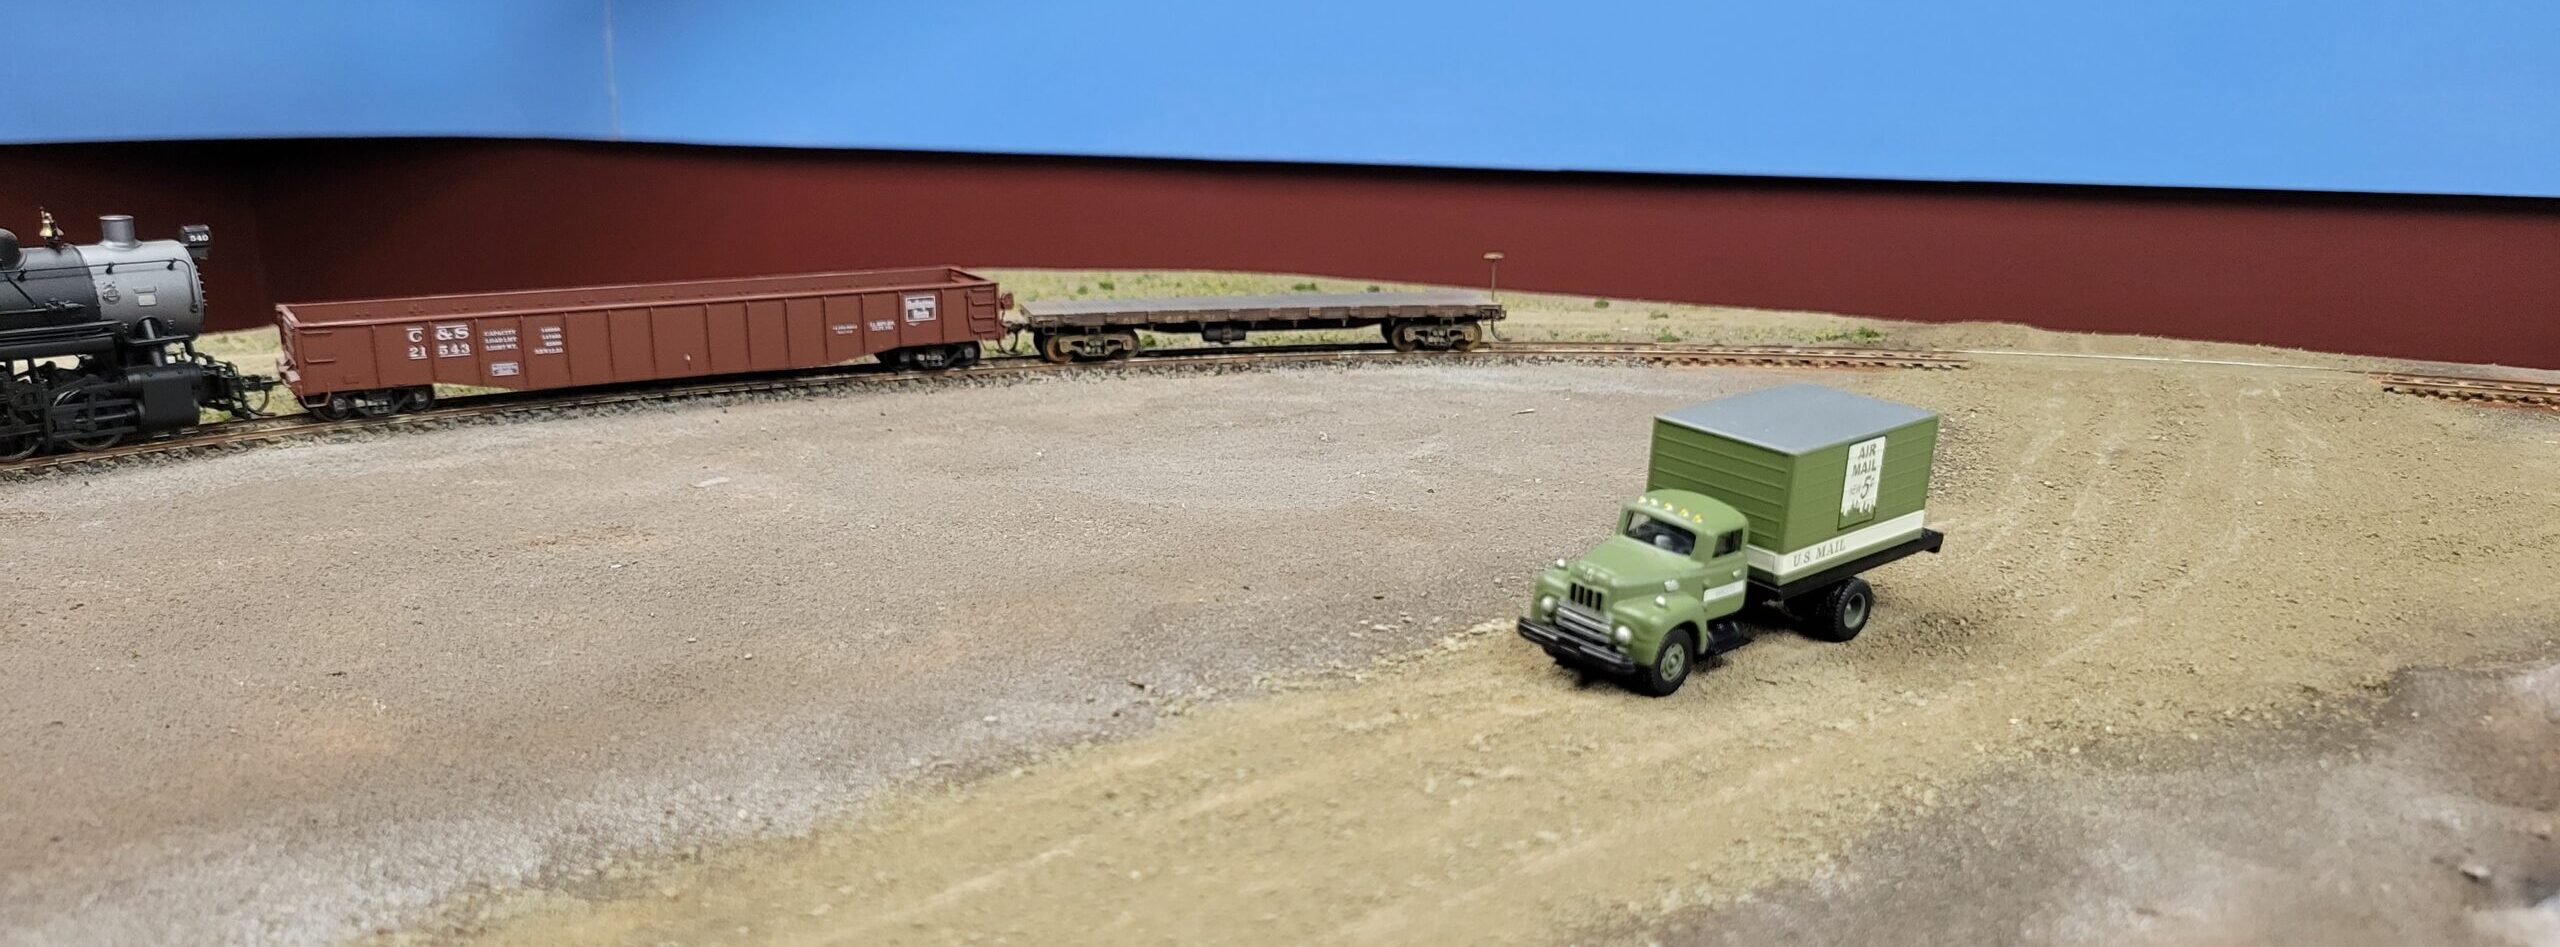
Yesterday I subdued the weathering, and this morning I permanently attached the platform and ladder. I set the tanks on the Hudson benchwork and flanked it with a couple of trucks.

And here's a shot from the other side of the depot.
 This may look okay when the rest of the scenery is done in this area! I just set the tanks here to get a shot of them, but I kind of like them in this location. They may just stay here.
I haven't built the small filling shed that accompanies the tanks yet. I'll do that in a few days.
I've never built a kit like this before, and it came out much better than I expected. It was a lot of fun!
I painted more of the rail on the Rocky Mountain Drilling spur - all the way past the soon-to-be-created grade crossing. Talk about tedious! Painting track is even worse than replacing ties!
And speaking of the grade crossing, I got it started today.
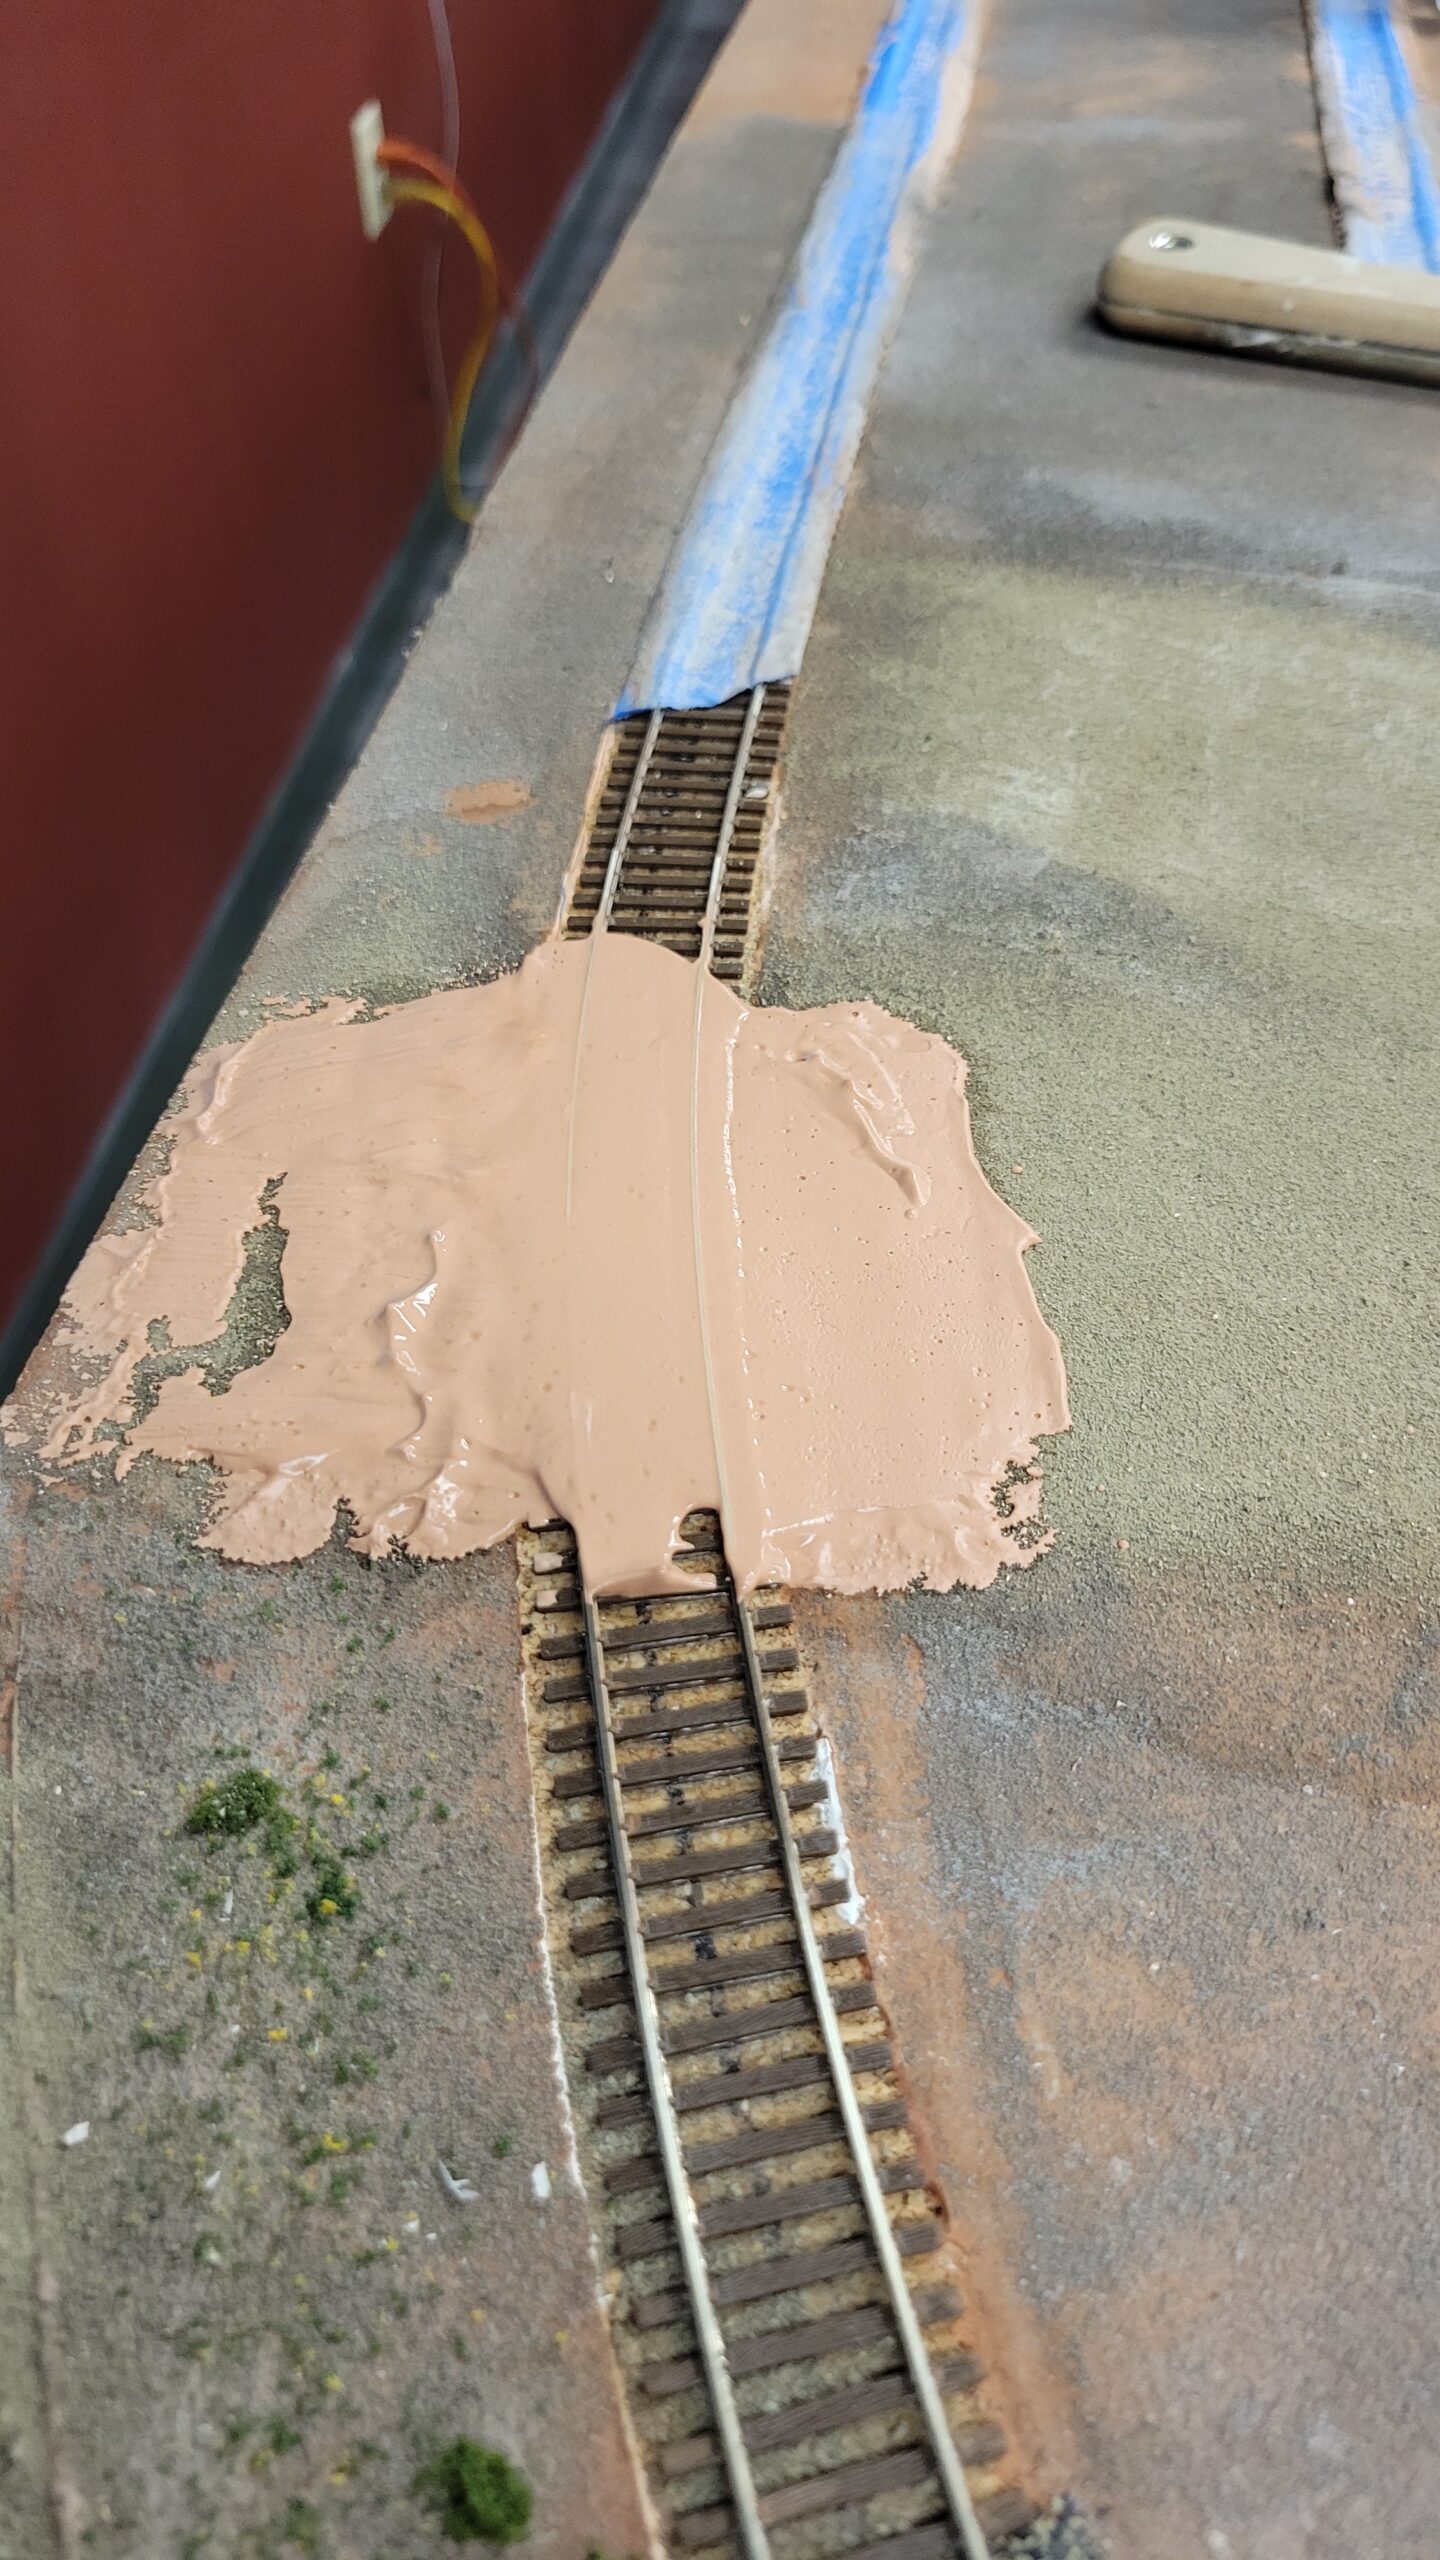
It doesn't look like much now, but this is just the underlaying part. It's colored plaster (okay, I could have done a bit better on the color. Believe it or not, that was brown pigment). I'll sand that smooth, shape the edges and cut the flangeways, then paint it a more respectable tannish brown. After that will come the dirt layers.

After letting the plaster grade crossing dry overnight, I carved and shaped it with a putty knife.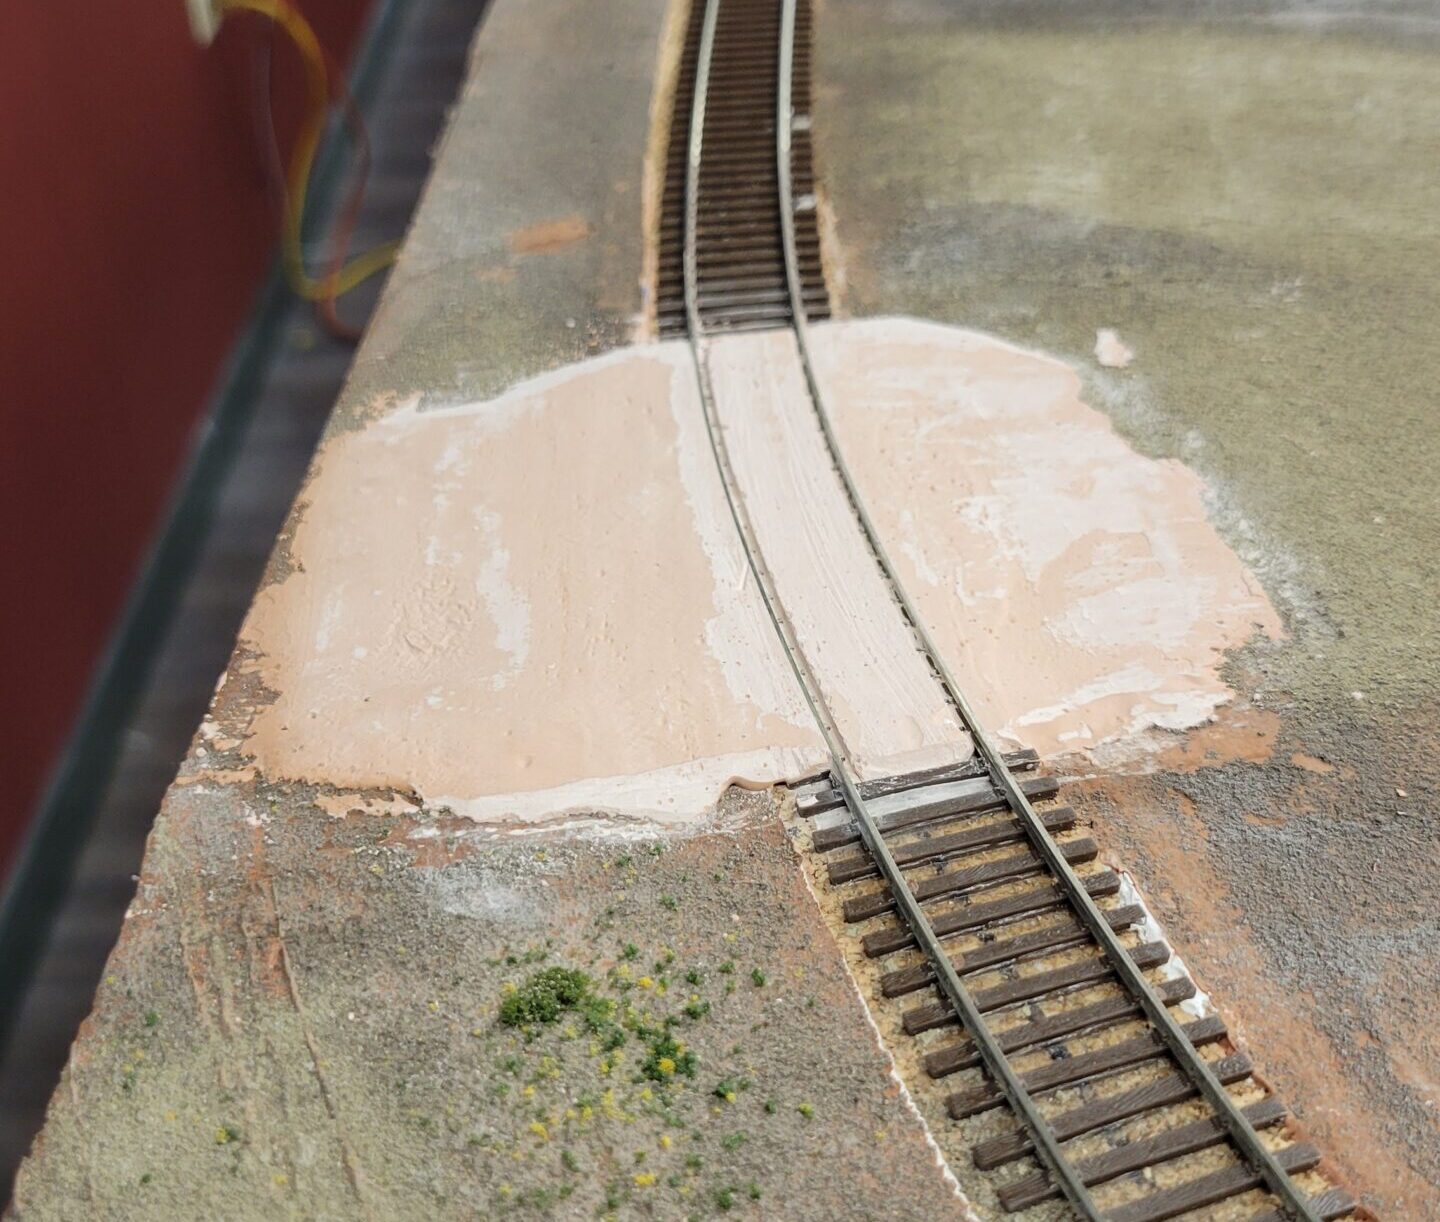
Then I painted it...

And glued on a layer of dirt. Now it's being left to dry overnight.

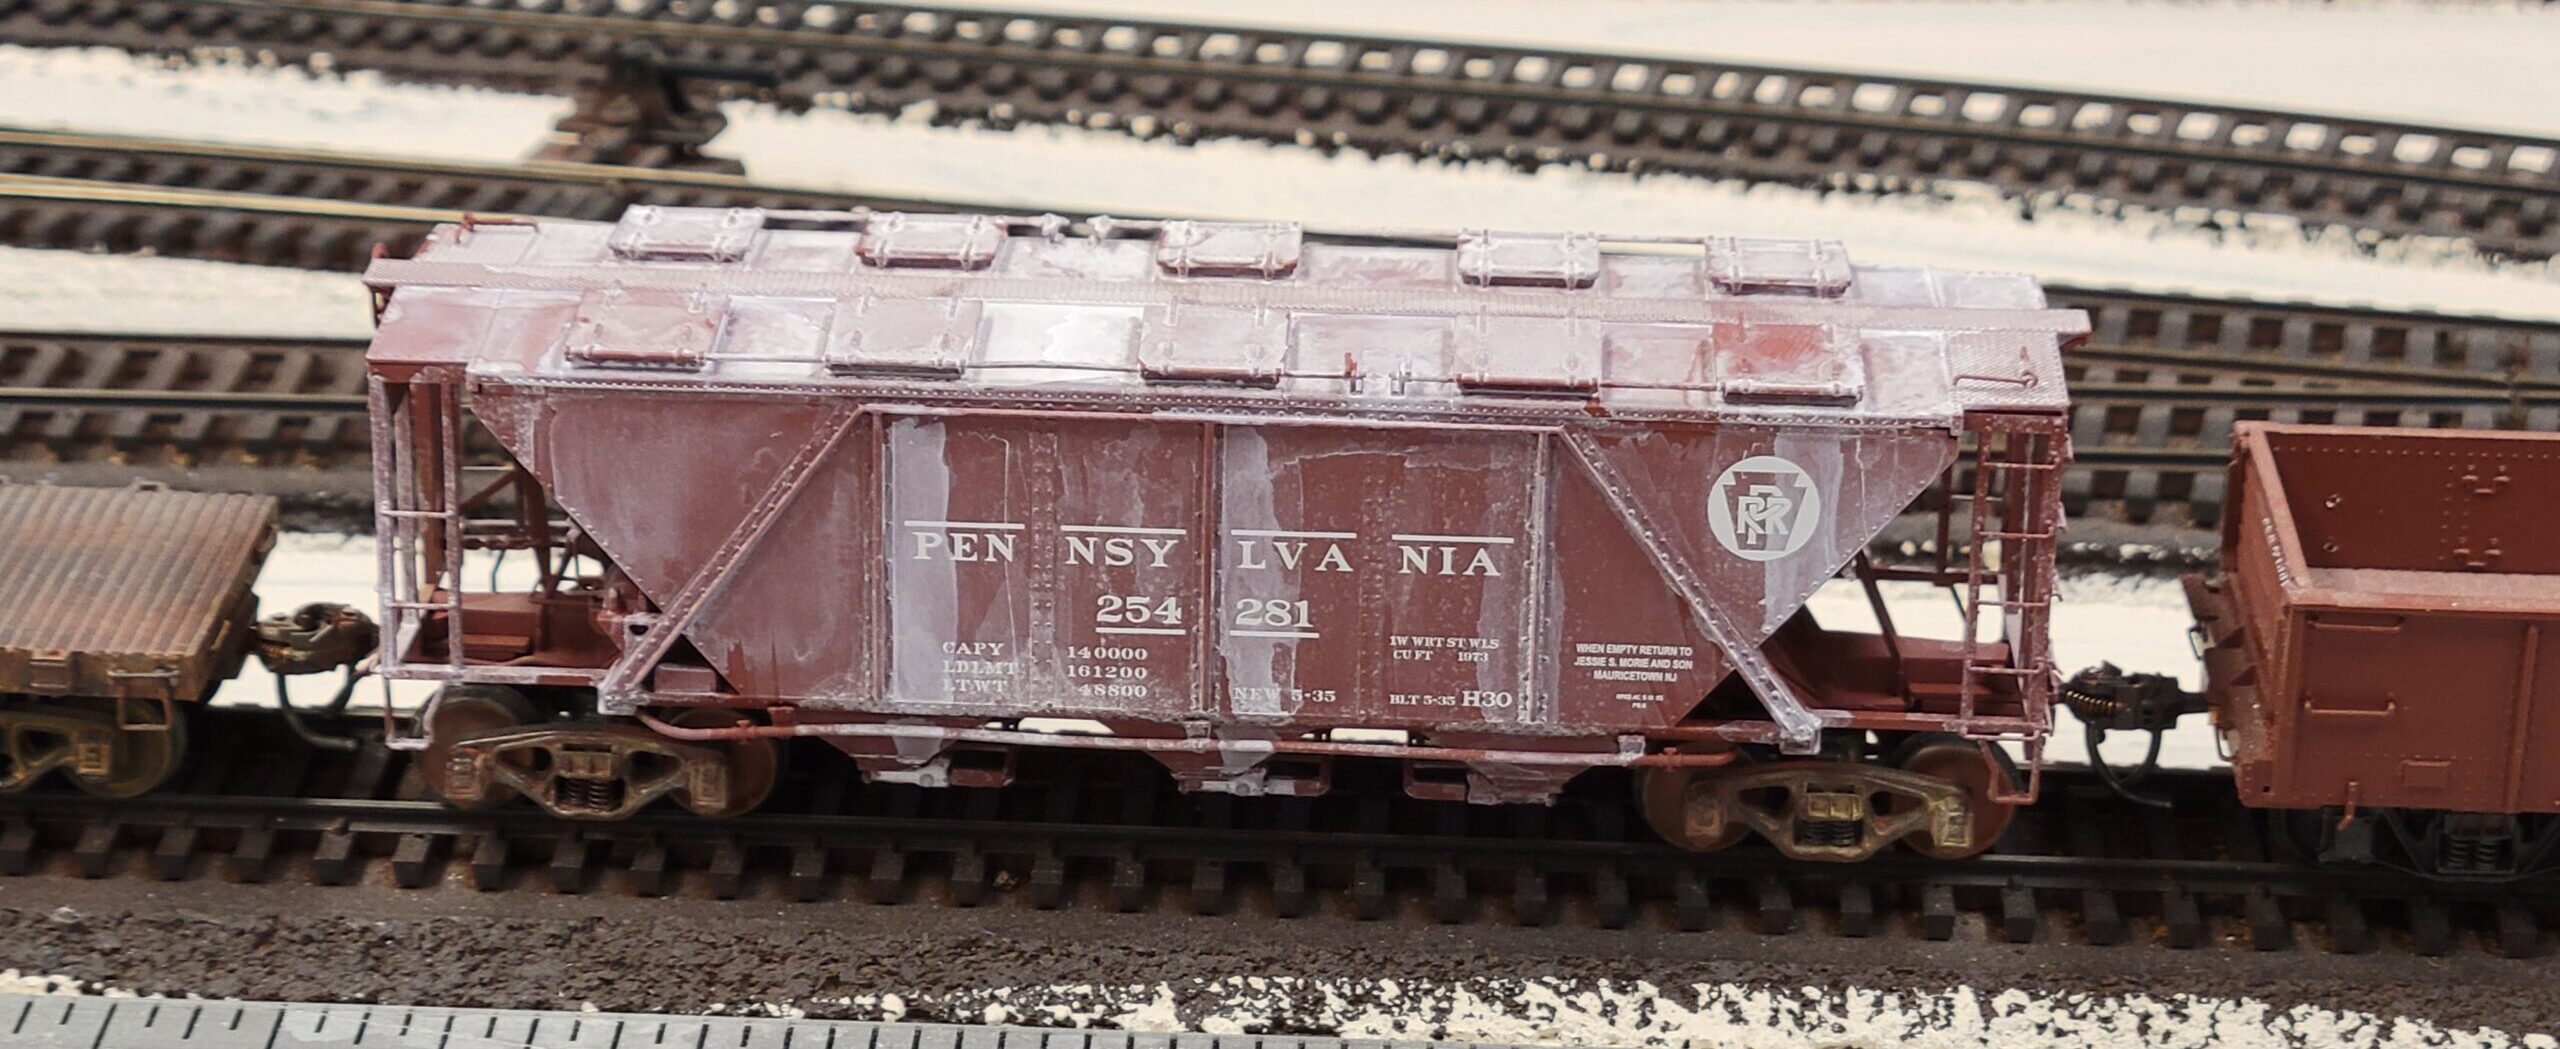
While the road was drying, I finished preparing a Bowser covered hopper for the layout by replacing the trucks and heavily weathering it. The story is that a brand new flood loader at the almost-as-new bentonite plant in Lovell came on line, and this was the test car. The chutes didn't close when they were supposed to, and nearly the entire car got buried in the bentonite! There was a half-hearted attempt to rinse it off, and this was the result. Over time rain will clean a bit more of it off, but the car will always look like some disaster overtook it from now on.
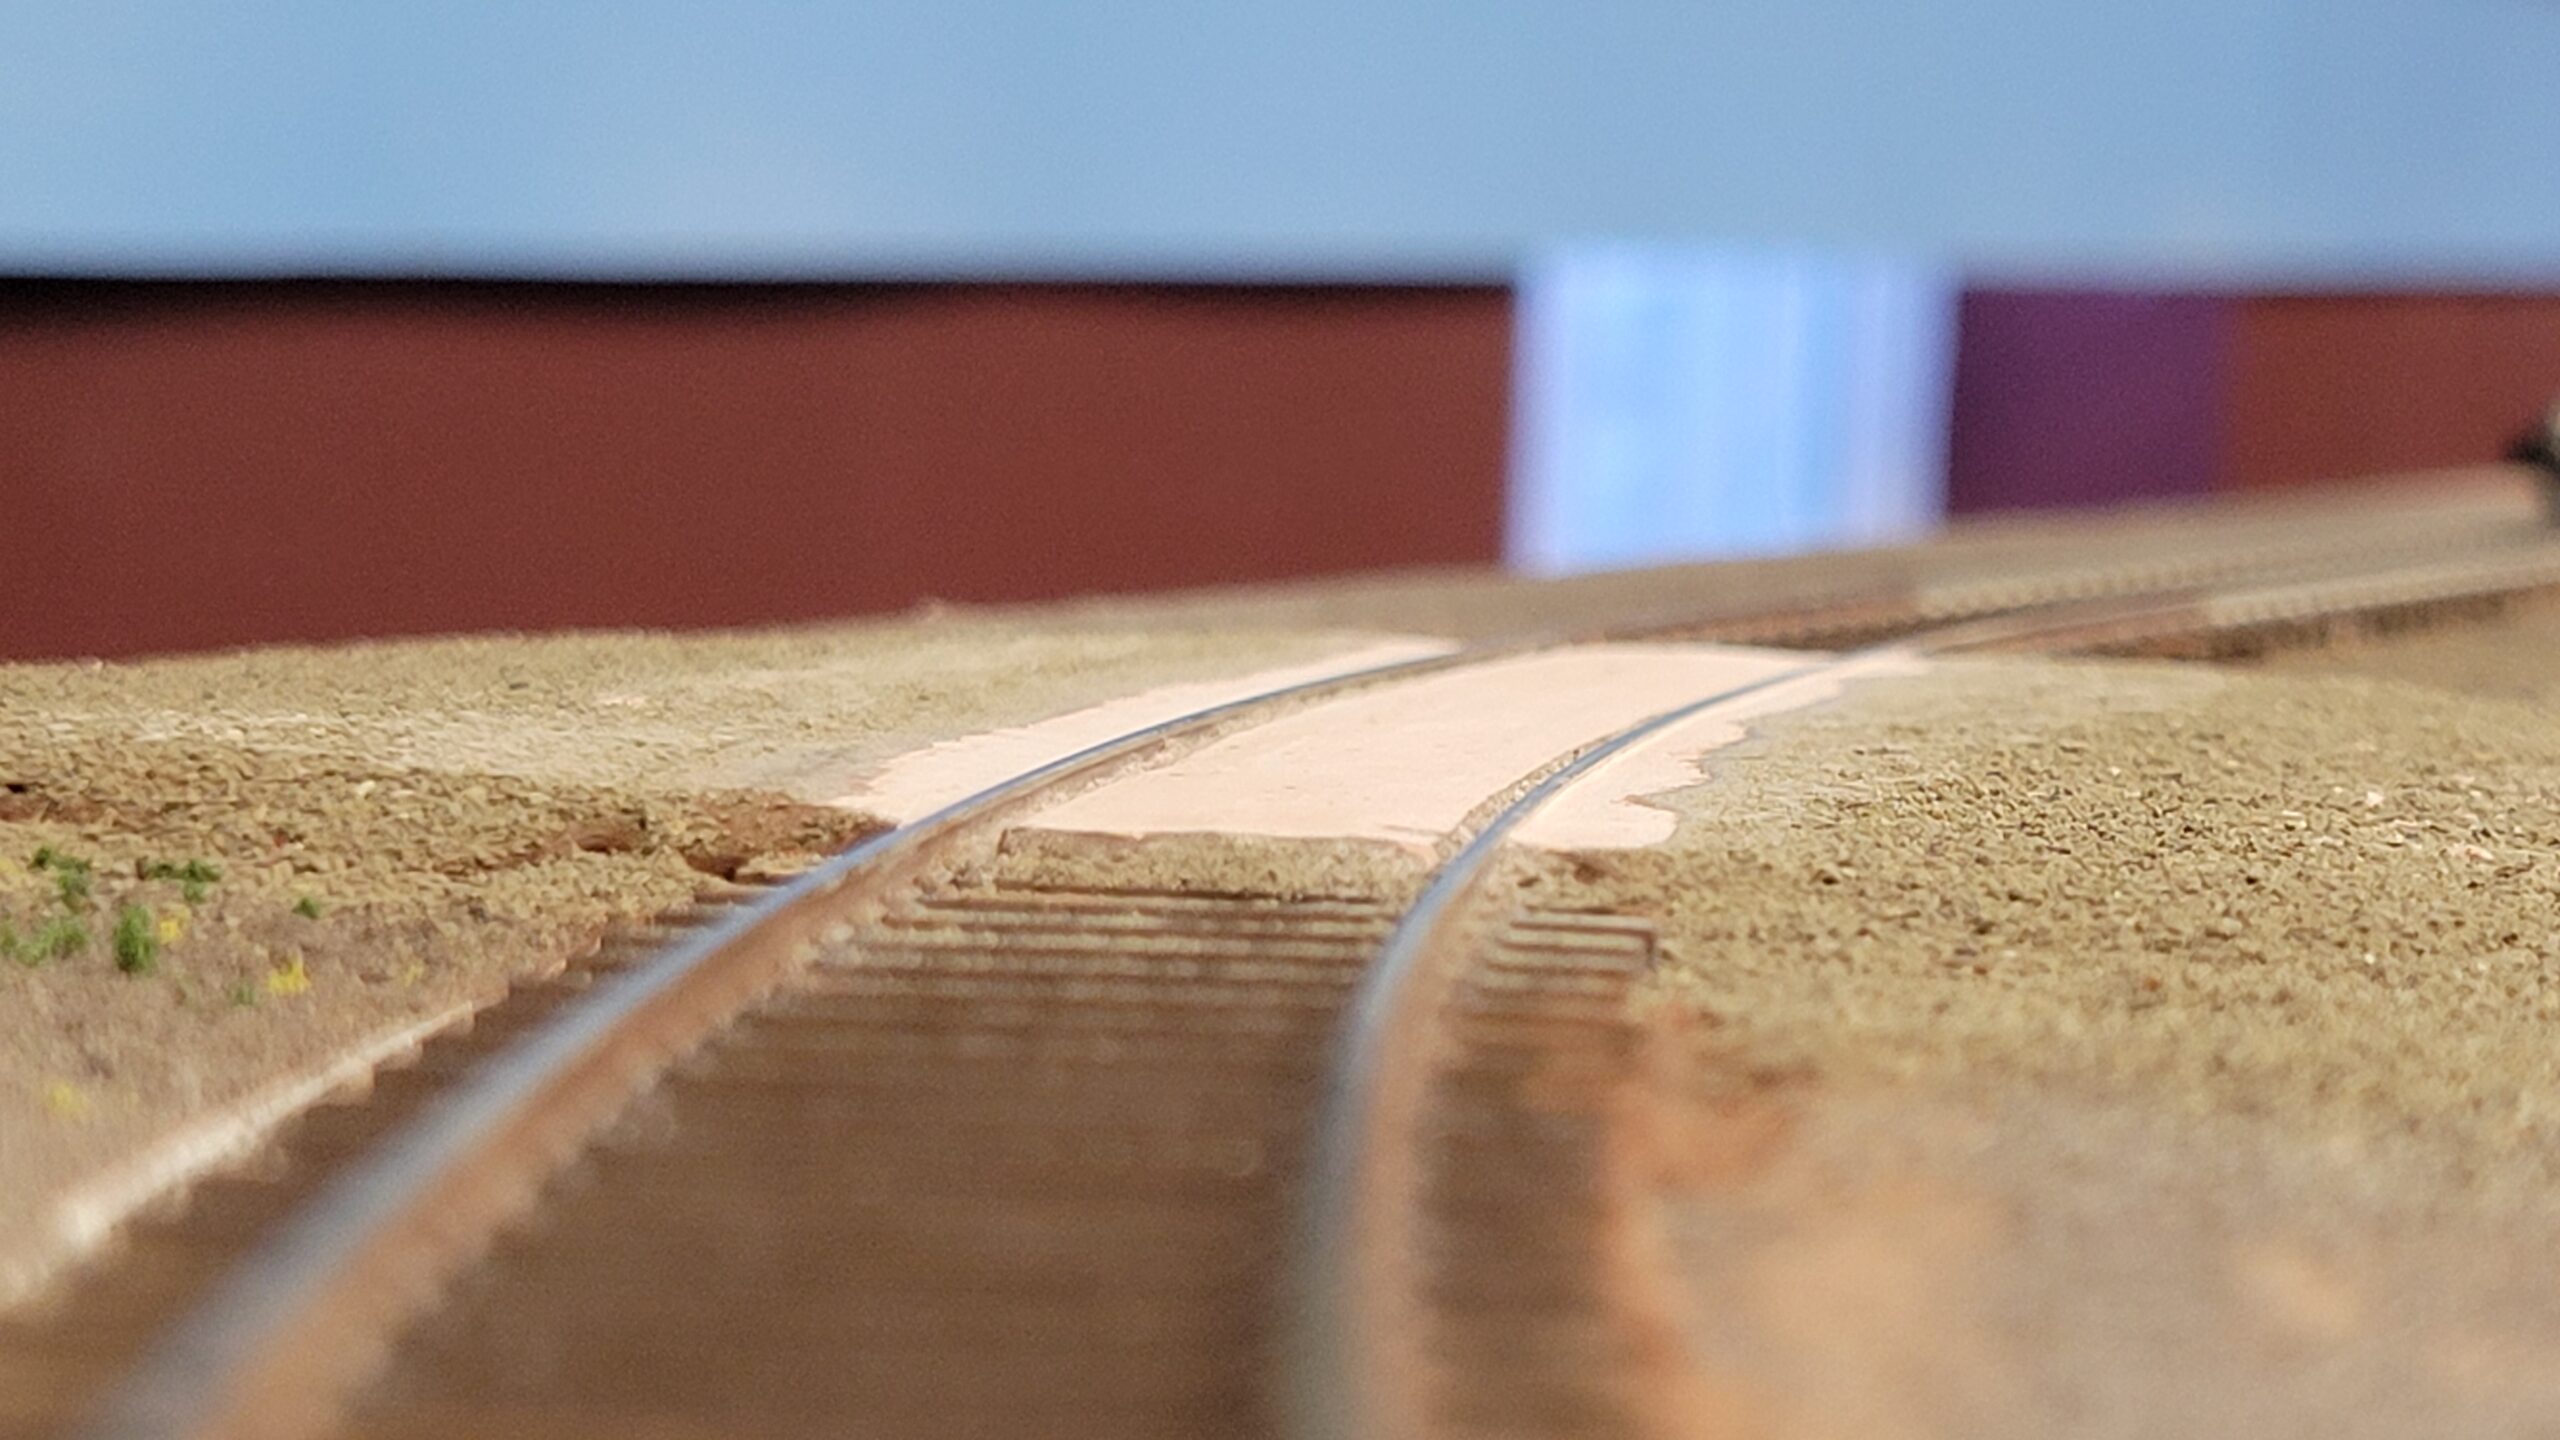
The morning of the 19th the now-dry crossing looked like this. As expected, I would have to cut the flangeways again and smooth the upper surface at the rails.

Which I did, and which gave me this. You can see how the rails protrude above the plaster a bit at this point.
If I was going for a concrete grade crossing, all I would have had to do is paint the shaved parts grey and I'd have almost had it. But I want a dirt crossing, so... more work to do!
Another round of added dirt and overnight drying, and on the 20th, after a bit more clean-up and the addition of coarser rock and dirt outside the tire ruts, I had this. Now I just had one more application og glue to fix the coarser dirt in place.
Also on the 20th I finished assembling and weathering this older Walthers boxcar kit. The photo looks a bit fuzzy, but that's mostly just the lettering on the car.

This morning the dirt road and crossing looks like this. Once the track around it is ballasted, a few weeds and some details are added, I think it'll be passable.
The last few days I've shifted my attention from the grade crossing to the CNW line over Casper again, and yesterday to the stub end of the Casper yard tracks.
On the 21st I finished the last bit of static grass before heading into the corner curve above Casper:

Then I worked into the corner. I cut out some 1/2" styrofoam insulation board to fit over the benchwork around the corner and into Hudson.
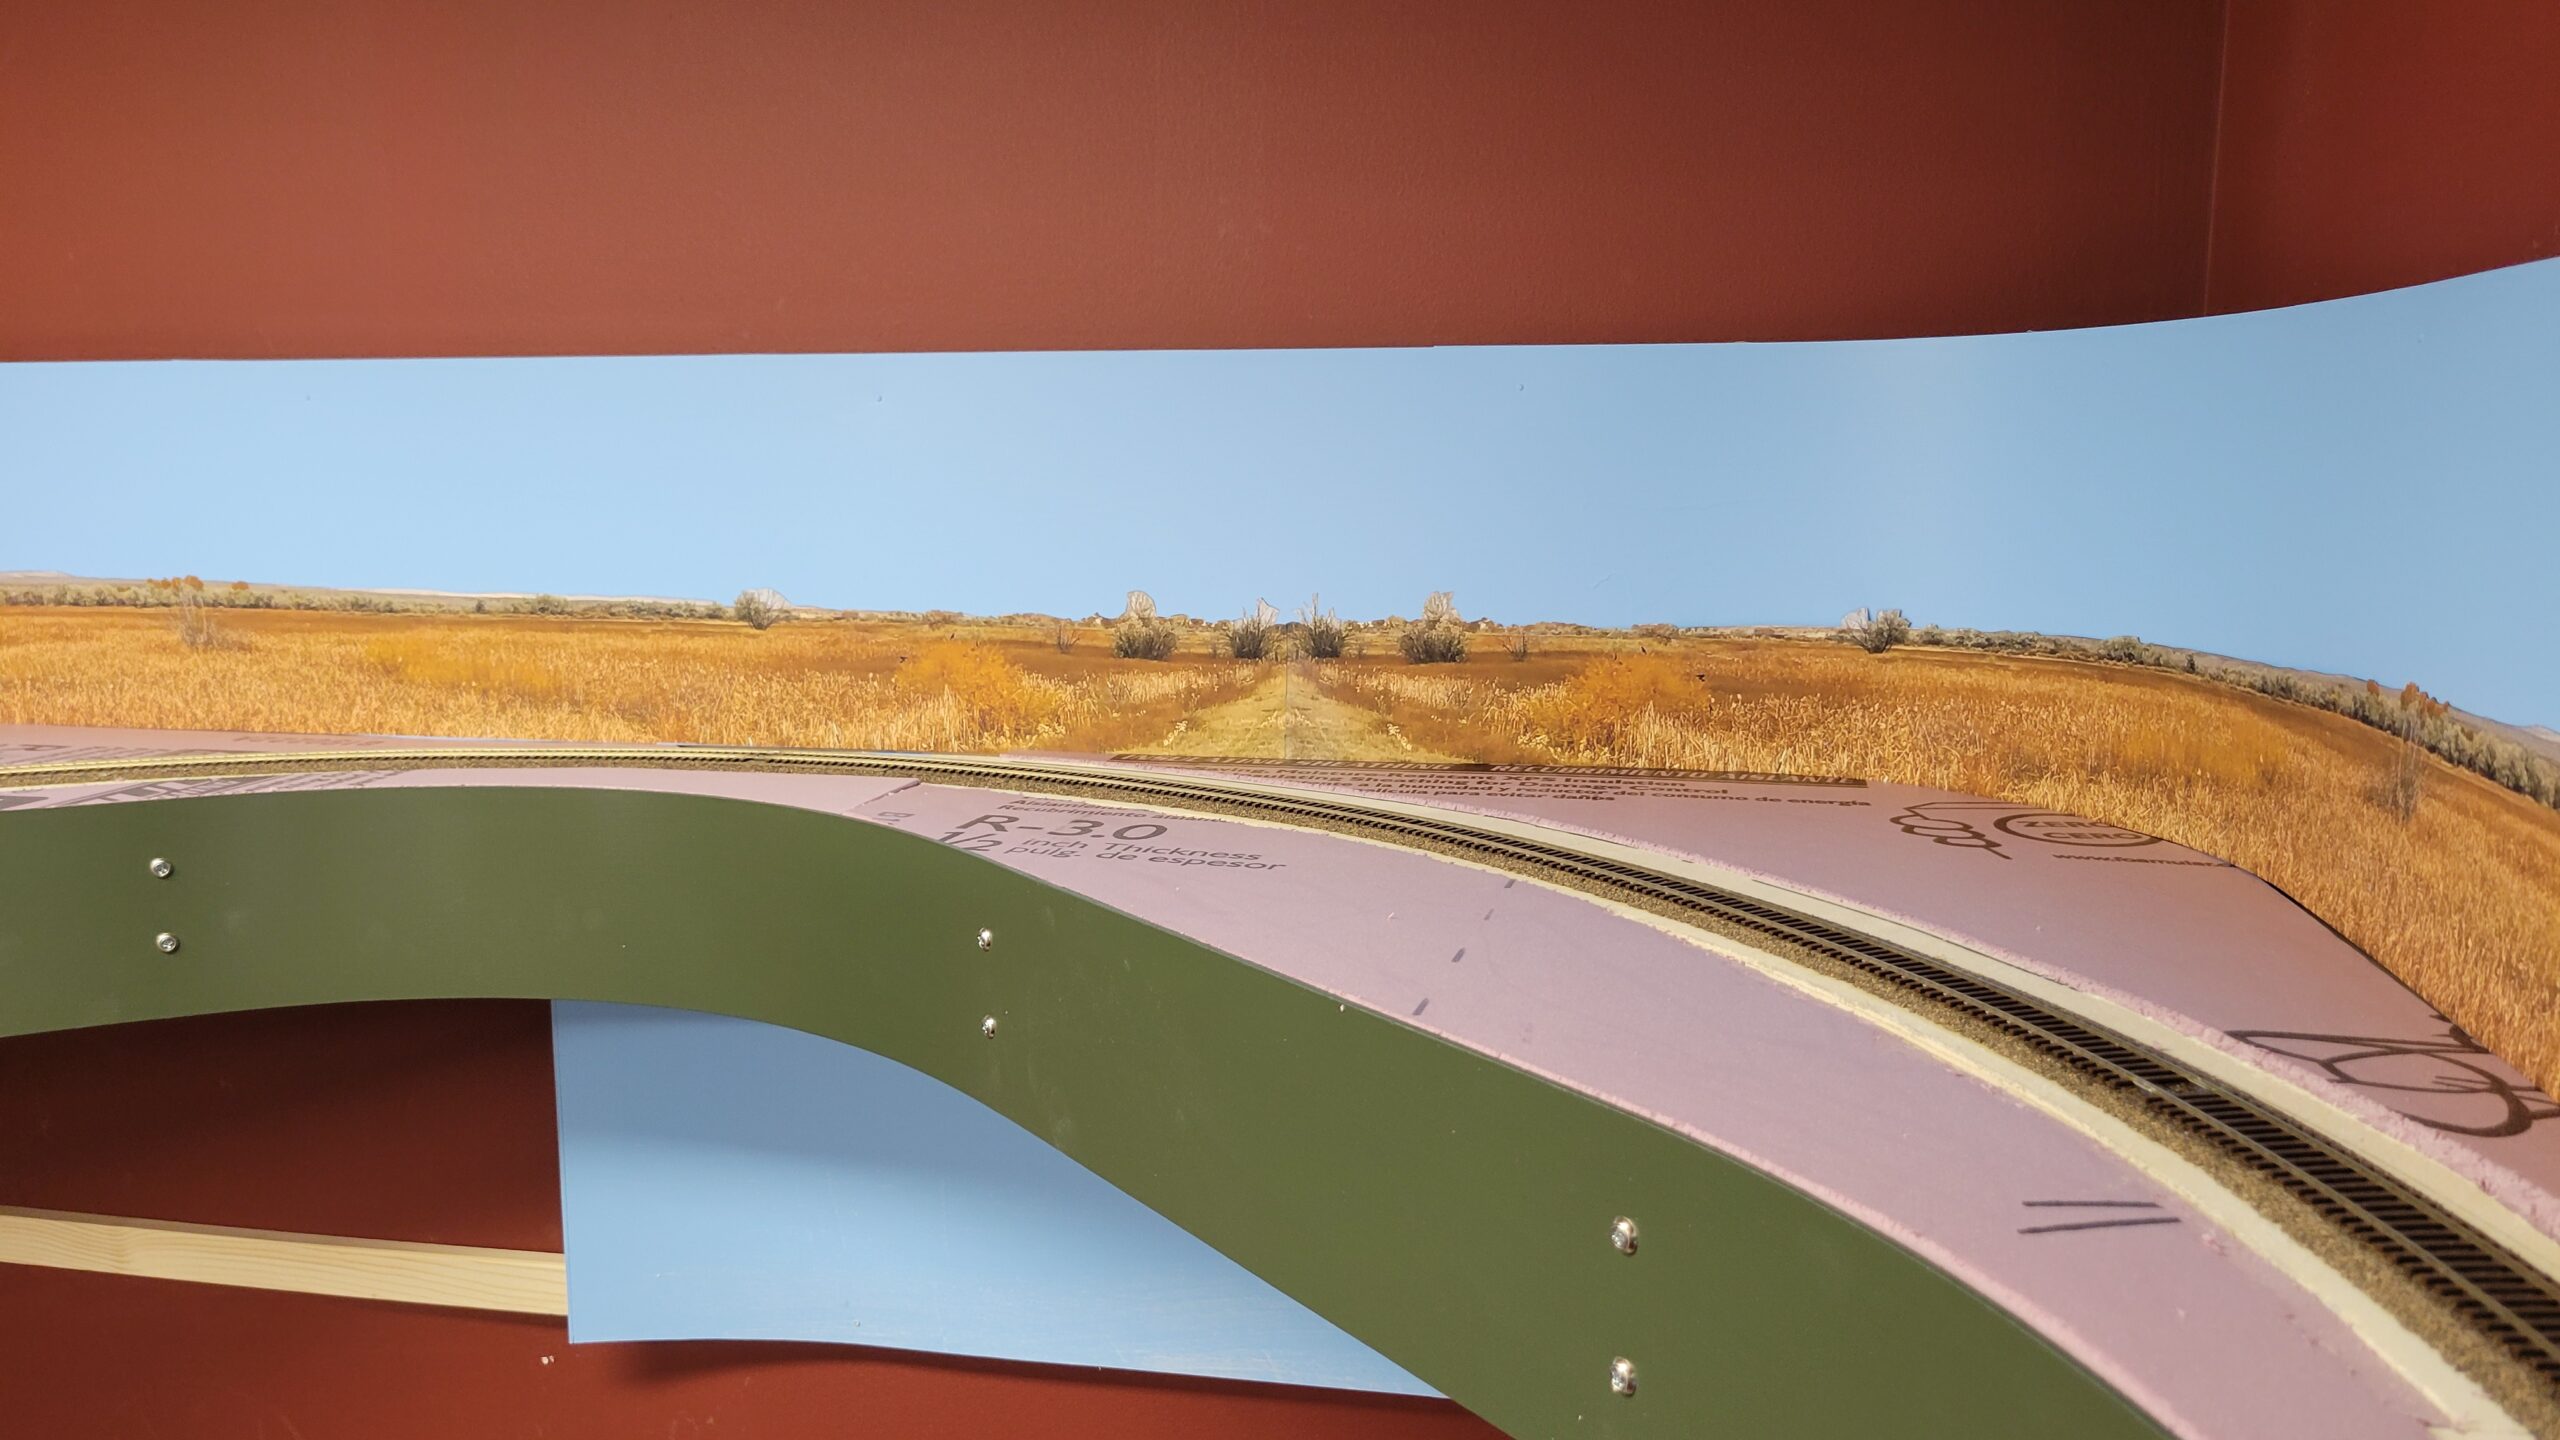

I covered the backdrop with wax paper to protect it, then covered the styrofoam with masking tape. Using paper towels and more masking tape I created (and painted) a low hill along the backdrop behind Hudson.
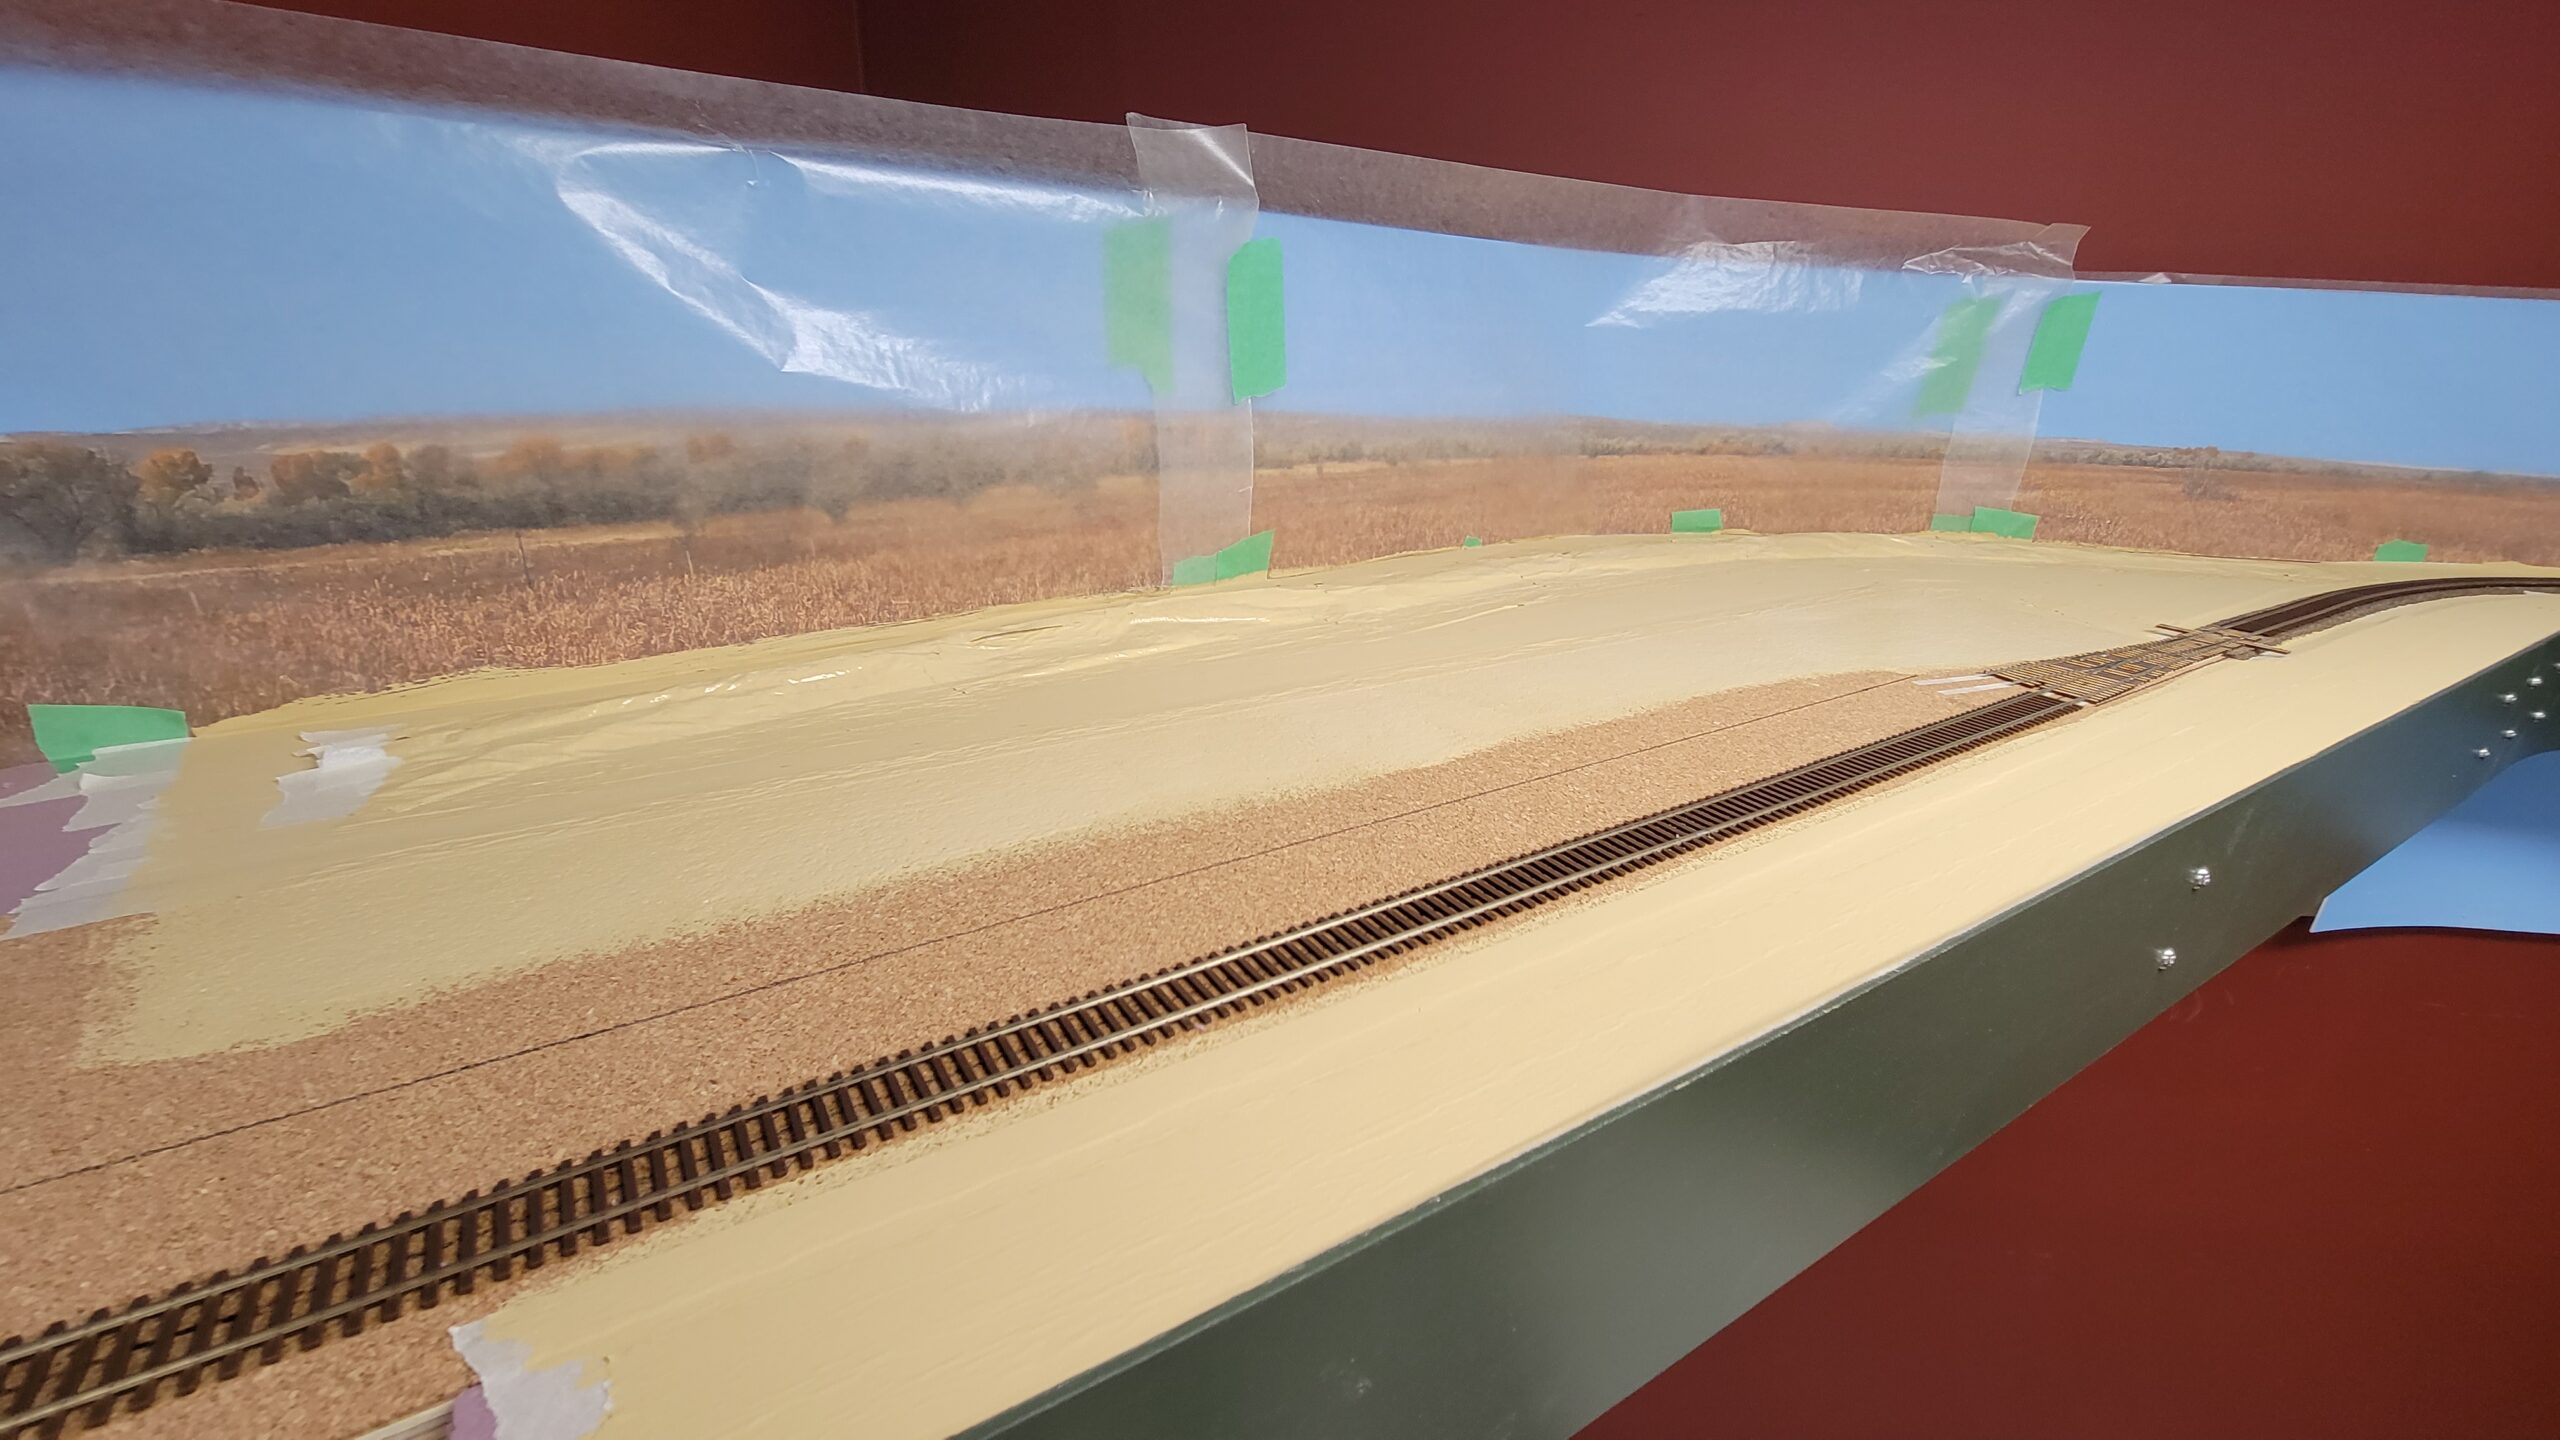
Yesterday after the paint dried I mixed up a thin batch of plaster (tinted with tempera paints) to apply over the whole area (except the track, of course).

And I spread the plaster over most of the area.

Since I couldn't do any more until the plaster dries overnight, and since I wasn't in the mood to start building an old Model Hobbies structure I'm going to use for Rocky Mountain Drilling Co., I decided it was time to turn my attention once again to the stub end of the Casper classification tracks. You remember - the ones that I screwed up so badly a couple years ago:
I stripped off the tape that was protecting track from the scenery work and cleaned up the debris. I had this:
A lot of plaster had seeped under the edges of the tape, and in between ties! I chipped it out using a small screwdriver (a much easier task than I anticipated), then made a wash of tempera brown paint and stained the remaining white edges of the plaster. At this point it looks like this:
 Next step is to apply ballast, then darken the brown stain with black tempera. After that we'll see where we are.
Well, the plaster I brushed on around Hudson failed miserably. It didn't stick to the latex paint at all! It was breaking apart and flaking just sitting there. Here's what it looked like today after it was completely dry:

I was able to run my hand across it and it broke into shards. The vacuum sucked it up easily, breaking it into small flakes as it went, leaving me with this:

I'll just run my hands along the rest of it and suck it up tomorrow. Then I have to figure out what I did wrong.
Here's a shot of the paint discoloration under the failed plaster job.
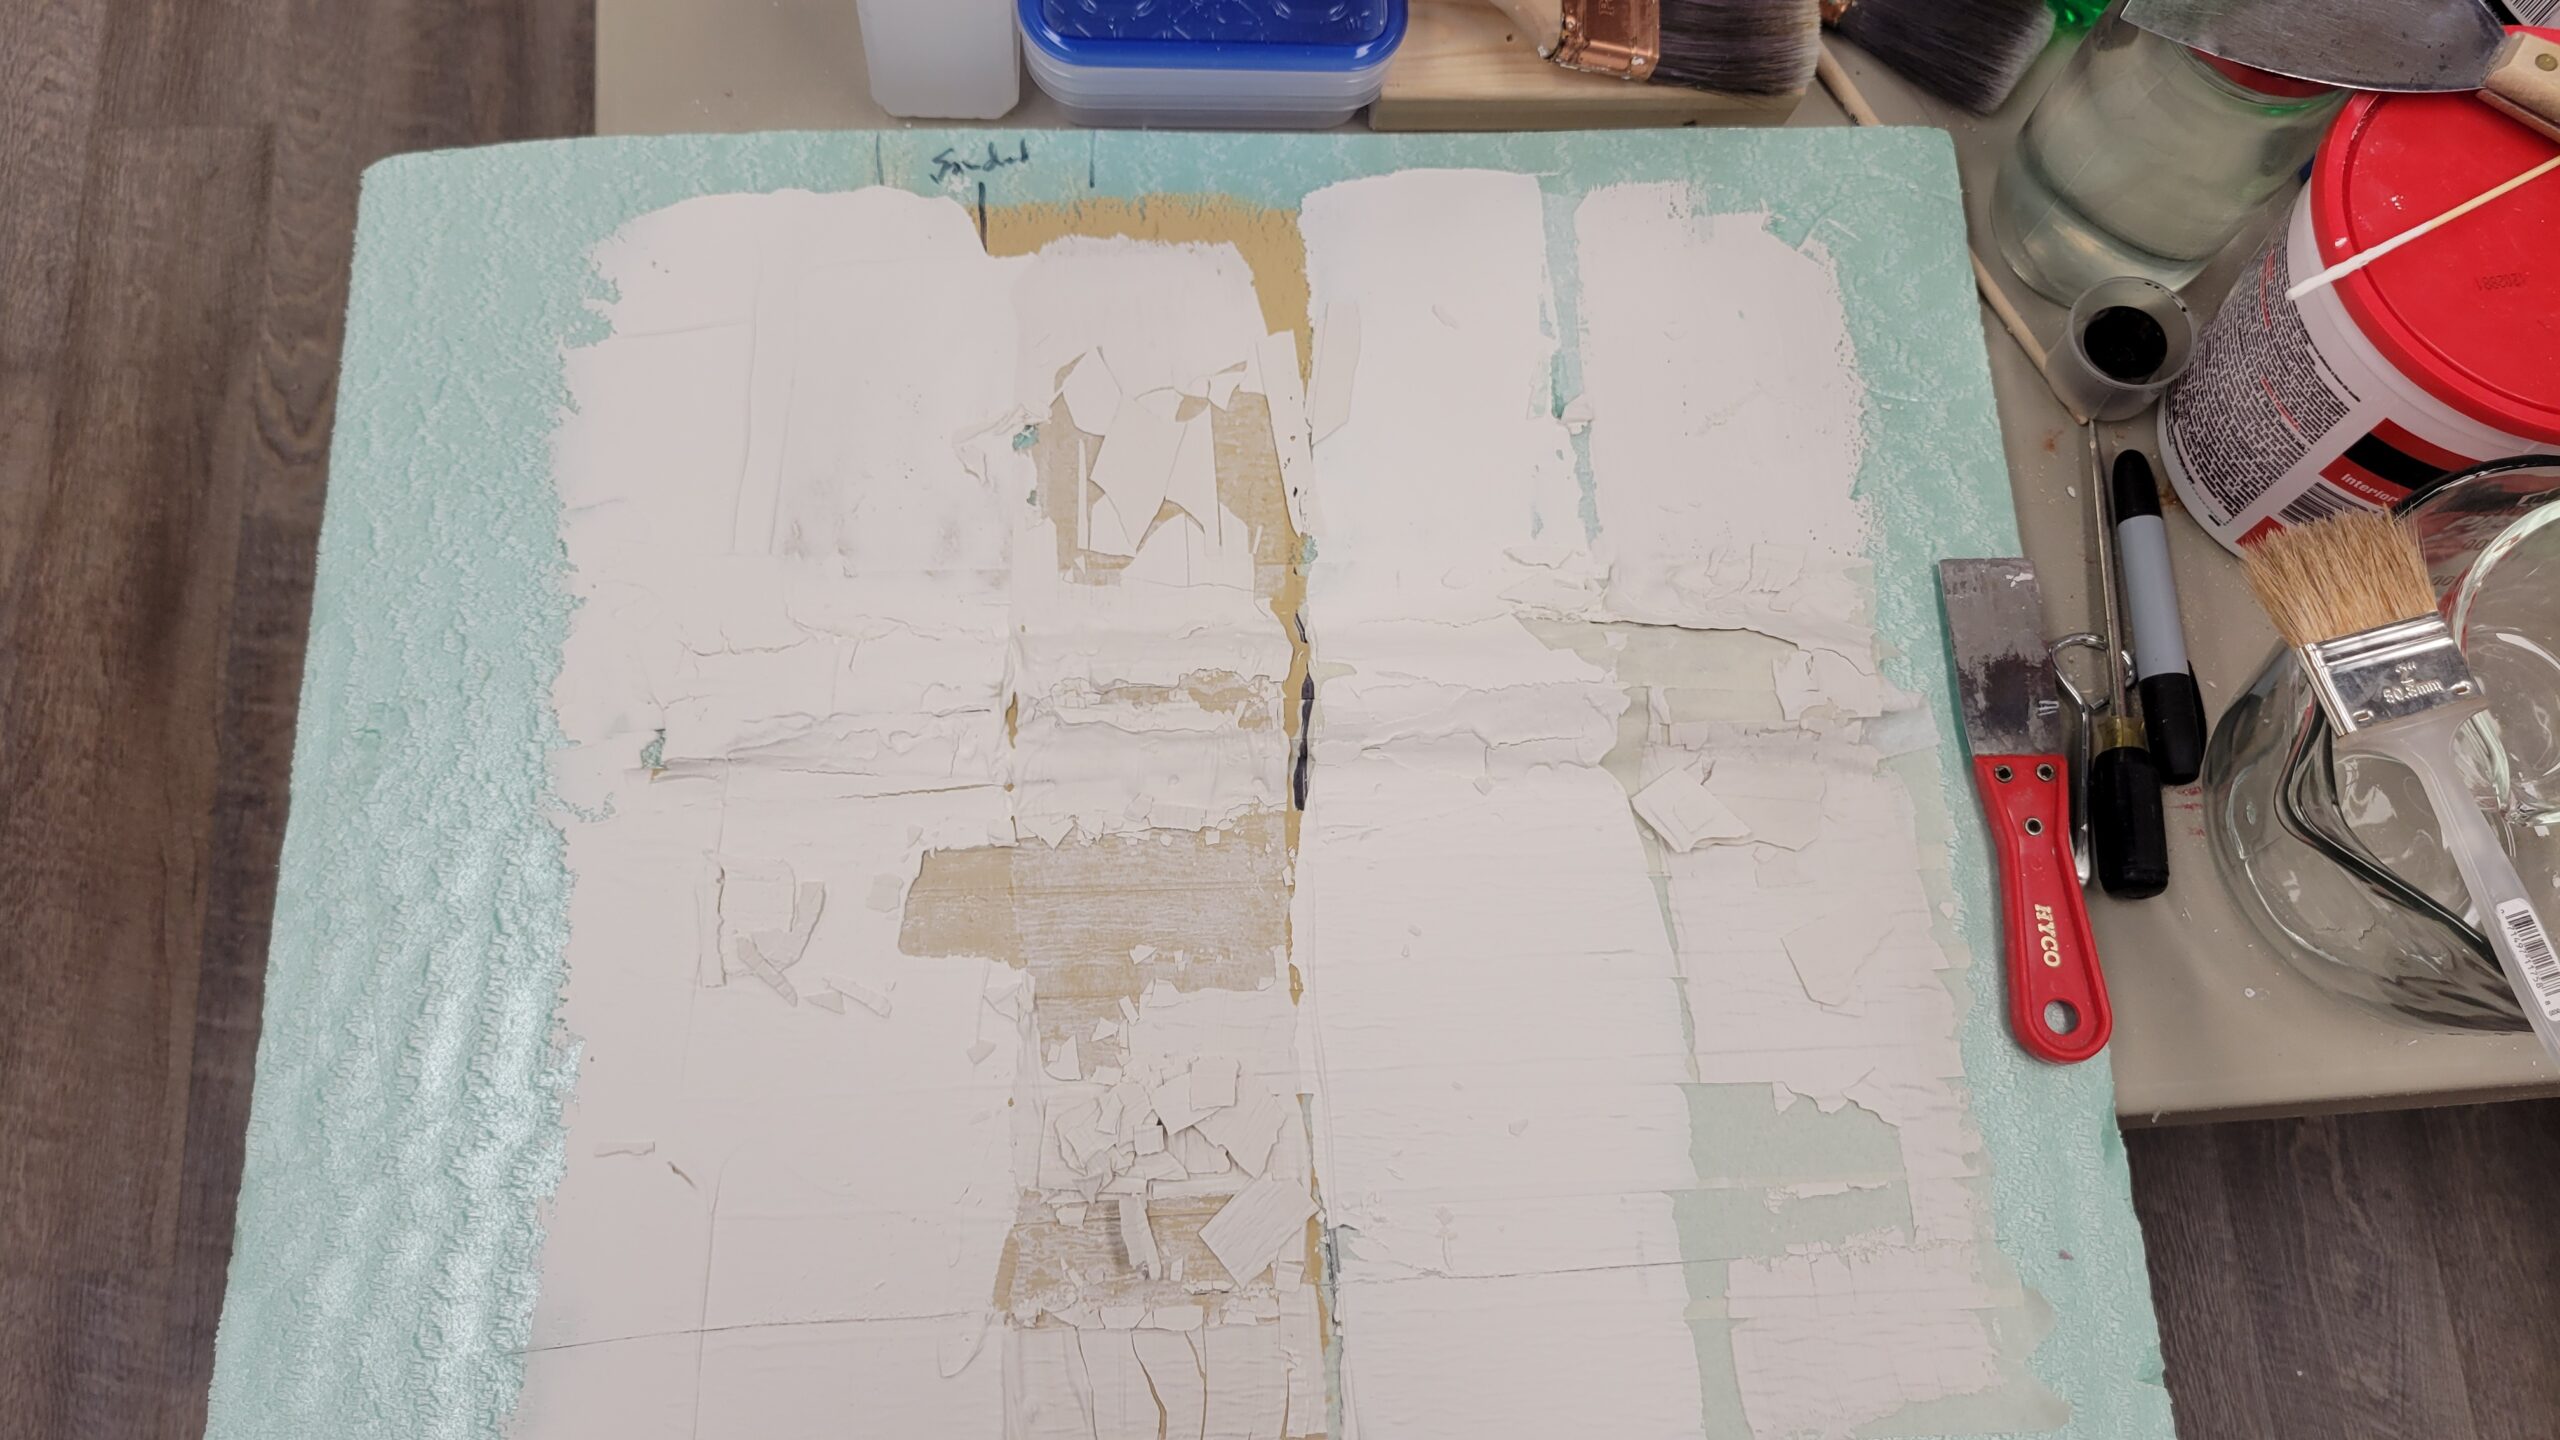
In trying to figure this out, yesterday afternoon I created a test board with two different kinds of plaster.
I'm sure you can't read the scribbles at the bottom, so here's what you're looking at.
There are four vertical (in the photo) stripes of plaster. From left to right - premixed patching plaster, plaster of paris, another premixed patching plaster, and finally another plaster of paris.
The left two stripes are on painted masking tape on the bottom half, and painted styrofoam (no tape) on the top half. Same paint as on the layout. I lightly sanded the center of the painted area vertically, so that half the patching plaster stripe and half the plaster-of-paris stripe are on sanded paint.
The right two stripes are on unpainted masking tape on the bottom half, and directly on the unpainted styrofoam on the top half. Now it just has to dry.

Here's the coupon as of this afternoon.
The patching plaster cracked more than the plaster of paris, but all four appear to have adhered decently. The plaster of paris is thicker than it was on the layout, so that may be part of the reason why. I can crack the plaster of paris easily in thin places on the bump. Tomorrow, after another night to dry further, I'll try scaping the stripes off to hopefully get a better idea of how well they stuck. Stay tuned.

On a better note, I started re-ballasting the area of Casper yard I talked about a couple days ago. The ballast is applied, but not glued down yet. Looks really good at this point.
I wetted the far ballasted track with alcohol and applied thinned Elmers. I didn't take a picture. I'll see how it looks tomorrow after it dries and continue on with the rest of the tracks if it looks okay.

The test panel plaster was completely dry today, so this evening I took a narrow putty knife to it to see what was what.
The plaster of paris didn't stick to anything at all except the bare nekkid styrofoam. Sanded or unsanded paint made no difference at all - it didn't stick. It also didn't stick to bare masking tape.
Patching plaster shrunk a lot more than the plaster of paris as it dried, but it stuck to everything. Here's a picture of the chewed-up test panel.
Now I just need to figure out what to do next.