I continued laying track across the swing gate and into Greybull. Here's how things looked on June 18:
I also continued adding fence sections around Rocky Mountain Drilling. Here's how it looked as of the 20th:


On the 27th I hosted an operating session. Here's a few shots.
Here Kevin (far distance) is rerailing a loco after running a switch. Kurt, in the orange shirt, is waiting to proceed out of Basin towards Greybull (that's his train with all the hoppers) when Kevin gets the line cleared, and Mary Kay, Kevin's wife, is acting as the engineer for Kevin's train.

Everything is cleared and Kurt is proceeding while Kevin and Mary Kay prepare to head back onto the main to Worland.

A bit later Kevin has proceeded onto Thermopolis and is doing switching chores there. Mary Kay handed off her engineer duties to Kevin and went upstairs to visit with the other ladies while their husbands played trains for the afternoon.

With running locals out of Greybull for the first time, shortages of both motive power and rolling stock became apparent. In fact, several Casper industries couldn't be switched because there weren't enough of the right types of cars on the layout!
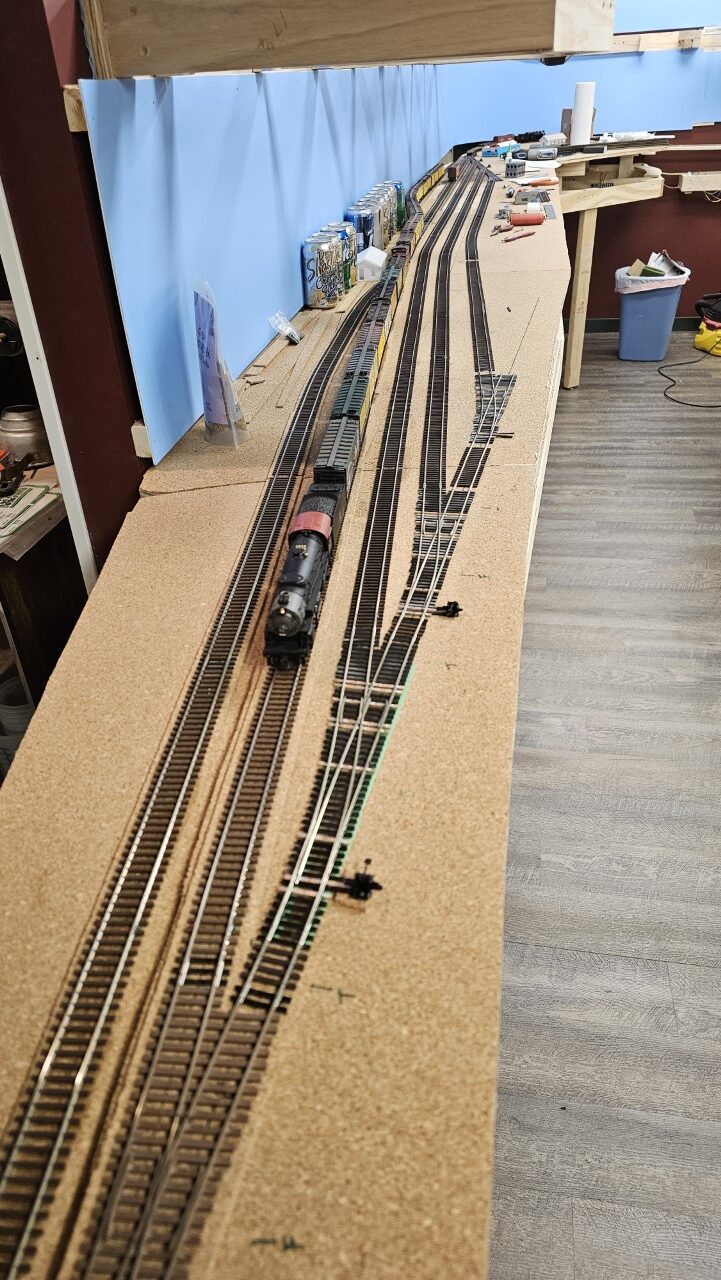
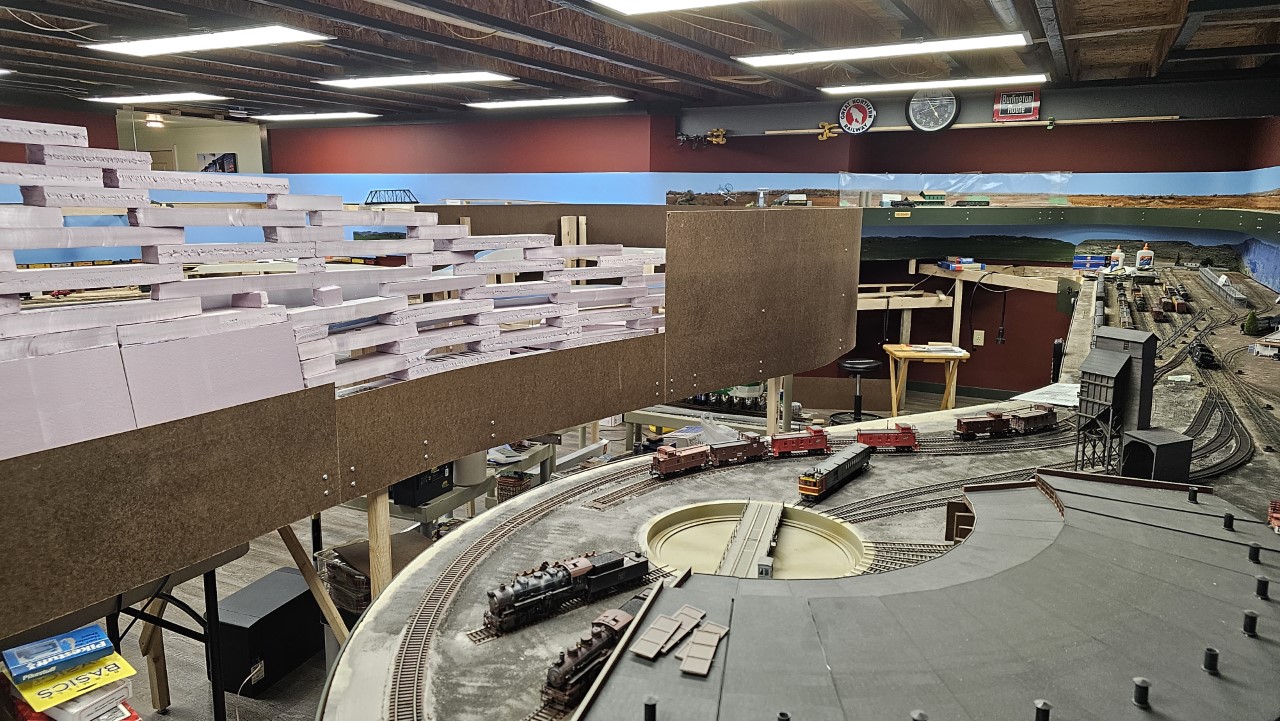
Here's what Casper yard looked like at the end of the session:

After the session it was back to work. I added another section of fencing at Rocky Mountain Drilling - this one behind the building. Work on the fence is now halted until I get the Douglas backdrop installed and scenery extended to the left of the current edge of the world.

The last day of the month had me extending the west staging lead from Greybull (Frannie) down under what will be Douglas.

On the second I had track laid onto the new subroadbed, and ran a train down it. Turned out I couldn't get the train back up - the drivers just spun helplessly. That wasn't totally unexpected - this loco has no traction tires. Bullfrog Snot was on order.

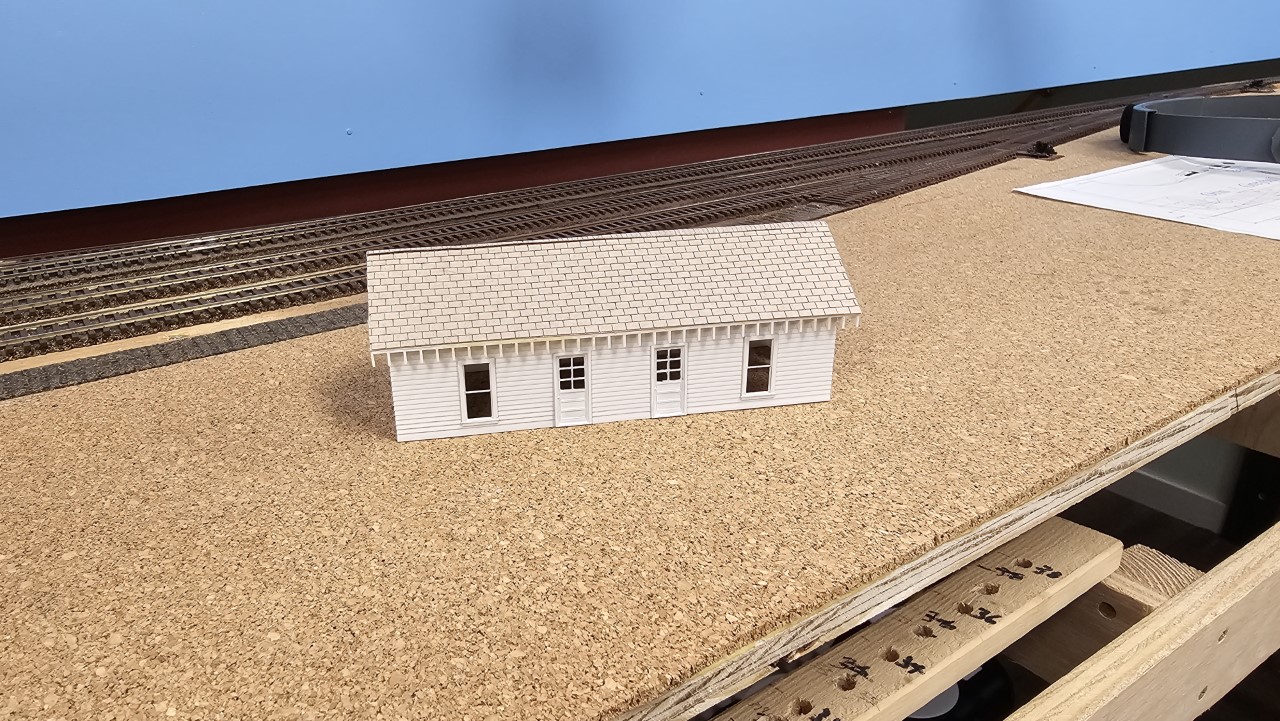
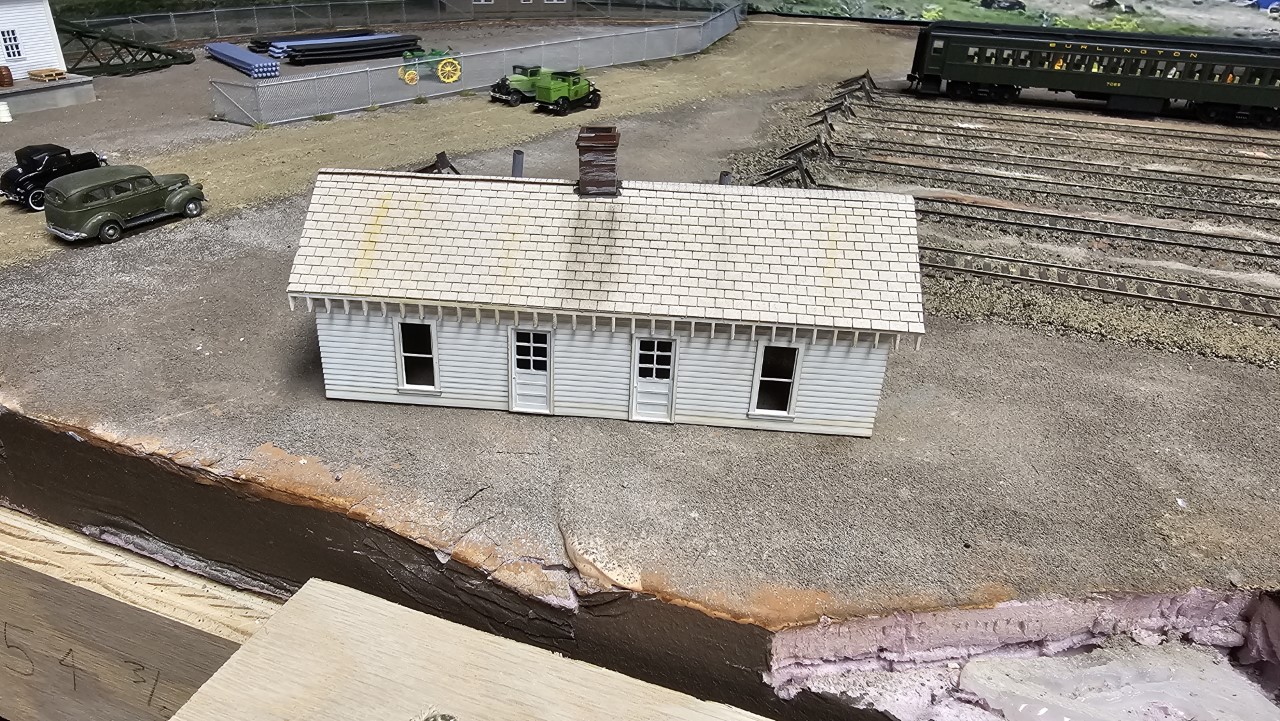
Also on the 2nd I finished shingling the small house for the far corner of Casper, behind Rocky Mountain Drilling. Came out okay. All that's left is to add the chimney and plumbing vents, then weather the house and plop it into position.
While I was working on the West Staging lead and shingling the house, I also worked to begin easing the rolling stock shortage, by getting nine "new" freight cars onto the layout. These were cars that I had acquired from various sources over the last few years (mostly train shows, but gifts from a few folks, too), but hadn't prepped for the layout yet. They were all assembled, but I needed to swap trucks (I use Kadee sprung trucks exclusively - except for cabooses) and in some cases couplers. Weathering also had to be completed
Here's several of the new additions to the layout.
This is an RTR (horrors!) flatcar made by Ertl some years ago. Cars in this line came with basic weathering. These Ertl cars make decent looking and running rolling stock. Whenever I see them at train shows I pick up a few. For what they are, they're a real bargain! All I did for weathering was weather the deck. I changed trucks and couplers, and it was ready to go! This and the following gondola are both by Ertl.


I found several of these Burlington stockcars assembled at a train show years ago. They're bright red plastic out of the box, and without weathering they look, quite frankly, like crap. On top of that, this one had a lot of pieces not installed (and not in the box). I only noticed that when I was prepping the car for the layout. I weathered it and it seemed to become at least passable, even without stirrup steps and some other details. It rolls fine, so while not a masterpiece it will suffice for operating sessions.

This is another RTR car, from the Atlas Trainman line. I wound up with two these, but I don't remember where they came from.

Just for fun, I placed the weathered car on the layout along with the other one just out of the box. Quite a difference, isn't there? After I took this shot I weathered the second one also. Both are now on the layout.

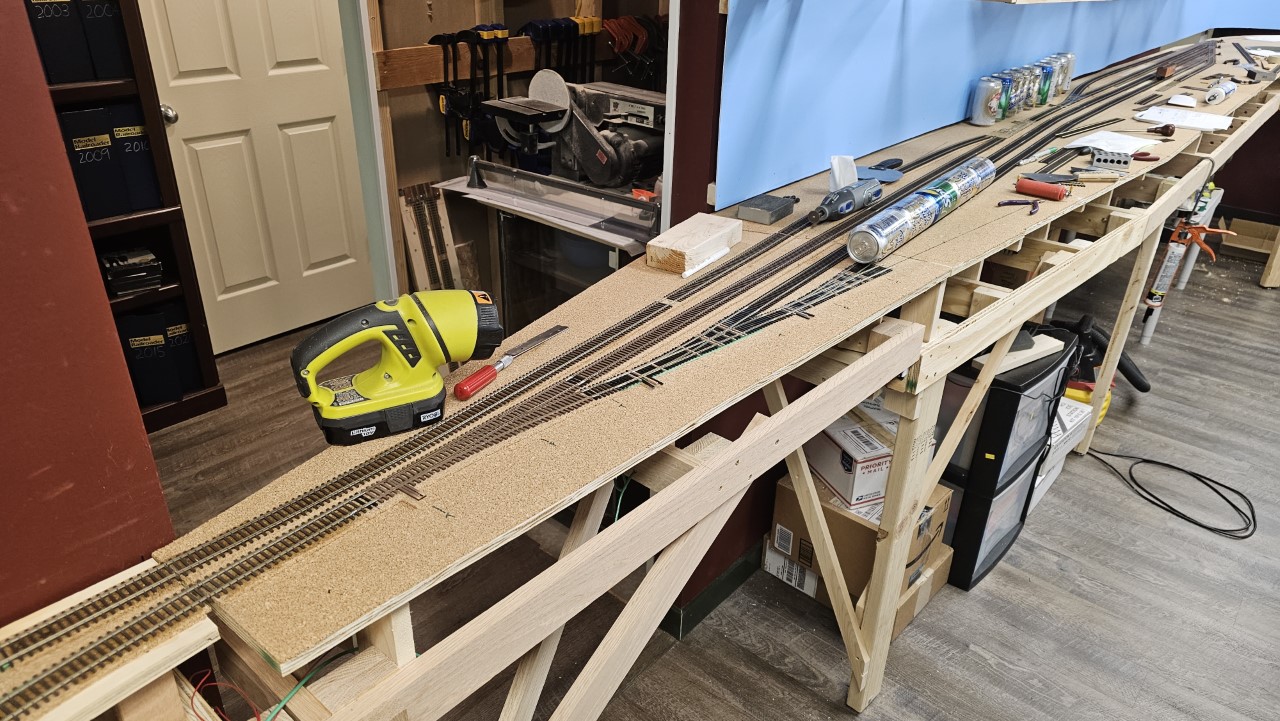
In early July I continued working on trackwork for Greybull, finishing a couple turnouts and laying additional yard tracks., including the last bit of track on the Swing Gate.
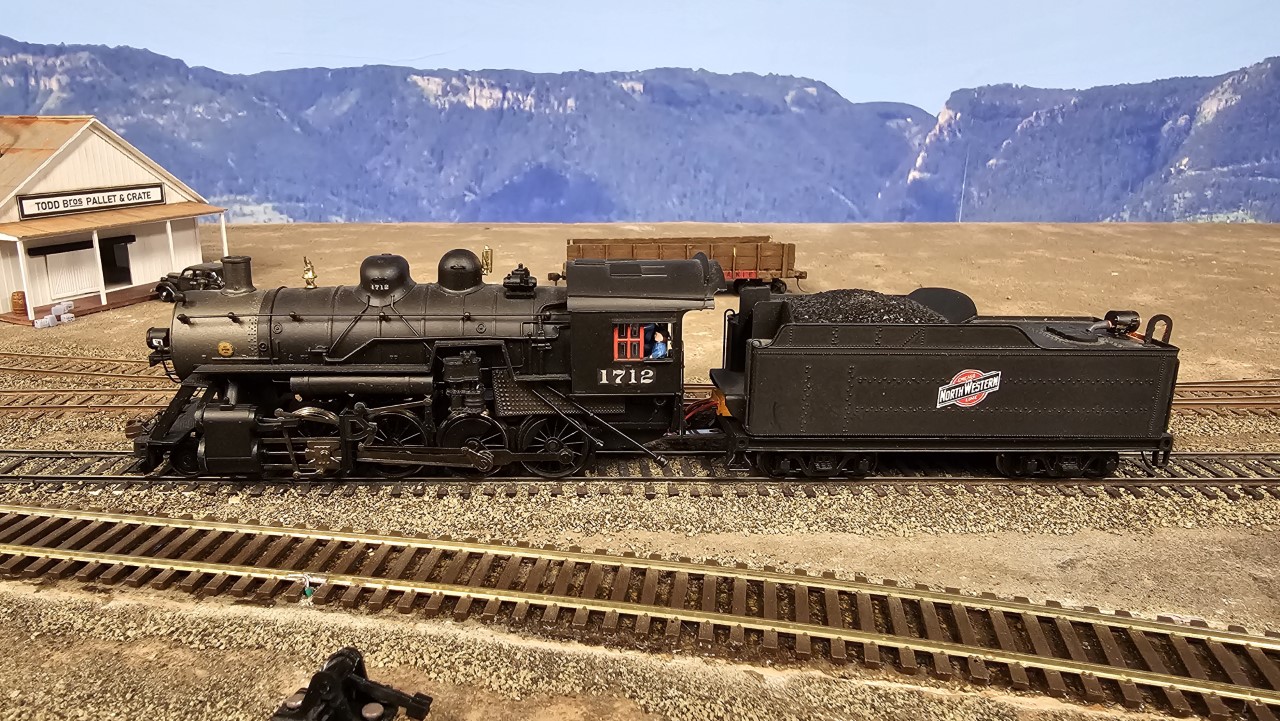
The Bullfrog Snot arrived and I applied it to the rear set of drivers on the Mikado, then placed the loco on the train and ran it up from staging. There was some slippage, but it made it. Here, on the 10th, the train has managed to struggle up the grade into Greybull and onto the Swing Gate.
I ran the train through Basin and parked it on the main in Worland so I wouldn't knock it with an elbow or something while I was working in Greybull. I took two cars off to see how it would look, and twenty-plus-caboose still makes a decently proportioned train, I think.
Even though the train did make it up from the staging lead, that wasn't acceptable performance. Staging won't be easily accessible, so having a loco slipping as it's pulling a train out is just not going to cut it. I needed to make some adjustments to the grade in staging, since I didn't want to reduce train length any further.

This was the grade on the west staging lead under Douglas and just beyond Greybull - a solid 2%.

I spent a couple of hours loosening and shifting risers on the joists, and reduced the grade about one fifth, to about 1.6%. On the curve behind Greybull I reduced it to about 1%. That, along with reducing train length by two cars, should be enough to eliminate driver slippage. I'll be testing it in a day or two.

I pulled the Casper end of Douglas' benchwork off the wall and lowered it down to match the other section. That makes working on the staging lead much easier, and also eliminates a clearance problem that cropped up with the reduced grade on the line.
Yesterday I laid out the staging lead on the newly-positioned Douglas benchwork.

Then I assembled the new subroadbed sections and clamped the risers in place.

Today I finalized the grade and secured the risers. Then I started adding roadbed and track. Work on that will continue this afternoon, then I'll test the new track with a full-length train.

Picking up where I left off in July -
I added a bit more track to the west staging lead right after my last post:

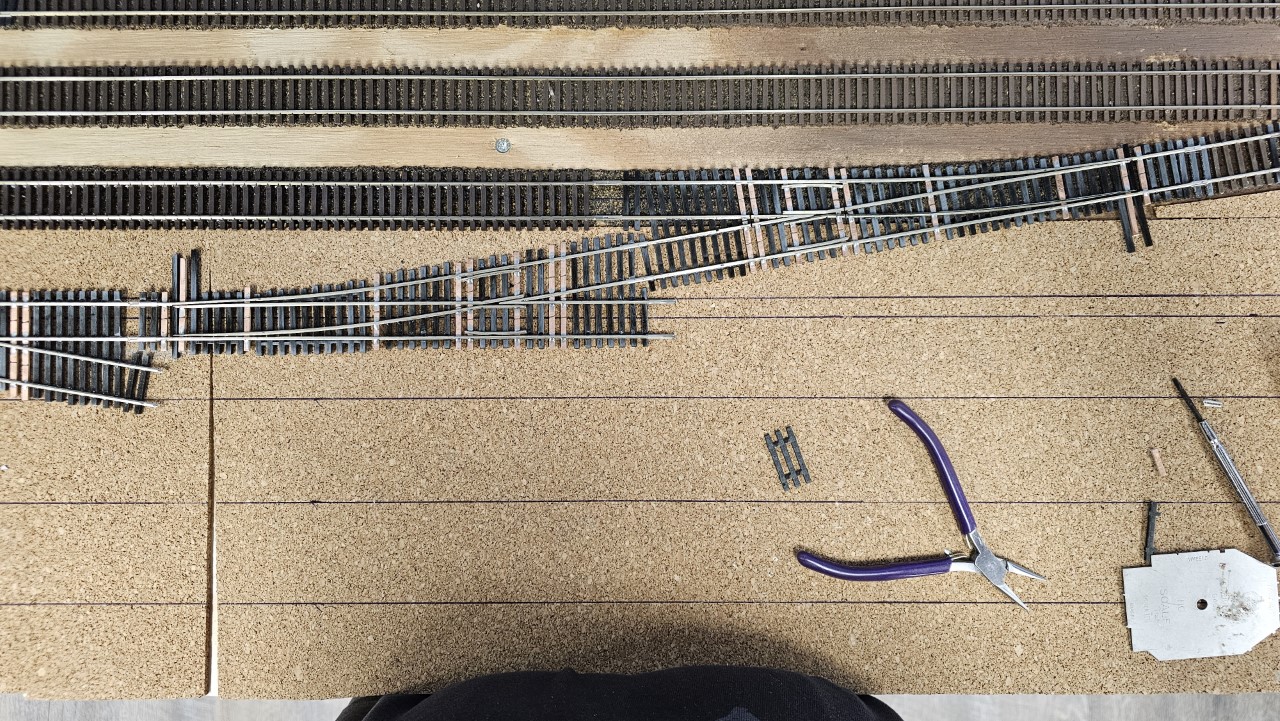
Then I switched back to Greybull for most of the rest of the month, building turnouts and laying track. Here, on July 16, I installed the turnouts that lead to the engine facility.
Then it was just build more turnouts and lay more track. On July 28 I got the first lead to the turntable installed, and powered and tested the turntable.

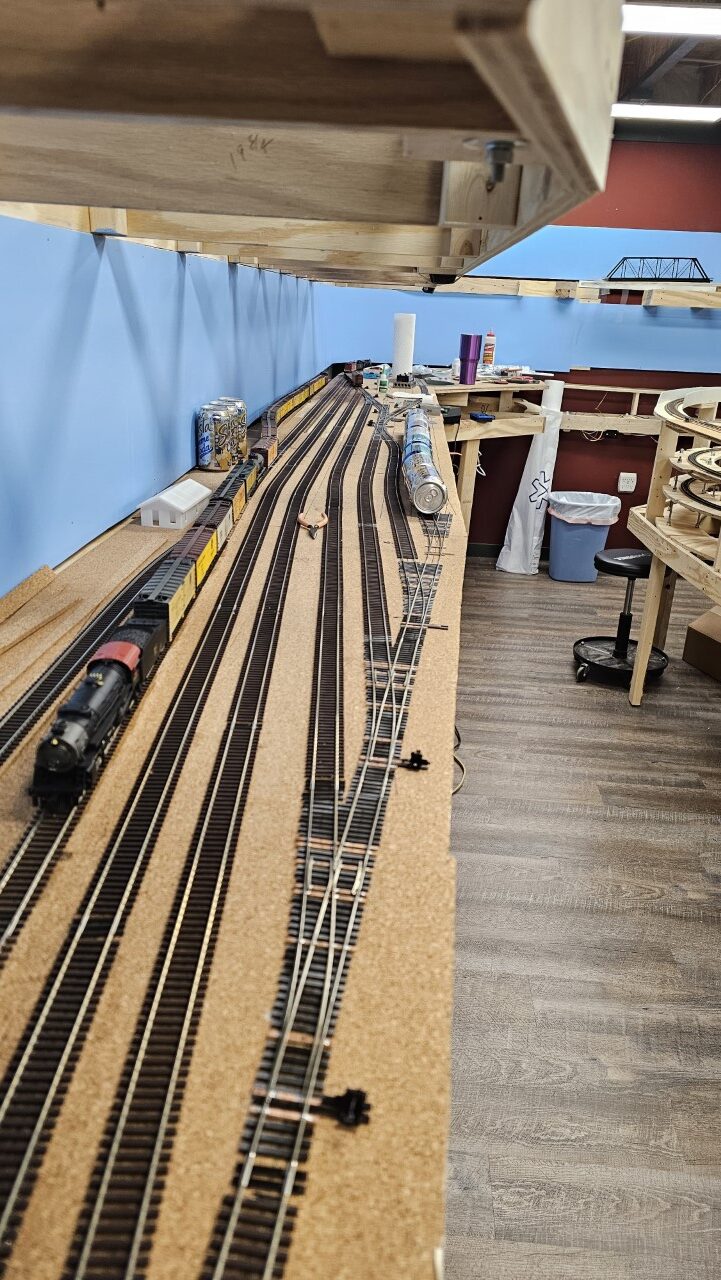
By the 30th I reached this point:

And on August 1st I was laying almost the last of the Greybull track - the two stub-ended storage tracks next to the aisle. Still to come is the engine supply track and the roundhouse tracks. Those won't be done for awhile.
I also spent time wiring the new track, of course. I'd lay a few sections of track and then wire them in.
I was doing stuff other than building Greybull, including building rolling stock, working on scenery in the area behind Rocky Mountain Drilling, and doing a bit of prototype research.
Regarding Rocky Mountain Drilling - I added roof details to the houses and on the 18th I weathered both of them:

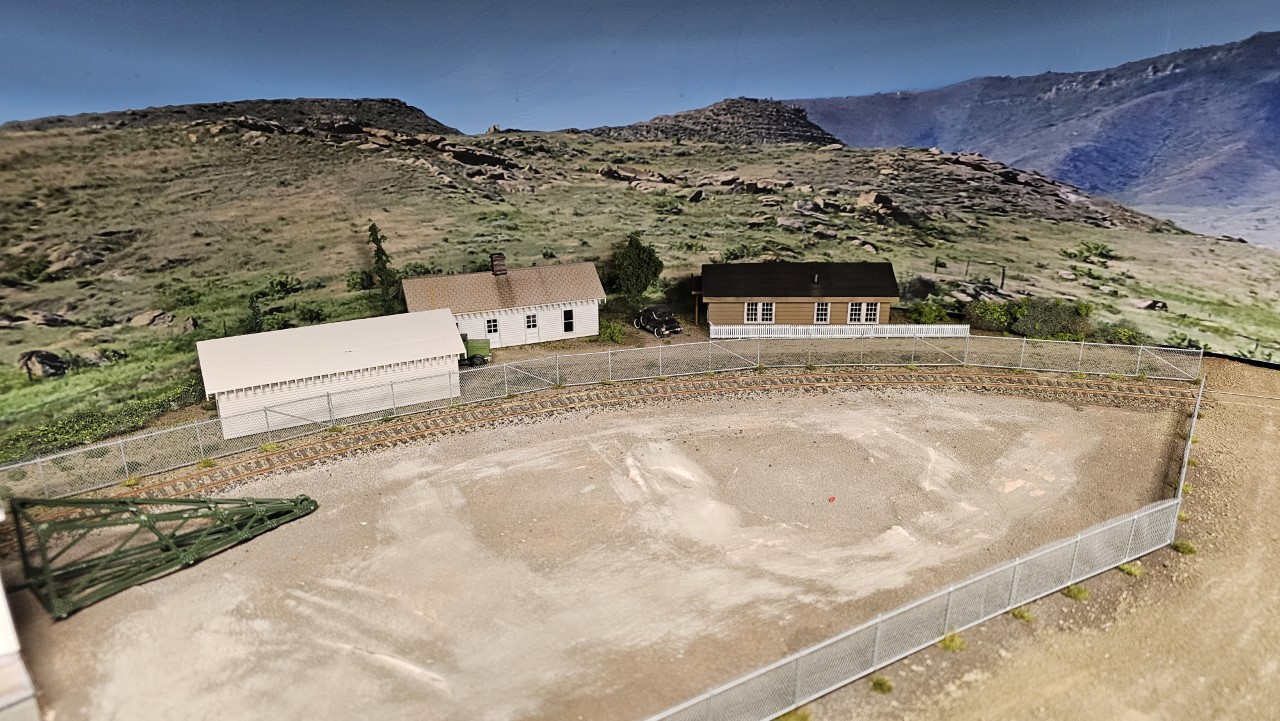
By early August the two houses were in place and some shrubbery was in place back in the corner.

Here's how the area looked as of August 8th. I've added trees and additional shrubbery around the two houses, a picket fence around the one on the right, and set a third house in place to hide where the dirt road slams into the backdrop.
Since then I've shingled the third house and will be putting it back in the scene in a day or two, along with a few more shrubs and undergrowth along the base of the backdrop. I've also added pipe stacks and a bunch of grass and weeds in the Rocky Mountain Drilling yard. Over time I'll add more yard junk (drill bits, cast off pieces of pipe, structural frames laying in piles, etc. But the basic work in this area is finally almost complete. Soon I'll be able to extend the mainline east of Casper to Douglas.
On the 23rd of July I took a drive over to Douglas and followed the CNW grade all the way to Orin. I found a lot more than I ever thought was there, along both the Burlington and the CNW lines. Here's just a few things.
Here's one frame of several shots of a large mud mountain south of Douglas. I'm going to use this as the backdrop transition between Douglas and Orin / Greybull, with a 3D modeled portion of the lower part of the hill.

Here's a deep, long cut on the CB&Q line between Douglas and Orin. We're looking back towards Douglas in this shot.

A bit farther long towards Orin from that big cut is this bridge on the Burlington that goes over the old CNW grade. That fill is pretty long and very high in places, so I think I know where all that material from the big cut went. Note the telltales are still hanging from the metal frame on the old CNW line, now almost 30 years since the line was abandoned.

Back up near Douglas is this double culvert under the CNW grade. I'm going to model this.

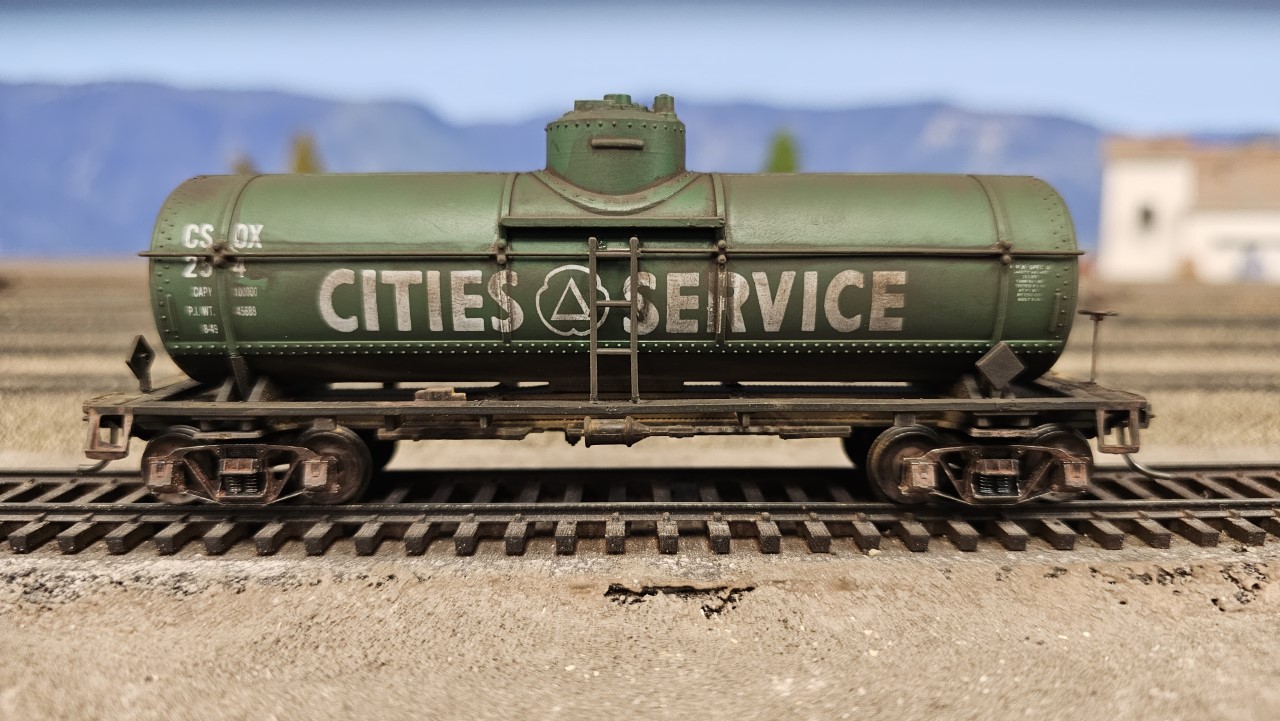
I also built a few more freight cars. I completed two tank cars...

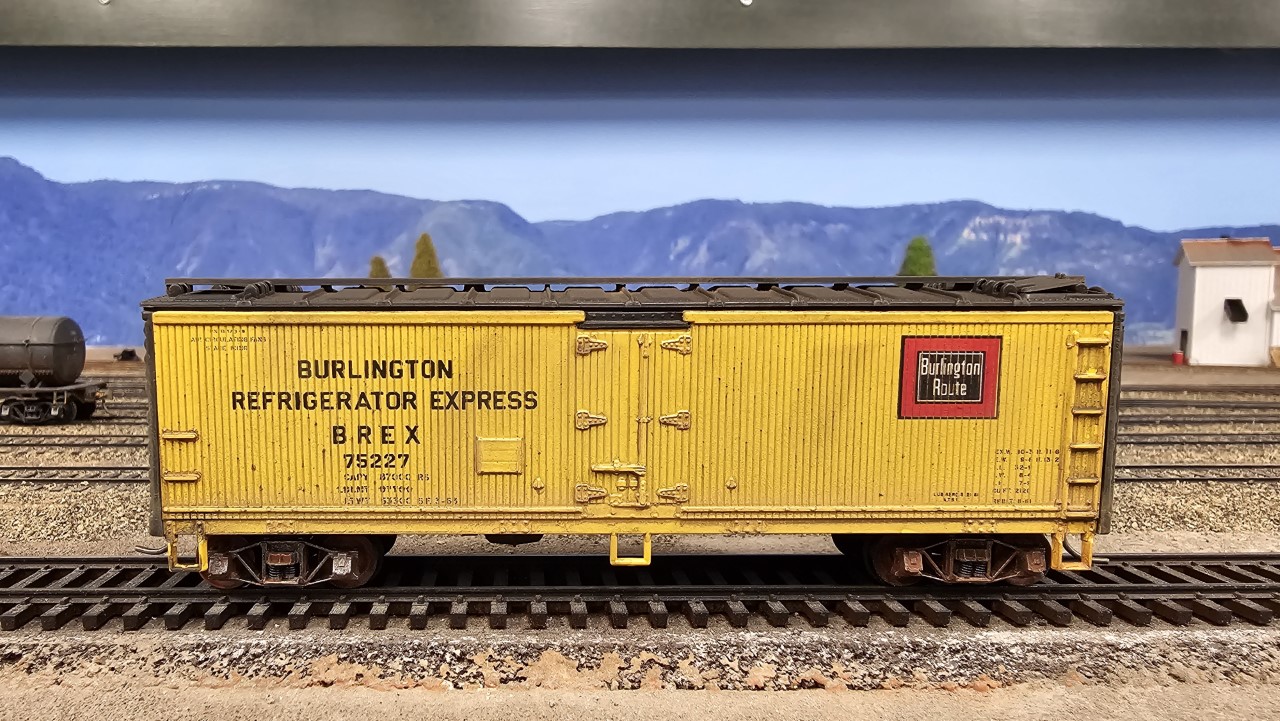
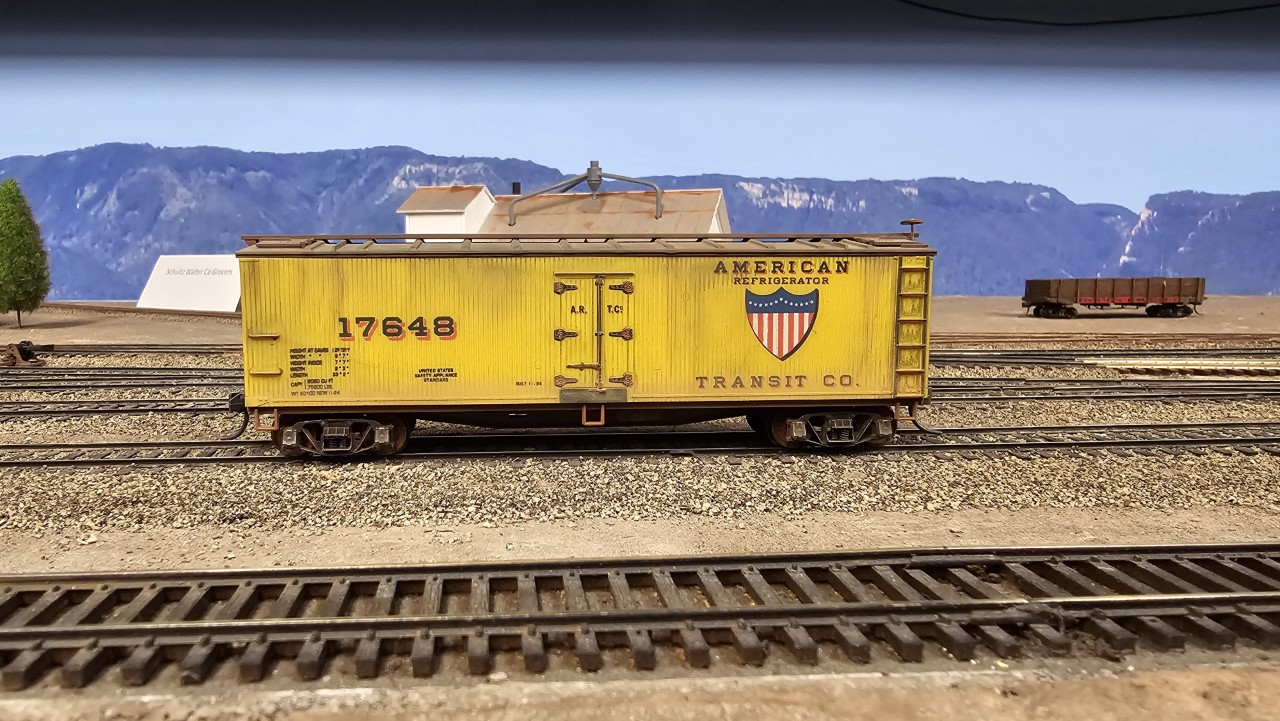
Two reefers...


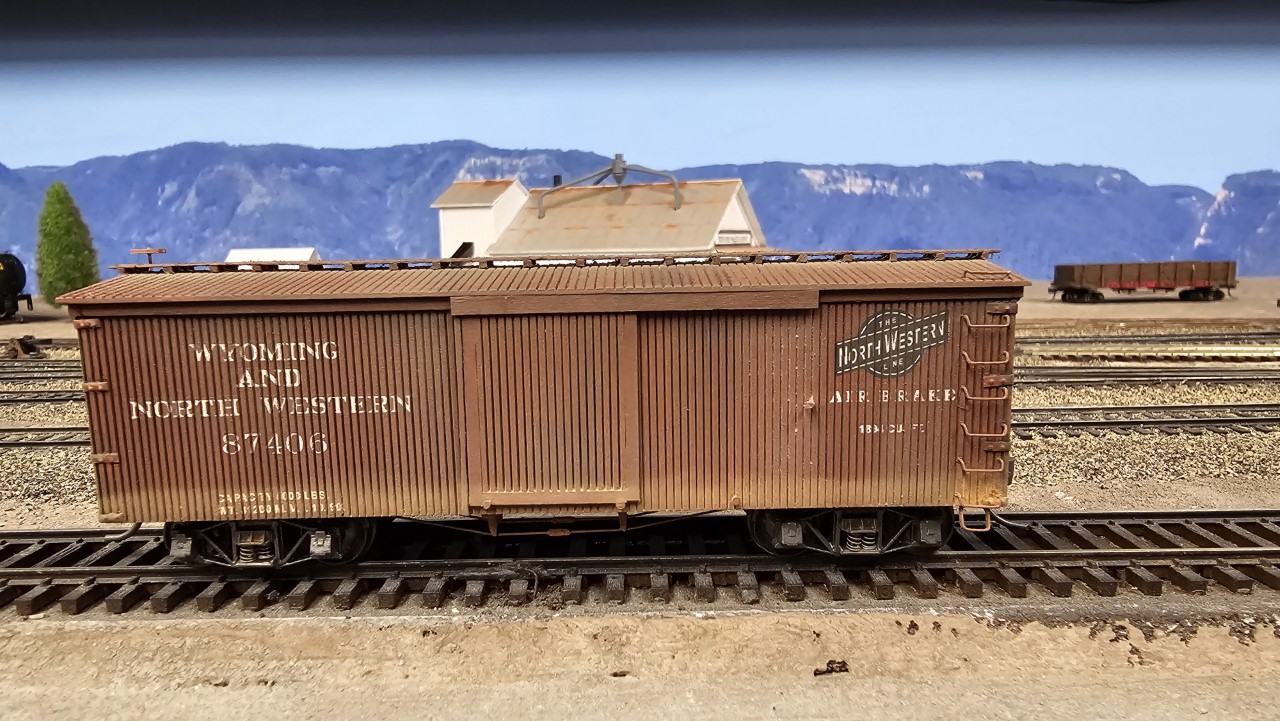
And one more stock car.

These were all relatively easy. There were cars that were already assembled that I mostly picked up at train shows over the past few years. A couple of the reefers are cars that Dave from Basin gave me. All I had to do was add trucks and sometimes couplers, then weather them.
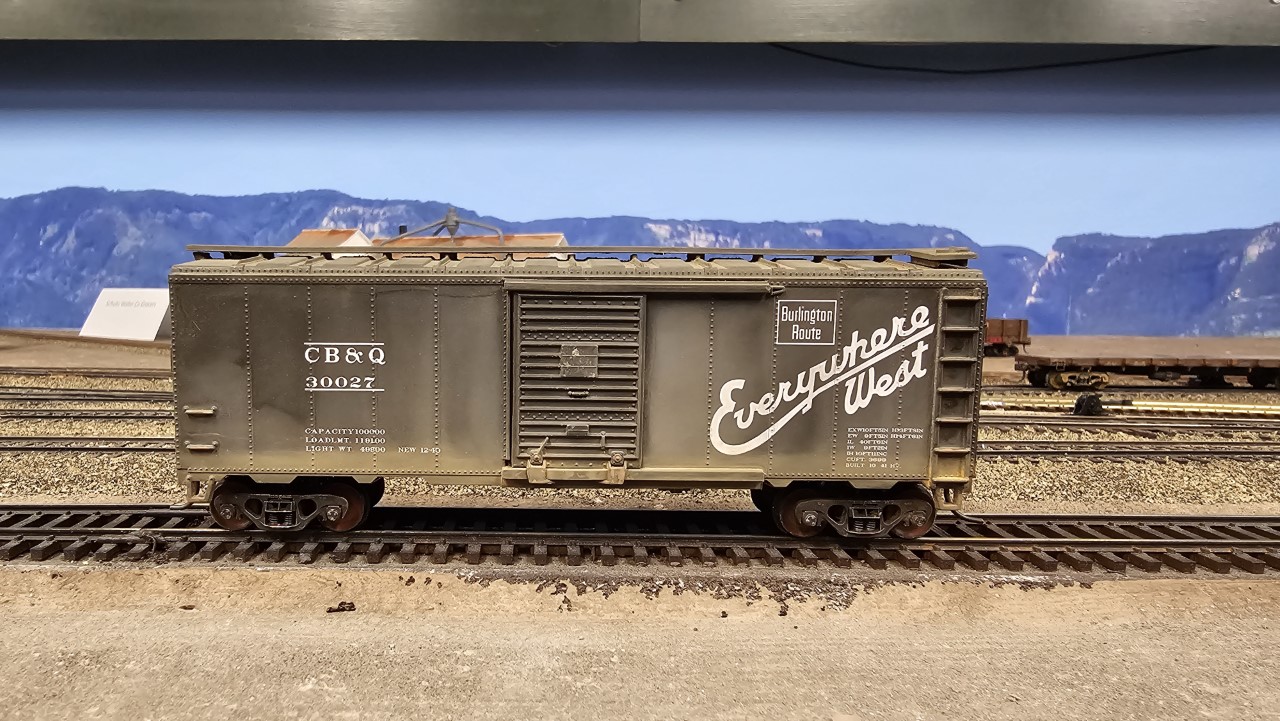
I now have two of these Burlington stock cars. The paint scheme isn't accurate for my era - it's about 15 years too new. But they'll suffice for now. Once the layout is closer to completion (years from now) I'll go back and repaint them to closer match what ran in the 1930's and '40's.
I'll ultimately have five or six of these stock cars, since they're what I picked up at a train show a few years ago (before I knew any better). I also have about half a dozen of the kits I bought when they were new. I'll probably paint and decal them for my timeframe before I assemble them.
Meanwhile I think these look okay...

I also got a bare start on work on the Wind River Canyon again. I've just placed some vertical supports for the foam over the CNW track (upper) at the free end of the peninsula. Here the Burlington (lower track) will be inside Pink Tunnel, the northernmost tunnel in the canyon. The modeled tunnel will be longer than the real one, to hide most of the turnback curve.

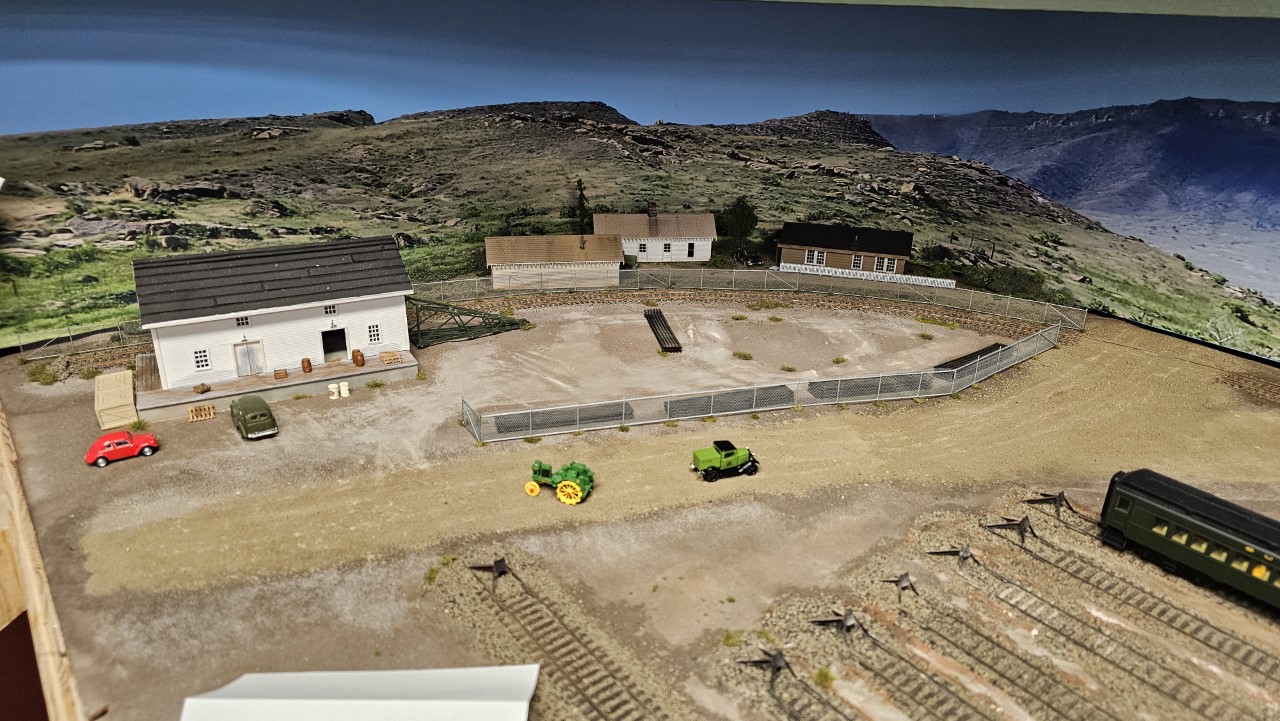
On August 11th I finished weathering the third house that will go behind Rocky Mountain Drilling.

The next day I plopped it into place and took this picture. Aside from having to add a lot more clutter to the pipe yard, this area is almost complete. I think I'm going to add a couple lights to the brown house, and some static patches throughout the area. Also still to come are the signs on Rocky Mountain Drilling.
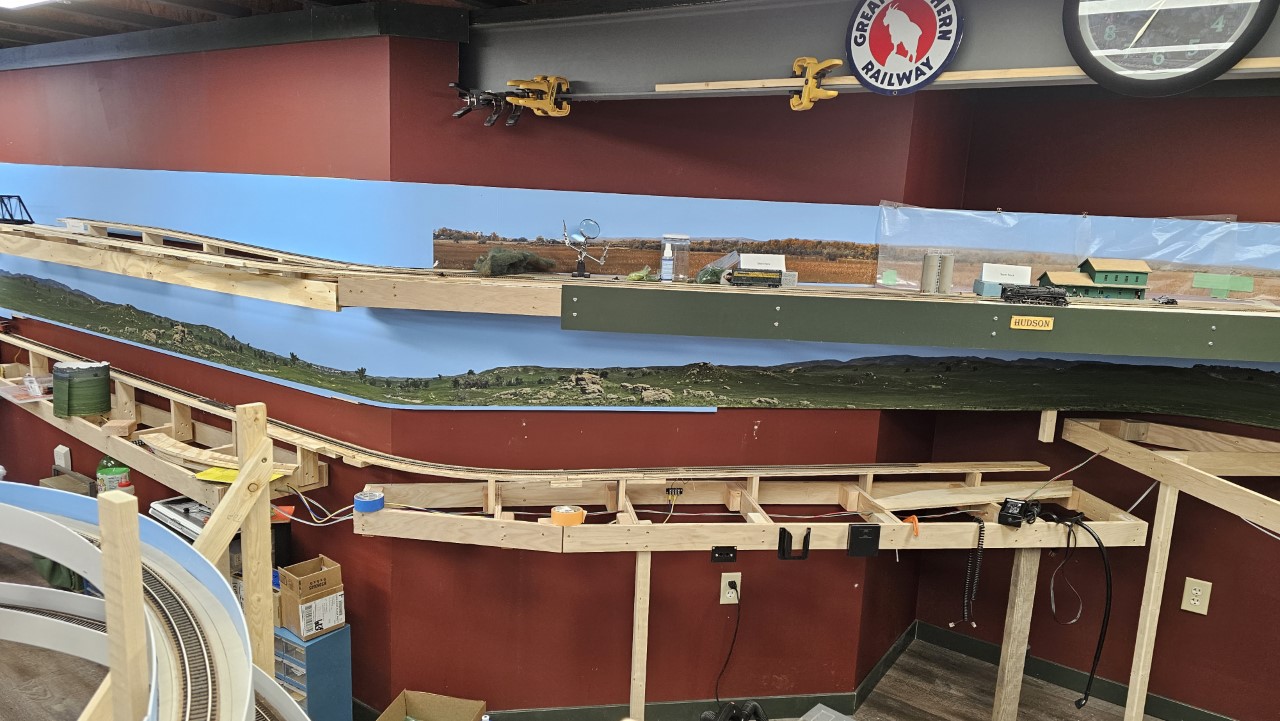
By the 15th I was well into adding fascia to the Wind River Canyon, in preparation for building up the canyon at the free end of the peninsula. In this shot I've added a temporary section of fascia far down the canyon, in order to determine where the next sections will go towards the camera. Those sections, the ones with the silver screws, are "permanently" installed (subject to removal for painting later). I'm well into building the rather stout supports for the taller fascia sections that will wrap around the near end of the peninsula.

On the 17th Dave came down from Basin and helped me with several tasks on the layout.
First we installed the backdrop for Douglas (the lower benchwork).
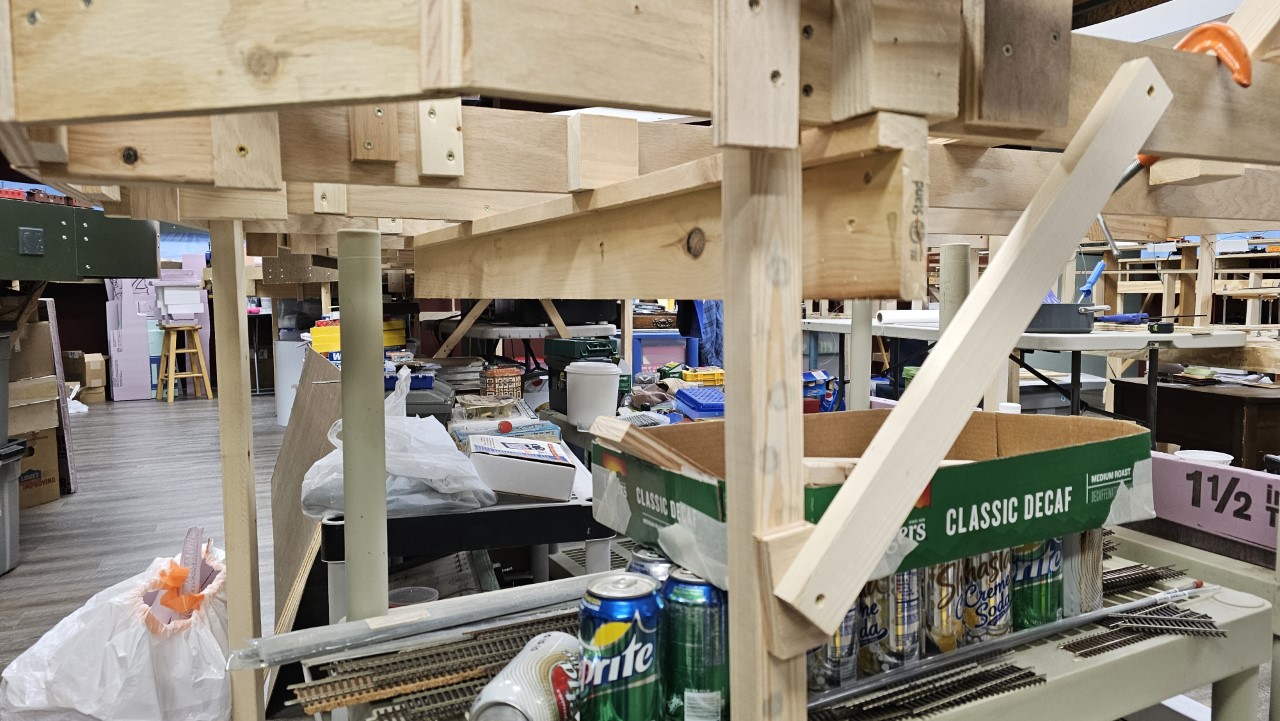
Then we spent the rest of the day on preparations for mounting the large fascia sections on the Wind River Canyon peninsula.
Turns out the corner was far too sharp for the Masonite to bend around it without breaking, so we cut the corner away and added this bevel.

The additional wood pieces to create the bevel left the area a bit weaker than I wanted, so we installed a section of L-girder that I had left over from New Jersey underneat the joists to stiffen and strengthen the structure. All this stuff looks like a big kludge, and really that's exactly what it is. But it works.
On the 19th, Bill, one of the guys from the club in Sheridan came down to the Casper club, bringing with him a bunch of stuff he wanted to get rid of. I wound up buying most of what he brought! There was a lot, including most of the cars in this passenger train.
I've been watching for the Walthers Heavyweights Burlington passenger cars on ebay, and when they come up the usually go for $80 or more each. I got seven cars for $99 from Bill! With the two cars I already had on hand, it makes an impressive-looking train. Between these cars and a couple of shorter cars I already have, I now have enough cars to make up three passenger trains (in the 40's the trains through here were usually four to five cars long). That will be trains 29 and 30 (the Nightcrawler) that ran from Denver to Laurel, and the train that ran from Alliance to Casper and back.

Also on the 19th I added the signs to Rocky Mountain Drilling, then weathered the building. It will be reinstalled in a few days.

The signs are as close as I could get to the prototype signs. The building changed significantly over the years. When I built the model I had no idea what it looked like. Someday I may rebuild it to more closely resemble this photo of the real thing.

On the 20th I was finally ready to install the fascia at the end of the peninsula. Here it's partially installed.
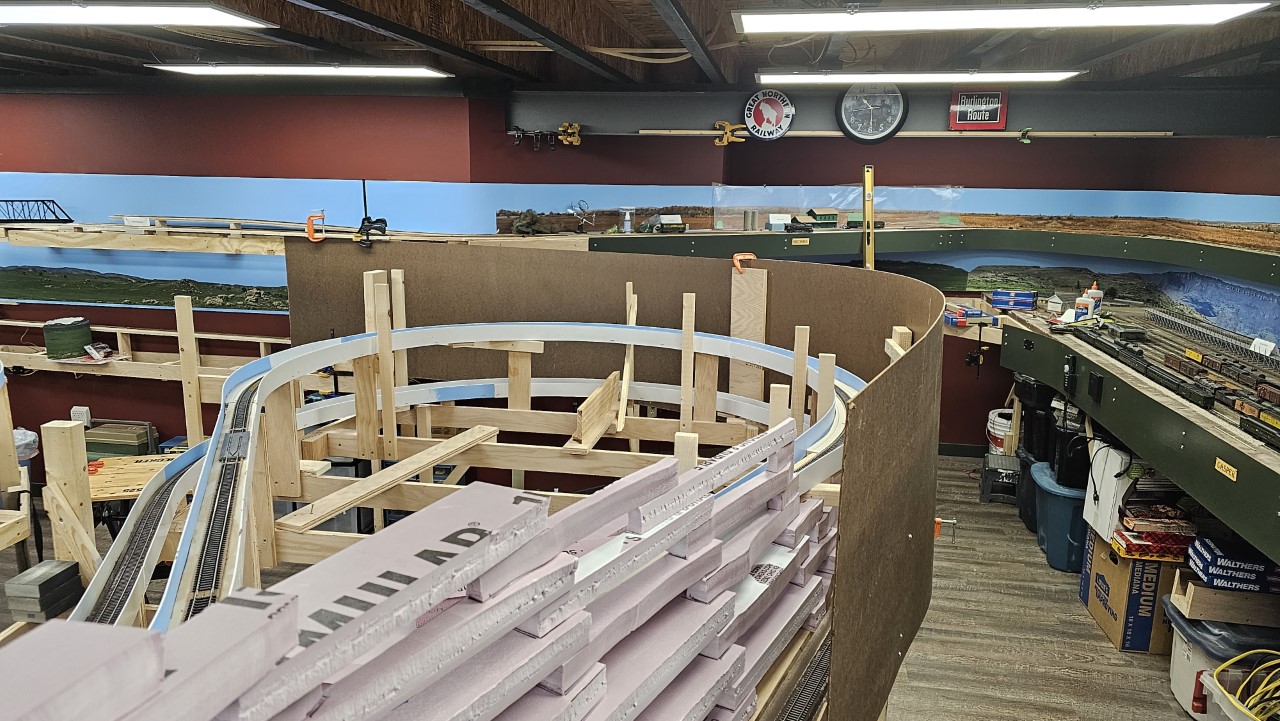
And here's a couple shots of it completed. It wasn't easy doing this by myself, but I managed. Later the top will be trimmed unevenly to the profile of the mountain slopes, and the fascia will be painted green to match what you can see at Casper to the left.

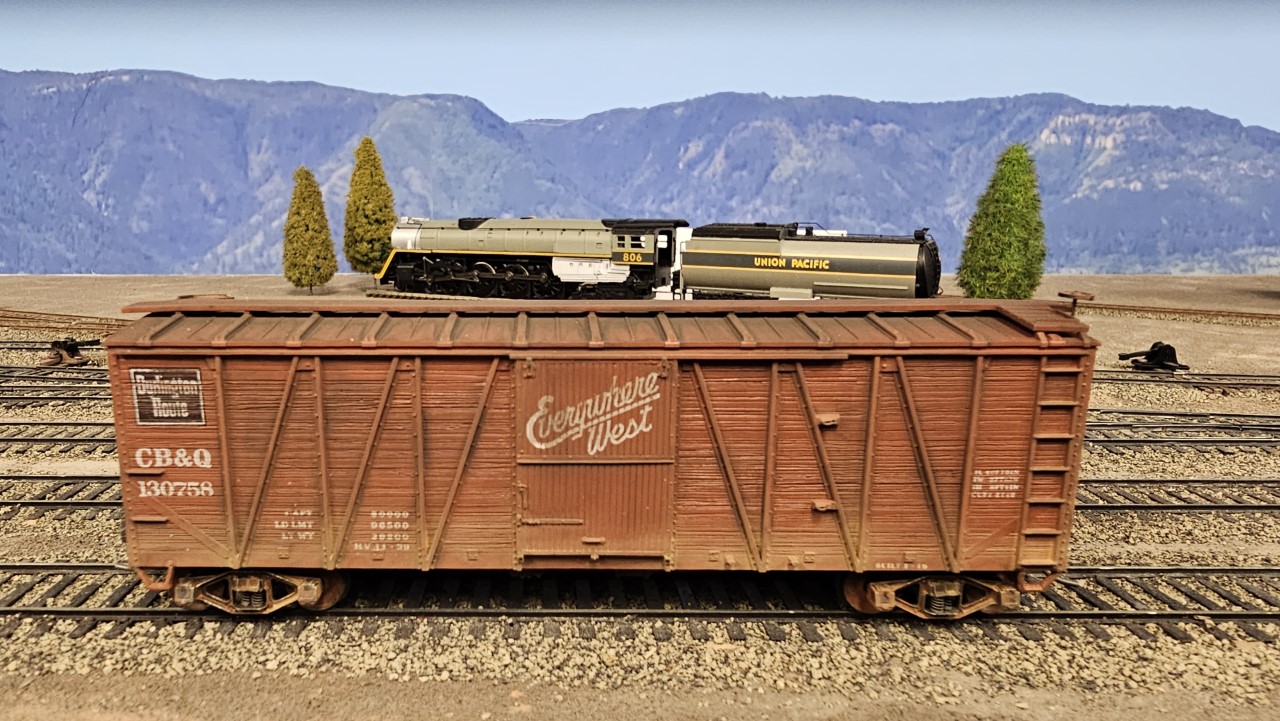
On August 4th I went to the train show in Evanston, WY, where I picked up a Spectrum Consolidation lettered for CNW. The decoder, and very early TCS WowSound unit, had some issues and I couldn't adjust the sound levels properly. TCS has an upgrade special to replace older WowSound decoders with the current iteration for a very reasonable price. I ordered an upgrade, and received the new decoder Saturday (after shipping my old one to them). I installed it today. Here's the new locomotive.
I need to do some PM on the loco - fresh grease and oil in the mechanism, but it runs passably well right now. I'll take it to the club, where we have DecoderPro on a computer, and adjust the top speed down to about 35 mph, and fine tune the sound levels.
The past couple weeks have been B U S Y !
A few days after I finished the fascia at the end of the WInd River Canyon peninsula I started adding new mountainside with pink foam.
I began by carving some pieces to fit roughly against the new fascia:

Then I moved back towards the plastered part of the canyon and roughed in tunnel number three.

Then I went back to the new tall fascia and roughed in Pink Tunnel - tunnel number two. The top edge of the fascia will be roughly trimmed to the final in a few weeks.

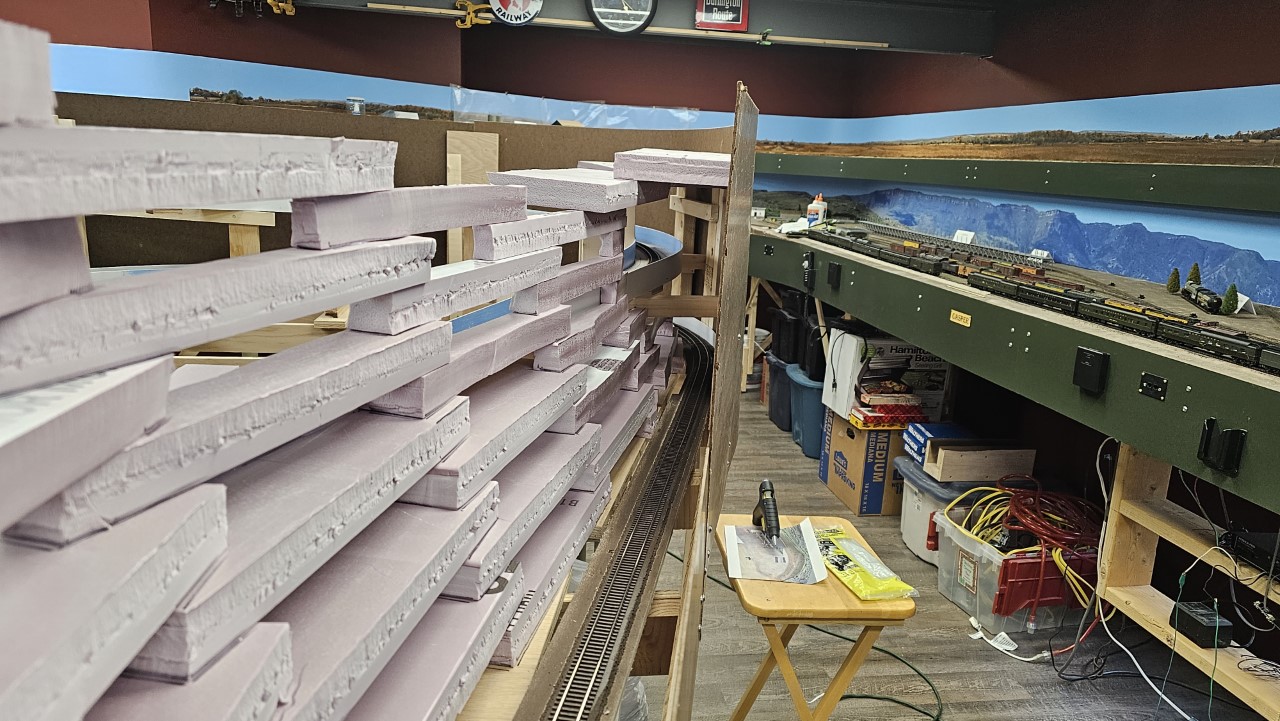
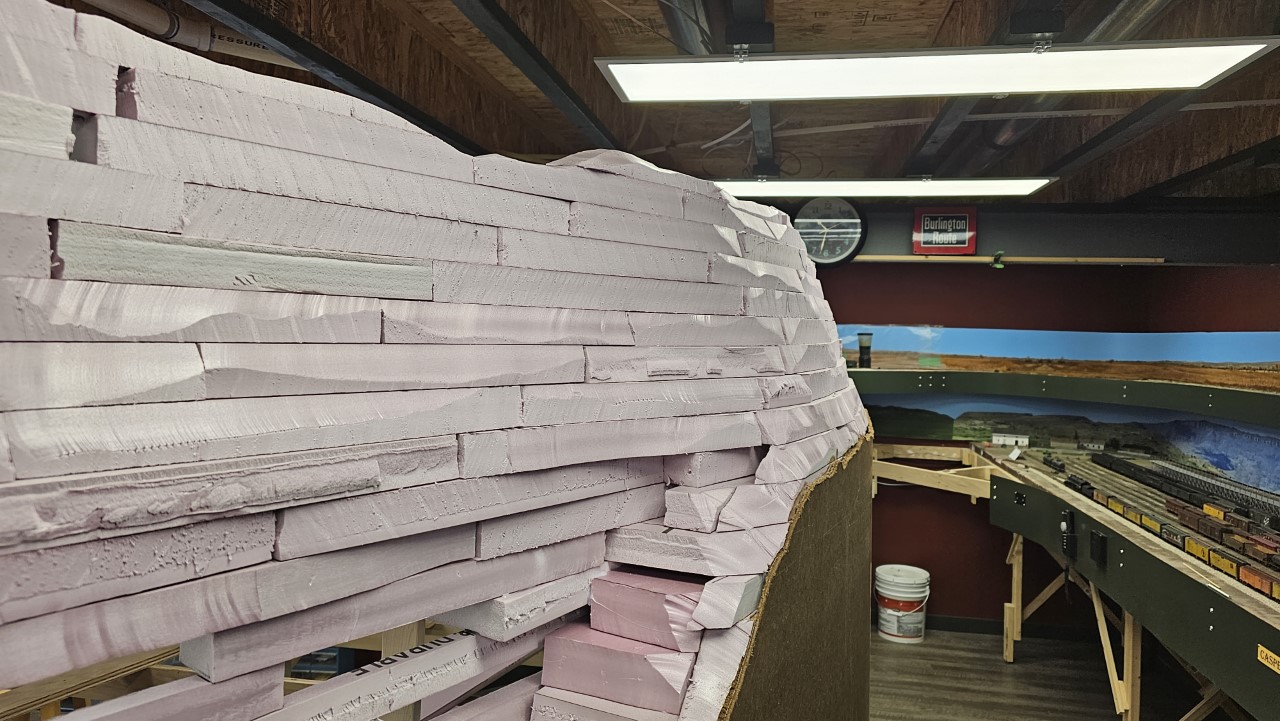
After a break to work on structure lighting at Rocky Mountain Drilling, which I'll cover below, I was back at the canyon on August 26th. For the next two days it was just cut and stack pink foam to final general contours for the mountain.


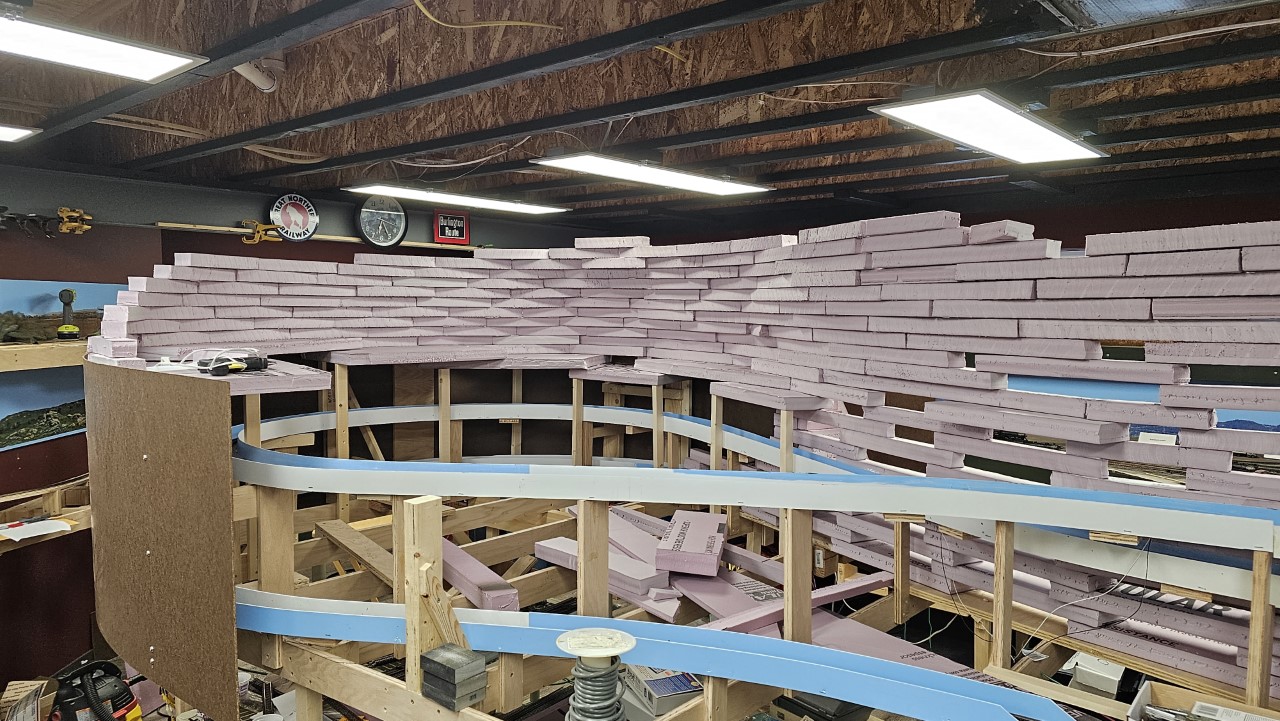
Here's how things looked as of August 27th, and how they look now.
From the end of the peninsula:
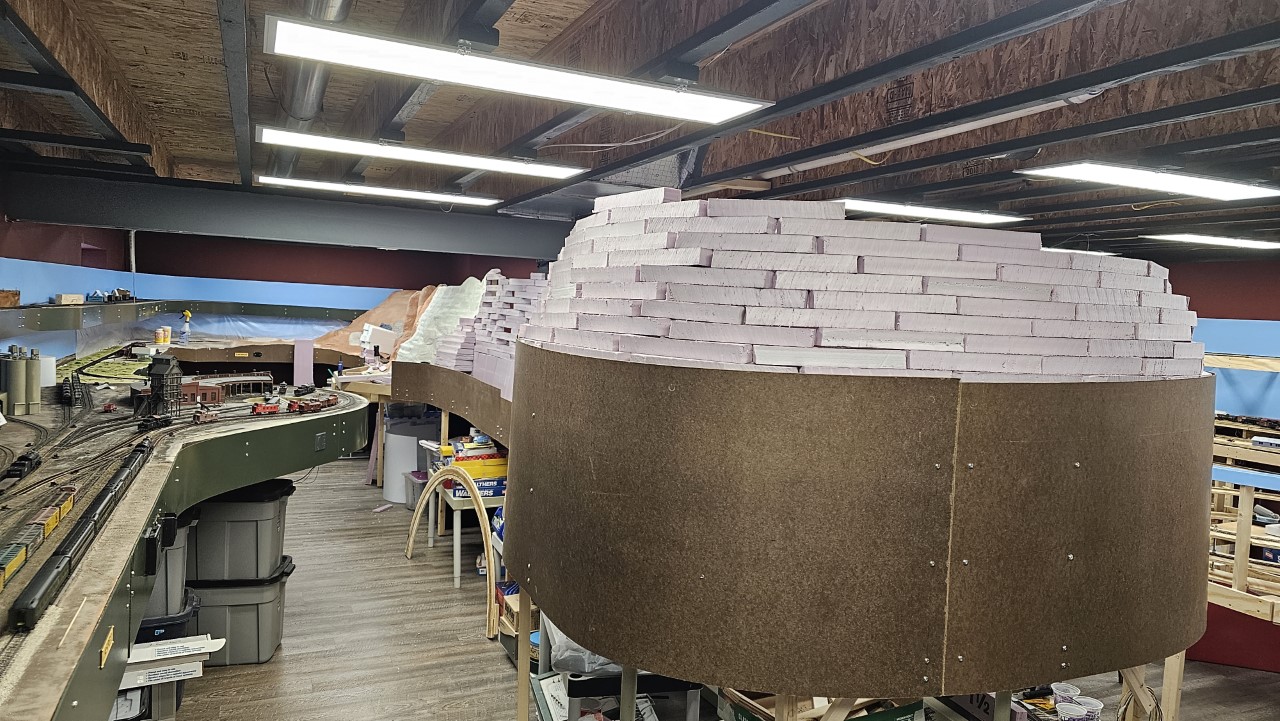
And from the far end of the canyon.

In between bouts of war with the pink foam, I was working on the Rocky Mountain Drilling area. I spent a bit of time messing with the structure lighting. I'd already had LEDs in Rocky Mountain Drilling, but I wanted at least one of the houses in the background to be lit as well, so I added a couple LEDs to the larger brown house. Here's how the area looked when I first powered the lights.
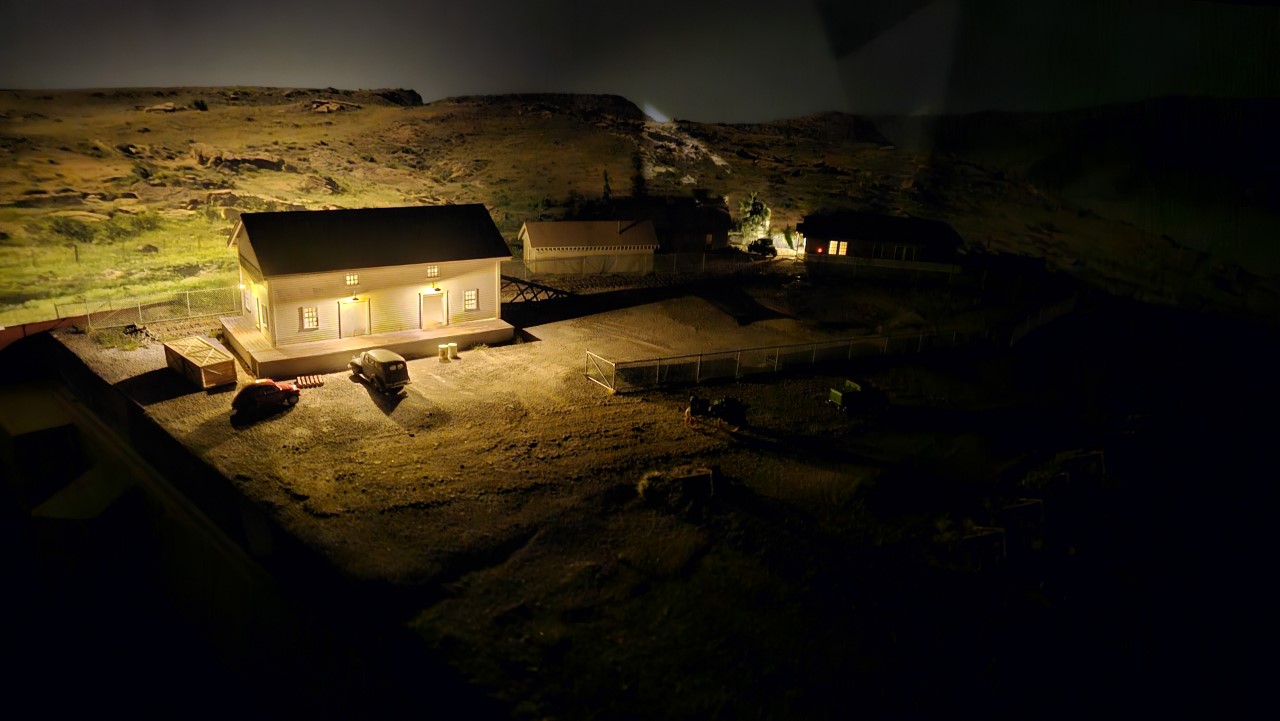
Seems blazingly bright, but that's just my cell phone camera on automatic settings. It didn't look that intense when standing there. I messed with my phone, adjusting the ISO, exposure and shitter speed manually and got something that looked a lot more like what I saw with my eyes:

Much better, but the area behind RMD seemed a bit dead. Not enough light back there. I decided to add some LEDs to the smaller white house that faces towards the viewer.
After adding the LEDs, I took this shot. YIKES! Those LEDs glowed right through the thick white resin walls (and the paint) of the white house!

I painted the inside walls of the house a dark grey and placed it back on the layout. That helped a lot.

At this point the building lights weren't balanced at all, so some of the house lights were as bright as the industry lights. All of them were being driven off a 3V wall wart.
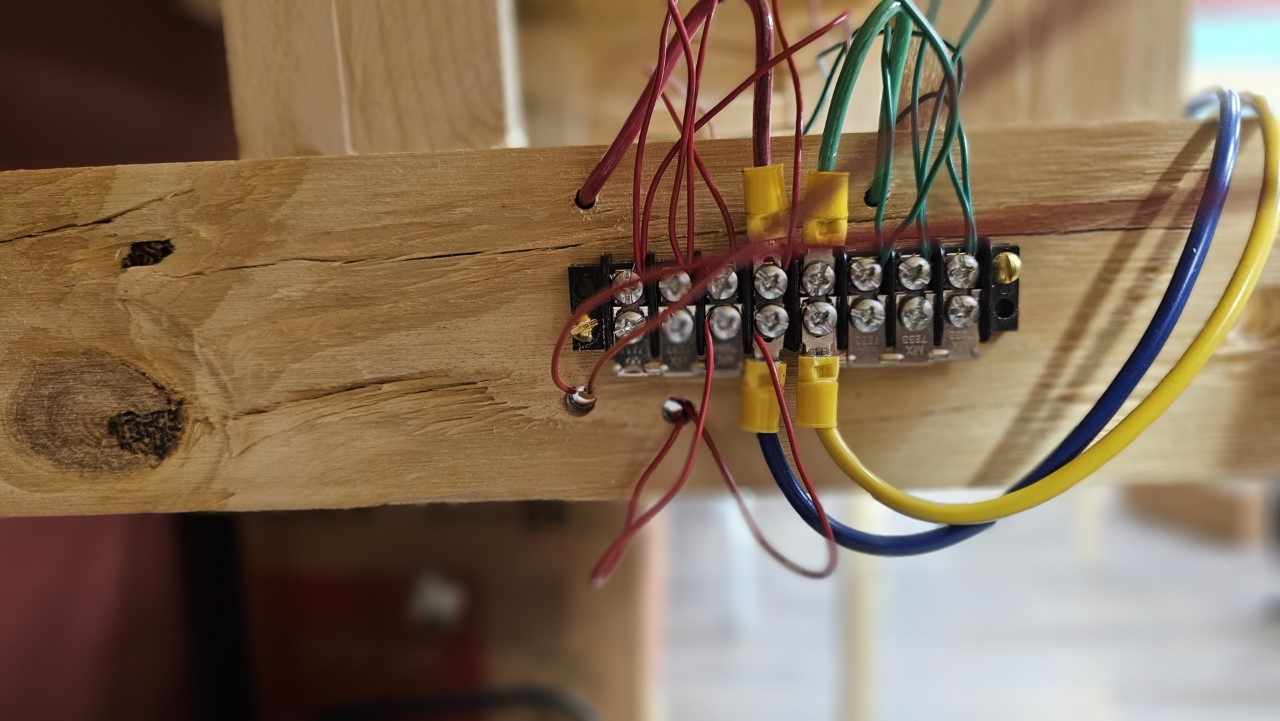
I ordered an LED light hub off Amazon based on a recommendation in the August issue of Model Railroad Hobbyist, and installed that. I also added resistors to the LED leads to reduce the intensity of some of them. Here's that hub installed and wired:

This thing is a fraction of the cost of the Woodland Scenics Just Plug lighting system. The only drawback is that it has one adjustment for the entire hub, rather than one for each LED output the Just Plug has. But this hub will drive up to about 50 LEDs! I can add resistors to each line as needed to balance the light.
It's hard to see the difference in this shot, but the lights are much more balanced than they were before.

I wasn't done with this area of the layout yet.
Being under the CNW curve into Hudson, the area is much darker than everything around it, so I installed an under-counter LED light to brighten it up. As part of that installation, I set up switches to control that light, and the ones that will be needed for Douglas as well. I also added a switch to turn the power supplies on and off for the structure lights at the east end of Casper and the west part of Douglas. The switch to the left in this shot controls the structure lights, and the one on the right controls the under-cabinet lights. The latter will be replaced with a dimmer in a few days - those under-counter lights are bright!

The switches are positioned so that the face plates will fit against the Douglas fascia when it's installed ( I Hope!).
Today I added some additional grass in the pipe yard and along the dirt road. Here's how the area looks now, with the under-counter light turned on. Looks like a really bright summer day, doesn't it?
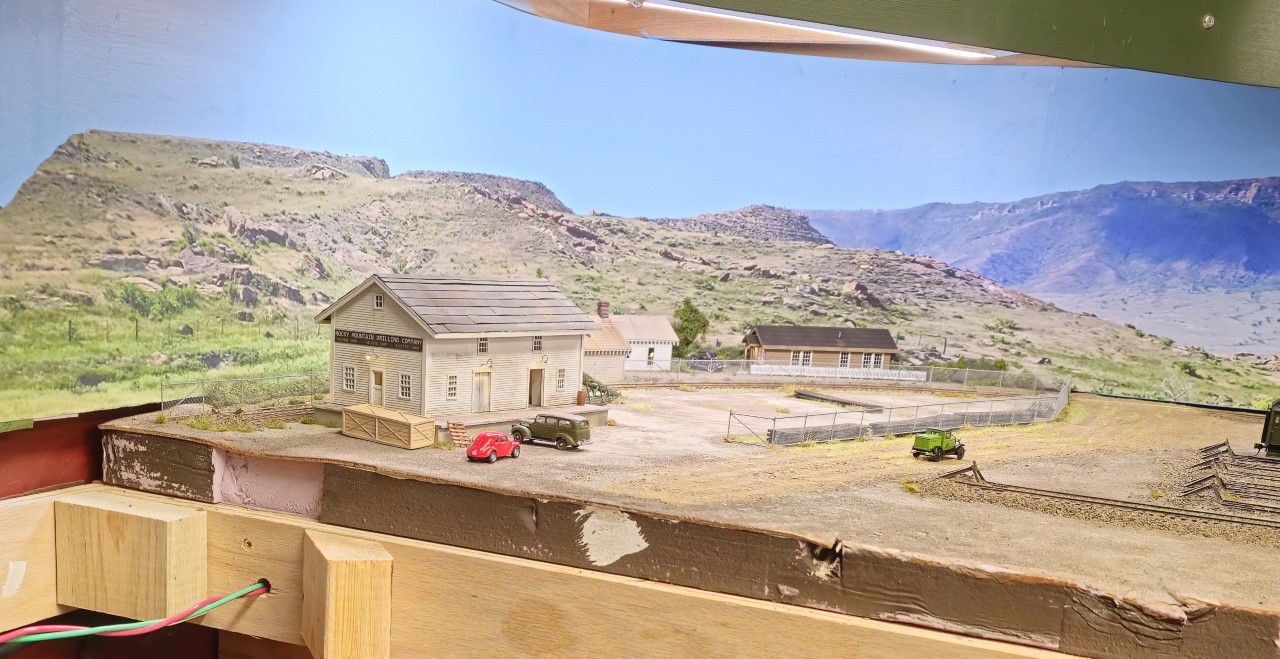
And with this I'm pretty much finished working on the area in the far corner. I'm ready to finally extend the mainline east from Casper into Douglas, and on to Orin Junction.
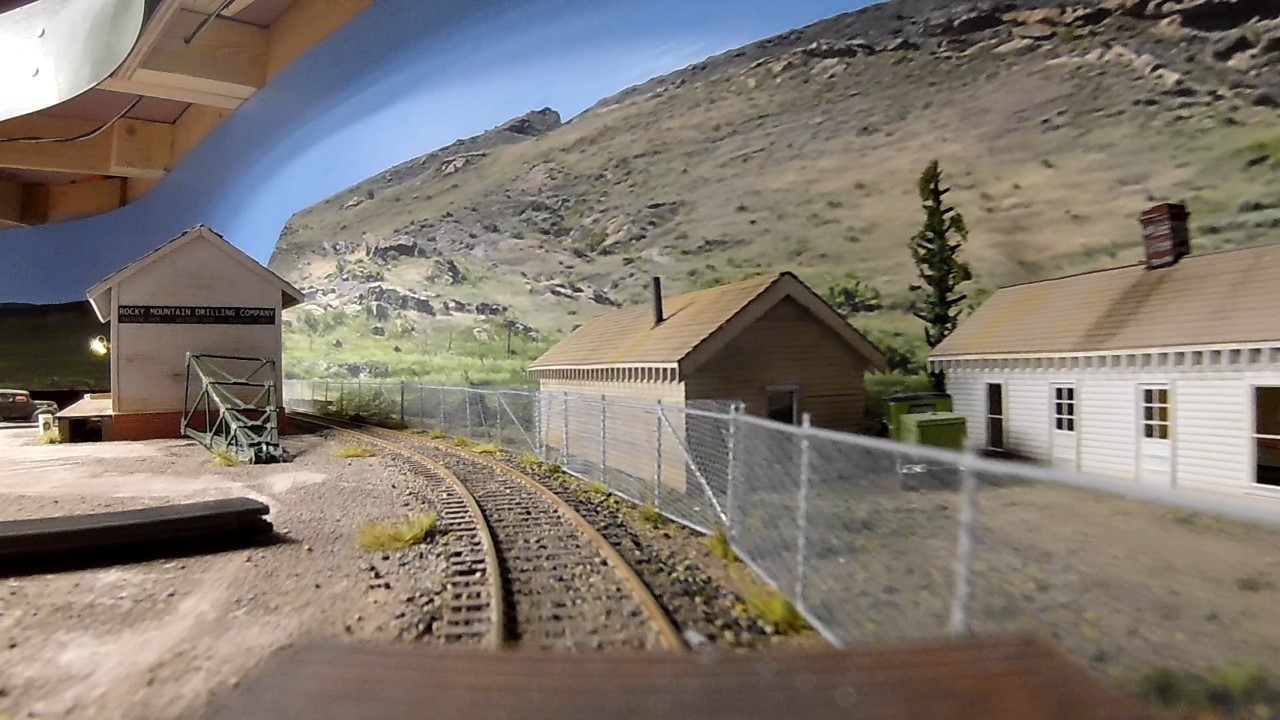
Here's an almost ground-level view of the area.

The final thing I've done in the last couple weeks, and which I just did yesterday, is add that missing section of track that connects the end of the Cody branch to the Frannie end of Greybull. Here's the track is installed and the caulk is curing. The only thing left is to wire the track into the swing gate power cutoff switch, and add the ground throw to the switch at the far right..

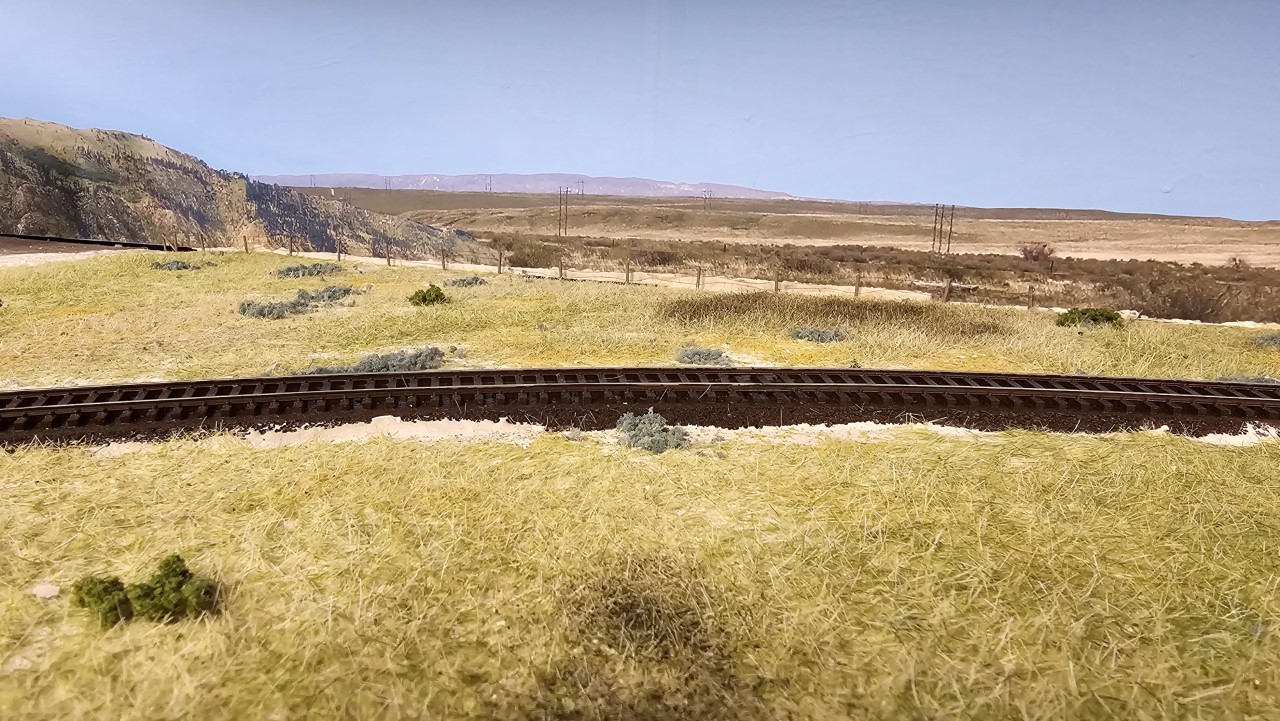
I took this image of a car being delivered to Rocky Mountain Drilling on the 4th.
I've spent a few hours this past week extending the subroadbed for west staging a bit. Here it is as of the 5th:

And as of today. This is taking quite a bit of time to figure out exactly how to position the staging yard under Casper, meaning I'm having to work out the curve into the yard and the placement of tangent tracks, grades, etc.
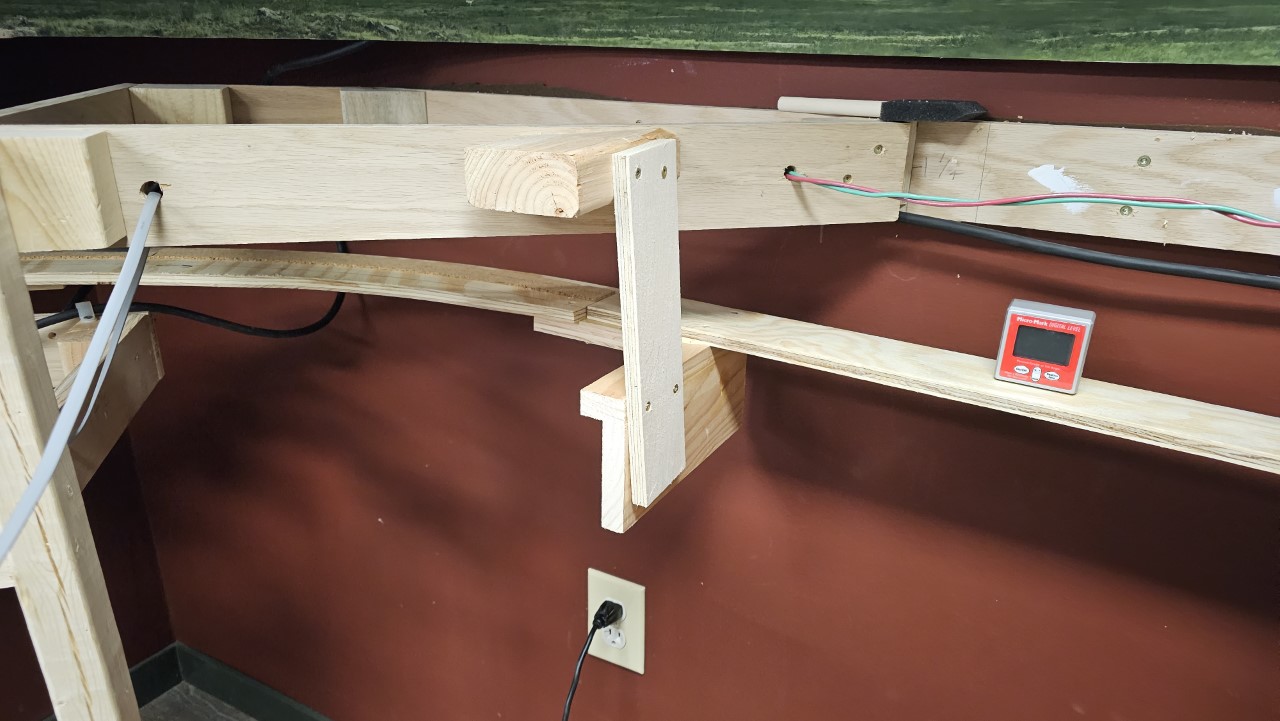
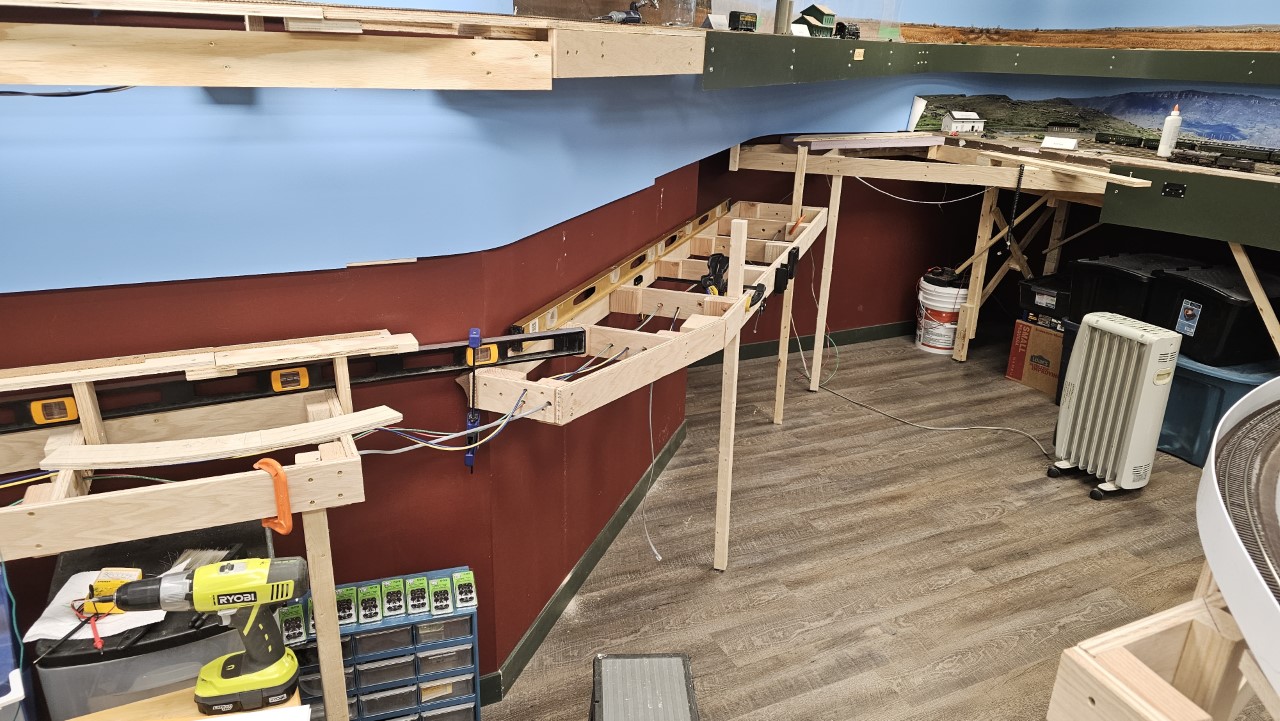
I spent more time than I did on a project I wasn't planning to do yet - installing supports for the backdrop behind Thermopolis. I've had the 1X2 lumber for a few months, and just decided to install it on the spur of the moment. Took several days. In this shot you can see the track buss wires in the joists between Thermopolis and Wind River Canyon. Of course the green on was right in the way of where the backdrop posts needed to attach to the joists. I didn't plan that out real well, but it only took about 20 minutes to relocate that wire and clear the space.
Here I've got several posts installed and am working on more. I was using the level at the top of the shot to make sure the posts are all even at the top.
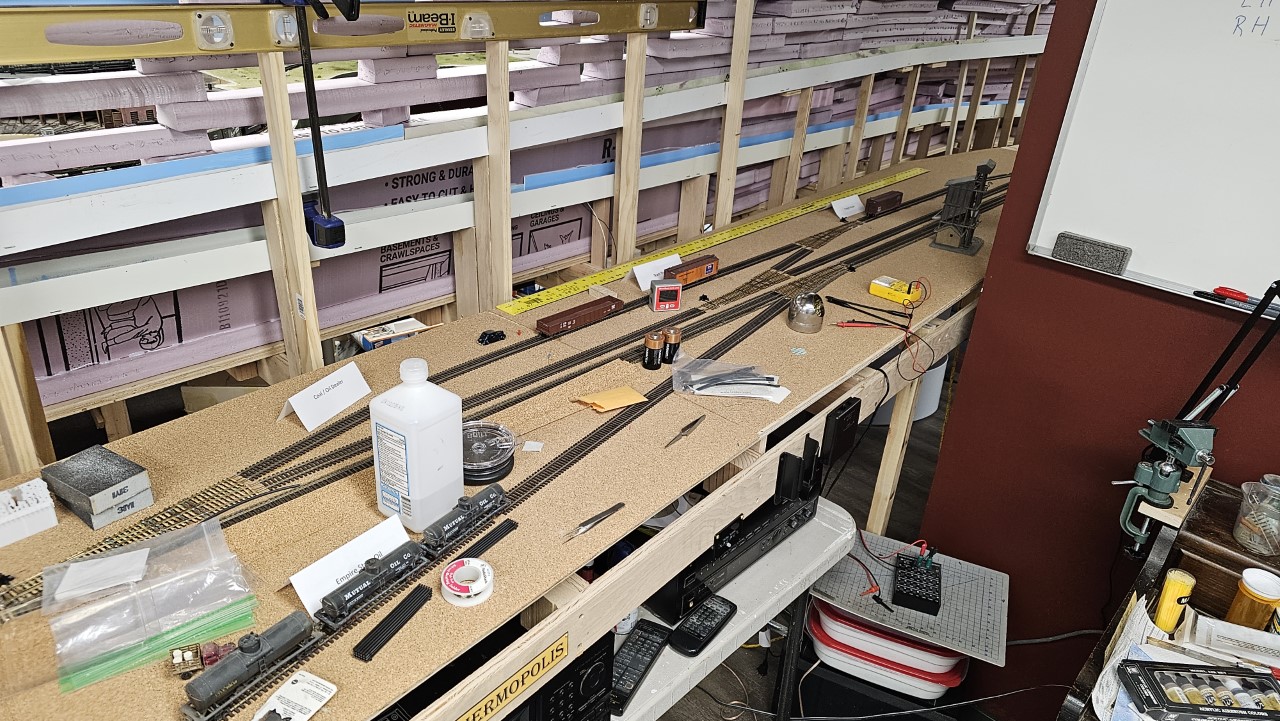
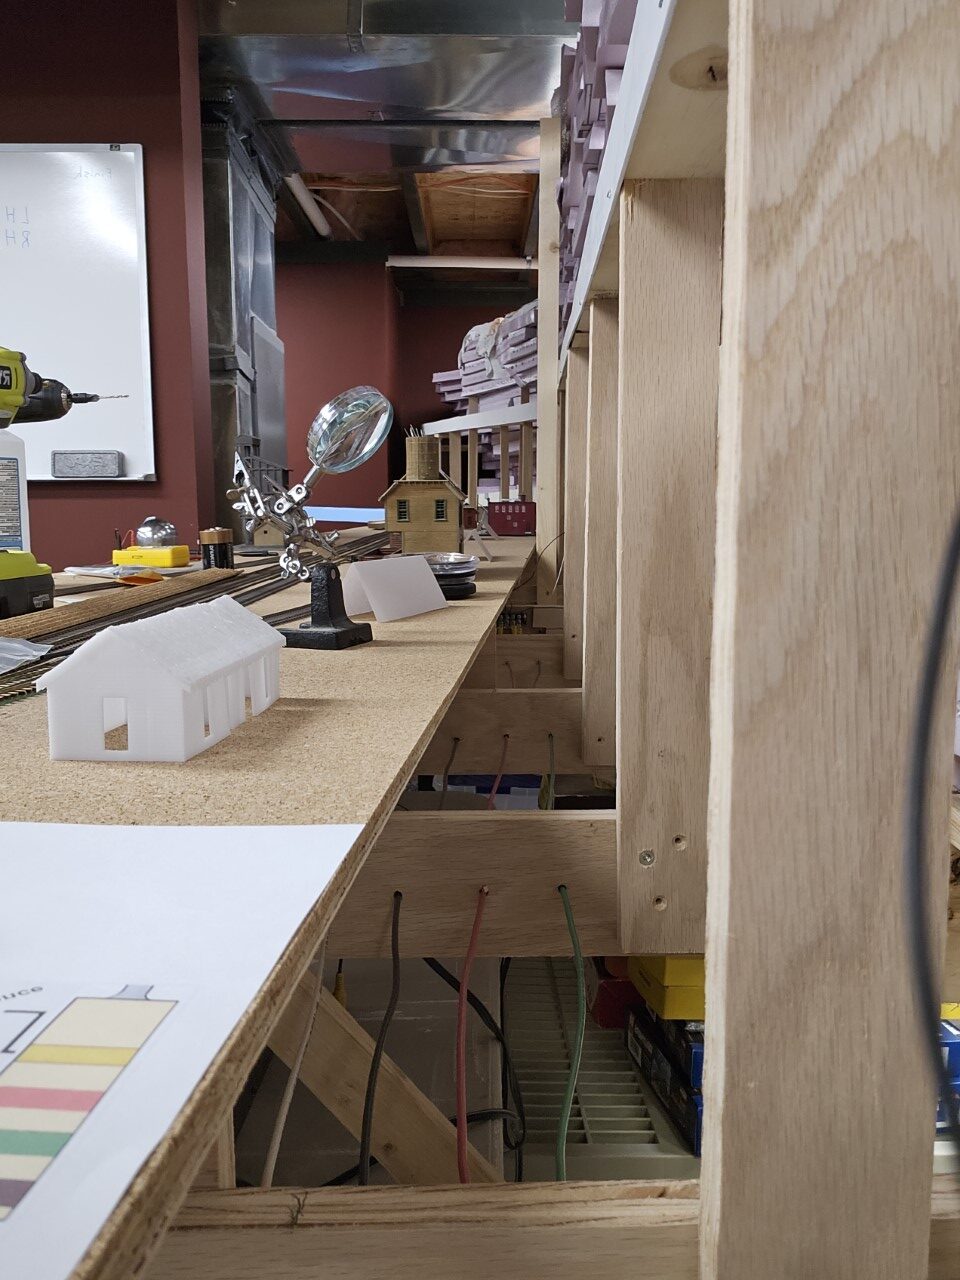
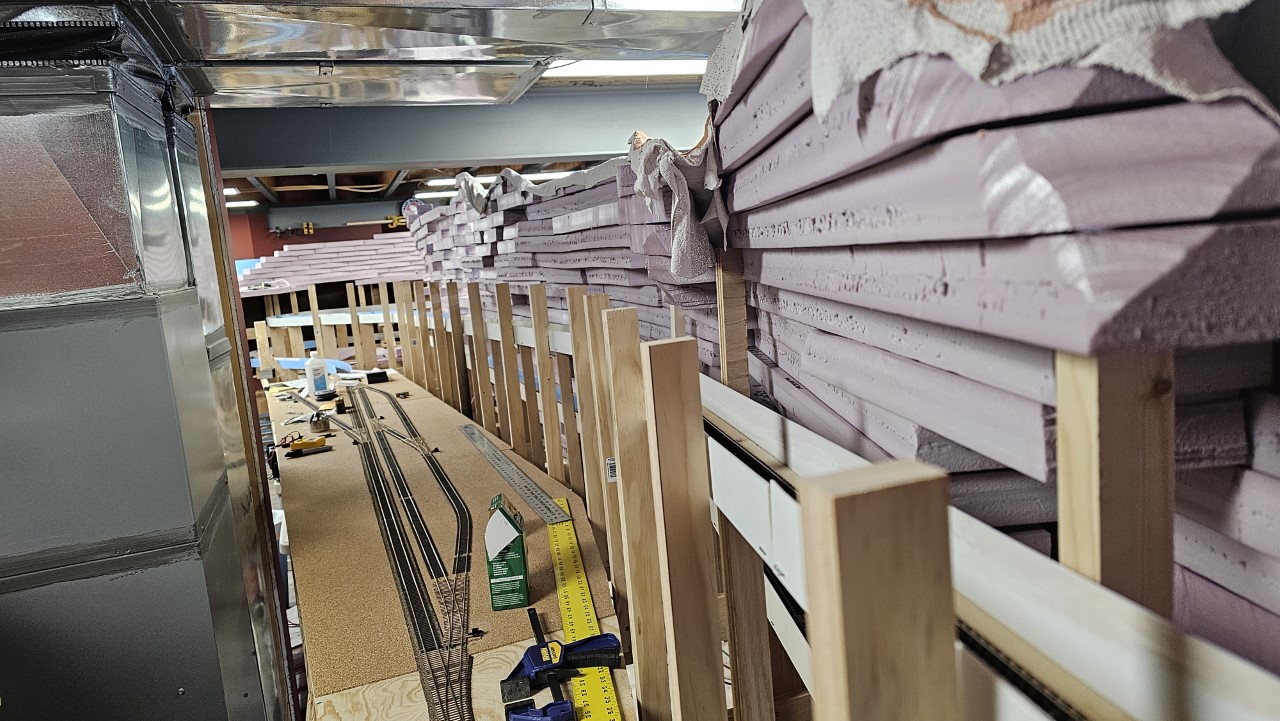
As of yesterday the backdrop supports were all in place. Here's a couple views looking different directions. Now I'll need to drive to Denver to buy a few more sheets of styrene to install.

I've also been adding more freight cars to the layout. These cars I obtained from different sources already built, so preparing them for the layout only requires adding strung trucks and sometimes Kadee couplers, ensuring everything works properly and weathering the cars. Here's three of the ones I've done recently.
This one is an express boxcar that will go on a passenger train. It's an Athearn RTR car I got from a friend.
Here's one of the oldest (in prototype years) cars on the layout - A truss-rod boxcar. This is a LaBelle kit built and custom lettered by the same guy I got the express boxcar from. Too old for interchange service by my era, this car will be limited to running along the Cowboy Line between Casper and Lander.
I think this reefer is an Accurail kit (not totally sure) I got as a gift along with about a dozen others, mostly reefers, from a friend in Ontario.
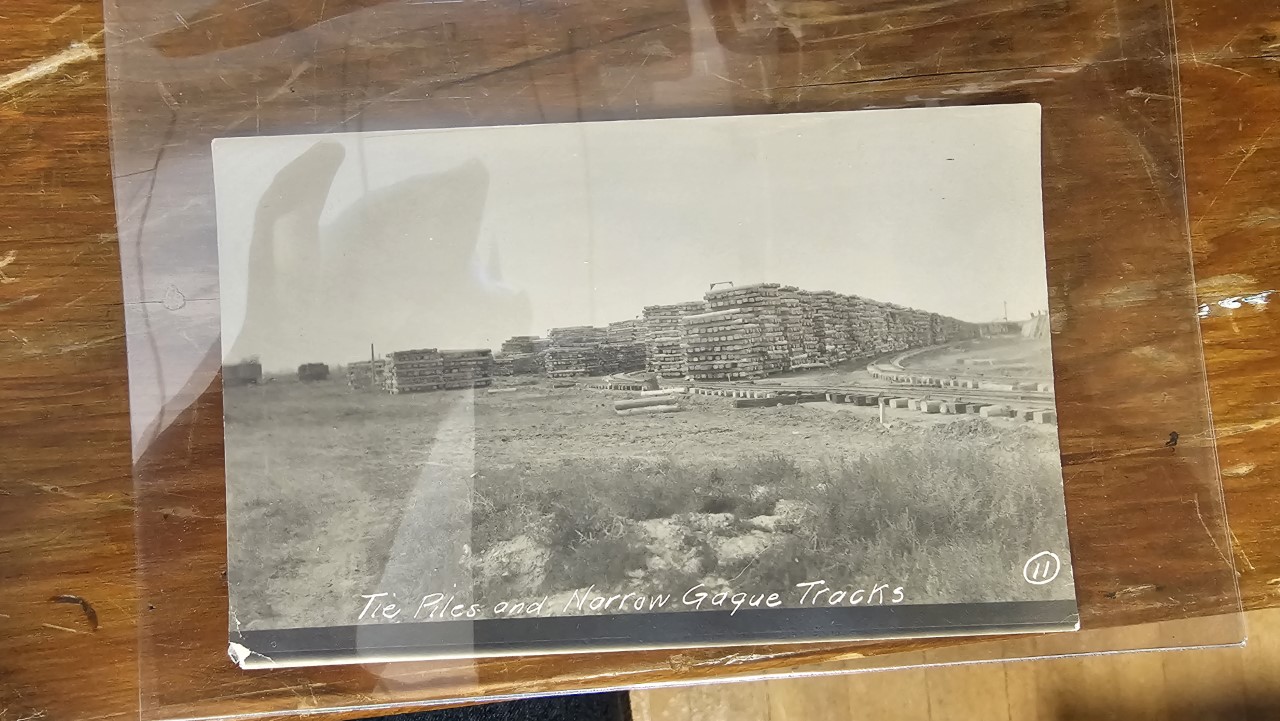
On the 7th I drove over to Riverton, Wyoming to explore what remnants I could find of the railroad there. I was particularly interested in anything I might find on the old tie-producing plant that used to be in town.
I stopped by the Riverton town museum, and was delighted to find that they have quite a few photos of the old tie plant. The place was called Wyoming Tie & Timber. Here's just a couple of pictures I took of old photos they have on file.
Stacks of ties:
And workers pulling the cut timbers, which were floated down the Wind River from above Dubois, WY, out of the river for processing.

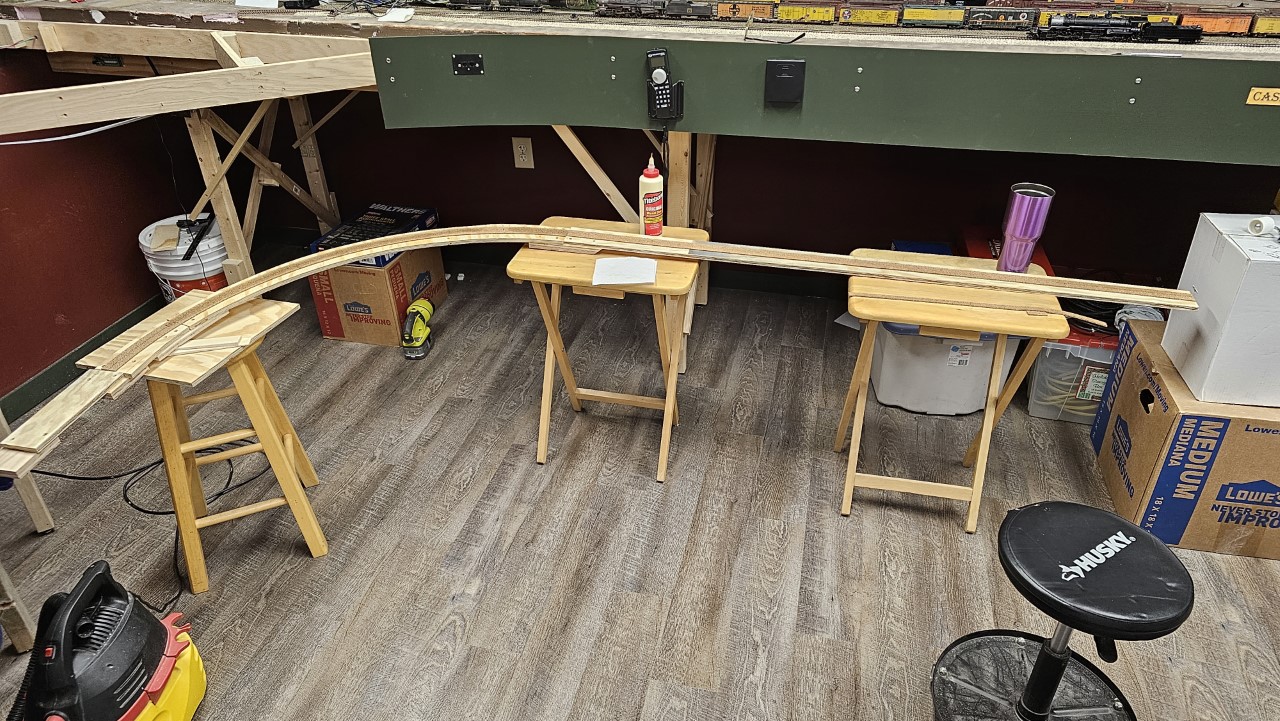
After my last post I continued working on the track to west staging. Because of it's location under Casper, it would be very difficult to build this track in place, so I built it in the open and mounted it later. Here's the final section of subroadbed that leads to the staging yard itself, ready for track. It's the 10th of September
On the 11th I laid the track, and on the 12th I moved it into position and began fitting it up to the previous end of the subroadbed.
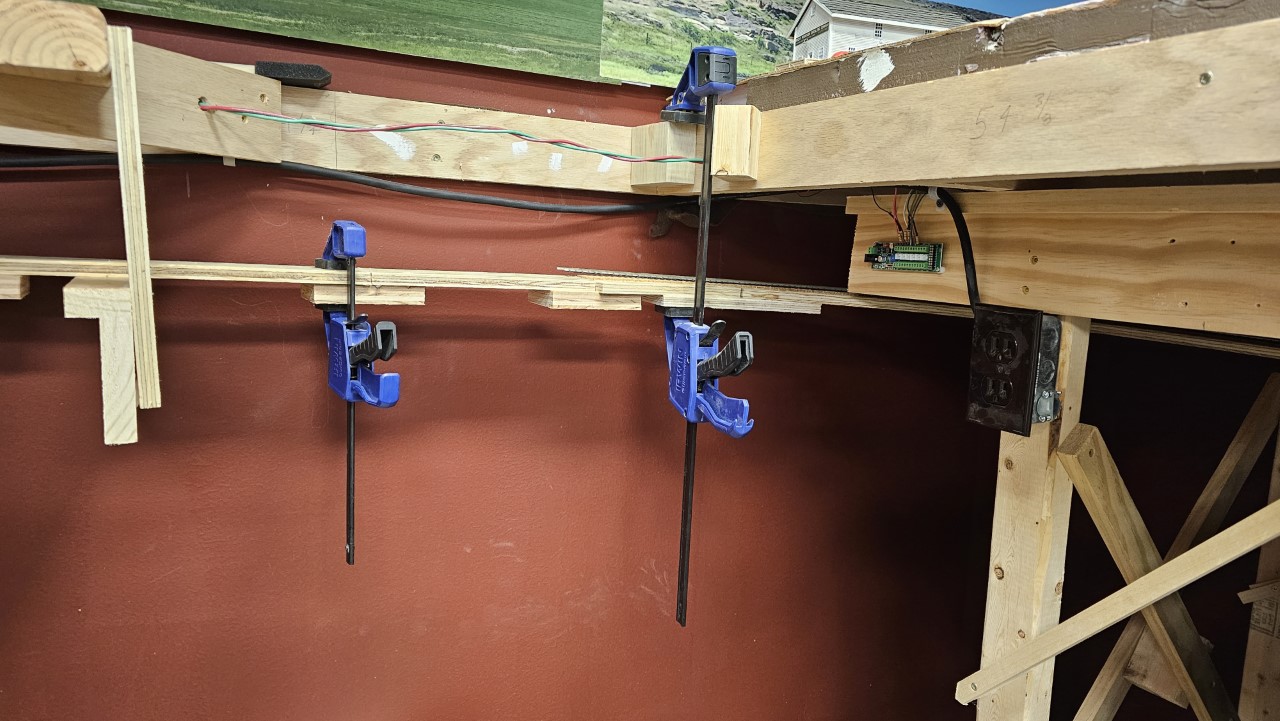
Here's what the tail end of the new track looked like after I got the other end clamped to the existing subroadbed. Right now it's just resting on the plastic bin.

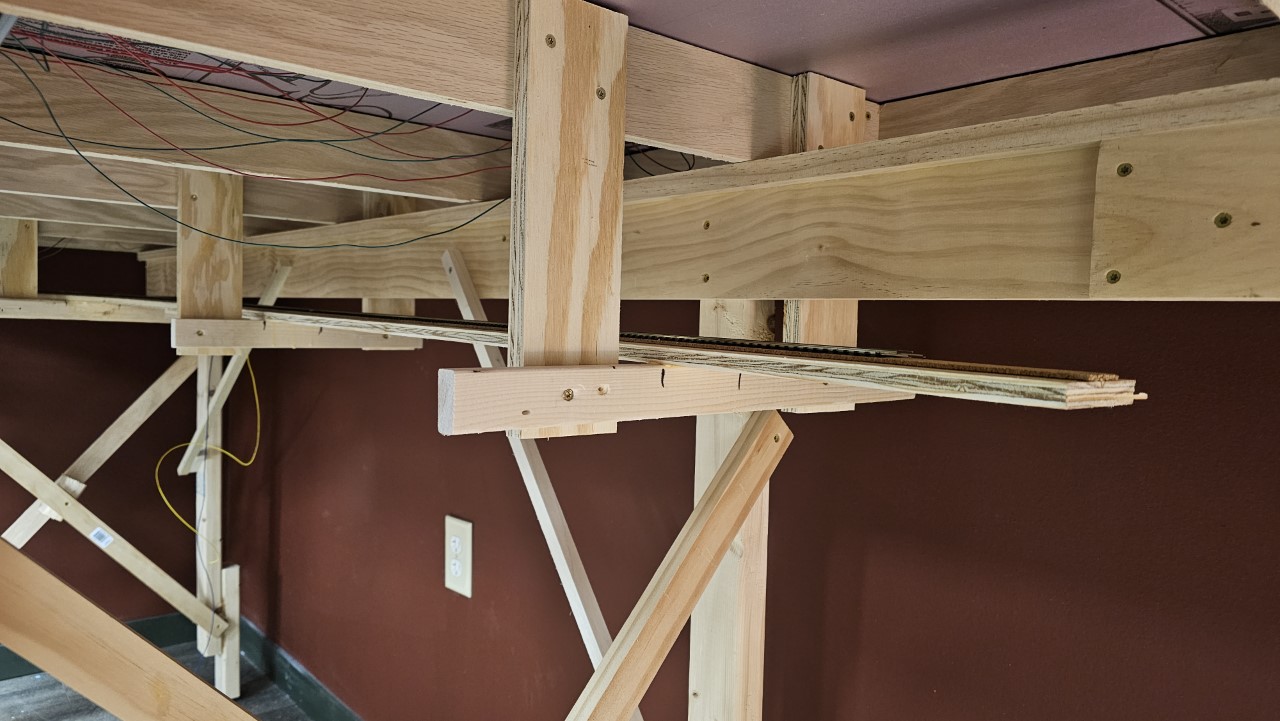
Next step was to adjust the grade and get the final elevation of the track. You can see here how I supported the new section.
I thought this was going to be a real bear to work on, but I was very pleased to discover that there's quite a bit of space under Casper to work. I was able to sit on a step stool and not hunch over uncomfortably. Because of that, it only took a couple hours to level the track and establish the grade.
After connecting the track in this new section to the existing track under what will be Douglas on the 15th, I backed a train down the entire lead to West Staging.

Here's the train pulled out from under Casper, on it's way to appearing on the layout at Frannie / Greybull.

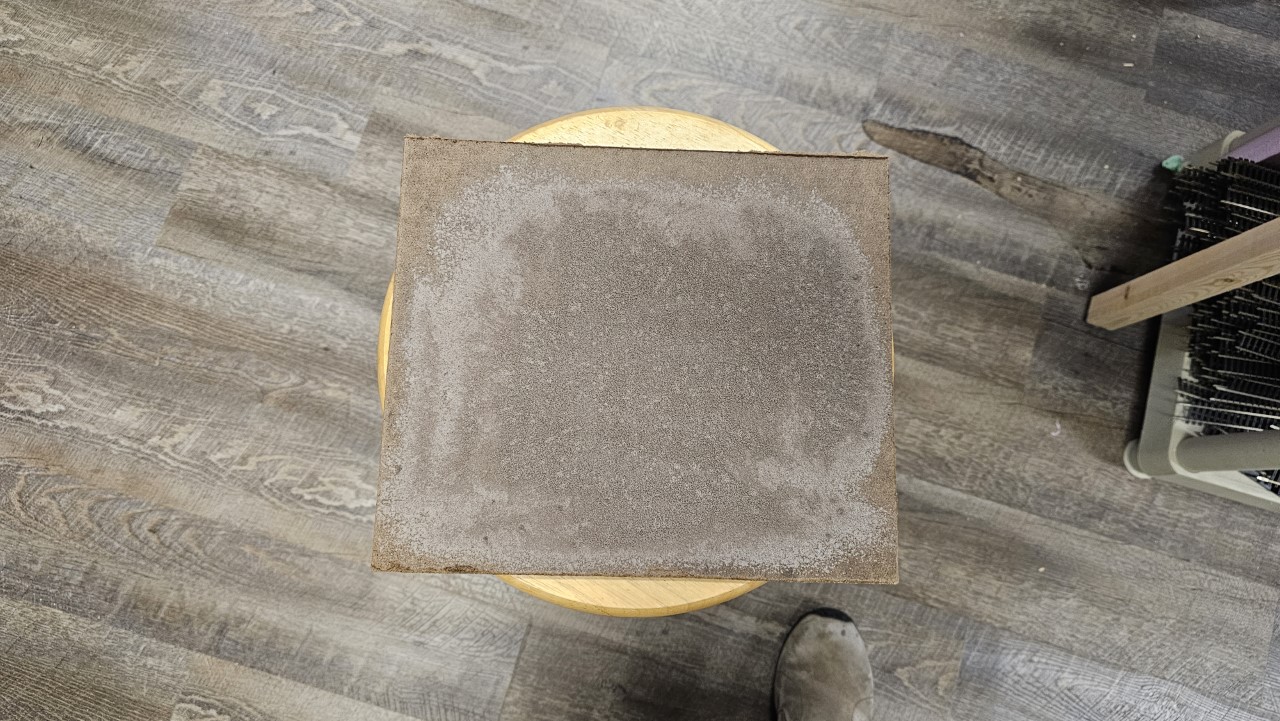
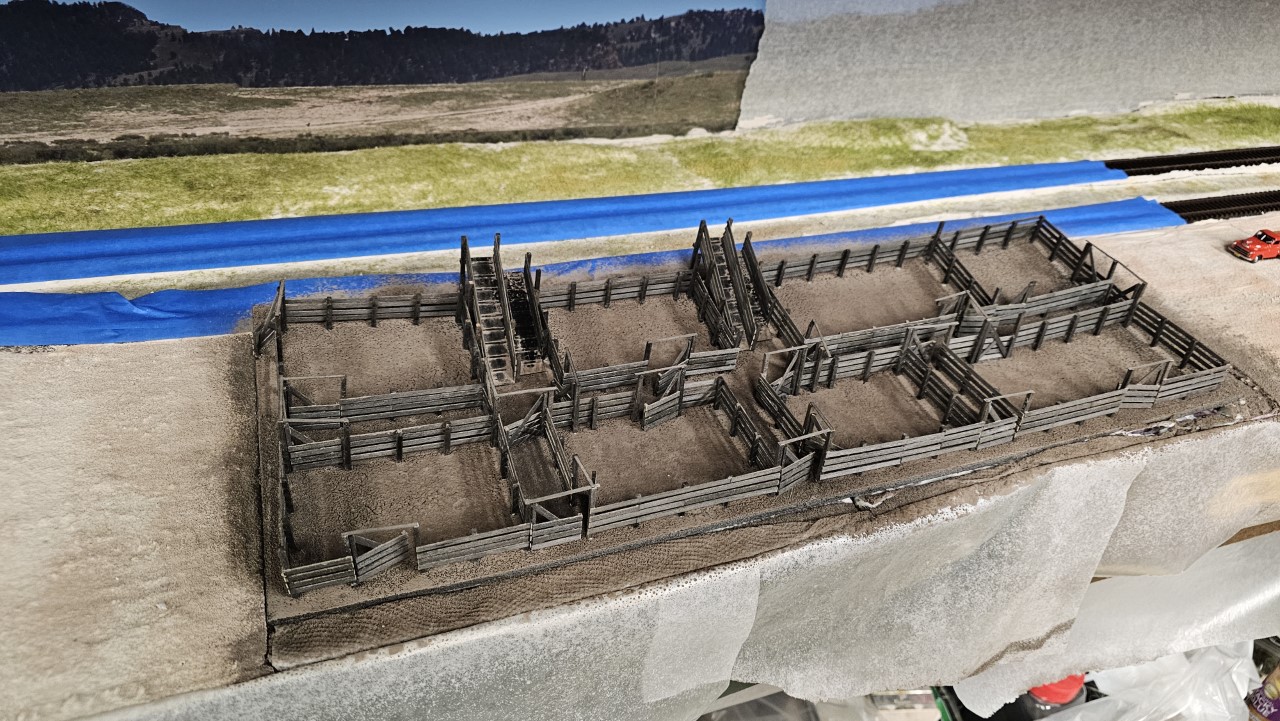
Once the west staging approach was finished I turned my attention to the Powder River stock pens (finally!). On the 17th I did a test panel with the dark tile grout I plan to use for the dirt within the pens. It came out looking fine.
Today I began preparing to apply the grout to the pens and their immediate surroundings. I needed to fill the excess gap between the base of the pens and the fascia, so I slipped some wax paper in behind the fascia to keep the filler from sticking to it.

Then I folded up a couple of paper towels and fit them between the fascia and pens base. I soaked them with a 50-50 mix of white glue and water. Hopefully this will stiffen the towels so they can act as a base for the grout I'll apply after they dry (which might be a couple days).

While I was working in that general area I also installed the first section barbed wire fencing along the backdrop. This first sections starts where it intersects the not-yet-installed chain link fence around standard oil, and will extend behind Powder River almost to Shobon. The gap between the benchwork and backdrop on the left will be covered up mostly by refinery equipment, piping and storage tanks.
The last thing I did today was mark the rough cut line for the Wind River Canyon fascia I installed a few weeks ago.

I also finished up three more cars for the layout yesterday. There is one older outside-braced boxcar, one modern (to my time period) express boxcar, and one modern (slightly too modern, actually) reefer.


On September 19th, the day after my last update, I nearly destroyed the Powder River stock pens.
I added the powdered tile grout ground cover to the pens and wetted it to set the grout. That seemed to go well, but when I went down a couple hours later to check out how it was drying, I discovered that the base had curled up severely! It's kind of hard to see in this photo, but if you look at the back edge (along the taped-over track), you can see that the entire thing now has something of a bowl shape to it.
As the foam core base continued to dry the pens lifted off the base in the corners and along the edges. I removed the assembly from the layout (it was just set in place, fortunately) and set it on the very flat library table. It's easier to see the warpage in this position, and you can also see where some of the posts have lifted off the foam core (look especially at the near corner). I had no idea foam core would warp like that when it got wet - I thought it was pretty insensitive to that sort of thing. Live and learn.

I considered carefully removing the pens bit by bit from the foam core and making a new base, but I decided to try to salvage what I'd already built first. I can always remove the pens later if it comes to that.
So I cut a bit of Masonite to the same size as the foam core base from some of the extra bits from the fascia and applied two coats of Modge Podge that had been thinned by 50% with water. Here the second coat has just been applied and is starting to dry.

Well, the Masonite didn't warp or swell overly much from that treatment, and as the foam core continued drying it flattened out a bit (but it still wasn't flat; just not quite so much of a bowl anymore). I gave it a few days to dry thoroughly before taking the next step, and on the 23rd I sprayed the Masonite panel with Super77 adhesive and stuck the foam core with the pens down onto it, weighting the foam core to straighten it and make sure it was securely stuck to the Masonite.
Things were looking a bit better, but the pens are still a bit skewed and twisted from being so severely misshapen by the foam core. I sculpted out the recess in the pink foam a bit deeper to account for the Masonite under the pens and set them back in place.
And that's where we are now. The base is flat again, but some of the pens need to be glued back down. I'll do that over the next few days and see where that leaves me. Here's how they look now set back into place on the layout.

In between messing with the pens, I spent the majority of my time on the Wind River Canyon.
On the 20th I trimmed the fascia in the canyon with a Roto-Zip.

These shots show the fascia after trimming was complete.


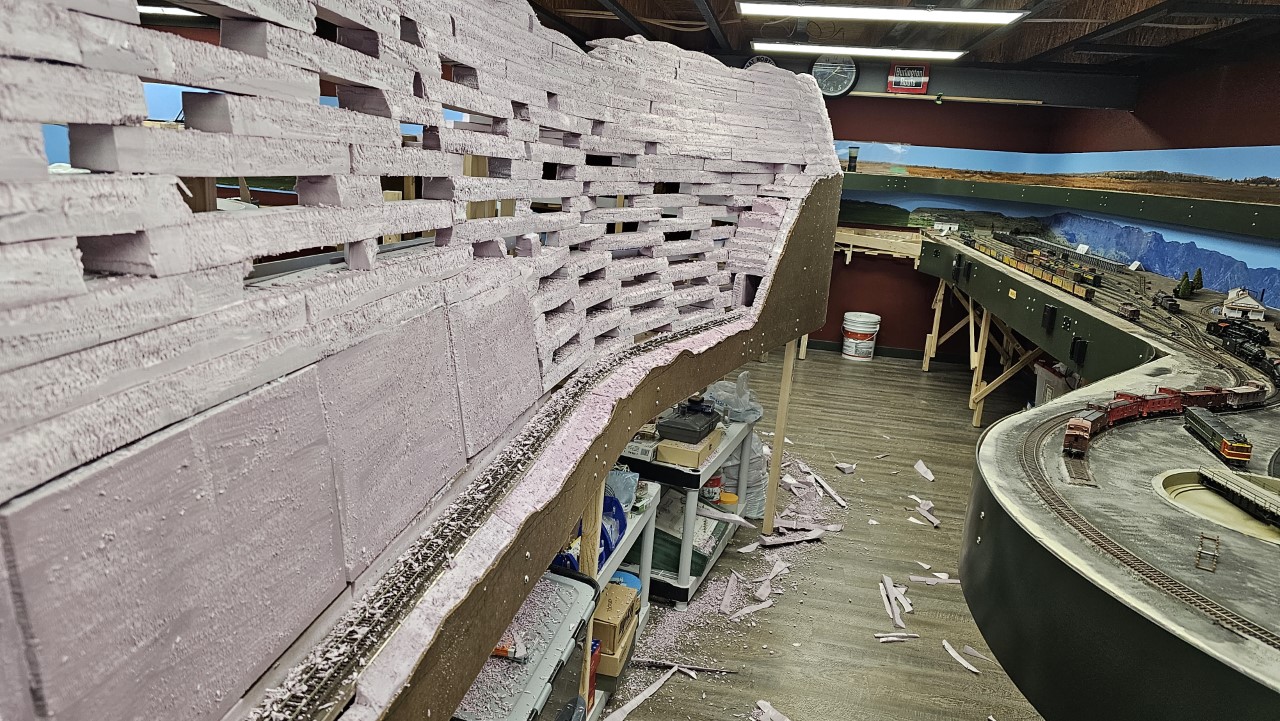
Then I broke out the hot wire cutter and began shaping the foam. I started with the newly-added Tunnel Number 3.

After shaping that area I began roughing up the foam with a Sur-form tool. Note the piles of foam bits piling up on the track. A lot more was piling up on the floor.

Then I continued with the hot wire cutter, shaping the foam on around the end of the peninsula.
Then came more roughing-up with the Sur-form. Quite a pile of debris bulding up below!
I worked my way around the end of the peninsula as far as I could towards Thermopolis. Here we're looking back down the entire length of the canyon.

The 23rd was clean-up day. It took me several hours to sweep and vacuum up all those pink foam shavings and balls.

Try as I might, though, I couldn't get to some the mess left on the CNW and CB&Q turnback curves. So I built an access hole in the benchwork inside the curves, much as I had done when I was building the helix on the other peninsula.

Then I was able to get inside and clean all those foam bits off the tracks.
